Love this? Save it for later!
Share the inspiration with your friends
There used to be a tiny bakery tucked between a dry cleaner and a dusty antiques shop on Main Street that made the most incredible peanut butter blossom cookies. When they closed their doors three summers ago, I stood on the sidewalk staring at the “For Lease” sign like I’d lost a friend. That first Christmas without those cookies, I tried every recipe I could find, and let me tell you, the results were mostly tragic. After twelve attempts—twelve, including one batch that spread so thin they looked like peanut butter tortillas—I finally got it. These are the cookies that made my neighbor knock on my door to ask what smelled so good, and honestly, that moment made all the flour-dusted counters worth it.
The secret to getting that soft, thick texture isn’t some complicated technique or fancy equipment. It comes down to how you handle the dough and a few smart ingredient choices. I mean, I spent weeks obsessing over this, and the answer was simpler than I expected. Maybe you’ve been there—chasing a memory of a perfect cookie that just hits different than anything you can buy at the store. These peanut butter blossoms have that nostalgic, bakery-quality feel, but they come together in your own kitchen with zero stress. The chocolate kiss on top, the soft peanut butter base, the way they hold their shape perfectly—it’s everything I wanted and more.
What kept me going was the memory of that first bite from the bakery. You know that feeling when something tastes exactly how you remember it? That’s what these cookies deliver. They’re not too sweet, not too dense, and the peanut butter flavor is front and center without being overpowering. I’ve made them for three holiday parties now, and every time someone asks for the recipe, I feel a little proud that I cracked the code. This is the version I’ll be making forever.
Why You’ll Love This Recipe
Let me be real with you—I tested this recipe on a Tuesday night after a long workday, and it still came together in under 30 minutes. These cookies are designed for real life, not for food photography setups. Here’s why they work so well:
- Quick & Easy: From start to finish, you’re looking at about 25 minutes. The dough comes together in one bowl, and there’s no chilling required (though you can if you want).
- Simple Ingredients: You probably have most of these in your pantry right now. Peanut butter, sugar, butter, eggs—nothing fancy, nothing expensive.
- Perfect for Weeknights: When you need a quick dessert fix or a treat for the kids after dinner, these cookies deliver without a huge mess or cleanup.
- Crowd-Pleaser: I’ve brought these to potlucks, school events, and family gatherings. They disappear faster than almost anything else I make.
- Unbelievably Soft: The texture is what sets these apart. They stay thick and tender for days, not dry or crumbly like some peanut butter cookies tend to be.
What makes this recipe different from the dozens of others out there? It’s the technique of using both granulated and brown sugar, plus the right ratio of peanut butter to flour. I’ve tested this with natural peanut butter (too oily, spread too much), with crunchy peanut butter (texture was weird), and with reduced sugar (don’t bother). This version uses classic creamy peanut butter and gets the balance just right. The cookies come out thick, soft, and perfectly sturdy enough to hold that chocolate kiss without cracking.
These aren’t just cookies—they’re the kind that make you close your eyes after the first bite. The chocolate melts slightly against the warm peanut butter base, and the texture is this perfect combination of soft and slightly chewy. It’s comfort food reimagined for a busy weeknight, and honestly, it hits every single time.
What Ingredients You Will Need
This recipe uses simple, everyday ingredients to create something special. Most of these are pantry staples, so you might not even need a grocery run. Let me walk you through what you’ll need and why each ingredient matters.
For the Cookie Dough
- 1/2 cup unsalted butter, softened (1 stick, or 113 grams) — I prefer using unsalted so I can control the salt level. Let it sit out for about 30 minutes before starting. If you’re in a hurry, you can microwave it for 10 seconds at a time, but don’t melt it.
- 1/2 cup creamy peanut butter (130 grams) — Use a standard brand like Jif or Skippy for best results. Natural peanut butter that separates will make the cookies spread too much. Trust me on this one—I learned the hard way.
- 1/2 cup granulated sugar (100 grams) plus 1/3 cup packed brown sugar (70 grams) — The combination gives you sweetness plus moisture. Brown sugar is what keeps these cookies soft and thick.
- 1 large egg — Room temperature works best. If you forgot to take it out, place it in a bowl of warm water for 5 minutes.
- 1 teaspoon vanilla extract — Pure vanilla is better if you have it, but imitation works fine too.
- 1 1/2 cups all-purpose flour (190 grams) — Spoon and level your flour. Scooping directly from the bag packs it down and gives you too much, which makes dry cookies.
- 1 teaspoon baking soda — This helps the cookies rise and stay thick.
- 1/2 teaspoon salt — Even if your peanut butter has salt, add this. It balances the sweetness.
For the Topping
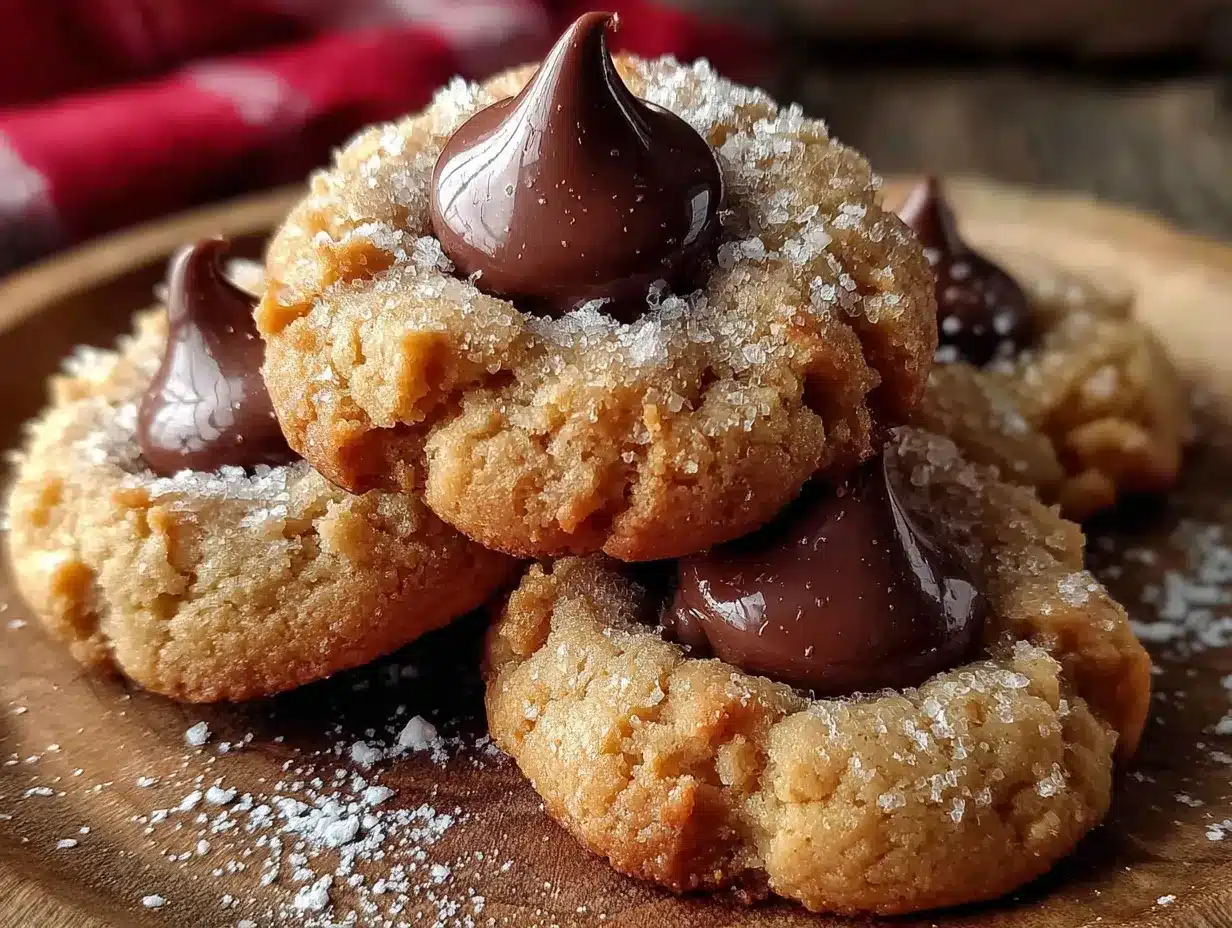
- About 24 chocolate kiss candies, unwrapped — Hershey’s kisses are classic, but you can use any brand. I’ve also used dark chocolate kisses and mini peanut butter cups (pressed in upside down) for fun variations.
- Extra granulated sugar for rolling (about 1/4 cup) — This gives the cookies that classic crackly look and a tiny bit of crunch on the outside.
One thing I want to mention about the peanut butter—don’t use the “natural” stuff that has oil sitting on top. I tried it once because I thought it would be healthier, and the cookies spread into flat, greasy messes. Stick with the regular creamy peanut butter for the texture we’re going for here. Also, if you’re using a no-stir variety, give it a quick stir anyway just to make sure the oils are evenly distributed.
For the chocolate kisses, unwrap them while the cookies are baking. This saves time and keeps you from scrambling when the cookies come out hot. I usually set a little assembly line going—unwrap, set aside, and then press them in as soon as the cookies come out of the oven.
Equipment Needed
You don’t need a fancy kitchen to make these cookies. Here’s what you’ll need:
- Mixing bowls — One large bowl for the dough. A medium bowl for the rolling sugar works well too.
- Electric mixer — A hand mixer works perfectly. You can mix by hand, but it takes more elbow grease to get the butter and sugars creamy.
- Baking sheets — Two standard baking sheets work best so you can bake one batch while prepping the next. If you only have one, let it cool completely between batches.
- Parchment paper or silicone baking mat — This prevents sticking and makes cleanup a breeze. I’ve used both and prefer parchment for these cookies.
- Cookie scoop — A 1.5-tablespoon scoop gives you uniform cookies. If you don’t have one, use a tablespoon measure and roll the dough into balls by hand.
- Cooling rack — Essential for letting the cookies cool properly. If you don’t have one, you can use a clean kitchen towel laid flat.
- Small bowl for sugar — For rolling the dough balls before baking.
I’ve made these cookies with a $10 hand mixer from the grocery store and they turned out just as good as with my fancy KitchenAid. Don’t let equipment hold you back. The only thing I wouldn’t skip is the parchment paper—it really does make a difference in how evenly the cookies bake and how easily they come off the sheet.
Preparation Method
Alright, let’s get to the good part. Here’s how to make these cookies step by step. I’ll include all the little details I wish someone had told me when I first started making them.
- Preheat your oven to 375°F (190°C) and line two baking sheets with parchment paper. Getting the oven hot ahead of time ensures even baking from the start.
- Cream the butter and sugars together. In a large mixing bowl, beat the softened butter, granulated sugar, and brown sugar together until light and fluffy. This takes about 2-3 minutes with a hand mixer on medium speed. You’re looking for a pale, creamy texture. Scrape down the sides of the bowl halfway through.
- Add the peanut butter. Beat in the peanut butter until it’s fully combined. The mixture might look a little grainy at first, but keep mixing until it smooths out. About 1 minute should do it.
- Add the egg and vanilla. Crack the egg into the mixture and add the vanilla extract. Beat until just combined—don’t overmix here. You’ll see the batter come together into a smooth, thick consistency.
- Mix the dry ingredients separately. In a small bowl, whisk together the flour, baking soda, and salt. This ensures the baking soda is evenly distributed so your cookies rise uniformly.
- Combine wet and dry ingredients. Gradually add the flour mixture to the wet ingredients, mixing on low speed. Stop as soon as you don’t see any more white streaks of flour. Overmixing at this stage develops gluten and makes tough cookies.
- Portion the dough. Scoop rounded tablespoons of dough (about 1.5 tablespoons each) and roll them into smooth balls. You should get about 24 balls. If the dough feels too sticky, refrigerate it for 15 minutes.
- Roll in sugar. Roll each dough ball in the extra granulated sugar until coated. Place them on the prepared baking sheets about 2 inches apart. They’ll spread a little, but not too much.
- Bake for 10-12 minutes. The cookies should look puffed and slightly cracked on top. The edges will be set but the centers will still look soft. Don’t overbake—they continue cooking on the hot pan after you take them out. For softer cookies, aim for 10 minutes. For slightly firmer, go to 12.
- Press in the chocolate kisses immediately. As soon as the cookies come out of the oven, gently press a chocolate kiss into the center of each one. Do this while they’re hot, or the kiss won’t stick. Press just until the cookie cracks slightly around the edges—don’t push all the way through.
- Cool on the baking sheet for 5 minutes. This allows the cookies to set up before you move them. Then transfer to a wire rack to cool completely. The chocolate will firm up as they cool.
One thing I learned the hard way—if you press the kisses in too hard, the cookies will break apart. Just a gentle push until the cookie starts to crackle around the edges is perfect. Also, if some kisses fall out while cooling, you can press them back in gently once the cookie has firmed up a bit.
Cooking Tips & Techniques
After making these cookies more times than I care to count, here are the things I’ve figured out that make a real difference:
Don’t skip the brown sugar. I know it’s tempting to just use all granulated sugar, especially if you’re out of brown. But the brown sugar adds moisture and keeps the cookies soft for days. If you absolutely have to substitute, add a tablespoon of honey or maple syrup to the dough to compensate.
Watch your baking time like a hawk. The difference between a perfect soft cookie and a dry one is about 90 seconds. Start checking at 9 minutes. The cookies should look puffy and slightly cracked, but the centers should still look a little underdone. They’ll continue setting as they cool.
Let the cookies rest before moving them. I ruined my first batch by trying to transfer them too soon. Those 5 minutes on the baking sheet are crucial. The cookies need that time to firm up enough to hold together. If you try to move them too early, they’ll fall apart.
Room temperature ingredients matter. I know it’s annoying to wait for butter to soften, but cold butter doesn’t cream properly with the sugar. You end up with dense, flat cookies. Same with the egg—cold egg can seize the butter and make the dough lumpy.
Use a cookie scoop for consistency. When all your cookies are the same size, they bake evenly. I’ve had batches where some cookies were underdone and others were overdone just because I eyeballed the portions. A scoop costs like five bucks and solves that problem completely.
One mistake I still make sometimes is forgetting to unwrap all the kisses before the cookies come out of the oven. Nothing worse than having hot cookies waiting while you frantically unwrap chocolate. Do it ahead of time!
Variations & Adaptations
One of the best things about this recipe is how flexible it is. Here are some variations I’ve tried and loved:
Chocolate Peanut Butter Blossoms: Instead of plain milk chocolate kisses, use dark chocolate or white chocolate kisses. The dark chocolate version is my personal favorite—it balances the sweetness of the cookie perfectly.
Gluten-Free Version: Substitute the all-purpose flour with a 1:1 gluten-free baking flour blend. I’ve used King Arthur’s measure-for-measure blend with great results. The texture is slightly more crumbly, but still delicious.
Nut-Free Option: Use sunflower seed butter instead of peanut butter. The flavor is different, obviously, but the texture works well. Just note that sunflower seed butter can turn green when baked (it’s a chemical reaction, not mold).
Holiday Twist: Use colored sugar for rolling instead of plain white. Red and green for Christmas, pastels for Easter, orange for Halloween—it makes them festive without any extra effort.
Stuffed Blossoms: Before rolling the dough balls, press a small piece of chocolate into the center of each one. Then roll and bake as usual. When you add the kiss on top, you get double the chocolate surprise inside.
Smaller Cookies: Use a teaspoon scoop instead of a tablespoon for bite-sized cookies. Reduce baking time to 8-9 minutes and use mini chocolate kisses on top. Perfect for cookie platters or lunchbox treats.
I tried the gluten-free version for a friend with celiac disease, and honestly, I was surprised how well they turned out. The texture wasn’t exactly the same, but she said they were the best cookies she’d had in years. That felt pretty good.
Serving & Storage Suggestions
These cookies are best served slightly warm, when the chocolate kiss is still a little melty. If you’re serving them at room temperature, they’re still fantastic—the chocolate will be firm but the cookie stays soft.
For a dessert platter: Arrange them on a nice plate with a few other cookie varieties. They pair beautifully with a cold glass of milk, a cup of coffee, or even a scoop of vanilla ice cream. I’ve crumbled one over ice cream before and it was life-changing.
Storage: Keep these cookies in an airtight container at room temperature for up to 5 days. Place a slice of bread in the container to keep them extra soft—the cookies will absorb moisture from the bread. Replace the bread every couple of days if needed.
Freezing: These freeze beautifully. Place the baked and cooled cookies in a single layer in a freezer-safe container, with parchment paper between layers. They’ll keep for up to 3 months. Thaw at room temperature for about 30 minutes before serving. You can also freeze the unbaked dough balls—just roll them in sugar, place on a baking sheet, freeze until solid, then transfer to a freezer bag. Bake from frozen, adding 2-3 minutes to the baking time.
Reheating: Pop a cookie in the microwave for about 10 seconds to get that just-baked softness back. It’s not quite the same as fresh from the oven, but it’s pretty close. For a crowd, warm them in a 300°F oven for 5 minutes.
One thing I’ve noticed—these cookies actually taste better the next day. The flavors meld together overnight, and the texture stays perfectly soft. So don’t stress if you’re making them ahead of time. They’re actually better for it.
Nutritional Information & Benefits
Here’s the approximate nutritional breakdown for one cookie (based on 24 cookies):
- Calories: 165
- Total Fat: 9g
- Saturated Fat: 4g
- Cholesterol: 18mg
- Sodium: 115mg
- Total Carbohydrates: 19g
- Sugars: 12g
- Protein: 3g
- Fiber: 1g
These numbers are estimates and will vary based on the specific brands you use. If you’re watching your sugar intake, you can reduce the sugar by a couple tablespoons, but the texture will be slightly different.
On the positive side, peanut butter provides protein and healthy fats that make these cookies more satisfying than your average dessert. The protein helps balance blood sugar, so you don’t get that crash after eating them. Plus, dark chocolate (if you use it) contains antioxidants. I’m not saying these are health food, but they’re not the worst thing you could eat either.
If you have peanut allergies in your household, obviously skip this recipe or use the sunflower seed butter variation. The cookies also contain gluten, dairy, and eggs, so they’re not suitable for everyone. But for those who can enjoy them, they’re a real treat.
Conclusion
These easy peanut butter blossom cookies are everything I hoped they’d be when I started that quest to recreate the bakery version. They’re soft, thick, perfectly peanut buttery, and topped with that iconic chocolate kiss that makes them so special. And the best part? They come together in about 25 minutes with ingredients you probably already have.
I love that this recipe doesn’t require any special skills or equipment. Whether you’re a seasoned baker or someone who only makes cookies for holiday parties, these will turn out great. The dough is forgiving, the instructions are straightforward, and the results are consistently delicious.
If you try these cookies, I’d love to hear how they turn out. Leave a comment below and let me know if you made any variations or if they reminded you of a favorite bakery memory. And if you share them on social media, tag me—I always love seeing your creations. Happy baking, friends!
Frequently Asked Questions
Can I use natural peanut butter for these cookies?
I don’t recommend it. Natural peanut butter that separates has too much oil and not enough stabilizers, which causes the cookies to spread too much and become greasy. Stick with regular creamy peanut butter like Jif or Skippy for the best texture.
Why did my cookies spread too much?
This usually happens for one of three reasons: your butter was too soft or melted, your dough wasn’t chilled enough, or you used natural peanut butter. Make sure your butter is softened but not melted, and if your kitchen is warm, pop the dough in the fridge for 15-20 minutes before baking.
Can I freeze the dough for later?
Absolutely! Roll the dough into balls, coat them in sugar, and place them on a baking sheet in the freezer. Once frozen solid, transfer to a freezer bag. When you’re ready to bake, place the frozen dough balls on a baking sheet and add 2-3 minutes to the baking time.
How do I keep the chocolate kisses from falling off?
Press the kisses in while the cookies are still hot from the oven. The residual heat melts the bottom of the kiss slightly, which helps it stick. If some still fall off after cooling, you can use a tiny dab of melted chocolate as “glue” to reattach them.
Can I make these cookies without an electric mixer?
Yes, you can mix everything by hand. Just make sure your butter is very soft so you can cream it with the sugars using a wooden spoon. It takes a little more effort, but the cookies will turn out just as good. Just don’t overmix once you add the flour.
Pin This Recipe!
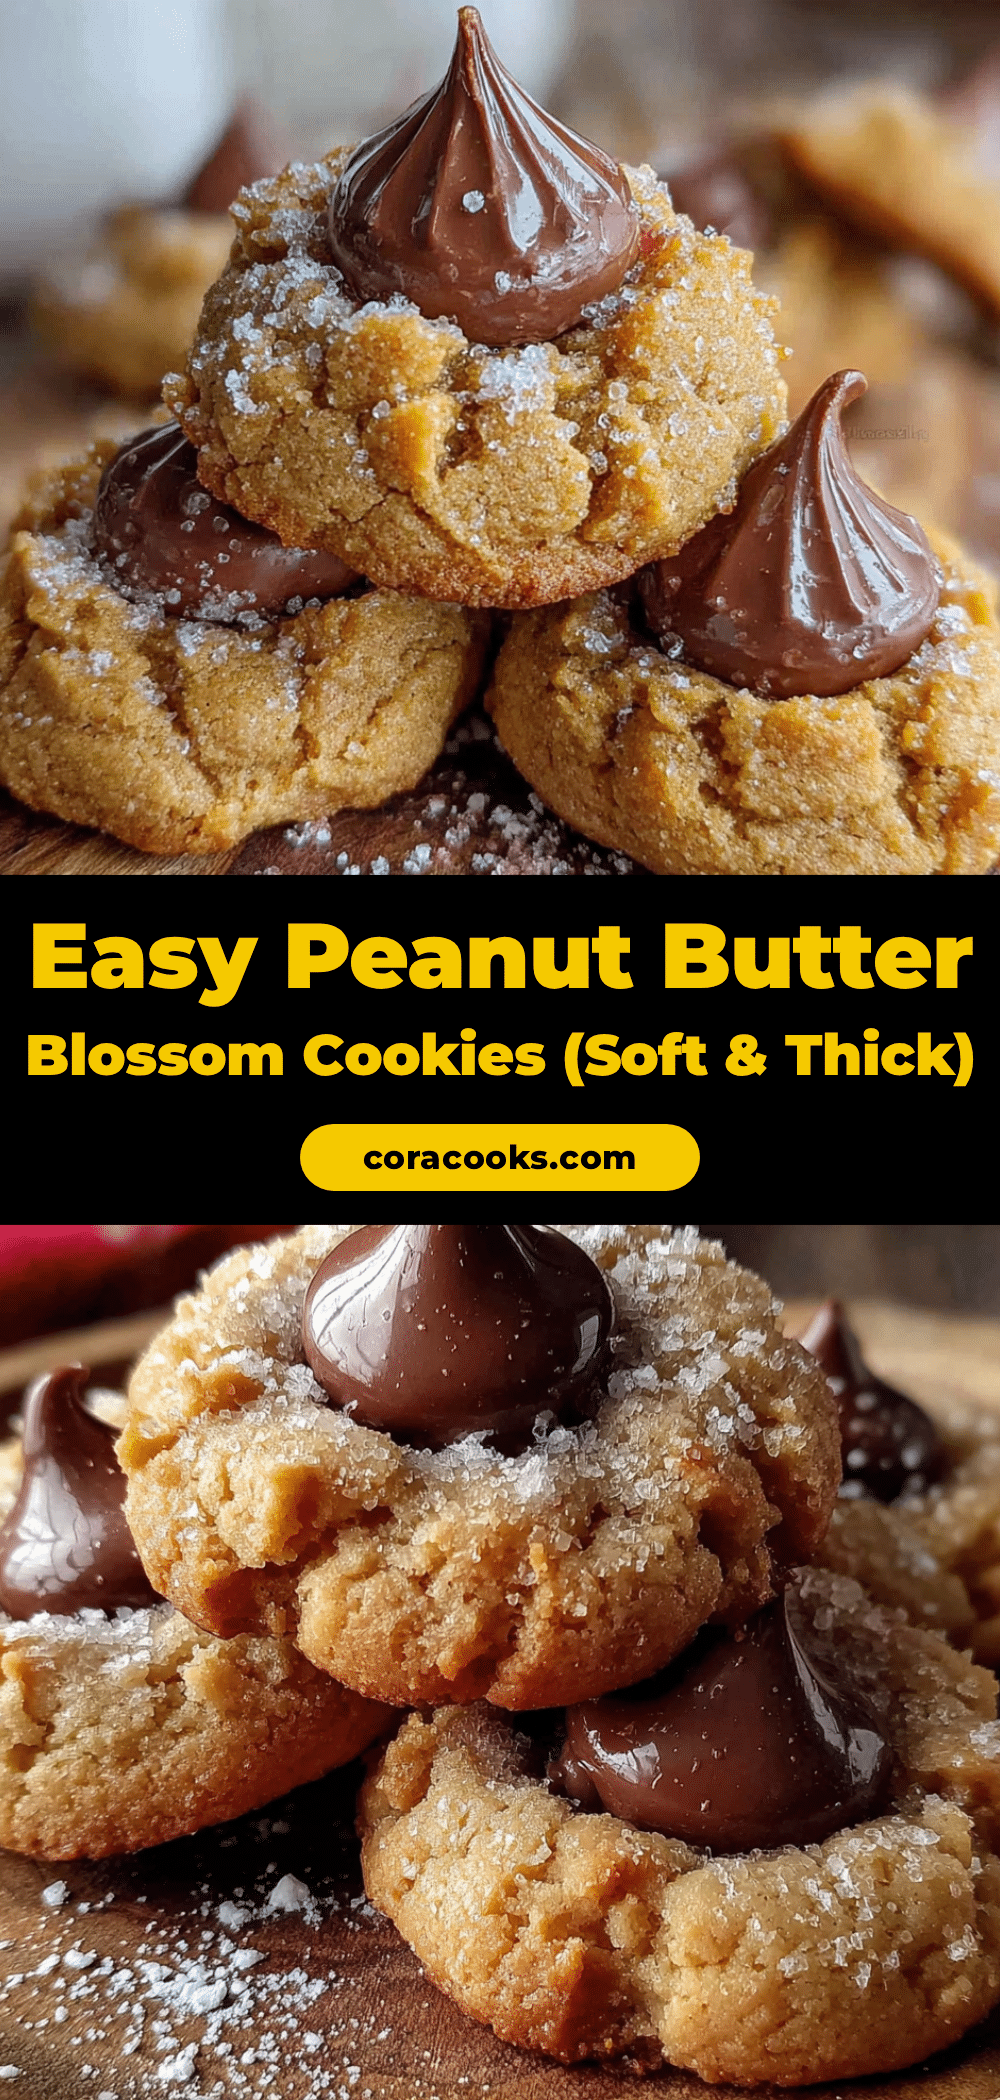
Easy Peanut Butter Blossom Cookies: Soft & Thick Recipe

These soft and thick peanut butter blossom cookies are topped with a chocolate kiss and come together in about 25 minutes. They’re the perfect nostalgic treat for any occasion.
- Prep Time: 15 minutes
- Cook Time: 10 minutes
- Total Time: 25 minutes
- Yield: 24 cookies 1x
- Category: Dessert
- Cuisine: American
Ingredients
- 1/2 cup unsalted butter, softened (1 stick, 113 grams)
- 1/2 cup creamy peanut butter (130 grams)
- 1/2 cup granulated sugar (100 grams)
- 1/3 cup packed brown sugar (70 grams)
- 1 large egg, room temperature
- 1 teaspoon vanilla extract
- 1 1/2 cups all-purpose flour (190 grams)
- 1 teaspoon baking soda
- 1/2 teaspoon salt
- About 24 chocolate kiss candies, unwrapped
- Extra granulated sugar for rolling (about 1/4 cup)
Instructions
- Preheat your oven to 375°F (190°C) and line two baking sheets with parchment paper.
- In a large mixing bowl, beat the softened butter, granulated sugar, and brown sugar together until light and fluffy, about 2-3 minutes with a hand mixer on medium speed. Scrape down the sides halfway through.
- Beat in the peanut butter until fully combined, about 1 minute.
- Add the egg and vanilla extract, beating until just combined.
- In a small bowl, whisk together the flour, baking soda, and salt.
- Gradually add the flour mixture to the wet ingredients, mixing on low speed until no white streaks remain. Do not overmix.
- Scoop rounded tablespoons of dough (about 1.5 tablespoons each) and roll into smooth balls. You should get about 24 balls. If the dough is too sticky, refrigerate for 15 minutes.
- Roll each dough ball in the extra granulated sugar until coated. Place on prepared baking sheets about 2 inches apart.
- Bake for 10-12 minutes. The cookies should look puffed and slightly cracked on top; the centers will still look soft.
- Immediately after removing from the oven, gently press a chocolate kiss into the center of each cookie. Press just until the cookie cracks slightly around the edges.
- Cool on the baking sheet for 5 minutes, then transfer to a wire rack to cool completely.
Notes
Use regular creamy peanut butter (like Jif or Skippy) for best results; natural peanut butter will cause spreading. Unwrap chocolate kisses while cookies bake to save time. For softer cookies, bake for 10 minutes; for firmer, bake for 12. Cookies taste even better the next day.
Nutrition
- Serving Size: 1 cookie
- Calories: 165
- Sugar: 12
- Sodium: 115
- Fat: 9
- Saturated Fat: 4
- Carbohydrates: 19
- Fiber: 1
- Protein: 3
Keywords: peanut butter blossom cookies, soft peanut butter cookies, chocolate kiss cookies, easy cookie recipe, holiday cookies