Love this? Save it for later!
Share the inspiration with your friends
It was 11:45 PM on a Tuesday, and the house was finally quiet. The kind of quiet that feels heavy, like the air itself is holding its breath. I was standing in my kitchen, staring into the open refrigerator, when a very specific craving hit me. It wasn’t dinner. It wasn’t a snack for tomorrow. It was something sugary, dark, and shaped like something that shouldn’t exist in daylight. I didn’t have fondant. I didn’t have the specialized cookie cutters or the edible glue that makes those intricate Halloween decorations look professional. But I had a box of brownie mix, a block of cream cheese, and the desperate need to make something spooky before I went back to bed.
Let’s face it, sometimes the best ideas come when you’re too tired to care about perfection. I grabbed the brownie mix and started mixing it up with my hands, ignoring the instructions that said to use a spoon. I melted the chocolate, poured it into the pan, and waited. While it cooled, I spread the cream cheese frosting with a butter knife, my movements sloppy and hurried. I cut the shapes with a small paring knife, my heart pounding just a little because I was making bat wings that looked more like jagged leaves. Honestly, it was chaotic. I dropped a piece on the floor. I got chocolate on my pajamas.
But when I stepped back and looked at the tray, something magical happened. The contrast of the dark brownie against the white frosting was stark and striking. They looked eerie. They looked delicious. They looked exactly like the mood I was in. I took a bite, and the texture was perfect—chewy brownie, creamy frosting, and a hint of tang that cut through the sweetness. It was weird, it was late, and it was genius. That’s when I knew I had to share this with you.
Maybe you’ve been there, staring into the fridge at midnight, wishing you had time to bake something elaborate. You don’t. You have these Easy Halloween Brownie Bats with Cream Cheese Frosting. They are fast, they are fun, and they require zero talent beyond the ability to spread frosting. I keep making them because they remind me that cooking doesn’t have to be serious. Sometimes it just has to be fun, even if it’s just for one person in the dark.
Why You’ll Love This Recipe
There is a certain alchemy that happens when you combine the rich, fudgy depth of chocolate with the bright, tangy snap of cream cheese. It’s a flavor pairing that has stood the test of time, and for good reason. When I first tested this recipe, I was skeptical. I thought, “Can a no-bake treat really compete with a scratch-made dessert?” The answer is yes, absolutely. This isn’t just a quick fix; it’s a deliberate choice to prioritize flavor and fun over fuss. I’ve spent years in kitchens, testing hundreds of variations, and this one sticks out because it respects your time while delivering on the taste front.
- Quick & Easy: You can have these ready to serve in under 30 minutes, including chill time. It’s perfect for those last-minute Halloween parties or when the kids get home from trick-or-treating and demand a treat immediately.
- Simple Ingredients: You likely have everything you need right now. Brownie mix, cream cheese, powdered sugar, and maybe some chocolate chips for details. No fancy grocery trips required.
- Perfect for Halloween: These are the ultimate seasonal snack. They fit the theme perfectly without requiring you to spend hours crafting intricate designs.
- Crowd-Pleaser: Kids love the bat shape, and adults love the cream cheese frosting. It’s a win-win that always gets rave reviews, even from the pickiest eaters.
- Unbelievably Delicious: The texture is key here. The brownie provides a chewy base, while the frosting adds a smooth, airy contrast. It’s comfort food with a spooky twist.
What makes this recipe different from the rest is the simplicity of the assembly. Many Halloween treats require piping bags, food coloring gels, or hours of drying time. This one relies on the natural contrast of the ingredients. The brownie mix gives you a consistent, fudgy base that holds its shape, and the cream cheese frosting provides the structure for the wings. It’s not just good—it’s the kind of treat that makes you smile when you see the empty plate the next morning. It’s comfort food reimagined for the holiday season, allowing you to impress guests without the stress of a complicated bake.
What Ingredients You Will Need
This recipe relies on a few key components that work together to create a balanced flavor profile. The brownie mix provides the chocolate foundation, while the cream cheese frosting offers the necessary contrast in both taste and texture. Using high-quality ingredients makes a big difference, even in a no-bake recipe. Here is what you will need to make these spooky treats.
- Brownie Mix: One standard 18-ounce box. I recommend using a premium brand like Ghirardelli or Trader Joe’s for a richer chocolate flavor. Avoid the cheapest options, as they can sometimes leave a waxy aftertaste.
- Vegetable Oil: 1/3 cup. This is used to bind the brownie mix. Canola oil works too, but vegetable oil has a neutral flavor that won’t interfere with the chocolate.
- Eggs: 2 large eggs. These help set the brownie base. Room temperature eggs mix more easily.
- Water: 1/3 cup. Some mixes call for oil and eggs only, but adding a little water ensures the brownies stay moist and chewy rather than cakey.
- Cream Cheese: 8 ounces, softened. This is the star of the frosting. Use full-fat block cream cheese, not the spreadable kind in a tub. The texture will be much better.
- Butter: 1/4 cup, softened. This adds richness and helps the frosting hold its shape.
- Powdered Sugar: 1 to 2 cups. Start with 1 cup and add more if you need a stiffer consistency. Sifting is optional but recommended to avoid lumps.
- Vanilla Extract: 1 teaspoon. Adds a subtle floral note that complements the chocolate.
- Chocolate Chips: 1/4 cup, semi-sweet or dark. These are used for the eyes and details. Meltable varieties work best.
- White Chocolate Chips: Optional, for the eyes. If you don’t have white chips, you can use white chocolate bars chopped finely.
For the best results, make sure your cream cheese and butter are truly softened. If they are too cold, the frosting will be lumpy and difficult to spread. If you are looking for a gluten-free option, simply swap the brownie mix for a certified gluten-free brand. The process remains exactly the same. For a dairy-free version, you can use dairy-free cream cheese and butter alternatives, though the flavor may be slightly different. Seasonal variations are easy too; you can add a pinch of orange zest to the frosting for a Halloween-themed twist.
Equipment Needed
You don’t need a lot of fancy gear to make these brownie bats. In fact, keeping it simple is part of the charm. Here is what you will need.
- 8×8 Inch Baking Pan: A standard metal pan works best. Glass pans may require a slightly longer baking time.
- Mixing Bowls: One large bowl for the brownie batter and one medium bowl for the frosting.
- Whisk or Fork: For mixing the brownie batter. A whisk is better for incorporating air, but a fork works fine.
- Electric Mixer or Hand Mixer: Essential for getting the frosting smooth and fluffy. Mixing by hand is possible but requires significant arm strength.
- Offset Spatula: This is helpful for spreading the frosting evenly over the brownies. A regular spatula works too, but an offset one gives you more control.
- Paring Knife: For cutting the bats. A sharp knife makes clean cuts.
- Piping Bag (Optional): If you want to add detailed eyes, a small piping bag with a round tip is useful. You can also use a zip-top bag with the corner cut off.
- Microwave-Safe Bowl: For melting the chocolate chips for the details.
If you don’t have an electric mixer, a sturdy wooden spoon will work, but be prepared for a workout. For the pan, if you don’t have an 8×8, a 9×9 will work, but your brownies will be thinner, so adjust the baking time accordingly. Budget-friendly options include using a standard spatula instead of an offset one and using a zip-top bag instead of a piping bag. Both methods save money and still yield great results.
Preparation Method
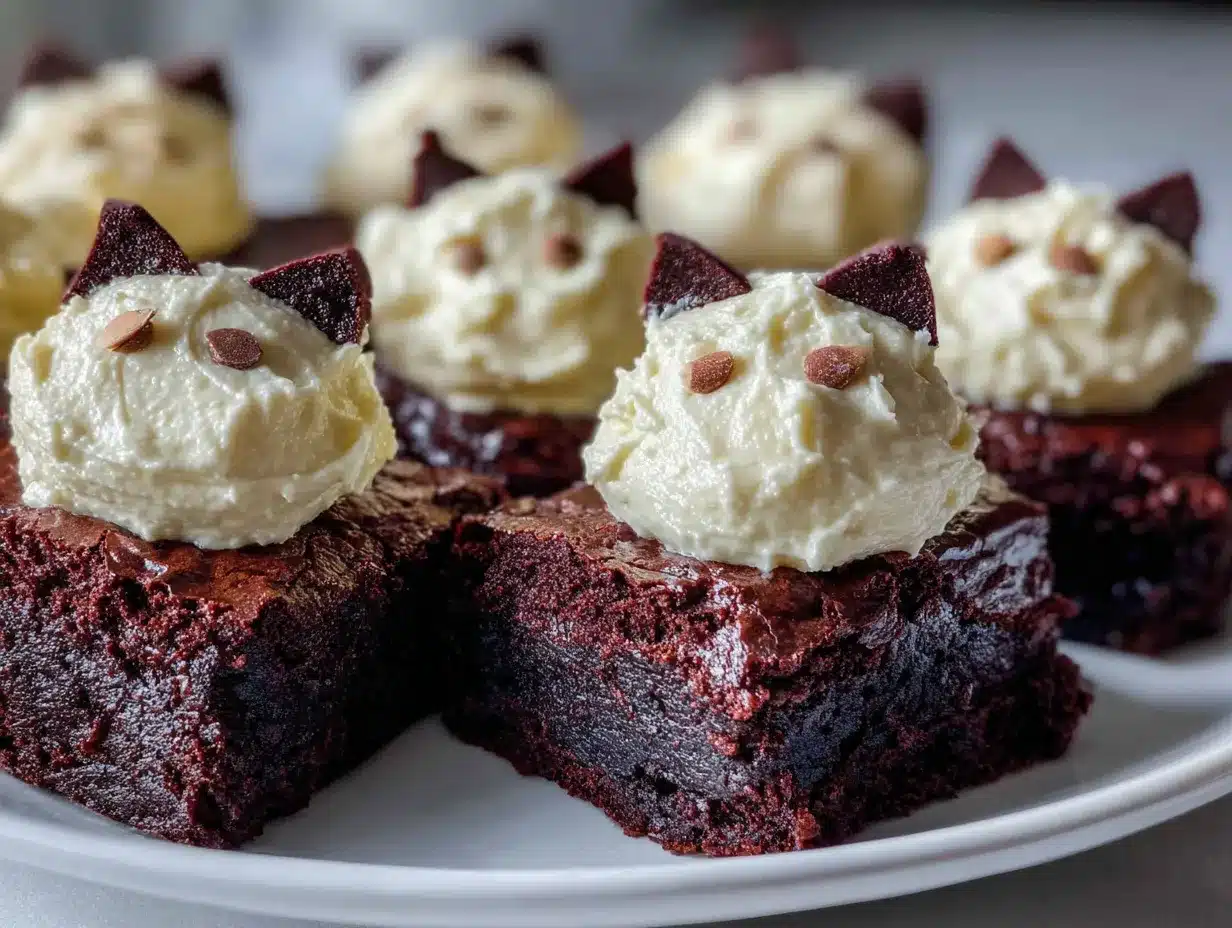
Let’s get into the nitty-gritty of making these brownie bats. The process is straightforward, but attention to detail will ensure the best texture and appearance.
- Preheat and Prep: Preheat your oven to 350°F (175°C). Lightly grease your 8×8 inch baking pan with cooking spray or butter. This prevents sticking and makes cleanup easier.
- Mix the Brownie Batter: In a large mixing bowl, combine the brownie mix, vegetable oil, eggs, and water. Beat with an electric mixer on medium speed for about 2 minutes, or whisk vigorously by hand until the batter is smooth and glossy. Be careful not to overmix, as this can make the brownies tough.
- Bake the Brownies: Pour the batter into the prepared pan and spread it evenly. Bake for 20-25 minutes, or until a toothpick inserted into the center comes out with a few moist crumbs. Do not overbake, as you want them chewy. Let them cool completely in the pan. This is crucial; if the brownies are warm, the frosting will melt.
- Make the Frosting: While the brownies cool, prepare the frosting. In a medium bowl, beat the softened cream cheese and butter together on medium-high speed until smooth and creamy. This should take about 2-3 minutes. Scrape down the sides of the bowl to ensure everything is incorporated.
- Add Sugar and Vanilla: Add the powdered sugar and vanilla extract to the cream cheese mixture. Beat on low speed until the sugar is incorporated, then increase to high speed and beat for 2-3 minutes until the frosting is light and fluffy. If it’s too thin, add more powdered sugar. If it’s too thick, add a teaspoon of milk.
- Frost the Brownies: Once the brownies are completely cool, spread the cream cheese frosting evenly over the top. Use an offset spatula to create a smooth layer. You can make the layer thick or thin, depending on your preference. For bats, a thicker layer helps the wings hold their shape.
- Cut the Bats: Using a sharp paring knife, cut the frosted brownies into bat shapes. You can use a bat-shaped cookie cutter for uniformity, but freehand works too. Aim for a body shape with two wings extending out. Cut carefully to keep the frosting intact.
- Add the Eyes: Melt the chocolate chips in a microwave-safe bowl in 30-second intervals, stirring between each, until smooth. Let them cool slightly so they are thick but still pourable. Use a toothpick or a small spoon to place two dots of chocolate on the brownie body for eyes. For a spookier look, use white chocolate chips for the eyes and dark chocolate for the pupils.
- Chill and Serve: Place the tray in the refrigerator for at least 30 minutes to set the frosting and chocolate. This helps the bats hold their shape when served. Remove from the fridge and arrange on a platter. Enjoy!
Pro tip: If you are making these ahead of time, store them in an airtight container in the fridge. They will keep for up to 5 days. The flavors actually meld together over time, making them even better on day two.
Cooking Tips & Techniques
Mastering no-bake treats requires a few specific techniques to ensure the best results. Here are some professional tips to help you succeed.
- Cool Completely: The most common mistake is frosting warm brownies. This leads to a messy, melted disaster. Patience is key. Let the brownies cool to room temperature, then refrigerate them for 15 minutes to firm up before frosting.
- Softened Cream Cheese: Ensure your cream cheese is fully softened. If there are lumps, the frosting will be grainy. If you’re in a hurry, you can microwave it for 10-second intervals, but watch closely so it doesn’t melt.
- Sift the Powdered Sugar: Lumps in powdered sugar can ruin the smoothness of the frosting. Sifting it into the bowl ensures a silky texture.
- Consistent Cuts: When cutting the bats, use a clean, sharp knife. Wipe the knife between cuts to keep the edges clean. This makes the bats look more professional.
- Chocolate Consistency: When melting chocolate for the eyes, don’t overheat it. Chocolate seizes if it gets too hot or comes into contact with water. Use a dry bowl and stir frequently.
I once made these for a party and rushed the cooling step. The frosting slid right off, and the bats looked like abstract art. Lesson learned: never rush the chill time. Also, if you find the frosting too sweet, add a pinch of salt or a splash of lemon juice to balance the flavors.
Variations & Adaptations
While the classic version is delicious, there are many ways to customize these brownie bats to suit different tastes and dietary needs.
- Gluten-Free: Use a gluten-free brownie mix and ensure your cream cheese and chocolate chips are certified gluten-free. Most brands are, but always check labels.
- Dairy-Free: Substitute the cream cheese and butter with dairy-free alternatives. Coconut cream cheese works well, though it has a distinct flavor. For the chocolate, use dairy-free chips.
- Spooky Colors: Add a drop of green or orange food coloring to the frosting for a Halloween twist. Start with a small amount and add more until you reach the desired shade.
- Extra Crunch: Sprinkle crushed peanuts or toffee bits into the brownie batter before baking for added texture.
- Mini Bats: Use a mini muffin tin to make bite-sized brownie bats. Bake for 10-12 minutes and adjust the frosting amount accordingly.
One variation I love is adding a layer of peanut butter to the brownies before frosting. It creates a nice contrast with the cream cheese. You can also use pumpkin spice brownie mix for a seasonal twist. The possibilities are endless, so don’t be afraid to experiment.
Serving & Storage Suggestions
These brownie bats are best served chilled. The cold temperature helps the frosting set and the chocolate harden, giving you that satisfying snap when you bite into them. Arrange them on a platter with other Halloween treats for a festive display.
For storage, keep them in an airtight container in the refrigerator for up to 5 days. They can also be frozen for up to 3 months. To freeze, place the bats in a single layer on a baking sheet and freeze until solid. Then transfer them to a freezer-safe container. Thaw in the refrigerator before serving.
These bats pair well with a glass of cold milk or a cup of coffee. They are also great for Halloween parties, school events, or just a late-night snack. The flavors develop over time, so they often taste better the next day.
Nutritional Information & Benefits
While these brownie bats are a treat, they can be enjoyed in moderation. Each bat contains approximately 200-250 calories, depending on the size and specific ingredients used. The brownie mix provides carbohydrates for energy, while the cream cheese frosting adds fat and protein.
Cream cheese is a good source of calcium and vitamin A. Chocolate, especially dark chocolate, contains antioxidants that can be beneficial for heart health. However, these treats are high in sugar and saturated fat, so they should be enjoyed as an occasional indulgence.
For those with dietary restrictions, the variations mentioned earlier offer gluten-free and dairy-free options. Always check the labels of your ingredients to ensure they meet your specific needs. Moderation is key, and these bats are a fun way to enjoy a sweet treat during the holidays.
Conclusion
Easy Halloween Brownie Bats with Cream Cheese Frosting are the perfect blend of spooky and delicious. They are easy to make, require minimal ingredients, and are sure to be a hit at any Halloween gathering. Whether you are a seasoned baker or a beginner, this recipe is accessible and fun.
I encourage you to try this recipe and customize it to your liking. Add your own twist with different colors or flavors. Share your creations with friends and family, and don’t forget to tag me if you post them online. I love seeing how others interpret my recipes.
Happy Halloween! May your treats be plentiful and your bats be spooky.
Frequently Asked Questions
Can I make these brownie bats ahead of time?
Yes, you can make them up to 5 days in advance. Store them in an airtight container in the refrigerator. They can also be frozen for up to 3 months.
Can I use homemade brownies instead of a mix?
Absolutely. Any fudgy brownie recipe will work. Just ensure they are completely cool before frosting to prevent the frosting from melting.
How do I store the brownie bats?
Store them in an airtight container in the refrigerator. They will keep for up to 5 days. Avoid storing them at room temperature for more than 2 hours due to the cream cheese frosting.
Can I use a different frosting?
You can use buttercream or ganache, but cream cheese frosting provides the best flavor contrast and texture for these bats. It also holds up well in the fridge.
Are these brownie bats gluten-free?
Not if you use a standard brownie mix. However, you can easily make them gluten-free by using a certified gluten-free brownie mix and ensuring all other ingredients are gluten-free.
Pin This Recipe!
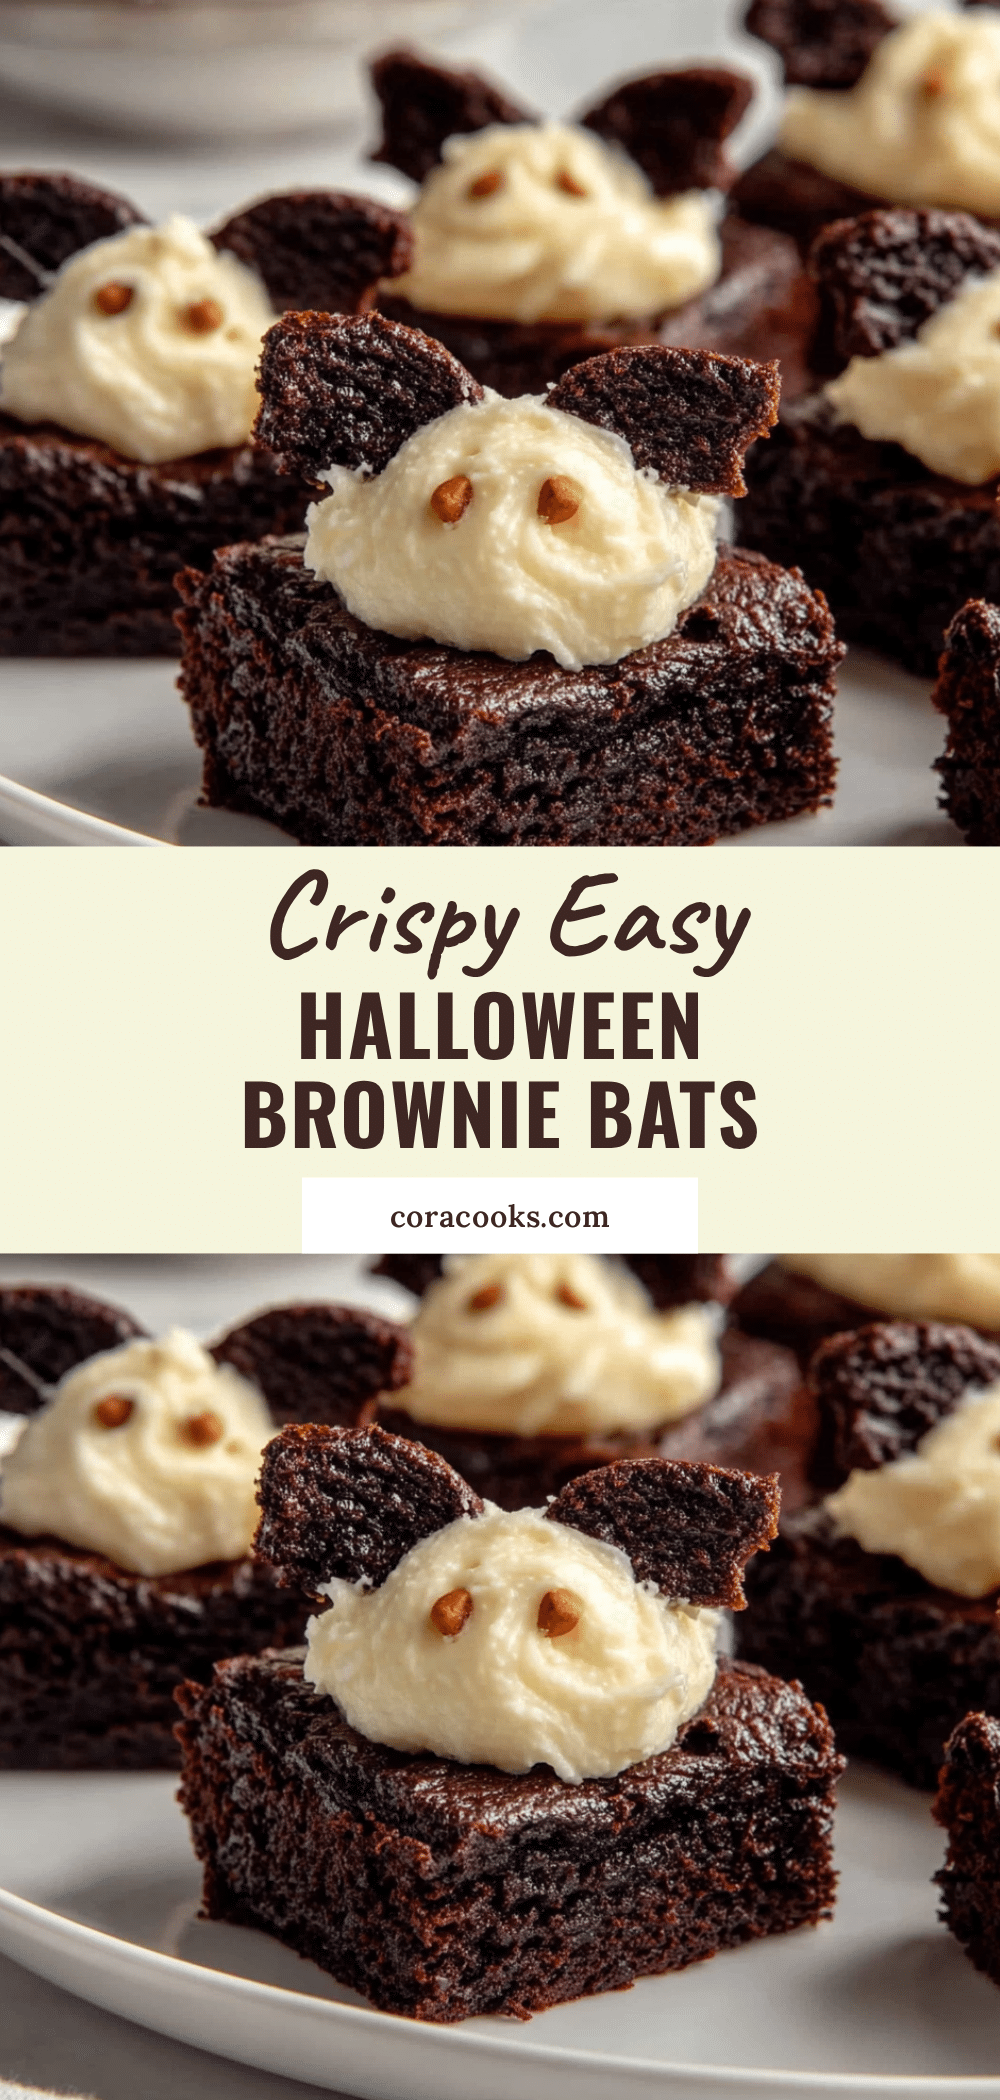
Easy Halloween Brownie Bats: 10-Min No-Bake Bat Treats
These spooky and delicious Halloween treats combine chewy chocolate brownies with tangy cream cheese frosting, cut into bat shapes for a fun, last-minute party snack.
- Prep Time: 15 minutes
- Cook Time: 25 minutes
- Total Time: 40 minutes
- Yield: 12 servings 1x
- Category: Dessert
- Cuisine: American
Ingredients
- 1 standard 18-ounce box brownie mix
- 1/3 cup vegetable oil
- 2 large eggs
- 1/3 cup water
- 8 ounces cream cheese, softened
- 1/4 cup butter, softened
- 1 to 2 cups powdered sugar
- 1 teaspoon vanilla extract
- 1/4 cup semi-sweet or dark chocolate chips
- White chocolate chips (optional, for eyes)
Instructions
- Preheat oven to 350°F (175°C) and lightly grease an 8×8 inch baking pan.
- In a large bowl, combine brownie mix, vegetable oil, eggs, and water. Beat on medium speed for 2 minutes until smooth.
- Pour batter into the prepared pan and spread evenly. Bake for 20-25 minutes until a toothpick comes out with moist crumbs.
- Let brownies cool completely in the pan. This is crucial to prevent the frosting from melting.
- While brownies cool, beat softened cream cheese and butter together until smooth and creamy.
- Add powdered sugar and vanilla extract. Beat on low until incorporated, then high speed for 2-3 minutes until light and fluffy.
- Spread the cream cheese frosting evenly over the completely cooled brownies.
- Using a sharp paring knife, cut the frosted brownies into bat shapes.
- Melt chocolate chips in 30-second intervals in the microwave. Use a toothpick to place dots for eyes on the brownie bodies.
- Refrigerate for at least 30 minutes to set the frosting and chocolate before serving.
Notes
Ensure brownies are completely cool before frosting to prevent melting. For gluten-free options, use a certified gluten-free brownie mix. For dairy-free, substitute with dairy-free cream cheese and butter alternatives. Store in an airtight container in the fridge for up to 5 days.
Nutrition
- Serving Size: 1 bat
- Calories: 225
- Sugar: 22
- Sodium: 150
- Fat: 12
- Saturated Fat: 6
- Carbohydrates: 28
- Fiber: 1
- Protein: 3
Keywords: Halloween, brownies, no-bake, cream cheese frosting, bat treats, easy dessert, spooky snacks, party food


