Love this? Save it for later!
Share the inspiration with your friends
The autumn bake sale was in six hours and I’d completely forgotten. I mean, completely. I was standing in my kitchen at 7 AM, still in my pajamas, staring at a pantry that had clearly not been grocery-shopped for in a week. Everyone else would be bringing elaborate layer cakes, homemade breads, and those perfectly decorated sugar cookies that make you feel like you’re competing with a professional bakery. I had a can of pumpkin puree, a box of graham crackers, and a carton of heavy cream that was technically one day past its sell-by date. Panic doesn’t even begin to cover it.
I started mentally running through every recipe I knew that didn’t require an oven—because, let’s be real, I didn’t have time to preheat one anyway. That’s when it hit me. I’d made a version of this dreamy no-bake pumpkin pie icebox cake for a Friendsgiving a few years back, and it had disappeared in about twelve minutes. The problem? I couldn’t remember the exact proportions. I just remembered the way the layers looked, all stacked and creamy, and how everyone kept asking for the recipe. So I did what any reasonable, slightly desperate person would do: I winged it.
I mashed up the pumpkin with some spices, whipped the cream until it was fluffy, and started layering. Graham crackers on the bottom, a smear of the pumpkin mixture, another layer of crackers, more pumpkin, and so on. I dropped a whole cracker on the floor at one point—my dog was very happy about that—and I definitely licked the spatula clean when I thought no one was looking. By the time I was done, it looked like a proper dessert. I threw it in the fridge, crossed my fingers, and ran to get dressed.
Here’s the thing about this dreamy no-bake pumpkin pie icebox cake. It won. It actually won the bake sale. Not because it was fancy, but because it was good. Like, really good. The kind of good that makes people close their eyes when they take a bite. I’ve been making it every fall since, and honestly, it’s never let me down. Maybe you’ve been there—needing a dessert that looks like you spent hours on it when you really spent ten minutes. This is that recipe.
Why You’ll Love This Recipe
Let me tell you why this dreamy no-bake pumpkin pie icebox cake has become my go-to fall dessert. I’ve tested this recipe at least a dozen times, tweaking the spice ratios and the layering technique until it was just right. It’s the kind of recipe that makes you look like a kitchen genius without actually having to do much work.
- Quick & Easy: This comes together in about 10 minutes of active time. No baking, no fussing with a crust, no tempering eggs. It’s perfect for those days when you need a dessert but don’t have the energy for a production.
- Simple Ingredients: You probably have most of these in your pantry right now. Pumpkin puree, graham crackers, cream cheese, heavy cream. No weird specialty items that you’ll use once and then forget about.
- Perfect for Fall Gatherings: Whether it’s a Thanksgiving potluck, a Friendsgiving, or just a cozy dinner with friends, this cake fits right in. It’s impressive enough for company but easy enough for a Tuesday.
- Crowd-Pleaser: I’ve served this to kids, adults, picky eaters, and even my uncle who “doesn’t like pumpkin.” Every single time, people go back for seconds. It’s got that magic combination of creamy, spiced, and crunchy that everyone loves.
- Unbelievably Delicious: The texture is what gets me. The graham crackers soften into a cake-like layer, the pumpkin filling stays light and fluffy, and the whole thing tastes like a cloud made of fall spices. It’s next-level comfort food.
What makes this version different from the rest? It’s the technique of folding the whipped cream into the cream cheese mixture just enough to keep it airy, and the way I layer the graham crackers so they soften perfectly overnight. I’ve tried other icebox cakes that end up soggy or too dense, but this one hits that sweet spot every time. It’s not just another pumpkin dessert—it’s the one I keep coming back to, and I think you will too.
What Ingredients You Will Need
This dreamy no-bake pumpkin pie icebox cake uses simple, wholesome ingredients that come together to create something truly special. Most of these are pantry staples, especially if you do any fall baking at all.
- For the Pumpkin Filling:
- 1 can (15 oz) pumpkin puree (not pumpkin pie filling—make sure it’s 100% pure pumpkin)
- 8 oz cream cheese, softened to room temperature (I recommend Philadelphia for the smoothest texture)
- 1/2 cup granulated sugar
- 1/4 cup brown sugar, packed (adds depth and a hint of molasses)
- 1 teaspoon vanilla extract
- 1 1/2 teaspoons pumpkin pie spice (or make your own with cinnamon, nutmeg, ginger, and cloves)
- 1/2 teaspoon ground cinnamon (because you can never have too much)
- 1/4 teaspoon salt (this balances the sweetness and brings out the pumpkin flavor)
- For the Whipped Cream Layer:
- 2 cups heavy whipping cream, cold
- 3 tablespoons powdered sugar
- 1 teaspoon vanilla extract
- For the Layers:
- 1 box (about 14 oz) graham crackers (you’ll need about 3 sleeves)
- For the Topping (optional but recommended):
- Extra whipped cream for garnish
- A sprinkle of cinnamon or pumpkin pie spice
- Crushed graham crackers or gingersnap cookies for crunch
A few notes on ingredients. I always use full-fat cream cheese for this recipe—the low-fat versions can make the filling grainy and less creamy. For the pumpkin puree, Libby’s is my go-to brand because it’s consistently thick and not watery. If you’re using a different brand, you might want to blot the pumpkin with a paper towel to remove excess moisture. Trust me, this little step makes a big difference in the final texture.
For the graham crackers, you can use regular honey grahams or cinnamon grahams for extra flavor. I’ve also made this with gluten-free graham crackers and it works beautifully—just make sure they’re sturdy enough to hold up to the filling. And if you’re feeling fancy, you can substitute the graham crackers with speculoos cookies or ginger snaps for a different flavor profile.
Equipment Needed
You don’t need much for this dreamy no-bake pumpkin pie icebox cake, which is part of its charm. Here’s what you’ll need:
- 9×13-inch baking dish or pan: This is the ideal size for getting those perfect layers. A glass dish works great because you can see the layers building up. If you don’t have a 9×13, you can use an 8×8 pan for a taller cake—just adjust the layering accordingly.
- Electric hand mixer or stand mixer: You’ll need this to whip the cream and beat the cream cheese mixture. A hand mixer works perfectly fine. If you’re using a stand mixer, use the whisk attachment for the cream and the paddle attachment for the cream cheese.
- Large mixing bowls: At least two—one for the cream cheese mixture and one for the whipped cream.
- Rubber spatula: For folding the whipped cream into the pumpkin mixture. A good spatula is your best friend here.
- Measuring cups and spoons: For accuracy. I’ve eyeballed this recipe before and it didn’t turn out as well.
- Plastic wrap or aluminum foil: For covering the cake while it chills overnight.
If you don’t have a hand mixer, you can whip the cream by hand with a whisk. It’ll take about 5-7 minutes of vigorous whisking, but it’s totally doable. I’ve done it before when my mixer was on the fritz, and honestly, it’s a good arm workout. Just make sure your cream is very cold—it whips up faster that way.
Preparation Method
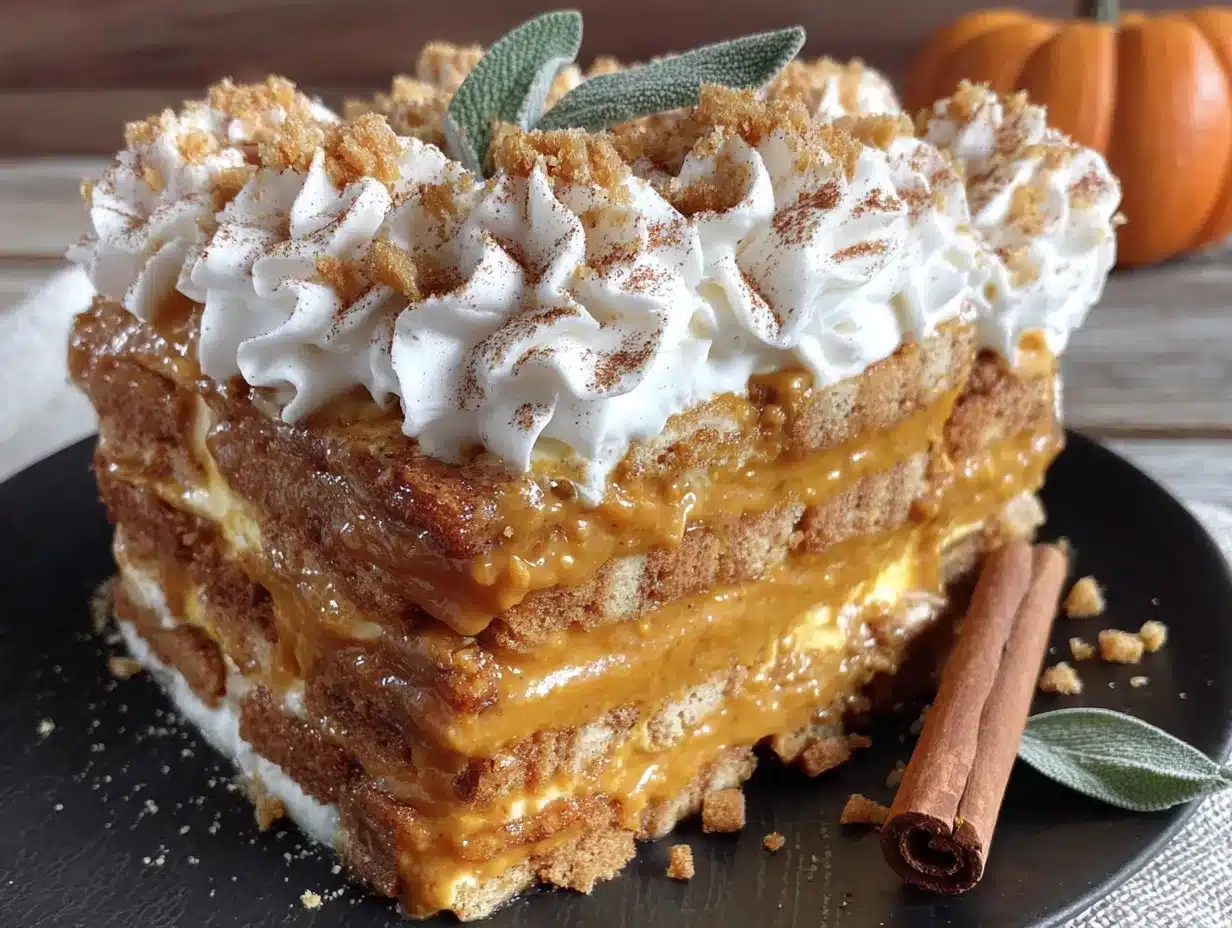
Alright, let’s get into the step-by-step for this dreamy no-bake pumpkin pie icebox cake. Take your time with each step, and don’t rush the chilling process—that’s where the magic happens.
- Prepare your pan. Lightly grease your 9×13-inch baking dish with a little butter or non-stick spray. This helps the first layer of graham crackers not stick too much. Set it aside while you make the filling.
- Make the pumpkin cream cheese mixture. In a large bowl, beat the softened cream cheese with an electric mixer until it’s smooth and creamy, about 2 minutes. Add the granulated sugar and brown sugar, and beat until combined and fluffy, another 2 minutes. Scrape down the sides of the bowl with your spatula. Add the pumpkin puree, vanilla extract, pumpkin pie spice, cinnamon, and salt. Beat on medium speed until everything is well combined and smooth. The mixture should be thick and fragrant—that smell is pure fall in a bowl.
- Whip the cream. In a separate large bowl, pour in the cold heavy whipping cream. Using clean beaters, beat the cream on medium-high speed until it starts to thicken, about 2 minutes. Add the powdered sugar and vanilla extract, and continue beating until stiff peaks form. You’ll know it’s ready when you lift the beaters and the cream holds its shape without drooping. Be careful not to over-whip, or you’ll end up with butter. I’ve done that before—it’s not pretty.
- Fold it all together. Take about one-third of the whipped cream and gently fold it into the pumpkin mixture using your rubber spatula. This lightens the pumpkin mixture and makes it easier to combine with the rest of the cream. Once that’s incorporated, add the remaining whipped cream and fold gently until no white streaks remain. The mixture should be light, airy, and a beautiful pale orange color. Don’t over-mix—you want to keep that fluffy texture.
- Start layering. Arrange a single layer of graham crackers on the bottom of your prepared dish. You’ll probably need to break some crackers to fit them perfectly. Don’t leave big gaps—the filling needs something to sit on. Spread about one-third of the pumpkin cream mixture evenly over the graham crackers. Use your spatula to smooth it out to the edges.
- Keep layering. Add another layer of graham crackers on top of the pumpkin mixture, again fitting them snugly. Spread another third of the pumpkin mixture over that. Repeat with a third layer of graham crackers and the remaining pumpkin mixture. You should end with a final layer of graham crackers on top. That last layer will soften and form the “crust” on top—it’s my favorite part.
- Cover and chill. Cover the dish tightly with plastic wrap or aluminum foil. Refrigerate for at least 6 hours, but overnight is really best. The graham crackers need time to soften and absorb the moisture from the filling, turning into a cake-like texture. I know it’s hard to wait, but trust the process. The first time I made this, I tried to rush it after 4 hours, and the crackers were still crunchy in spots. Not terrible, but not as good as it could be.
- Prepare the topping. Just before serving, make the topping. Whip another cup of heavy cream with 2 tablespoons of powdered sugar and a splash of vanilla until stiff peaks form. Spread or pipe this over the top of the chilled cake. Sprinkle with cinnamon or crushed graham crackers for that finishing touch.
- Slice and serve. Use a sharp knife to cut the cake into squares. Wipe the knife clean between cuts for neat slices. Serve cold—this cake is best straight from the fridge.
Cooking Tips & Techniques
Over the years, I’ve learned a few things about making this dreamy no-bake pumpkin pie icebox cake. Here are my best tips for getting it right every time.
Don’t skip softening the cream cheese. I know it’s tempting to use it straight from the fridge, but cold cream cheese will leave you with lumpy filling. Leave it on the counter for about 30 minutes before you start. If you’re in a hurry, you can microwave it in 10-second bursts until it’s soft but not melted.
Use cold heavy cream. For the best whipped cream, make sure your cream is very cold. I even chill my mixing bowl and beaters for 10 minutes before whipping—it makes a noticeable difference. Warm cream won’t whip properly and will deflate faster.
Fold, don’t stir. When you’re combining the whipped cream with the pumpkin mixture, use a gentle folding motion. Cut through the center of the mixture, scrape along the bottom, and bring it up and over. Turn the bowl as you go. This keeps the air in the whipped cream and gives you a light, fluffy filling. Stirring will deflate it and make the cake dense.
Let it chill properly. This is the most important tip. The cake needs at least 6 hours in the fridge, but overnight is truly best. The graham crackers need time to soften completely. If you cut into it too soon, you’ll have crunchy crackers and loose filling. Patience pays off here.
Make it ahead. This cake actually gets better after a day in the fridge. The flavors meld together and the texture becomes perfectly uniform. I often make it two days before I need it. Just don’t add the topping until right before serving, or it might get watery.
Common mistake to avoid: I once used pumpkin pie filling instead of pure pumpkin puree. The result was way too sweet and the texture was off because the filling already had thickeners in it. Always check the label—you want 100% pure pumpkin.
Variations & Adaptations
One of the best things about this dreamy no-bake pumpkin pie icebox cake is how adaptable it is. Here are some variations I’ve tried and loved.
Gluten-Free Version: Swap the regular graham crackers for gluten-free ones. I’ve used Schär brand graham-style crackers with great results. The texture is slightly different, but the cake still holds together beautifully. Just make sure your pumpkin puree and other ingredients are certified gluten-free if needed.
Dairy-Free Version: Use dairy-free cream cheese (Kite Hill makes a good one) and coconut cream instead of heavy cream. Chill the cans of coconut cream overnight, then scoop out the solid part and whip it with some powdered sugar. It won’t be quite as fluffy as regular whipped cream, but it’s still delicious. I’ve made this for a friend with dairy allergies and she said it was the best dessert she’d had in years.
Gingersnap Twist: Instead of graham crackers, use gingersnap cookies for the layers. The spicy ginger flavor pairs perfectly with the pumpkin. This version is a little more grown-up and has a wonderful crunch. I made this for a Thanksgiving dinner once and it was gone before the pumpkin pie.
Pumpkin Chocolate Chip Version: Sprinkle a handful of mini chocolate chips over each layer of pumpkin filling before adding the next layer of graham crackers. The chocolate adds a nice contrast to the spiced pumpkin. My kids absolutely love this version—it’s like a s’more meets pumpkin pie.
Individual Servings: Instead of a big cake, make individual parfaits in small glasses or mason jars. Layer crushed graham crackers, pumpkin filling, and whipped cream. These are perfect for parties and look adorable. Plus, no slicing required.
Serving & Storage Suggestions
This dreamy no-bake pumpkin pie icebox cake is best served cold, straight from the fridge. The texture is perfect when it’s chilled—firm enough to slice neatly but creamy and soft on the palate.
How to serve: Cut the cake into squares using a sharp knife. Wipe the knife clean between cuts for the neatest slices. Serve each square with a dollop of extra whipped cream and a sprinkle of cinnamon. If you’re feeling fancy, drizzle some caramel sauce over the top—it’s incredible with the pumpkin spice flavors.
What to serve with it: This cake pairs beautifully with a hot cup of coffee or spiced chai tea. For a fall-themed dessert spread, serve it alongside apple cider, a slice of apple pie, or some pumpkin cookies. It’s also great on its own—it’s rich enough to be satisfying without any accompaniments.
Storage instructions: Cover the cake tightly with plastic wrap or aluminum foil and store it in the refrigerator. It will keep for up to 5 days, but honestly, it’s best within the first 3 days. The graham crackers continue to soften over time, so after day 4, the texture becomes a bit too soft for my liking.
Freezing instructions: You can freeze this cake for up to 2 months. Wrap it tightly in plastic wrap, then in a layer of aluminum foil. Thaw it overnight in the refrigerator before serving. Don’t add the topping until after it’s thawed. I’ve frozen this cake for Christmas when I wanted to get ahead on desserts, and it thawed perfectly.
Reheating: You don’t need to reheat this cake—it’s meant to be served cold. But if you prefer a slightly softer texture, let it sit at room temperature for about 15 minutes before slicing. Just don’t leave it out too long, or the cream will start to soften too much.
Nutritional Information & Benefits
Here’s the estimated nutritional breakdown for one serving of this dreamy no-bake pumpkin pie icebox cake (based on 12 servings):
| Nutrient | Amount per Serving |
|---|---|
| Calories | 385 |
| Total Fat | 24g |
| Saturated Fat | 14g |
| Cholesterol | 75mg |
| Sodium | 280mg |
| Total Carbohydrates | 40g |
| Dietary Fiber | 2g |
| Sugars | 26g |
| Protein | 4g |
Now, let’s talk about the good stuff. Pumpkin is packed with vitamin A, which is great for your eyes and immune system. It’s also a good source of fiber, which helps with digestion. The cream cheese and heavy cream add calcium and protein, so it’s not all empty calories. And the spices—cinnamon, nutmeg, ginger—have anti-inflammatory properties. I mean, it’s still a dessert, so don’t go overboard, but it’s not the worst thing you could eat.
This recipe is vegetarian and can be made gluten-free and dairy-free with the substitutions mentioned above. It contains dairy and gluten in its standard form, so be mindful if you’re serving anyone with allergies. The sugar content is moderate for a dessert, but you can reduce the sugar by 1/4 cup if you prefer a less sweet version.
Personally, I love that this dessert feels indulgent without being heavy. It’s the kind of treat that satisfies your sweet tooth without leaving you feeling sluggish. Plus, the portion control is built in—one square is plenty satisfying.
Conclusion
This dreamy no-bake pumpkin pie icebox cake is more than just a dessert—it’s a lifesaver for busy fall days when you need something impressive without the stress. It’s the recipe I turn to when I want to enjoy the flavors of pumpkin pie without turning on the oven. And honestly, it might even be better than the real thing.
I love how forgiving this recipe is. You can tweak the spices, swap the cookies, or make it ahead of time. It always turns out beautifully. There’s something so satisfying about pulling a perfectly layered cake out of the fridge, knowing you made it in just 10 minutes. It feels like a little kitchen magic.
I hope you give this recipe a try and make it your own. Maybe you’ll add a little extra cinnamon, or use gingersnaps instead of graham crackers, or top it with a drizzle of caramel. Whatever you do, I’d love to hear about it. Drop a comment below and let me know how it turned out, or share a photo of your creation. And if you have a favorite fall dessert that’s saved you in a pinch, I’d love to hear about that too.
Happy baking—or rather, happy no-baking! You’ve got this.
Frequently Asked Questions
Can I use low-fat cream cheese in this recipe?
I don’t recommend it. Low-fat cream cheese has a higher water content, which can make the filling grainy and less stable. Full-fat cream cheese gives you that smooth, creamy texture that makes this cake so dreamy. If you’re watching calories, you can use a little less cream cheese and a bit more pumpkin puree to lighten it up.
How long does this cake need to chill?
At least 6 hours, but overnight is best. The graham crackers need time to soften and absorb the moisture from the filling. If you cut into it too soon, the texture won’t be right. I usually make it the night before I plan to serve it—it’s one less thing to worry about on the day of the event.
Can I use homemade pumpkin puree instead of canned?
Yes, but you’ll need to strain it first. Homemade pumpkin puree tends to be more watery than canned, which can make the filling too loose. Place the puree in a fine-mesh strainer lined with cheesecloth and let it drain for about an hour before using. You want it to be as thick as possible.
What if I don’t have pumpkin pie spice?
No problem! You can make your own by mixing 1/2 teaspoon cinnamon, 1/4 teaspoon nutmeg, 1/4 teaspoon ginger, and 1/8 teaspoon cloves. That’s roughly the equivalent of 1 1/2 teaspoons of pumpkin pie spice. I’ve done this many times when I’ve run out of the pre-mixed stuff.
Can I make this cake in a different size pan?
Absolutely. For an 8×8 pan, you’ll have about 4 layers of graham crackers and filling. For a 9×9 pan, you’ll get about 3 layers. Just adjust the amount of filling you use per layer. The key is to make sure the graham crackers are completely covered so they soften evenly. You might need to break the crackers into smaller pieces to fit the pan.
Pin This Recipe!
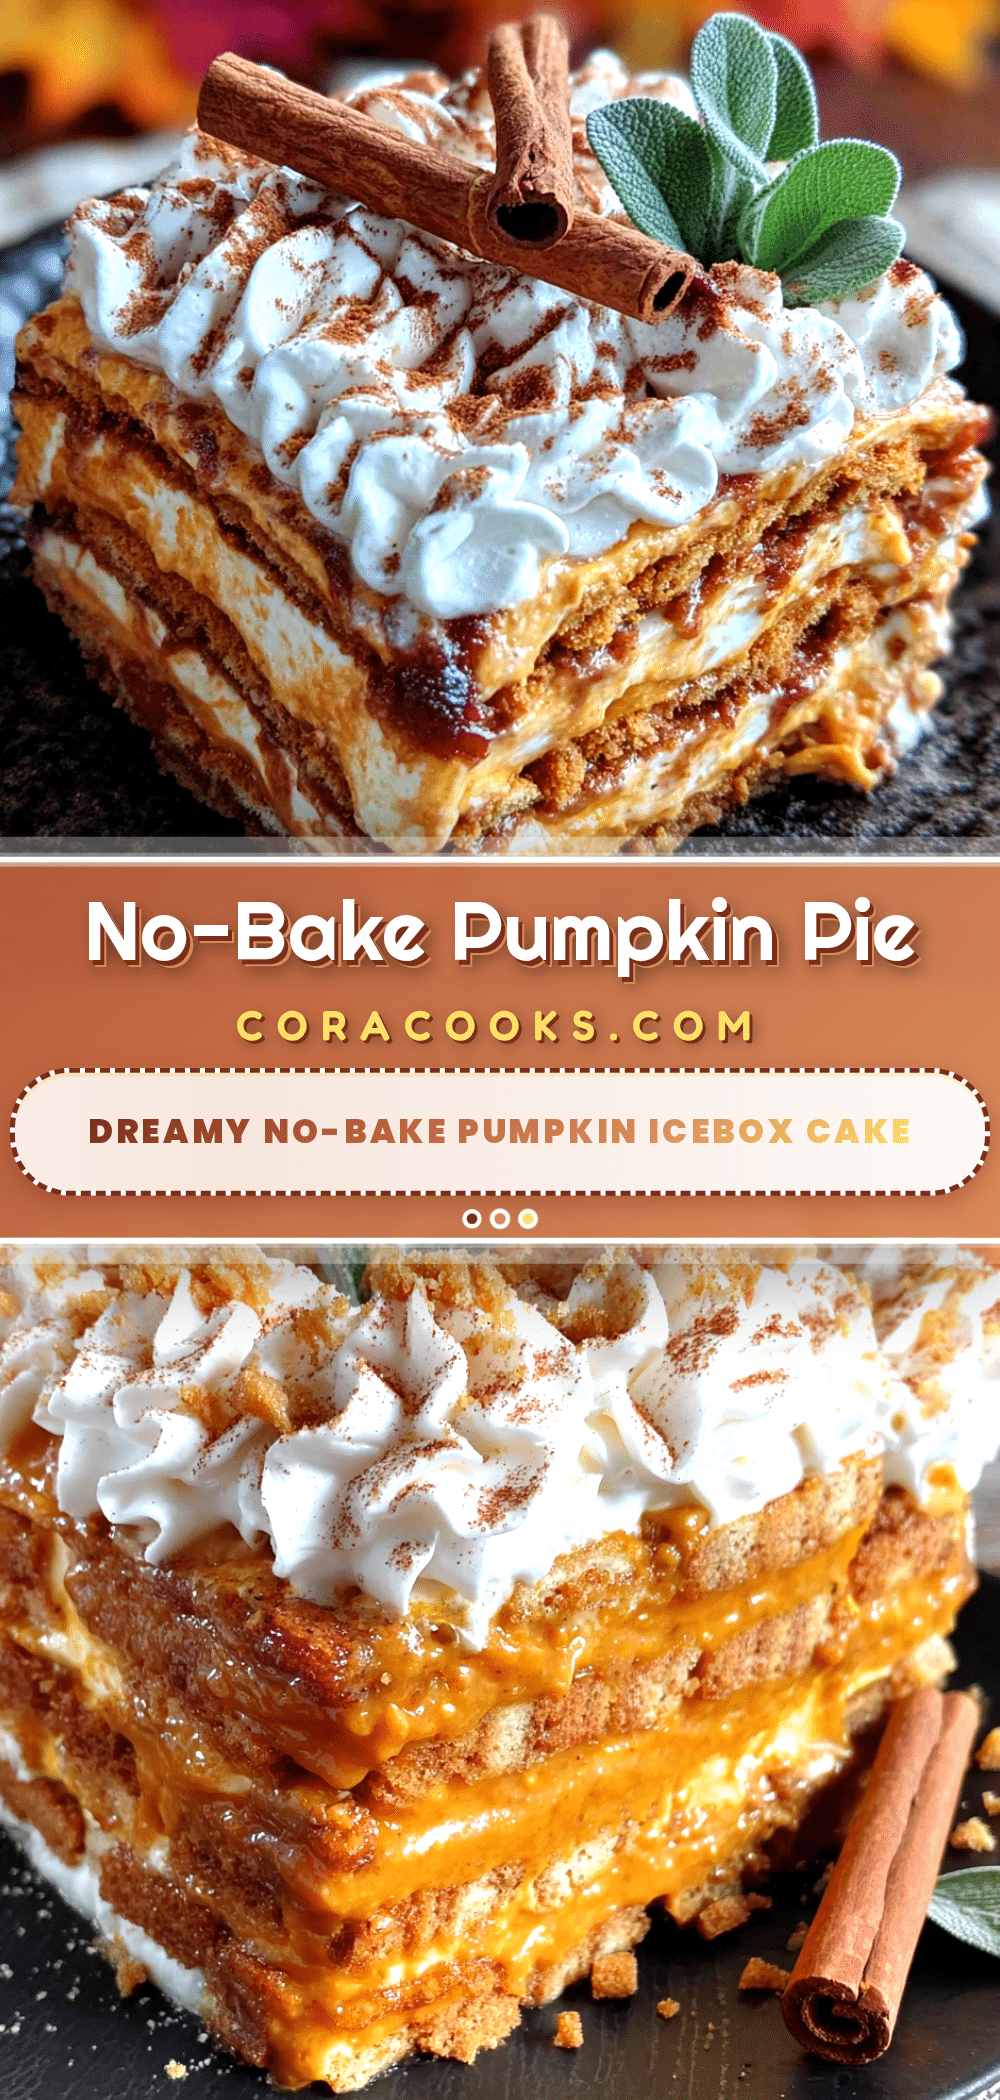
Dreamy No-Bake Pumpkin Pie Icebox Cake: Easy 10-Minute Dessert
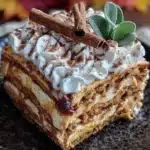
A quick and easy no-bake dessert that layers creamy pumpkin filling with graham crackers for a dreamy, crowd-pleasing treat. Perfect for fall gatherings and ready in just 10 minutes of active time.
- Prep Time: 10 minutes
- Cook Time: 0 minutes
- Total Time: 6 hours 10 minutes (includes chilling)
- Yield: 12 servings 1x
- Category: Dessert
- Cuisine: American
Ingredients
- 1 can (15 oz) pumpkin puree (not pumpkin pie filling)
- 8 oz cream cheese, softened to room temperature
- 1/2 cup granulated sugar
- 1/4 cup brown sugar, packed
- 1 teaspoon vanilla extract
- 1 1/2 teaspoons pumpkin pie spice
- 1/2 teaspoon ground cinnamon
- 1/4 teaspoon salt
- 2 cups heavy whipping cream, cold
- 3 tablespoons powdered sugar
- 1 teaspoon vanilla extract
- 1 box (about 14 oz) graham crackers (about 3 sleeves)
- Extra whipped cream for garnish (optional)
- A sprinkle of cinnamon or pumpkin pie spice (optional)
- Crushed graham crackers or gingersnap cookies for crunch (optional)
Instructions
- Lightly grease a 9×13-inch baking dish with butter or non-stick spray.
- In a large bowl, beat softened cream cheese with an electric mixer until smooth and creamy, about 2 minutes. Add granulated sugar and brown sugar, beat until fluffy, about 2 minutes. Scrape down sides. Add pumpkin puree, vanilla extract, pumpkin pie spice, cinnamon, and salt. Beat on medium speed until well combined and smooth.
- In a separate large bowl, beat cold heavy whipping cream on medium-high speed until it starts to thicken, about 2 minutes. Add powdered sugar and vanilla extract, continue beating until stiff peaks form.
- Fold one-third of the whipped cream into the pumpkin mixture using a rubber spatula. Add remaining whipped cream and fold gently until no white streaks remain.
- Arrange a single layer of graham crackers on the bottom of the prepared dish, breaking crackers to fit snugly. Spread about one-third of the pumpkin cream mixture evenly over the crackers.
- Add another layer of graham crackers, then another third of the pumpkin mixture. Repeat with a third layer of graham crackers and remaining pumpkin mixture. End with a final layer of graham crackers on top.
- Cover tightly with plastic wrap or aluminum foil. Refrigerate for at least 6 hours, preferably overnight.
- Just before serving, whip another cup of heavy cream with 2 tablespoons powdered sugar and a splash of vanilla until stiff peaks form. Spread or pipe over the top. Sprinkle with cinnamon or crushed graham crackers.
- Slice into squares using a sharp knife, wiping clean between cuts. Serve cold.
Notes
Use full-fat cream cheese for best texture. If using homemade pumpkin puree, strain it first to remove excess moisture. For best results, chill overnight. The cake can be made up to 2 days ahead; add topping just before serving. Can be frozen for up to 2 months.
Nutrition
- Serving Size: 1 square
- Calories: 385
- Sugar: 26
- Sodium: 280
- Fat: 24
- Saturated Fat: 14
- Carbohydrates: 40
- Fiber: 2
- Protein: 4
Keywords: no-bake pumpkin pie, icebox cake, pumpkin dessert, fall dessert, easy dessert, no-bake dessert, graham cracker cake