Love this? Save it for later!
Share the inspiration with your friends
The taxi driver was explaining the proper way to roll pie dough while we sat in bumper-to-bumper traffic on the way to the airport. I wasn’t expecting cooking advice from a cabbie, but there I was, late for my flight, listening to him describe exactly how to make a pumpkin pie that would change my entire perspective on Thanksgiving desserts. His name was Frank, he’d been driving a cab in Chicago for twenty-two years, and apparently, he’d won the neighborhood pie contest three years running. I almost missed my boarding call because I was scribbling his tips on a napkin.
Frank told me that most people get pumpkin pie wrong because they’re afraid of the crust. They buy the pre-made shells, use canned filling, and call it a day. But according to Frank—and I’ve since learned he was absolutely right—the magic happens when you start from scratch. Not because it’s fancy, but because that’s where the soul of the pie lives. I mean, honestly, I’d made pumpkin pie for years using shortcuts, and it was fine. But fine isn’t what you want when the family gathers around the table and everyone goes quiet after that first bite.
So this recipe? It’s Frank’s philosophy in edible form. It’s the one I’ve been making every fall since that random Tuesday in October when a taxi driver changed my baking life. It’s got that velvety, spiced filling that tastes like autumn distilled into a slice, paired with a flaky, buttery crust that actually holds up. And the best part? It’s not complicated. It just takes a little patience and a willingness to get your hands floury. Maybe you’ve been looking for that one pumpkin pie recipe that finally delivers. Trust me, I get it. This is the one.
Why You’ll Love This Recipe
Let me tell you why this homemade pumpkin pie from scratch is different from every other recipe you’ve tried. I’ve tested this version more times than I care to admit—burned a few crusts, overseasoned a filling, and once accidentally used pumpkin puree instead of pumpkin pie filling (don’t ask). But after all that trial and error, this is the recipe I keep coming back to. It’s the one my friends now request for Friendsgiving, and the one that made my pastry-chef aunt actually ask for seconds.
- Quick & Easy: Despite being from scratch, this pie comes together in about 45 minutes of active prep time. The rest is just baking and cooling. Perfect for a busy week when you want to impress without spending all day in the kitchen.
- Simple Ingredients: You probably already have most of these in your pantry. No weird extracts or hard-to-find spices. Just good, honest baking staples.
- Perfect for Fall Gatherings: Whether it’s Thanksgiving, a cozy Sunday dinner, or just because the leaves are turning, this pie fits the season beautifully.
- Crowd-Pleaser: I’ve served this to kids who swear they hate pumpkin pie, and they asked for seconds. It’s that good.
- Unbelievably Delicious: The texture is silky without being goopy, and the spice blend is warm without being overpowering. It’s the kind of pie that makes you close your eyes after the first bite.
What makes this recipe stand out is the technique I learned from Frank—and refined through my own kitchen disasters. I use a combination of heavy cream and evaporated milk for the richest possible texture without making the filling too dense. And the crust? It’s all about keeping the butter cold and not overworking the dough. This isn’t just another pumpkin pie recipe; it’s your new go-to. The one that makes people say, “Wow, you made this from scratch?”
What Ingredients You Will Need
This recipe uses simple, wholesome ingredients that come together to create something truly special. Most of these are pantry staples, which makes this pie accessible even on short notice. Here’s what you’ll need, broken down by component:
For the Pie Crust (from scratch)
- 1 ¼ cups all-purpose flour (plus extra for dusting)
- ½ teaspoon salt
- ½ cup unsalted butter, very cold and cut into small cubes (I prefer Kerrygold for its higher fat content—it makes the crust flakier)
- 3-4 tablespoons ice water (you might need a little more or less depending on humidity)
If you’re nervous about making crust from scratch, don’t be. The key is keeping everything cold. I pop my butter in the freezer for 15 minutes before I start, and I use a pastry cutter instead of my hands to keep the butter from warming up. You can absolutely use a food processor too—just pulse until the mixture looks like coarse sand with some pea-sized butter bits remaining.
For the Pumpkin Filling
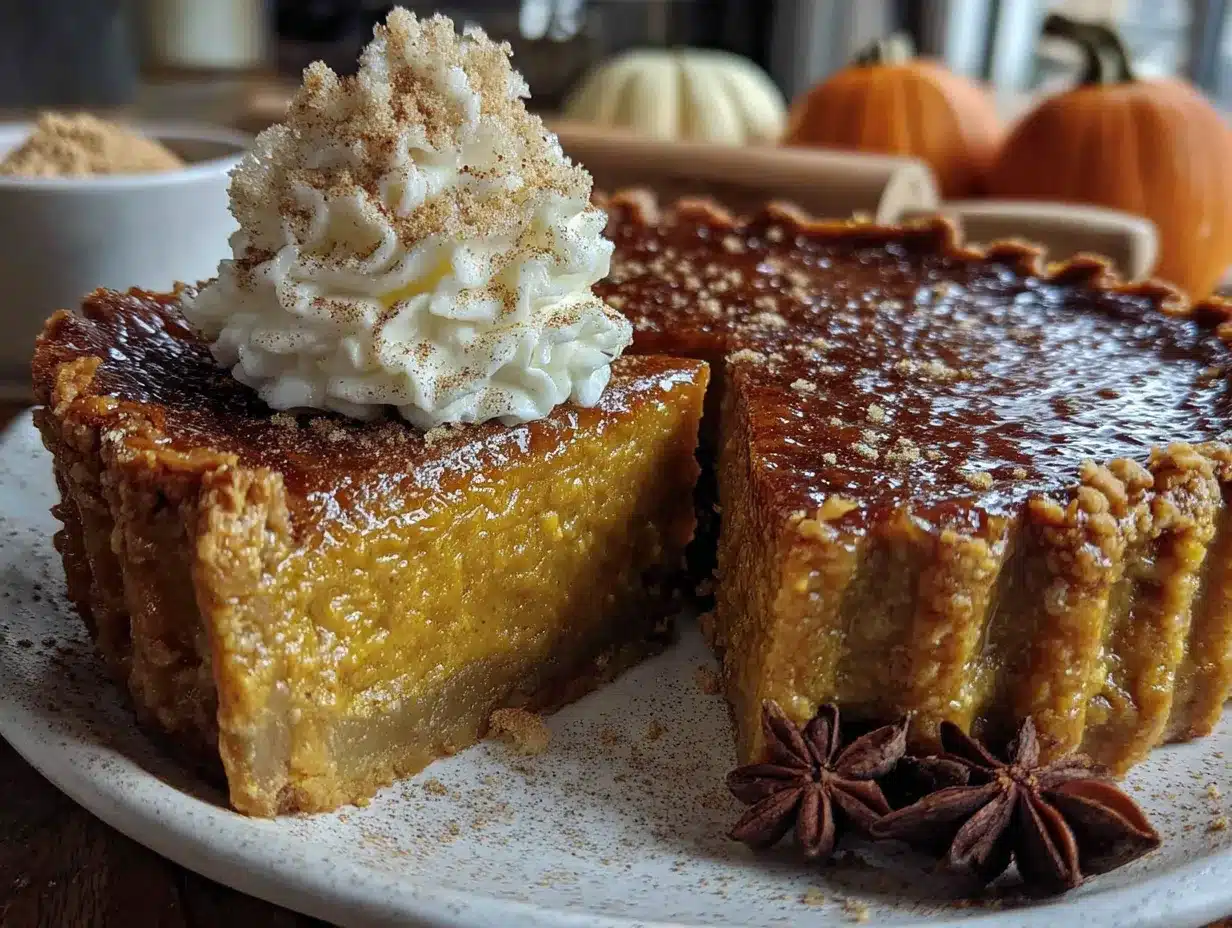
- 1 ¾ cups pumpkin puree (I use Libby’s—it’s consistent and has the right moisture content)
- ¾ cup granulated sugar
- ¼ cup packed brown sugar (light or dark works; dark adds more molasses flavor)
- 2 large eggs, room temperature
- 1 teaspoon vanilla extract
- 1 cup heavy cream
- ½ cup evaporated milk (not sweetened condensed milk—they’re different!)
- 2 teaspoons pumpkin pie spice (or make your own: 1 tsp cinnamon, ½ tsp ginger, ¼ tsp nutmeg, ¼ tsp cloves)
- ½ teaspoon salt
Here’s where Frank’s wisdom really shines. He insisted on using both heavy cream and evaporated milk. The heavy cream gives richness, while the evaporated milk keeps the filling from being too heavy. I’ve tried using all cream, and the pie turns out almost pudding-like. Too much evaporated milk, and it’s a bit thin. This ratio is the sweet spot.
For the pumpkin puree, make sure you’re buying 100% pure pumpkin, not pumpkin pie filling. The filling is already sweetened and spiced, which throws off the balance. And if you’re feeling ambitious, you can roast your own sugar pumpkins—just cut them in half, scoop out the seeds, roast at 400°F for 45 minutes, then scoop out the flesh and puree it. But honestly? Canned works beautifully here.
Equipment Needed
You don’t need a fancy kitchen to make this pie. Here’s what I use, along with some alternatives if you’re working with limited tools:
- 9-inch pie dish (glass or ceramic works best—metal can conduct heat unevenly)
- Rolling pin (a wine bottle works in a pinch, I’ve done it)
- Large mixing bowls (one for the crust, one for the filling)
- Whisk
- Pastry cutter or food processor (for cutting butter into flour)
- Plastic wrap (for chilling the dough)
- Parchment paper or aluminum foil (for blind baking)
- Pie weights or dried beans (to weigh down the crust while blind baking)
- Measuring cups and spoons
- Sharp knife or bench scraper
I learned the hard way that a dark metal pie pan can cause your crust to burn before the filling is set. Stick with glass or ceramic if you can. And if you don’t have pie weights, dried beans work perfectly—just save them in a jar for future blind baking sessions.
Preparation Method
Alright, let’s get baking. I’ll walk you through this step by step, with all the little details I wish someone had told me when I first started making pie from scratch.
Step 1: Make the Pie Crust (30 minutes active + 1 hour chilling)
In a large bowl, whisk together the flour and salt. Add the cold butter cubes and use a pastry cutter (or your fingertips) to work the butter into the flour until the mixture resembles coarse meal with some pea-sized butter pieces remaining. You want visible butter—that’s what creates flaky layers.
Drizzle 3 tablespoons of ice water over the mixture and stir with a fork until the dough starts to come together. If it seems dry, add the remaining tablespoon of water. The dough should hold together when you squeeze a handful. Turn it out onto a lightly floured surface, shape it into a disk, wrap it in plastic wrap, and refrigerate for at least 1 hour. I’ve rushed this step before, and the crust shrinks while baking. Patience pays off here.
Step 2: Blind Bake the Crust (20 minutes)
Preheat your oven to 375°F. On a floured surface, roll the chilled dough into a 12-inch circle, about ⅛-inch thick. Carefully transfer it to your pie dish, gently pressing it into the bottom and up the sides. Trim the excess dough, leaving about a ½-inch overhang, then fold it under and crimp the edges however you like. I do a simple flute with my fingers—nothing fancy.
Line the crust with parchment paper and fill with pie weights or dried beans. Bake for 15 minutes, then remove the weights and parchment and bake for another 5 minutes, until the bottom looks dry and set. Let it cool slightly while you make the filling. This blind baking step is non-negotiable—it prevents the dreaded soggy bottom.
Step 3: Make the Filling (10 minutes)
In a large bowl, whisk together the pumpkin puree, granulated sugar, brown sugar, eggs, and vanilla extract until smooth. Add the heavy cream, evaporated milk, pumpkin pie spice, and salt. Whisk until everything is fully combined. The mixture should be smooth and pourable, with a beautiful orange color and a warm, spicy aroma.
Here’s a tip I learned from burning my tongue more than once: taste the filling before pouring it into the crust. It’s safe since there are no raw eggs in this step (wait, there are eggs—so maybe don’t taste it raw). Instead, trust the measurements. If you want to adjust spices, do it now before it goes in the oven.
Step 4: Assemble and Bake (50-60 minutes)
Pour the filling into the pre-baked crust. It should come almost to the rim. Place the pie on a baking sheet (to catch any spills) and bake at 375°F for 50-60 minutes. The pie is done when the edges are set but the center still jiggles slightly when you gently shake the pan. It will continue to set as it cools.
If the crust edges start browning too quickly, tent them with aluminum foil or a pie shield ring around the 30-minute mark. I’ve forgotten this step before, and the result was a gorgeous filling with a charcoal crust. Not my finest moment.
Step 5: Cool and Serve (2 hours minimum)
Let the pie cool on a wire rack for at least 2 hours before slicing. This allows the filling to fully set. If you cut into it too early, you’ll get a runny mess—trust me, I’ve done it. For best results, refrigerate the pie for 4 hours or overnight. The flavors meld together beautifully, and the texture becomes perfectly sliceable.
Cooking Tips & Techniques
Let me share some hard-won wisdom from my pie-making journey. I’ve made every mistake you can imagine, and I’m here to help you avoid them.
Keep everything cold. This is the number one rule for flaky pie crust. The butter needs to stay solid until it hits the oven, where it melts and creates steam pockets that make the crust flaky. If your hands are warm, use a pastry cutter or food processor. If your kitchen is hot, chill your bowl and flour too.
Don’t overmix the filling. Whisk just until combined. Overmixing incorporates too much air, which can cause the filling to puff up and crack while baking. You want a smooth, dense texture, not a soufflé.
Use an oven thermometer. I learned this one the hard way when my pie came out undercooked after an hour. My oven runs 25 degrees cooler than the dial says. An oven thermometer costs five bucks and saves you from serving raw pumpkin pie.
The jiggle test is your friend. When you think the pie is done, give it a gentle shake. The center should wobble like Jell-O, not slosh like soup. It will continue to set as it cools, so don’t wait until it’s completely firm in the oven or you’ll end up with a dry, cracked pie.
Let it cool completely. I know it’s tempting to cut into a warm pie, but patience is essential. A fully cooled pie slices cleanly and holds its shape. Warm pie is delicious but messy. If you’re serving it warm, let it cool for at least 2 hours first.
Variations & Adaptations
This recipe is wonderfully adaptable. Here are some variations I’ve tried and loved:
Gluten-Free Version
Swap the all-purpose flour for a 1:1 gluten-free baking flour blend. I’ve had good luck with Bob’s Red Mill. The crust will be a bit more delicate, so handle it gently. The filling is naturally gluten-free, so no changes needed there.
Dairy-Free Version
Replace the butter in the crust with cold coconut oil or a plant-based butter stick. For the filling, use full-fat coconut cream instead of heavy cream and a dairy-free evaporated milk alternative. The coconut flavor is subtle and actually complements the pumpkin nicely.
Spice It Up
I once made a version with a teaspoon of chipotle powder added to the filling. The smoky heat paired surprisingly well with the sweet pumpkin. Start with ½ teaspoon if you’re unsure—you can always add more, but you can’t take it out.
Maple Pumpkin Pie
Replace the brown sugar with maple syrup (reduce the heavy cream by 2 tablespoons to compensate for the extra liquid). The maple flavor adds a lovely depth that feels extra cozy for fall.
Serving & Storage Suggestions
This pie is best served at room temperature or slightly warm. If you’ve refrigerated it, let it sit on the counter for 30 minutes before serving. A slice of this pie with a dollop of lightly sweetened whipped cream is pure heaven. For a truly decadent experience, try it with a scoop of vanilla bean ice cream and a drizzle of caramel sauce.
For storage, cover the pie loosely with plastic wrap or aluminum foil and refrigerate for up to 4 days. The crust will soften slightly over time, but the flavor actually improves after a day or two as the spices meld together. You can also freeze the baked pie for up to 3 months. Wrap it tightly in plastic wrap, then foil, and thaw overnight in the refrigerator before serving.
To reheat individual slices, pop them in a 350°F oven for 5-7 minutes or microwave for 20 seconds. Just be careful not to overheat, or the filling can become runny.
Nutritional Information & Benefits
Per slice (based on 8 servings): approximately 380 calories, 22g fat, 44g carbohydrates, 6g protein, 3g fiber. Pumpkin is packed with vitamin A, fiber, and antioxidants. It’s also naturally low in calories, so most of the indulgence here comes from the butter, cream, and sugar—which is exactly what makes it taste so good.
This recipe contains dairy, gluten, and eggs. For allergen-friendly versions, see the variations above. And honestly? I believe in balance. This is a treat, something to savor on a crisp fall evening with people you love. It’s not an everyday food, and that’s what makes it special.
FAQs
Can I use a store-bought crust instead?
Absolutely. If you’re short on time or intimidated by making crust from scratch, a high-quality refrigerated pie crust works just fine. Just be sure to blind bake it first to avoid a soggy bottom.
How do I know when the pie is fully baked?
The edges should be set and slightly puffed, while the center should jiggle like firm Jell-O when you gently shake the pan. A knife inserted near the center should come out mostly clean. Remember, it will continue to set as it cools.
Can I use fresh pumpkin instead of canned?
Yes, but you’ll need to roast and puree a sugar pumpkin first. Be aware that fresh pumpkin has a higher water content, so you may need to drain the puree through a cheesecloth-lined sieve for 30 minutes before using. Canned pumpkin is more consistent and works perfectly.
Why did my crust shrink while baking?
This usually happens when the dough isn’t chilled enough before baking, or when it’s overworked. Make sure to chill the shaped crust for at least 30 minutes before blind baking. Also, don’t stretch the dough when fitting it into the pie dish—gently press it in.
Can I make this pie ahead of time?
Yes! This pie actually tastes better the next day. Bake it a day ahead, let it cool completely, then cover and refrigerate. Bring to room temperature before serving. You can also freeze the baked pie for up to 3 months.
Conclusion
This homemade pumpkin pie from scratch is more than just a dessert—it’s a little piece of fall that you can hold in your hands. It’s the pie that made me believe in the magic of baking from scratch, that taught me to trust the process and be patient with myself in the kitchen. Every time I make it, I think of Frank, that taxi driver who took the time to share his wisdom with a stranger. And every time I take that first bite, I’m reminded that the best recipes come from the most unexpected places.
I hope you give this recipe a try. Make it for Thanksgiving, make it for a cozy Sunday, or make it just because you deserve something warm and wonderful. And when you do, I’d love to hear about it. Leave a comment below and tell me how it turned out—did you add your own twist? Did your family fight over the last slice? That’s what this is all about. Happy baking, friends.
Pin This Recipe!
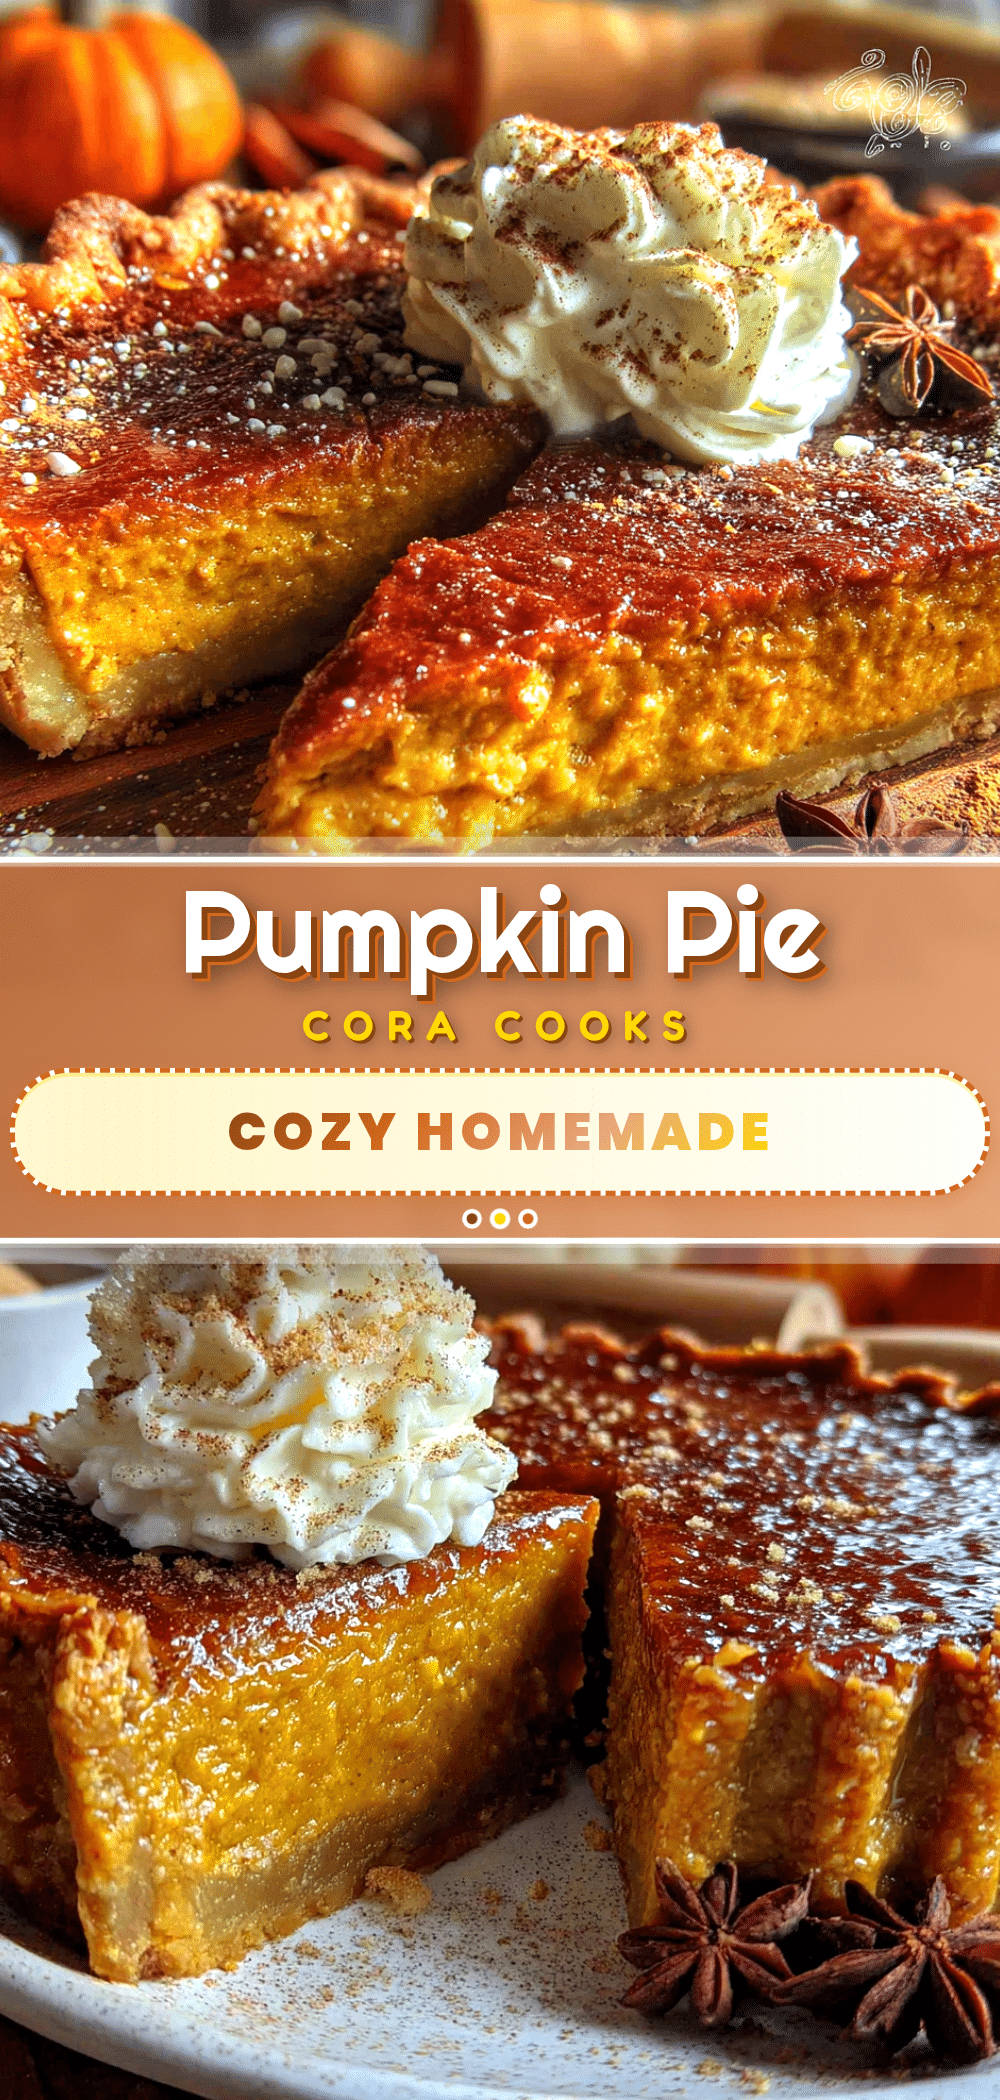
Best Homemade Pumpkin Pie from Scratch

This homemade pumpkin pie from scratch features a velvety, spiced filling that tastes like autumn distilled into a slice, paired with a flaky, buttery crust. It’s the perfect Thanksgiving dessert that will change your perspective on pumpkin pie forever.
- Prep Time: 45 minutes
- Cook Time: 60 minutes
- Total Time: 2 hours 45 minutes (plus chilling and cooling time)
- Yield: 8 servings 1x
- Category: Dessert
- Cuisine: American
Ingredients
- 1 ¼ cups all-purpose flour (plus extra for dusting)
- ½ teaspoon salt
- ½ cup unsalted butter, very cold and cut into small cubes
- 3–4 tablespoons ice water
- 1 ¾ cups pumpkin puree
- ¾ cup granulated sugar
- ¼ cup packed brown sugar (light or dark)
- 2 large eggs, room temperature
- 1 teaspoon vanilla extract
- 1 cup heavy cream
- ½ cup evaporated milk
- 2 teaspoons pumpkin pie spice (or 1 tsp cinnamon, ½ tsp ginger, ¼ tsp nutmeg, ¼ tsp cloves)
- ½ teaspoon salt
Instructions
- Make the pie crust: In a large bowl, whisk together flour and salt. Add cold butter cubes and use a pastry cutter or fingertips to work butter into flour until mixture resembles coarse meal with some pea-sized butter pieces. Drizzle 3 tablespoons ice water over mixture and stir with a fork until dough starts to come together. Add remaining water if needed. Shape into a disk, wrap in plastic wrap, and refrigerate for at least 1 hour.
- Blind bake the crust: Preheat oven to 375°F. On a floured surface, roll chilled dough into a 12-inch circle, about ⅛-inch thick. Transfer to a 9-inch pie dish, trim excess, fold under, and crimp edges. Line with parchment paper and fill with pie weights or dried beans. Bake for 15 minutes, remove weights and parchment, and bake another 5 minutes until bottom looks dry and set. Let cool slightly.
- Make the filling: In a large bowl, whisk together pumpkin puree, granulated sugar, brown sugar, eggs, and vanilla extract until smooth. Add heavy cream, evaporated milk, pumpkin pie spice, and salt. Whisk until fully combined.
- Assemble and bake: Pour filling into pre-baked crust. Place pie on a baking sheet and bake at 375°F for 50-60 minutes, until edges are set but center still jiggles slightly. If crust edges brown too quickly, tent with foil around 30-minute mark.
- Cool and serve: Let pie cool on a wire rack for at least 2 hours before slicing. For best results, refrigerate for 4 hours or overnight. Serve at room temperature or slightly warm.
Notes
Keep all ingredients cold for flaky crust. Don’t overmix the filling. Use an oven thermometer for accurate temperature. The jiggle test is key: center should wobble like Jell-O when done. Let pie cool completely before slicing for clean cuts. Pie tastes even better the next day.
Nutrition
- Serving Size: 1 slice (1/8 of pie)
- Calories: 380
- Sugar: 28
- Sodium: 380
- Fat: 22
- Saturated Fat: 13
- Carbohydrates: 44
- Fiber: 3
- Protein: 6
Keywords: pumpkin pie, homemade pumpkin pie, from scratch, Thanksgiving dessert, fall dessert, pumpkin pie recipe, best pumpkin pie