Love this? Save it for later!
Share the inspiration with your friends
This was supposed to be a simple chocolate sheet cake for a potluck. I had everything planned out—my go-to cocoa recipe, a tub of frosting from the store, and about forty-five minutes before I needed to walk out the door. Then I realized I was out of eggs. Not just low on eggs. Completely, totally out. And the corner store was already closed because, of course, it was a Sunday evening. I stood there staring into my fridge like an answer might magically appear, and that is when I spotted the bag of mini Reese’s cups my husband had hidden behind the pickles. A desperate idea started forming. What if I just… skipped the eggs? Used something else? Made a completely different kind of cake? I grabbed the peanut butter cups, a box of chocolate cake mix from the pantry, and decided to wing it. Honestly, I was half-convinced I would end up ordering pizza and showing up empty-handed.
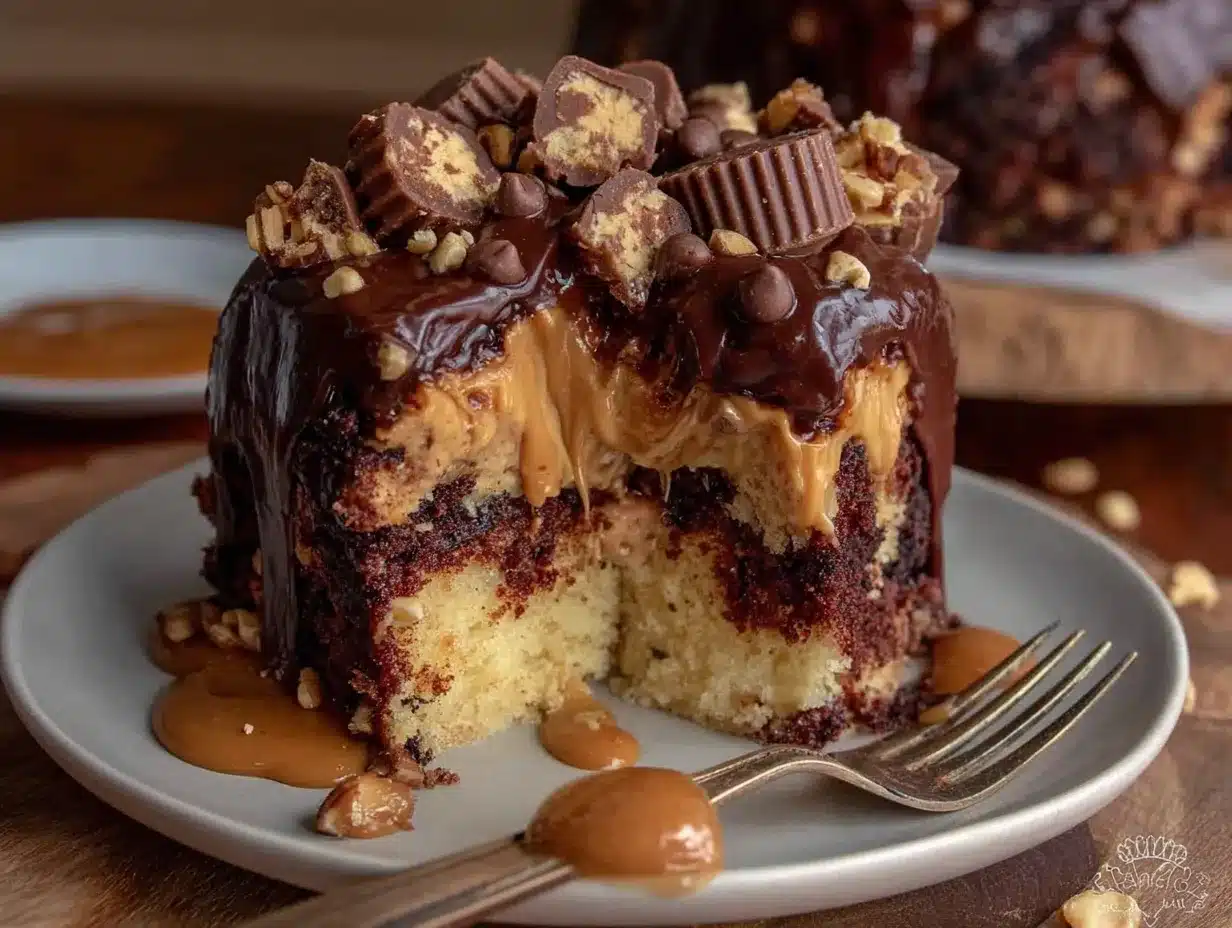
What came out of that oven was nothing like the plan—and better. The cake was dense and fudgy in a way my usual recipe never achieved. I poked holes in the warm surface, poured a sweetened condensed milk and peanut butter mixture over the top, and watched it soak in like the cake was thirsty for it. Then I added more peanut butter cups, a layer of Cool Whip, and a drizzle of chocolate syrup. I brought it to the potluck with zero confidence, I mean, zero. Someone took the first slice, then the second, and by the time I got a plate for myself, half the pan was gone. A woman I had never met grabbed my arm and asked for the recipe with the kind of intensity usually reserved for emergency situations. Maybe you have been there—that moment when a kitchen failure turns into something you cannot stop thinking about. That is this cake for me. It is the happy accident I keep making on purpose now.
Why You’ll Love This Recipe
This is not just another chocolate cake. This is the kind of dessert that makes people close their eyes after the first bite. I have made it for birthdays, barbecues, and random Tuesday nights when I needed a win, and it never fails. Here is why this one stands out:
- Quick & Easy : Comes together in under 30 minutes of active time. The oven does most of the work, and the rest is just poking holes and pouring. Perfect for last-minute cravings or when you forgot to sign up for the dessert table.
- Simple Ingredients : A boxed cake mix, sweetened condensed milk, peanut butter, Cool Whip, and a bag of Reese’s cups. No fancy baking skills or obscure ingredients required. You probably have most of this already.
- Perfect for Any Occasion : Great for potlucks, holiday gatherings, game day snacks, or just because. It travels well, serves a crowd, and sits happily on a buffet table without needing refrigeration for a few hours.
- Crowd-Pleaser : Kids devour it. Adults sneak seconds. I have watched self-proclaimed “not dessert people” go back for thirds. The combination of chocolate, peanut butter, and creamy topping is basically irresistible.
- Unbelievably Delicious : The texture is what gets you. The cake stays incredibly moist from the soaked-in mixture, the peanut butter cups add little pockets of melty candy, and the whipped topping keeps everything light. It is comfort food reimagined—faster, easier, but with the same soul-soothing satisfaction.
What makes this recipe different from the rest is the method. Instead of just mixing peanut butter into the batter, you pour a sweetened condensed milk and peanut butter mixture into the warm cake. That step changes everything. It seeps into every hole and makes the cake almost pudding-like in the best way. This is not just another poke cake recipe. It is the best version I have ever tried, and I have tested quite a few.
What Ingredients You Will Need
This recipe uses simple, mostly pantry-stable ingredients to deliver that rich, indulgent flavor without any complicated steps. Here is everything you need and a few notes on what to look for:
For the Cake Base
- 1 box (15.25 oz) chocolate cake mix (I prefer Duncan Hines or Betty Crocker for consistent results; any brand works fine)
- Eggs, oil, and water as called for on the back of the cake mix box (usually 3 eggs, 1/3 cup oil, and 1 cup water)
- 1 teaspoon vanilla extract (adds a warmth that deepens the chocolate flavor; use pure extract if you have it)
For the Peanut Butter Filling
- 1 can (14 oz) sweetened condensed milk (this is non-negotiable for the texture; do not use evaporated milk)
- 1/2 cup creamy peanut butter (Jif or Skippy work great; avoid natural peanut butter that separates, as it can make the filling grainy)
- 1/4 cup whole milk (helps thin the mixture so it pours easily; 2% works too, but avoid skim)
For the Topping
- 1 container (8 oz) Cool Whip, thawed (or homemade whipped cream if you prefer; Cool Whip holds up better for leftovers)
- 1 cup mini Reese’s peanut butter cups, roughly chopped (plus more for garnish; the minis are perfect because they distribute evenly)
- Chocolate syrup for drizzling (Hershey’s is classic, or use homemade if you are feeling fancy)
Ingredient Tips
For the peanut butter, stick with the standard processed kind. Natural peanut butter tends to separate and can make the filling oily instead of creamy. I learned this the hard way when I tried to be “healthier” and ended up with a greasy mess on top of my cake. Also, if you want to go all out, grab a full-size Reese’s cup to crumble on top for extra visual appeal. The mini ones are easier to chop, though, so that is what I usually reach for.
Equipment Needed
You do not need a fancy kitchen to pull this off. Here is what you will need:
- 9×13 inch baking pan (glass or metal both work; glass may need an extra minute or two of baking time)
- Mixing bowls (one large for the cake batter, one medium for the filling)
- Whisk or electric mixer (a hand whisk is fine for the cake mix; the filling just needs a fork or small whisk)
- Wooden spoon handle or similar utensil (for poking holes in the cake; a chopstick or the handle of a spatula works perfectly)
- Measuring cups and spoons
- Rubber spatula (for scraping every last bit of the filling into the holes)
- Sharp knife and cutting board (for chopping the peanut butter cups)
If you do not have a 9×13 pan, you can use two 8×8 square pans and adjust the baking time slightly. Just keep an eye on them around the 20-minute mark. I have also used a disposable aluminum pan when bringing this to a potluck, and it works perfectly—no cleanup required. For the Cool Whip, let it thaw in the fridge overnight or on the counter for about an hour. Do not microwave it unless you want soup.
Preparation Method
- Preheat your oven to 350°F (175°C). Grease a 9×13 inch baking pan with butter or nonstick spray. I like to use baking spray with flour for extra insurance.
- Prepare the cake batter. In a large bowl, combine the chocolate cake mix, eggs, oil, water, and vanilla extract. Mix according to package directions—usually about 2 minutes with an electric mixer or 3 minutes by hand. The batter should be smooth and slightly thick.
- Bake the cake. Pour the batter into the prepared pan and spread it evenly. Bake for 25 to 30 minutes, or until a toothpick inserted into the center comes out clean or with a few moist crumbs. The edges should pull away slightly from the pan. Do not overbake—a slightly underdone center is better for absorbing the filling.
- Poke the holes. Let the cake cool in the pan for 5 minutes. Then, using the handle of a wooden spoon or a chopstick, poke holes all over the cake. Space them about 1 inch apart. Poke all the way to the bottom of the pan but try not to tear the cake apart. You want about 40 to 50 holes total.
- Make the peanut butter filling. While the cake is still warm, combine the sweetened condensed milk, creamy peanut butter, and whole milk in a small saucepan. Warm over low heat, stirring constantly, until the peanut butter is fully melted and the mixture is smooth. This takes about 3 to 4 minutes. Do not let it boil—just warm enough to be pourable.
- Pour the filling over the cake. Slowly pour the warm peanut butter mixture over the entire surface of the cake, making sure it seeps into the holes. Use a rubber spatula to spread it evenly and push it into any dry spots. You will see the cake start to absorb it immediately.
- Add the first layer of peanut butter cups. Sprinkle about 3/4 cup of the chopped mini Reese’s cups over the warm cake. Press them gently into the surface so they stick. The warmth will soften them slightly, which is perfect.
- Cool completely. Let the cake cool to room temperature on a wire rack. This takes about 1 hour. Do not rush this step—if you add the Cool Whip while the cake is still warm, it will melt into a puddle.
- Top with Cool Whip. Once the cake is completely cool, spread the thawed Cool Whip evenly over the top. Use an offset spatula or the back of a spoon for a smooth finish, or leave it swirly for a more rustic look.
- Garnish and chill. Sprinkle the remaining chopped peanut butter cups over the Cool Whip, then drizzle chocolate syrup over the top in a zigzag pattern. Cover the pan with plastic wrap or foil and refrigerate for at least 2 hours before serving. Overnight is even better—the flavors really meld together.
Cooking Tips & Techniques
I have made this cake probably a dozen times now, and I have messed it up in almost every way possible. Here is what I learned so you do not have to repeat my mistakes:
Do not skip the cooling step. The first time I made this, I was in a hurry and spread the Cool Whip over a slightly warm cake. It turned into a sad, melted mess that looked nothing like the pretty photos I had in my head. Let the cake cool completely. Trust me on this one.
Poke the holes deep and wide. Use the thickest handle you have. A chopstick makes tiny holes that do not hold much filling. The handle of a wooden spoon creates perfect little wells that soak up all that peanut butter goodness. I actually keep a specific wooden spoon just for poking cakes now.
Warm the filling gently. Peanut butter can scorch if you get impatient and crank up the heat. Keep the saucepan on low and stir constantly. The mixture should be warm and pourable, not hot. If it starts bubbling at the edges, you have gone too far.
Let it rest overnight. I know, I know. Waiting is hard. But this cake genuinely tastes better the next day. The filling has time to distribute evenly through the cake, the Cool Whip sets up nicely, and the peanut butter cups soften into little fudgy pockets. Make it the day before you plan to serve it.
Use a serrated knife to slice. A regular knife tends to drag through the Cool Whip and make a mess. A serrated knife cuts cleanly through the topping and the cake. Run it under hot water and wipe it dry between slices for the prettiest presentation.
Variations & Adaptations
One of the best things about this cake is how easy it is to change up. Here are some variations I have tried and loved:
Chocolate Peanut Butter Brownie Version: Swap the cake mix for a box of brownie mix. Bake in the same 9×13 pan, but reduce the baking time by about 5 minutes. The brownie base is denser and even fudgier. This version is dangerously good.
Gluten-Free Option: Use a gluten-free chocolate cake mix. Most brands work well, but I have had the best luck with King Arthur Flour’s gluten-free mix. The filling and topping are naturally gluten-free, so this is an easy swap.
Peanut Butter Lovers Extreme: Add 1/2 cup of creamy peanut butter to the cake batter before baking. Also, use peanut butter chips instead of some of the chopped Reese’s cups. This version is intense—in the best way.
Healthier-ish Twist: Use a sugar-free cake mix, sugar-free Cool Whip, and reduced-fat peanut butter. Replace the sweetened condensed milk with a homemade version using evaporated milk and a sugar substitute. It is not exactly health food, but it cuts the sugar significantly while keeping the texture.
S’mores Poke Cake: Swap the peanut butter filling for a mixture of sweetened condensed milk and melted marshmallows. Top with crushed graham crackers and chocolate chunks instead of Reese’s cups. This is my summer potluck go-to.
Serving & Storage Suggestions
This cake is best served cold, straight from the fridge. The Cool Whip stays firm, and the cake has that perfect chilled, dense texture. I like to let it sit out for about 10 minutes before slicing—just enough to take the chill off without losing the structure.
For presentation, I cut it into squares and arrange them on a platter with a few extra mini Reese’s cups scattered around. A drizzle of chocolate syrup on the plate looks fancy with almost zero effort. This cake also holds up beautifully on a buffet table for a couple of hours at room temperature, so do not stress about keeping it cold during a party.
Storage: Cover the pan tightly with plastic wrap or foil and store in the refrigerator for up to 5 days. The cake actually improves after day one. By day three, the texture is almost like a peanut butter cup cheesecake. It is fantastic.
Freezing: You can freeze this cake for up to 3 months. Assemble the entire cake, but do not add the chocolate syrup drizzle until after thawing. Wrap the pan tightly in plastic wrap, then a layer of foil. To serve, thaw in the refrigerator overnight. The Cool Whip may be slightly looser after freezing, but it still tastes amazing.
Reheating: Honestly, I do not recommend reheating this cake. It is designed to be eaten cold. If you absolutely want a warm dessert, microwave a single slice for about 15 seconds. The peanut butter cups will get melty, and the cake will soften. It is a different experience, but still good.
Nutritional Information & Benefits
Let’s be real—this is a treat. It is not a health food, and it is not pretending to be. But here is the breakdown so you know what you are getting into:
Estimated per serving (1/12 of cake):
- Calories: 420
- Fat: 22g
- Carbohydrates: 52g
- Protein: 8g
- Sugar: 38g
That said, there are a few redeeming qualities. Peanut butter provides protein and healthy monounsaturated fats. It also contains vitamin E, magnesium, and potassium. Chocolate (especially dark chocolate) has antioxidants called flavonoids that can support heart health. The sweetened condensed milk adds calcium, though it also brings plenty of sugar.
If you are watching your intake, a smaller slice goes a long way. I often cut this into 16 pieces instead of 12 when I am serving it at a gathering. Everyone still gets a satisfying portion, and the calories drop to around 315 per serving. Also, this recipe is nut-free if you use a nut-free chocolate cake mix and sunflower seed butter instead of peanut butter, though that changes the flavor profile significantly.
FAQs
Can I use homemade whipped cream instead of Cool Whip?
Absolutely. Whip 1 1/2 cups of heavy cream with 3 tablespoons of powdered sugar and 1 teaspoon of vanilla extract until stiff peaks form. It is lighter and less sweet than Cool Whip. Just note that homemade whipped cream will not hold up as well for leftovers, so plan to eat the cake within 2 days if you go this route.
Do I have to use a boxed cake mix?
Not at all. If you have a favorite from-scratch chocolate cake recipe, use that instead. Just make sure it is a sturdy enough cake to hold up to the poking and soaking. A lighter, fluffier cake might fall apart. I have used a sour cream chocolate cake recipe before, and it was incredible.
Can I make this dairy-free?
Yes, with a few swaps. Use a dairy-free cake mix and replace the eggs with flax eggs (1 tablespoon ground flaxseed mixed with 3 tablespoons water per egg). Use canned coconut milk instead of whole milk, and a dairy-free cream cheese frosting or coconut whipped cream instead of Cool Whip. The sweetened condensed milk is harder to replace, but there are dairy-free versions available or you can make your own with coconut milk and sugar.
Why did my filling not soak into the cake?
This usually happens for one of two reasons. Either the cake was too cool when you poured the filling (the holes close up as the cake cools), or you did not poke the holes deep enough. Make sure you poke all the way to the bottom of the pan, and pour the filling while the cake is still warm—within 5 to 10 minutes of coming out of the oven.
How far in advance can I make this cake?
You can make it up to 2 days ahead of time. In fact, I recommend it. The cake needs at least 2 hours to chill, but overnight is better. If you are making it more than 2 days ahead, I would hold off on the Cool Whip and garnish until the day you plan to serve it. The cake base and filling will keep fine, but the topping stays fresher when added closer to serving time.
Conclusion
This cake started as a mistake, but it became one of those recipes I genuinely look forward to making. It is forgiving, adaptable, and absolutely irresistible. The combination of moist chocolate cake, creamy peanut butter filling, and light whipped topping hits every note you want in a dessert. Whether you are bringing it to a party, making it for a holiday, or just treating yourself on a random Wednesday, this cake delivers.
I would love to hear how yours turns out. Did you try one of the variations? Add your own twist? Forget to poke deep enough and end up with a dry spot? (Been there.) Drop a comment below and let me know. And if you share it on social media, tag me—I want to see your beautiful creation. Now go make some holes in a cake. You will not regret it.
Pin This Recipe!
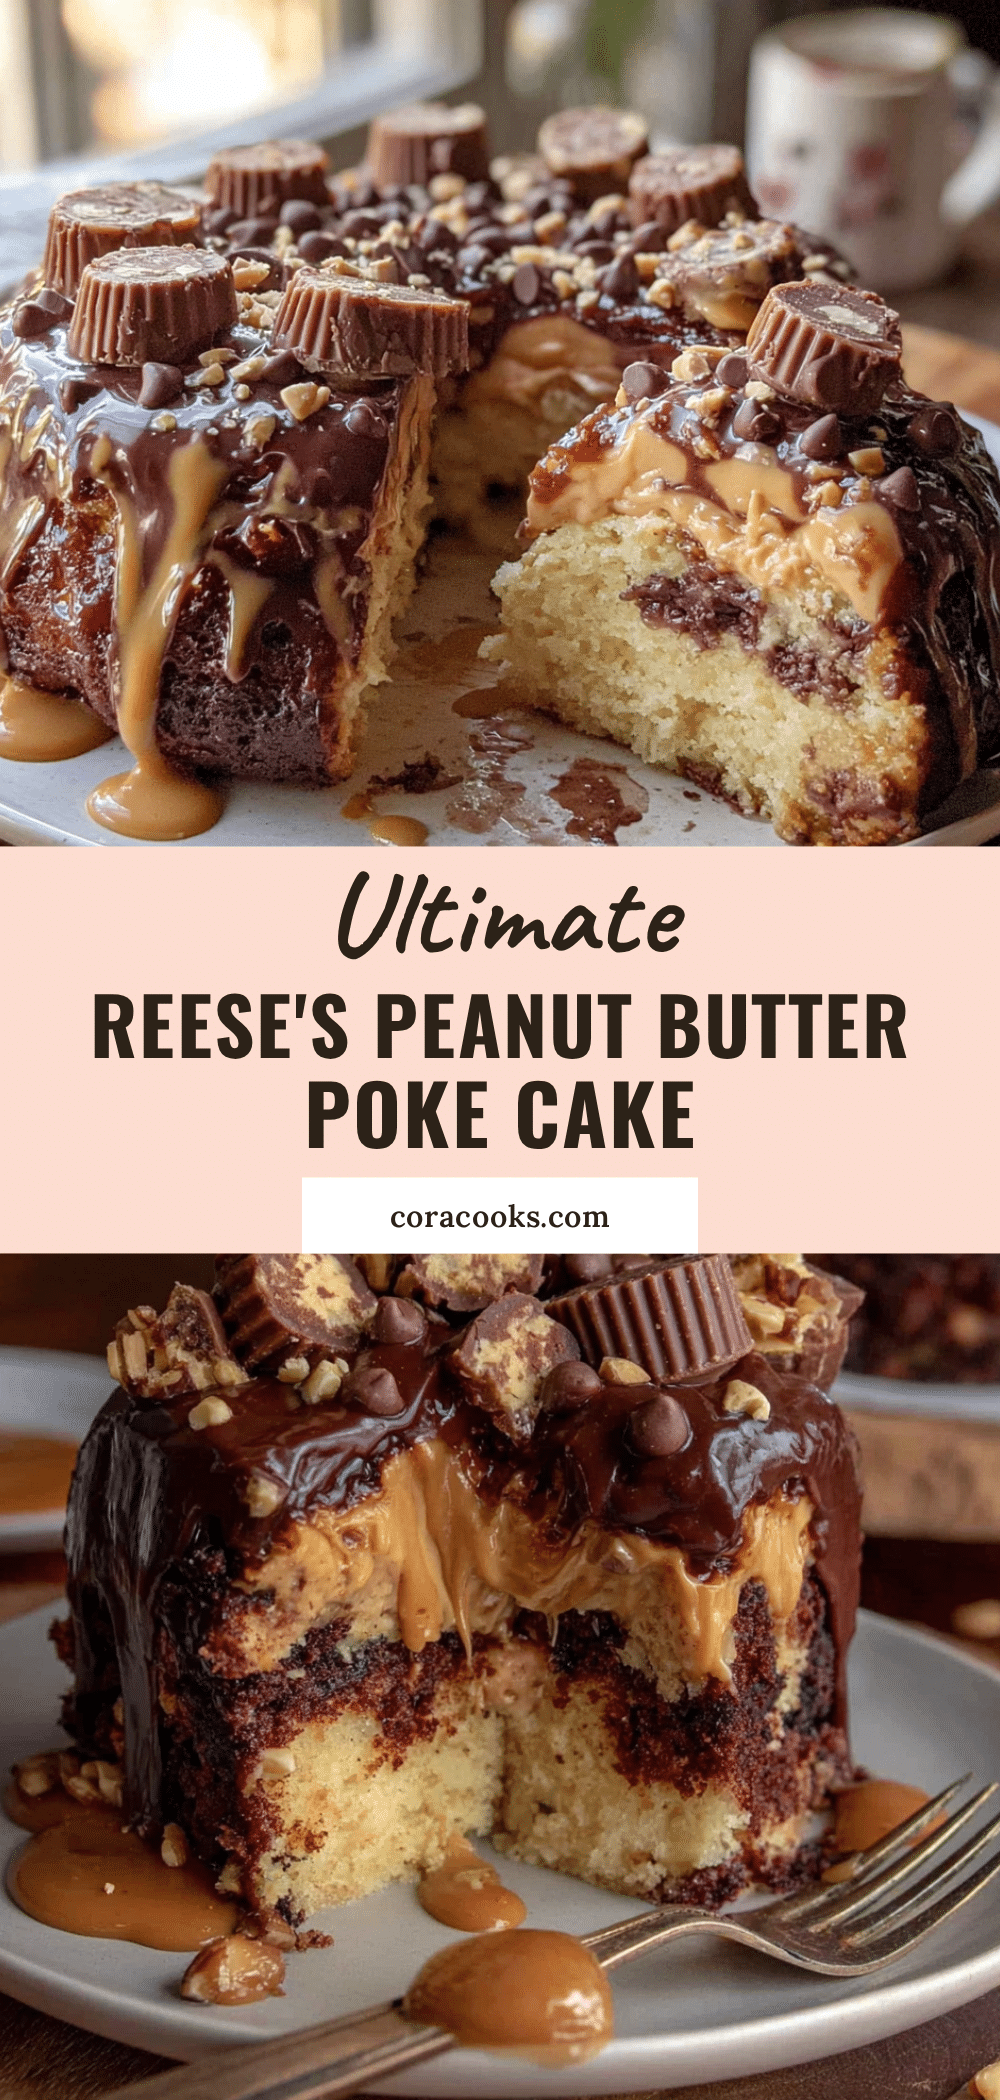
Ultimate Reese’s Peanut Butter Cup Poke Cake – Easy Dessert Recipe

A dense, fudgy chocolate poke cake soaked with a sweetened condensed milk and peanut butter mixture, topped with Cool Whip, chopped Reese’s cups, and chocolate syrup. This easy, crowd-pleasing dessert comes together in under 30 minutes of active time and is perfect for potlucks, holidays, or any occasion.
- Prep Time: 20 minutes
- Cook Time: 30 minutes
- Total Time: 3 hours 50 minutes (includes cooling and chilling)
- Yield: 12 servings 1x
- Category: Dessert
- Cuisine: American
Ingredients
- 1 box (15.25 oz) chocolate cake mix (e.g., Duncan Hines or Betty Crocker)
- Eggs, oil, and water as called for on the cake mix box (usually 3 eggs, 1/3 cup oil, and 1 cup water)
- 1 teaspoon vanilla extract
- 1 can (14 oz) sweetened condensed milk
- 1/2 cup creamy peanut butter (e.g., Jif or Skippy; avoid natural peanut butter)
- 1/4 cup whole milk (2% works too)
- 1 container (8 oz) Cool Whip, thawed (or homemade whipped cream)
- 1 cup mini Reese’s peanut butter cups, roughly chopped (plus more for garnish)
- Chocolate syrup for drizzling (e.g., Hershey’s)
Instructions
- Preheat your oven to 350°F (175°C). Grease a 9×13 inch baking pan with butter or nonstick spray.
- In a large bowl, combine the chocolate cake mix, eggs, oil, water, and vanilla extract. Mix according to package directions (about 2 minutes with an electric mixer or 3 minutes by hand) until smooth and slightly thick.
- Pour the batter into the prepared pan and spread evenly. Bake for 25 to 30 minutes, or until a toothpick inserted into the center comes out clean or with a few moist crumbs. Do not overbake.
- Let the cake cool in the pan for 5 minutes. Using the handle of a wooden spoon or a chopstick, poke holes all over the cake, spacing them about 1 inch apart and poking all the way to the bottom of the pan (about 40 to 50 holes).
- While the cake is still warm, combine the sweetened condensed milk, creamy peanut butter, and whole milk in a small saucepan. Warm over low heat, stirring constantly, until the peanut butter is fully melted and the mixture is smooth (about 3 to 4 minutes). Do not let it boil.
- Slowly pour the warm peanut butter mixture over the entire surface of the cake, making sure it seeps into the holes. Use a rubber spatula to spread it evenly and push it into any dry spots.
- Sprinkle about 3/4 cup of the chopped mini Reese’s cups over the warm cake. Press them gently into the surface.
- Let the cake cool completely on a wire rack (about 1 hour). Do not rush this step.
- Once the cake is completely cool, spread the thawed Cool Whip evenly over the top.
- Sprinkle the remaining chopped peanut butter cups over the Cool Whip, then drizzle chocolate syrup over the top in a zigzag pattern. Cover and refrigerate for at least 2 hours before serving (overnight is even better).
Notes
Do not skip the cooling step before adding Cool Whip, or it will melt. Poke holes deep and wide using the thickest handle you have. Warm the filling gently over low heat to avoid scorching. For best results, let the cake rest overnight in the refrigerator. Use a serrated knife to slice cleanly. The cake can be stored in the refrigerator for up to 5 days or frozen for up to 3 months (add chocolate syrup drizzle after thawing).
Nutrition
- Serving Size: 1 slice (1/12 of cak
- Calories: 420
- Sugar: 38
- Sodium: 380
- Fat: 22
- Saturated Fat: 8
- Carbohydrates: 52
- Fiber: 2
- Protein: 8
Keywords: poke cake, Reese's peanut butter cup, chocolate cake, peanut butter dessert, easy dessert, potluck dessert, no-fuss cake


