Love this? Save it for later!
Share the inspiration with your friends
“It was 11 PM on a Thursday, and all I could think about was the perfect burger bun,” I confessed to myself as I rummaged through my pantry. I had just switched to a gluten-free diet, and honestly, I hadn’t found a bun that felt right yet. You know that feeling when you want something so badly but every gluten-free bun you’ve tried either crumbles like a sad cookie or tastes like cardboard? Yeah, that night was exactly that.
I didn’t have all the usual ingredients for a fancy recipe, just some simple gluten-free flours, yeast, and a few kitchen staples. So, I started experimenting, mixing and matching, tweaking the hydration, and playing with the rising times. My kitchen was a mess—flour everywhere, a cracked bowl that slipped off the counter, and my phone alarm going off reminding me I should’ve been asleep hours ago.
But by midnight, I pulled a batch from the oven that was soft, tender, and had this airy, yeast-risen crumb that felt so familiar I almost forgot it was gluten-free. That recipe became my go-to for every burger night since, whether I’m grilling out or just craving a simple sandwich. Maybe you’ve been there too—chasing that elusive soft bun that doesn’t fall apart or taste funky. Let me tell you, this one’s a keeper, and I’m excited to share it with you.
Why You’ll Love This Recipe
After countless trials (and more than a few burnt batches), this recipe for tender gluten-free hamburger buns with soft yeast crumb truly stands out. It’s not just another gluten-free bun; it’s the one that finally feels like a real, satisfying bun. Here’s why you’ll be reaching for it again and again:
- Quick & Easy: Ready in about 2 hours from start to finish, perfect for busy weeknights or last-minute BBQs.
- Simple Ingredients: Uses pantry staples like gluten-free flour blends and active dry yeast—no exotic flours or additives.
- Perfect for Any Occasion: Whether it’s a casual cookout, a family dinner, or a picnic, these buns hold up beautifully.
- Crowd-Pleaser: Kids and adults alike rave about the soft texture and subtle sweetness—no one guesses they’re gluten-free.
- Unbelievably Delicious: The crumb is soft and pillowy with just the right amount of chew, complementing any burger or sandwich.
What makes this recipe different? For one, I blend a mix of gluten-free flours with tapioca starch to create a dough that behaves much like traditional wheat dough. The yeast is given plenty of time to work its magic, resulting in a soft crumb that isn’t dense or gummy. Plus, a touch of honey balances the flavors and helps with browning, making the buns look as good as they taste.
Honestly, this isn’t just a gluten-free bun—it’s comfort food that hugs you from the inside, perfect for those who thought they had to give up soft, delicious bread. If you’ve ever felt frustrated by crumbly, dry buns, this recipe will be a game changer for you.
What Ingredients You Will Need
This recipe uses simple, wholesome ingredients to create buns that are tender with a soft yeast crumb, without any fuss or hard-to-find items. Most are probably already in your kitchen, making this an easy recipe to try tonight.
- Gluten-Free Flour Blend (2 cups / 240 g) – I recommend a blend with rice flour, potato starch, and tapioca for best texture.
- Tapioca Starch (1/2 cup / 60 g) – Adds chewiness and stretch, giving the buns their classic soft crumb.
- Active Dry Yeast (2 1/4 tsp / 7 g or one packet) – The magic behind the rise and airy texture.
- Sugar (1 tbsp / 12 g) – Feeds the yeast and adds a subtle sweetness.
- Warm Water (1 cup / 240 ml) – Around 110°F (43°C), to activate the yeast without killing it.
- Egg (1 large, room temperature) – Binds ingredients and adds richness.
- Milk (1/4 cup / 60 ml) – Use dairy or dairy-free milk like almond or oat milk for a tender crumb.
- Unsalted Butter (2 tbsp / 28 g, melted) – Adds richness and moisture.
- Salt (1 tsp / 6 g) – Balances sweetness and enhances flavor.
- Honey (1 tbsp / 21 g) – Helps with browning and flavor depth (optional but recommended).
- Sesame Seeds or Poppy Seeds (optional topping) – Adds a nice crunch and classic bun look.
You can swap the gluten-free flour blend with a store-bought mix like Bob’s Red Mill Gluten-Free 1-to-1 Baking Flour for convenience. For dairy-free versions, coconut or soy milk works well, and vegan butter substitutes keep the recipe plant-based. I’ve also found that letting the dough rest a bit longer improves the crumb dramatically, so don’t rush the rising steps.
Equipment Needed
- Mixing Bowls: One medium bowl for proofing yeast and one large bowl for mixing dough.
- Whisk and Wooden Spoon: For combining wet and dry ingredients smoothly.
- Measuring Cups and Spoons: Accurate measurements are key, especially for gluten-free baking.
- Stand Mixer with Paddle Attachment (optional): It saves time and effort, but mixing by hand works just fine.
- Baking Sheet: Lined with parchment paper or a silicone mat for easy cleanup and even baking.
- Kitchen Scale (recommended): For precise flour measurement, which makes all the difference.
- Kitchen Thermometer (optional): To check the water temperature for yeast activation; aim for around 110°F (43°C).
Personally, I love using a stand mixer for kneading because gluten-free dough can be sticky, but don’t worry if you don’t have one. A sturdy spoon and some patience will get you through. Also, parchment paper is a lifesaver for keeping buns from sticking and makes cleanup a breeze.
Preparation Method
- Activate the Yeast (10 minutes): In a small mixing bowl, combine 1 cup (240 ml) warm water (about 110°F / 43°C) with 1 tablespoon (12 g) sugar and 2 1/4 teaspoons (7 g) active dry yeast. Stir gently and let it sit until foamy and bubbly, about 5 to 10 minutes. If it doesn’t foam, your yeast might be old—start over.
- Mix Dry Ingredients (2 minutes): In a large bowl, whisk together 2 cups (240 g) gluten-free flour blend, 1/2 cup (60 g) tapioca starch, and 1 teaspoon (6 g) salt until well combined.
- Combine Wet Ingredients (3 minutes): In a separate bowl, whisk 1 large egg (room temperature), 1/4 cup (60 ml) milk, 2 tablespoons (28 g) melted butter, and 1 tablespoon (21 g) honey until smooth.
- Make the Dough (5 minutes): Pour the activated yeast mixture and wet ingredients into the dry ingredients. Stir with a wooden spoon or paddle attachment until a sticky dough forms. The consistency should be thicker than pancake batter but not as firm as traditional bread dough. If it feels too dry, add water a tablespoon at a time.
- First Rise (45-60 minutes): Cover the bowl with a clean towel or plastic wrap and set it in a warm, draft-free spot. The dough should puff up noticeably but won’t double in size like wheat dough. Don’t rush this step—the yeast needs time to develop the soft crumb texture.
- Shape the Buns (10 minutes): Lightly flour your hands with gluten-free flour. Divide the dough into 6 equal portions (about 100 g / 3.5 oz each). Shape each into a smooth ball and place on a parchment-lined baking sheet, spaced about 2 inches apart. Flatten each ball gently with your palm to form a bun shape.
- Second Rise (30 minutes): Cover loosely and let the buns rise again until slightly puffed and springy to the touch.
- Preheat Oven to 375°F (190°C): About 10 minutes before baking.
- Optional Topping: Brush buns lightly with beaten egg or milk and sprinkle sesame or poppy seeds for a classic look.
- Bake (18-22 minutes): Bake buns in the preheated oven until golden brown on top and a toothpick inserted comes out clean. The internal temperature should be around 200°F (93°C).
- Cool Completely: Transfer buns to a wire rack to cool. This prevents sogginess and lets the crumb set perfectly. Bonus: they slice much better once cool.
Pro tip: If you find the dough a bit sticky during shaping, wet your hands slightly instead of adding more flour—this keeps the crumb tender. Also, don’t skip the cooling step; I learned the hard way that slicing warm buns can turn them into a crumbly mess!
Cooking Tips & Techniques
Here’s the scoop from my kitchen trials and a few secrets to get these gluten-free hamburger buns just right every time:
- Yeast Activation: Always check the yeast’s freshness. I once wasted a whole batch because my yeast was expired. If your mixture doesn’t foam, it’s time to get fresh yeast.
- Flour Blend Matters: Not all gluten-free flours behave the same. I recommend blends with rice flour and tapioca starch because they give the right balance between structure and softness.
- Hydration Balance: Gluten-free doughs are wetter than wheat doughs. Don’t be tempted to add too much extra flour during shaping or you’ll end up with dry buns.
- Rising Environment: Yeast loves warmth but hates drafts. I place my dough near a warm stovetop or inside the oven with just the light on to keep the temperature steady.
- Patience Is Key: The crumb texture depends on allowing the dough to rise fully. If you rush the rising times, buns can be dense and crumbly.
- Multitasking: Use the dough’s first rise time to prep burger toppings or whip up a quick salad—makes dinner feel less chaotic.
- Storage Tip: These buns freeze beautifully. Just slice and freeze with parchment between layers, then toast or warm to restore softness.
Honestly, the first few times I made these, I kept tweaking the water temperature and rising times because gluten-free baking is finicky. But once you get a feel for the dough texture and follow the temperature cues, it becomes second nature.
Variations & Adaptations
This recipe is pretty flexible, making it easy to tailor to your needs or mood:
- Vegan Version: Replace the egg with a flax egg (1 tbsp flaxseed meal + 3 tbsp water, mixed and set to gel) and use dairy-free milk and vegan butter.
- Whole Grain Boost: Add 1/4 cup (30 g) of brown rice flour or sorghum flour for a nuttier flavor and more fiber. You might need to increase water by 1-2 tablespoons.
- Seasoned Buns: Mix in herbs like dried rosemary, garlic powder, or even a pinch of smoked paprika to complement grilled burgers or sandwiches.
- Low-Carb Alternative: Swap the gluten-free flour blend for almond flour and reduce tapioca starch; the texture changes but you get a tasty, denser bun.
- Cooking Method: Try shaping the dough into sandwich rolls for subs or hot dog buns—just adjust baking time slightly (reduce by 2-3 minutes).
I once added a little toasted sesame oil to the dough for a subtle nutty aroma, and it was surprisingly good. Play around and find what suits your taste buds best!
Serving & Storage Suggestions
These buns are best enjoyed fresh but store well if you have leftovers:
- Serving: Slice the buns once completely cool. Toast lightly for an extra crunch or use them fresh for that soft bite. They pair perfectly with juicy burgers, grilled chicken, or a hearty veggie patty.
- Complementary Sides: Serve alongside crisp coleslaw, sweet potato fries, or a fresh green salad for a well-rounded meal. A cold craft beer or iced tea balances the warmth of the buns.
- Storage: Keep buns in an airtight container at room temperature for up to 2 days. For longer storage, freeze sliced buns with parchment paper between slices to prevent sticking.
- Reheating: Warm frozen buns in a toaster or oven at 350°F (175°C) for 5-7 minutes. Avoid the microwave if you want to keep the soft crumb texture intact.
- Flavor Development: These buns mellow and become slightly more flavorful after a day, thanks to the yeast fermentation—perfect for prepping ahead.
Nutritional Information & Benefits
Per bun (estimate based on 6 buns):
| Nutrient | Amount |
|---|---|
| Calories | 150-170 kcal |
| Carbohydrates | 28 g |
| Protein | 4 g |
| Fat | 4 g |
| Fiber | 1-2 g |
The recipe uses wholesome gluten-free flours low in allergens, making it great for those with gluten intolerance or celiac disease. The tapioca starch adds chewiness without gluten, while the honey lends natural sweetness and trace nutrients. Using dairy-free milk or vegan butter keeps it suitable for lactose-sensitive eaters. I appreciate that these buns offer a satisfying texture and flavor without relying on heavy additives or preservatives.
Conclusion
If you’ve been missing soft, tender hamburger buns since going gluten-free, this recipe will feel like a breath of fresh air. It’s straightforward, forgiving, and reliably delicious, making every burger night feel special. I love how these buns bring back that classic soft crumb texture without complicated ingredients or steps.
Feel free to customize with your favorite mix-ins or toppings, and don’t be shy about making it your own. Whether you’re new to gluten-free baking or just looking for a better bun option, this recipe will quickly become a staple.
Give it a try, and please drop a comment to share your experience or any tweaks you made—I love hearing how these buns fit into your kitchen stories. Happy baking and burger building!
FAQs About Tender Gluten-Free Hamburger Buns
Can I use instant yeast instead of active dry yeast?
Yes, you can substitute instant yeast using the same amount. Just mix it directly with the dry ingredients and reduce the initial water slightly if needed.
How do I know when the buns are fully baked?
They should be golden brown on top and sound hollow when tapped. For accuracy, an internal temperature of 200°F (93°C) is ideal.
Can I make the dough ahead of time?
Absolutely! You can prepare the dough, shape the buns, then refrigerate overnight. Let them come to room temperature and rise a bit before baking.
Are these buns suitable for freezing?
Yes, these buns freeze well. Slice before freezing for convenience and warm them up in the oven or toaster when ready.
Can I make these buns dairy-free and vegan?
Yes! Use a flax egg instead of a chicken egg, plant-based milk, and vegan butter or oil to keep the recipe vegan-friendly.
For those interested in expanding your gluten-free bread repertoire, you might enjoy my recipe for crispy garlic chicken, which pairs wonderfully with these buns. Also, if you’re curious about gluten-free baking techniques, my ultimate gluten-free baking guide covers tips that helped me perfect this recipe.
Pin This Recipe!

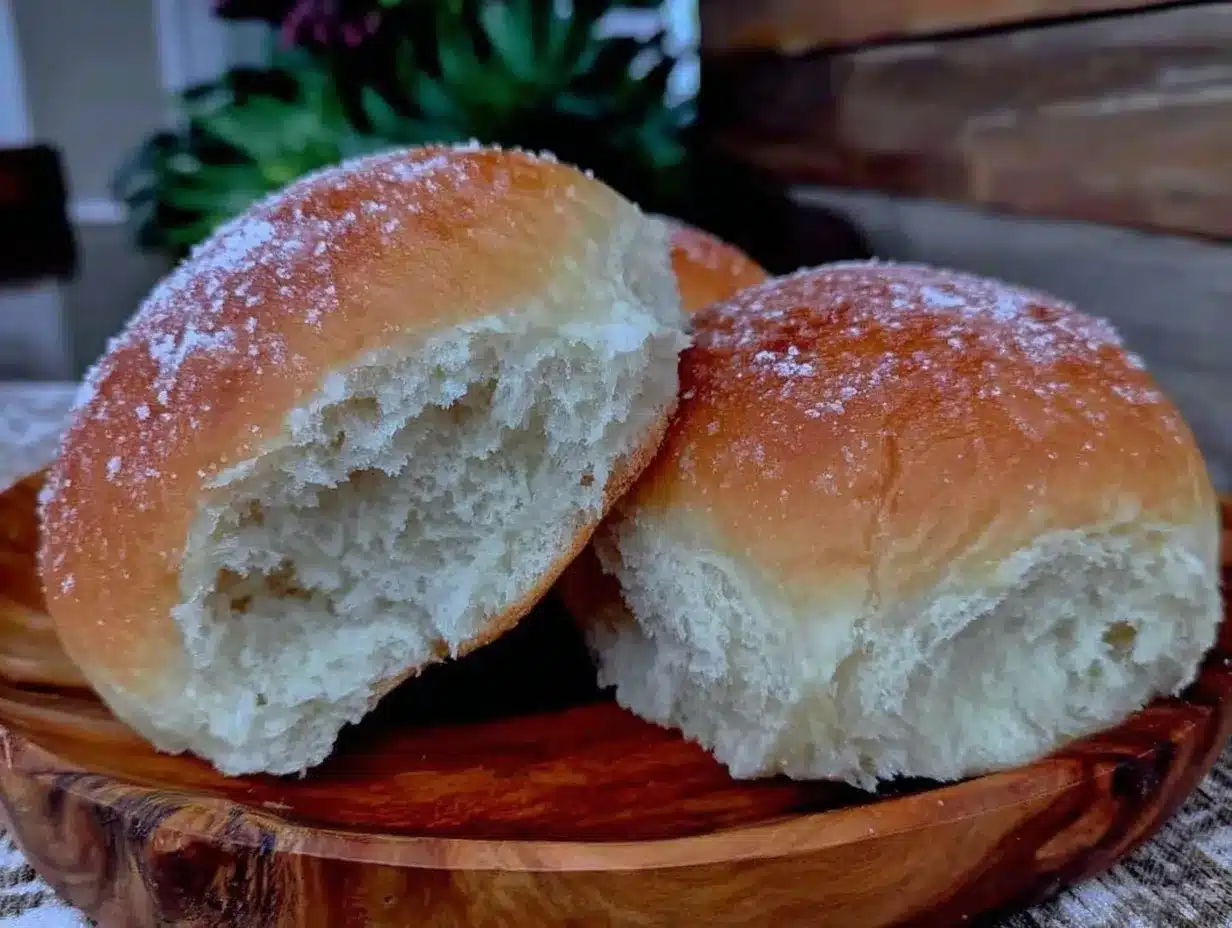
Tender Gluten-Free Hamburger Buns Easy Soft Yeast Crumb Recipe

Soft, tender gluten-free hamburger buns with a pillowy yeast crumb that hold up beautifully for burgers or sandwiches. Made with simple pantry staples and perfect for gluten-free diets.
- Prep Time: 20 minutes
- Cook Time: 20 minutes
- Total Time: 1 hour 40 minutes
- Yield: 6 buns 1x
- Category: Bread
- Cuisine: Gluten-Free
Ingredients
- 2 cups (240 g) gluten-free flour blend (rice flour, potato starch, tapioca)
- 1/2 cup (60 g) tapioca starch
- 2 1/4 tsp (7 g or one packet) active dry yeast
- 1 tbsp (12 g) sugar
- 1 cup (240 ml) warm water (about 110°F / 43°C)
- 1 large egg (room temperature)
- 1/4 cup (60 ml) milk (dairy or dairy-free like almond or oat milk)
- 2 tbsp (28 g) unsalted butter, melted
- 1 tsp (6 g) salt
- 1 tbsp (21 g) honey (optional but recommended)
- Sesame seeds or poppy seeds (optional topping)
Instructions
- Activate the yeast: In a small bowl, combine warm water, sugar, and active dry yeast. Stir gently and let sit until foamy, about 5 to 10 minutes.
- Mix dry ingredients: In a large bowl, whisk together gluten-free flour blend, tapioca starch, and salt.
- Combine wet ingredients: In a separate bowl, whisk egg, milk, melted butter, and honey until smooth.
- Make the dough: Pour the yeast mixture and wet ingredients into the dry ingredients. Stir until a sticky dough forms. Add water a tablespoon at a time if too dry.
- First rise: Cover the bowl and let dough rise in a warm, draft-free spot for 45-60 minutes until puffed but not doubled.
- Shape the buns: Lightly flour hands with gluten-free flour. Divide dough into 6 equal portions (~100 g each). Shape into smooth balls and place on parchment-lined baking sheet. Flatten gently.
- Second rise: Cover loosely and let buns rise for 30 minutes until slightly puffed and springy.
- Preheat oven to 375°F (190°C).
- Optional topping: Brush buns with beaten egg or milk and sprinkle sesame or poppy seeds.
- Bake buns for 18-22 minutes until golden brown and a toothpick comes out clean. Internal temperature should be about 200°F (93°C).
- Cool completely on a wire rack before slicing to prevent crumbling.
Notes
Use fresh yeast for best rise. Wet hands slightly when shaping dough to keep crumb tender. Let buns cool completely before slicing to avoid crumbling. Dough can be refrigerated overnight after shaping. Buns freeze well; slice before freezing and reheat in oven or toaster. For vegan version, replace egg with flax egg and use dairy-free milk and vegan butter.
Nutrition
- Serving Size: 1 bun
- Calories: 160
- Sugar: 4
- Sodium: 250
- Fat: 4
- Saturated Fat: 2
- Carbohydrates: 28
- Fiber: 1.5
- Protein: 4
Keywords: gluten-free hamburger buns, soft buns, yeast buns, gluten-free bread, easy gluten-free recipe, burger buns, dairy-free buns, vegan buns option