Love this? Save it for later!
Share the inspiration with your friends
I was standing in the fluorescent-lit aisle of the grocery store last Tuesday when the sharp, metallic tang of semi-sweet chocolate chips hit me — and suddenly I was seven at my uncle Arthur’s cluttered garage.
He wasn’t a baker. Honestly, he barely managed to toast bread without burning it. But Halloween was different. That was his magic night. He would pull out a bag of dark chocolate chips that always seemed to have a few stray pieces of foil stuck to them. I remember the smell of melting chocolate mixing with the dust of old sawdust and the damp earth from his garden.
He’d set up a folding table covered in newspaper. The air would grow thick with the scent of vanilla and warm sugar. I watched his large, calloused hands work with surprising delicacy. He didn’t use fancy molds or cookie cutters. He used his fingers. He’d roll the dough into balls, then press them flat, then add the legs.
Those legs were the best part. He’d use pretzel sticks, but only the thin, twisted ones. They looked like spider legs if you squinted. If you didn’t, they just looked like a snack. But in the dim light of his garage, with the Halloween decorations hanging from the rafters, they looked real. They looked spooky.
My uncle passed away five years ago. The garage was sold. But every October, I find myself drawn back to that specific feeling of anticipation. It’s not just about the sugar rush. It’s about that quiet focus he had. The way he’d hold his breath while placing the final leg on the cookie, as if he were assembling a tiny, edible machine.
I’ve spent years trying to recreate that exact moment. Not just the taste, but the vibe. The slightly messy, imperfect, deeply personal nature of baking with someone who doesn’t usually cook. These spooky spider cookies are my attempt to capture that memory. They are simple, yes. But they carry a weight that store-bought treats never could. You know that feeling when a flavor takes you somewhere else? That’s what this is.
I mean, let’s face it, we all have those ghostly memories we chase. This recipe is my way of keeping his garage alive, one chocolate-legged spider at a time. Maybe you’ve been there too, chasing a taste that disappeared with the person who made it.
Why You’ll Love This Recipe
Let’s be honest for a second. Halloween baking can be a nightmare. It’s easy to get lost in complicated icing techniques or expensive decorations that melt the second they hit the oven. But these spider cookies? They are the opposite of that stress. I’ve tested this recipe over the last three Halloweens, and it has become my go-to for a reason that goes beyond just being cute.
- Quick & Easy: You can have these from start to finish in under 45 minutes. That is perfect for those busy weeknights when you need a treat for school parties or last-minute trick-or-treaters. No overnight chilling required.
- Simple Ingredients: You likely already have everything in your kitchen right now. Flour, sugar, butter, eggs, chocolate chips, and pretzels. No fancy grocery trips needed. It’s pantry-friendly comfort food.
- Perfect for Kids (and Adults): These are great for spooky dinners or holiday mornings. The kids love assembling the legs, which keeps them busy while you handle the baking. It’s a hands-on activity that doesn’t involve messy icing bags.
- Crowd-Pleaser: They always get rave reviews from kids and adults alike. The combination of soft, chewy cookie and crunchy pretzel is a texture combo that works every single time.
- Unbelievably Delicious: The texture and flavor profile is next-level comfort food. The salt from the pretzels cuts through the sweetness of the chocolate and sugar, creating a balance that keeps you coming back for more.
What makes these spider cookies different from the rest is the simplicity of the assembly. Most spider cookie recipes require piping intricate legs with royal icing, which cracks and breaks. By using pretzel sticks, you get structural integrity and a salty crunch that complements the chocolate. It’s a creative twist on the classic chocolate chip cookie that feels elevated without the effort.
This recipe isn’t just good—it is the kind that makes you close your eyes after the first bite. It’s comfort food reimagined—spooky, fun, but with the same soul-soothing satisfaction of a warm cookie fresh from the oven. It’s perfect for impressing guests without stress, or turning a simple Tuesday snack into something memorable.
What Ingredients You Will Need
This recipe uses simple, wholesome ingredients to deliver bold flavor and satisfying texture without the fuss. The beauty here is in the balance. You need ingredients that hold their shape in the oven but still offer a soft bite. Most of these are staples you probably already have tucked away in your pantry or freezer.
For the Cookie Base
- Unsalted Butter: 1 cup (2 sticks), softened to room temperature. This is crucial for creaming properly. I recommend using high-quality butter like Plugrá or Kerrygold for the best flavor and texture.
- Granulated Sugar: 1 cup. This helps create the slight crispness on the edges.
- Light Brown Sugar: 1 cup, packed. This adds moisture and a hint of molasses flavor, keeping the cookies chewy.
- Eggs: 2 large eggs, room temperature. They bind the dough together. Don’t skip the room temperature part; cold eggs will seize the butter.
- Vanilla Extract: 1 teaspoon. Pure vanilla is best here. It enhances the chocolate flavor.
- All-Purpose Flour: 2 ½ cups. This is the structure. Do not use self-rising flour unless you adjust the leavening.
- Baking Powder: 1 teaspoon. Helps the cookies spread slightly and rise.
- Salt: 1 teaspoon. Essential to balance the sweetness.
For the “Spider” Parts
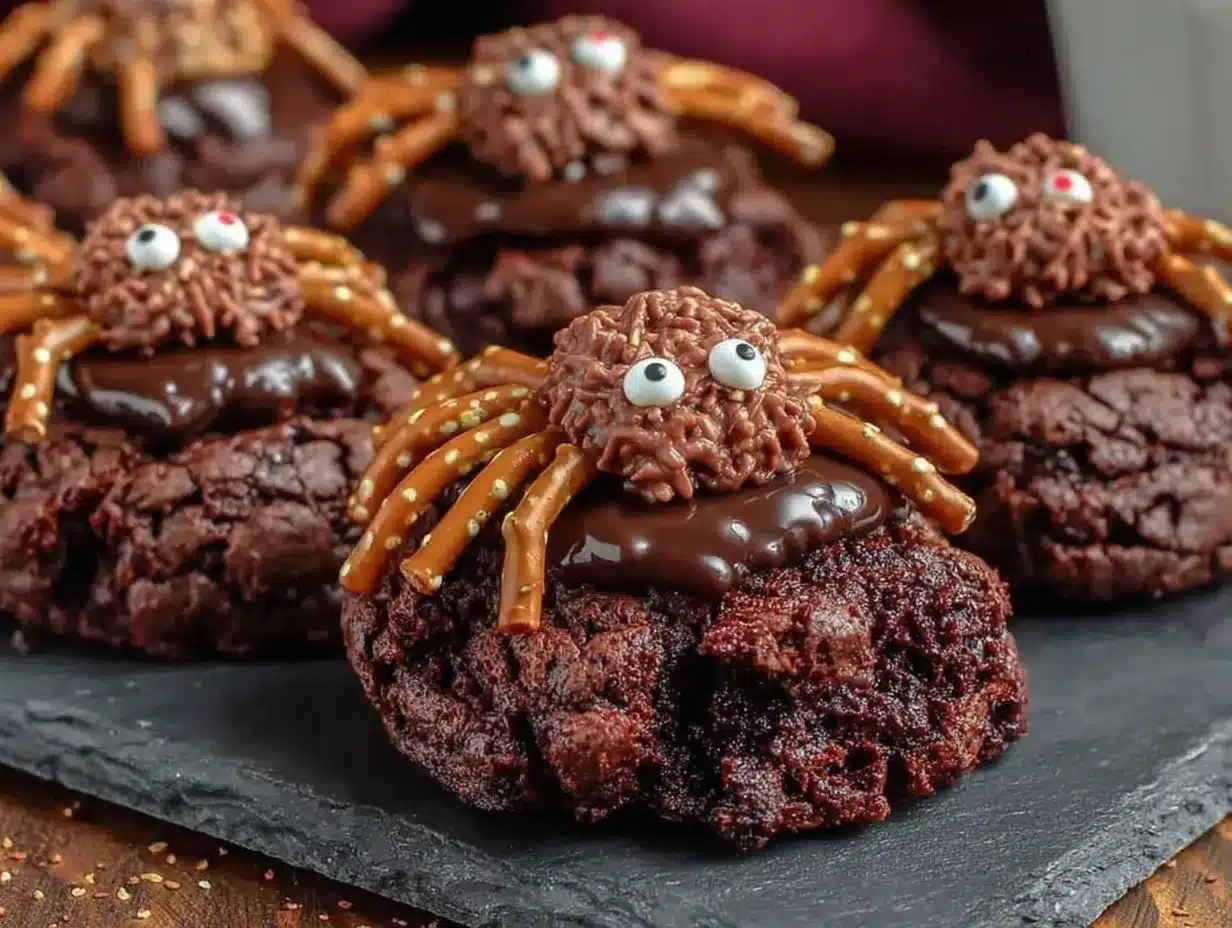
- Semi-Sweet Chocolate Chips: 2 cups. I prefer Ghirardelli or Toll House. You need enough to cover the top of the cookies generously.
- Pretzel Sticks: 1 package (about 8-10 oz), thin or regular twist. These are the legs. The saltiness is key.
For the chocolate, look for chips that melt smoothly. Avoid white chocolate for the base of the spider; it can be too sweet. If you need a gluten-free option, you can swap the all-purpose flour for a 1:1 gluten-free baking blend, though the texture might be slightly more crumbly. In summer, you might find the dough gets too soft, so chill it for 15 minutes before baking.
Equipment Needed
You don’t need a fancy kitchen to make these. The beauty of this recipe is its accessibility. Here is what you will need to get the job done efficiently.
- Mixing Bowls: You will need two medium-sized bowls. One for creaming the butter and sugars, and another for whisking the dry ingredients. Glass or stainless steel are best because they don’t retain heat.
- Electric Mixer: A hand mixer or stand mixer is highly recommended. Creaming the butter and sugar by hand can be an arm workout. If you don’t have one, a wooden spoon will work, but it will take longer.
- Baking Sheets: Two standard half-sheet pans. Light-colored aluminum pans are best for even browning. Dark pans can cause the bottoms to burn.
- Parchment Paper: Line your baking sheets with parchment paper. This prevents sticking and makes cleanup a breeze. Silicone baking mats are a great reusable alternative.
- Cooling Rack: A wire cooling rack is essential. It allows air to circulate under the cookies so they don’t get soggy from steam.
- Small Paring Knife: You might need this to trim pretzel sticks if they are too long for your cookies. It also helps with scraping down the bowl.
- Microwave-Safe Bowl: For melting the extra chocolate for dipping or drizzling, if you choose to do that. A microwave is faster than a double boiler for this quantity.
Pro tip: If you are making these in bulk, have multiple baking sheets ready. You don’t want to wait for the pan to cool down completely between batches. A quick rinse under cold water and drying it off works in a pinch if you don’t have enough sheets.
Preparation Method
Let’s get into the nitty-gritty. Making these cookies is straightforward, but attention to detail matters. Follow these steps closely for the best results.
- Cream the Butter and Sugars: In a large mixing bowl, combine the softened unsalted butter, granulated sugar, and brown sugar. Using an electric mixer on medium speed, beat them together for about 2-3 minutes. You want the mixture to look pale and fluffy. This incorporates air, which helps the cookies rise. Scrape down the sides of the bowl with a spatula to ensure everything is mixed evenly.
- Add Eggs and Vanilla: Crack the two eggs into the bowl one at a time, mixing well after each addition. Add the vanilla extract and mix until just combined. Do not overmix here, or the cookies can become tough. The mixture should look smooth and homogeneous.
- Combine Dry Ingredients: In a separate medium bowl, whisk together the all-purpose flour, baking powder, and salt. This ensures the baking powder is distributed evenly, so you don’t get bitter spots of powder in your cookies.
- Mix Wet and Dry: Gradually add the dry ingredients to the wet ingredients. Mix on low speed until the flour disappears. Be careful not to overmix the dough. Once you see no more streaks of flour, stop. The dough should be thick and slightly sticky. If it feels too dry, add a teaspoon of milk. If it’s too wet, add a tablespoon of flour.
- Chill the Dough (Optional but Recommended): While not strictly necessary, chilling the dough for 30 minutes in the refrigerator helps the flavors meld and prevents the cookies from spreading too much. If you are in a hurry, you can skip this, but the cookies will be wider.
- Preheat and Prepare Pans: Preheat your oven to 350°F (175°C). Line your baking sheets with parchment paper. This is non-negotiable for easy cleanup and even baking.
- Scoop and Shape: Use a cookie scoop or a tablespoon to portion the dough. Roll the dough into balls about 1.5 inches in diameter. Place them on the prepared baking sheets, leaving about 2 inches of space between each ball. They will spread.
- First Bake: Bake the cookies for 8-10 minutes. They should be set on the edges but still soft in the center. They will not be brown yet. This is a crucial step. We are par-baking them to create a base for the chocolate and pretzels.
- Melt the Chocolate: While the cookies are baking, melt the semi-sweet chocolate chips. You can do this in the microwave in 30-second intervals, stirring in between, or in a double boiler on the stove. Stir until smooth. If it looks too thick, add a tiny teaspoon of coconut oil or butter to thin it out.
- Assemble the Spiders: Remove the par-baked cookies from the oven. Let them cool on the pan for just 2 minutes. This keeps them warm enough for the chocolate to stick but firm enough to handle. Spoon or pipe a generous mound of melted chocolate onto the top of each cookie. Spread it slightly to cover the center.
- Add the Legs: Immediately press 8 pretzel sticks into the chocolate, four on each side, to resemble spider legs. You may need to break some pretzel sticks in half to get the right length. Work quickly before the chocolate sets. If the chocolate hardens too fast, pop the pan back in the oven for 30 seconds to soften it slightly.
- Final Set: Once all spiders are assembled, let the cookies cool completely on the baking sheet. The chocolate will harden as they cool. This takes about 15-20 minutes. Do not move them until the chocolate is fully set, or the legs will fall off.
Personal tip: If you are nervous about breaking the pretzels, lay them out on a piece of wax paper first to measure the length. It saves time during the assembly phase.
Cooking Tips & Techniques
Even simple recipes have their pitfalls. Here are some professional techniques and personal lessons to ensure your spider cookies turn out perfectly every time.
Butter Temperature is Key: I learned this the hard way during my first attempt. My butter was too cold, and the dough wouldn’t cream properly. It was grainy and dense. Make sure your butter is soft enough to leave a fingerprint but not melted. If it melts, your cookies will spread into flat discs. If it’s too hard, they won’t spread at all. Aim for 65-68°F.
Don’t Overbake: These cookies are delicate. Because we are par-baking them, the second phase is just setting the chocolate. If you bake the initial dough too long, they will be hard and crunchy, not chewy. Pull them when they look slightly underdone in the center. They will continue to cook on the hot pan.
Chocolate Consistency: When melting chocolate, low and slow is the rule. High heat can burn chocolate, making it seize and become grainy. If you use the microwave, stop stirring when you see a few unmelted chips left; the residual heat will finish the job. If the chocolate is too thick, it will be heavy on the cookie and hard to press the pretzels into. Thin it out slightly for easier assembly.
Timing the Legs: The window for adding pretzels is short. The chocolate sets quickly at room temperature. If you are making a large batch, work in groups of four or five cookies at a time. Do not melt all the chocolate at once if you are slow. Keep the melted chocolate warm in a bowl set over a warm (not hot) water bath if you need to extend your working time.
Prevent Sticking: If the pretzels stick to your fingers, lightly grease your fingertips with a tiny bit of butter or oil. This allows you to place them precisely without smudging the chocolate. It’s a small trick that makes a big difference in presentation.
Variations & Adaptations
While the classic chocolate and pretzel combo is my favorite, these cookies are a great canvas for creativity. Here are a few ways to twist the recipe.
- Pumpkin Spice Spider Cookies: Add 1 teaspoon of pumpkin pie spice and 2 tablespoons of pumpkin puree to the dough. Use orange-tinted white chocolate for the spider bodies. This is perfect for autumn vibes beyond just Halloween.
- White Chocolate and Pretzel: Swap the semi-sweet chocolate for white chocolate. The contrast of the white chocolate against the dark pretzels looks strikingly spooky. Add a few orange food coloring drops to the white chocolate for a Halloween theme.
- Gluten-Free Option: As mentioned, use a 1:1 gluten-free flour blend. For better texture, add ¼ teaspoon of xanthan gum if your blend doesn’t include it. The cookies might be slightly more fragile, so handle them gently.
- Dark Chocolate and Sea Salt: Use high-percentage dark chocolate (70%) for a less sweet, more sophisticated flavor. Sprinkle flaky sea salt on top of the chocolate before it sets. This pairs beautifully with the salty pretzels.
- Mini Spider Cookies: Use a small cookie scoop to make bite-sized versions. These are perfect for party favors or gift boxes. Reduce the baking time to 6-7 minutes for the par-bake.
I once tried using candy melts instead of real chocolate. While they are easier to work with because they don’t require tempering, the flavor is inferior. I always recommend using real chocolate for the best taste. If you must use candy melts, choose a high-quality brand like Merckens.
Serving & Storage Suggestions
These cookies are best served at room temperature. The chocolate should be firm, and the cookie should be soft. Serve them on a black plate or a platter with Halloween decorations for maximum visual impact.
Pairing: They go wonderfully with a cold glass of milk, which is classic. For adults, a cup of black coffee or a stout beer complements the chocolate and pretzel flavors well. The bitterness of the coffee balances the sweetness.
Storage: Store the cookies in an airtight container at room temperature for up to 5 days. Place a piece of parchment paper between layers if you stack them to prevent the chocolate from sticking. They do not require refrigeration, which can actually make the cookies stale faster.
Freezing: You can freeze the baked cookies for up to 3 months. Thaw them at room temperature before serving. Do not freeze the dough with the pretzels attached, as the chocolate can crack and the pretzels can absorb moisture. Freeze the dough balls separately, then assemble after baking.
Reheating: If you want a warm cookie, microwave it for 10-15 seconds. The chocolate will melt slightly, creating a gooey center. Be careful not to overheat, or the pretzels will get soggy.
Over time, the flavors meld together. The salt from the pretzels continues to season the cookie, making them taste better on day two than on day one. This is a rare treat that improves with a little patience.
Nutritional Information & Benefits
While these are definitely a treat, understanding their nutritional profile can help you plan your intake. One cookie contains approximately 250-300 calories, depending on the size of the pretzel sticks and amount of chocolate used.
- Carbohydrates: The primary source of calories comes from the sugar and flour. The pretzels add some carbs as well.
- Fat: The butter and chocolate provide significant fat content. Using high-quality butter adds beneficial flavor compounds.
- Protein: There is a small amount of protein from the eggs, flour, and pretzels.
- Sodium: The pretzels and salt in the dough contribute to the sodium content. If you are watching your salt intake, you can use unsalted pretzels and reduce the salt in the dough.
From a wellness perspective, these cookies offer comfort. Food is not just fuel; it’s also about emotional satisfaction. The act of baking and sharing these treats can boost mood and connect us with others. However, enjoy them in moderation. They are best shared with friends and family, turning a simple snack into a social experience.
If you are looking for a lighter option, consider using half the amount of chocolate and focusing on the cookie and pretzel texture. It’s still delicious and slightly less indulgent.
Conclusion
These spooky spider cookies are more than just a Halloween dessert. They are a tribute to memory, a way to bring a bit of my uncle’s garage into my modern kitchen. They are easy to make, fun to assemble, and absolutely delicious. I hope they bring you as much joy and nostalgia as they do for me.
Don’t be afraid to experiment with the variations. Make them your own. Add different chocolates, try different pretzel shapes, or change the dough flavor. The base recipe is flexible enough to accommodate your creativity. I love this recipe because it bridges the gap between baking and crafting. It’s tactile and rewarding.
I encourage you to try this recipe and see how it turns out. If you do, I would love to hear about it. Leave a comment below with your thoughts, or share a photo on social media and tag me. Let’s keep the tradition of spooky baking alive together. Happy baking, and may your cookies be always chewy and your chocolate always smooth!
FAQs
Can I use salted pretzels instead of unsalted?
Yes, you can use salted pretzels. In fact, I prefer them because the saltiness contrasts nicely with the sweet chocolate. If you use salted pretzels, you might want to reduce the salt in the cookie dough by half to avoid over-salting.
Why did my spider legs fall off?
This usually happens if the chocolate was too thick or if it had started to set before you added the pretzels. Make sure your melted chocolate is smooth and fluid. If it’s too thick, add a teaspoon of coconut oil. Also, work quickly after applying the chocolate to the cookie.
Can I make the dough ahead of time?
Absolutely. You can scoop the dough balls and store them in the refrigerator for up to 3 days or in the freezer for up to 3 months. Bake them straight from the fridge or freezer, adding a minute or two to the baking time if frozen.
What if I don’t have an electric mixer?
You can use a wooden spoon or a sturdy spatula. It will require more elbow grease to cream the butter and sugar properly, but it will work. Just make sure the butter is soft enough to mix easily.
Can I use white chocolate chips for the spiders?
Yes, white chocolate chips work well. They provide a nice visual contrast with the dark pretzels. Just be aware that white chocolate is more delicate and can burn easily, so melt it on low power in the microwave.
Pin This Recipe!
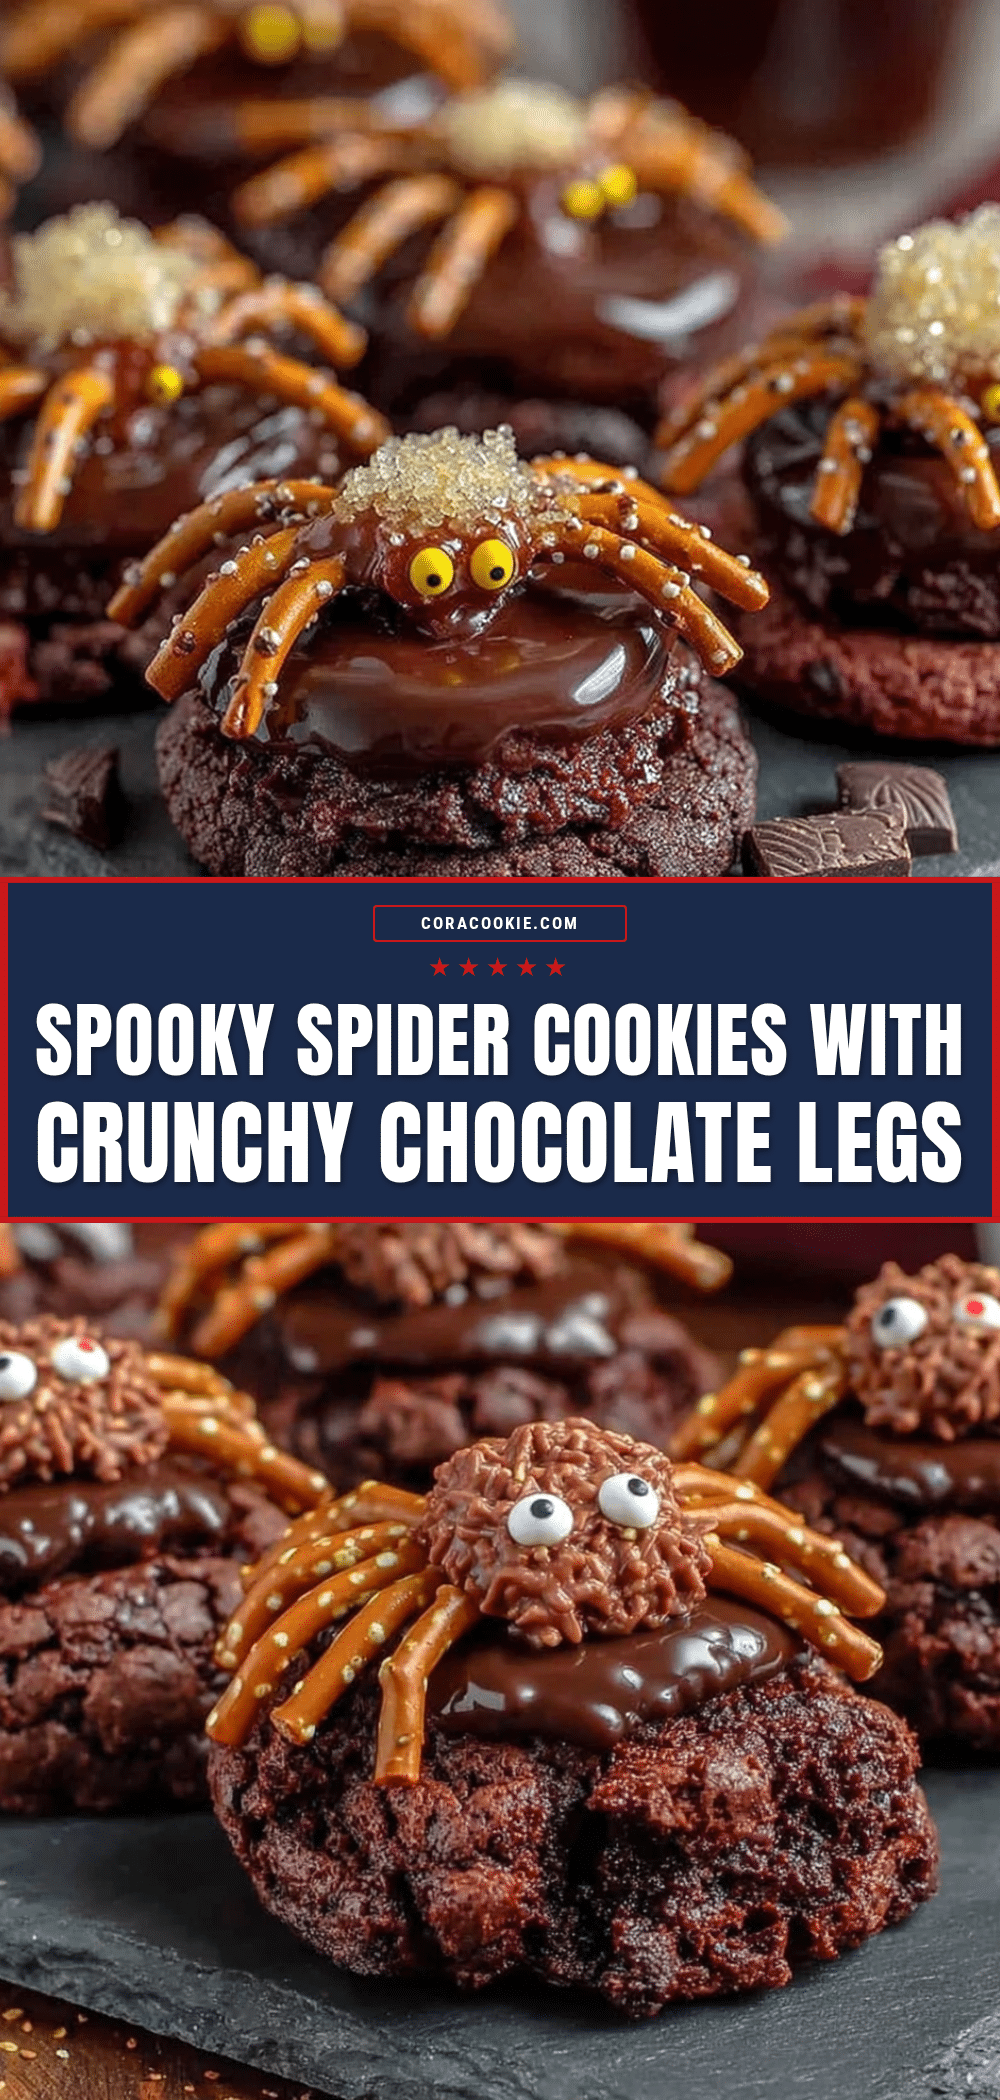
Spooky Spider Cookies: 10 Easy Halloween Treats
These spooky spider cookies are a simple, nostalgic Halloween treat featuring soft, chewy chocolate chip cookies topped with melted semi-sweet chocolate and pretzel stick legs. They are quick to make, require minimal equipment, and offer a perfect balance of sweet and salty flavors.
- Prep Time: 15 minutes
- Cook Time: 10 minutes
- Total Time: 45 minutes
- Yield: Approximately 24 cookies 1x
- Category: Dessert
- Cuisine: American
Ingredients
- 1 cup (2 sticks) unsalted butter, softened to room temperature
- 1 cup granulated sugar
- 1 cup light brown sugar, packed
- 2 large eggs, room temperature
- 1 teaspoon vanilla extract
- 2 ½ cups all-purpose flour
- 1 teaspoon baking powder
- 1 teaspoon salt
- 2 cups semi-sweet chocolate chips
- 1 package (about 8–10 oz) thin or regular twist pretzel sticks
Instructions
- In a large mixing bowl, combine softened butter, granulated sugar, and brown sugar. Beat on medium speed for 2-3 minutes until pale and fluffy. Scrape down the sides of the bowl.
- Add eggs one at a time, mixing well after each addition. Add vanilla extract and mix until just combined.
- In a separate medium bowl, whisk together flour, baking powder, and salt.
- Gradually add dry ingredients to wet ingredients on low speed until flour disappears. Do not overmix. Dough should be thick and slightly sticky.
- Optional: Chill dough for 30 minutes in the refrigerator to prevent spreading.
- Preheat oven to 350°F (175°C). Line baking sheets with parchment paper.
- Scoop dough into 1.5-inch balls and place on prepared sheets, leaving 2 inches of space between each.
- Bake for 8-10 minutes until edges are set but centers are still soft (par-bake).
- While cookies bake, melt chocolate chips in the microwave in 30-second intervals or using a double boiler until smooth. Thin with a teaspoon of coconut oil or butter if too thick.
- Remove par-baked cookies from oven and let cool on the pan for 2 minutes.
- Spoon or pipe a generous mound of melted chocolate onto the top of each cookie.
- Immediately press 8 pretzel sticks into the chocolate (4 on each side) to resemble spider legs. Work quickly before chocolate sets.
- Let cookies cool completely on the baking sheet until chocolate is fully set, about 15-20 minutes.
Notes
Butter should be softened but not melted. Do not overbake the initial cookie dough to maintain chewiness. If chocolate is too thick, add a tiny amount of coconut oil. For gluten-free option, swap flour for a 1:1 gluten-free baking blend. Store in an airtight container at room temperature for up to 5 days.
Nutrition
- Serving Size: 1 cookie
- Calories: 275
- Sugar: 24
- Sodium: 180
- Fat: 14
- Saturated Fat: 8
- Carbohydrates: 35
- Fiber: 1
- Protein: 3
Keywords: Halloween cookies, spider cookies, pretzel cookies, easy Halloween treats, chocolate chip cookies, spooky baking, family-friendly recipes


