Love this? Save it for later!
Share the inspiration with your friends
My neighbor wasn’t trying to impress anyone. I’d stopped by to borrow a muffin tin—don’t ask why, it was a whole thing—and the smell of toasted bread and melted cheese hit me before I even got through the door. She was standing at the counter, casually wrapping a ham and cheese roll-up in foil like it was no big deal, while her kid was running around looking for a lost shoe. I stood there, slightly hypnotized, watching her work. She didn’t use a recipe, didn’t measure a thing, and didn’t even look up when she said, “Oh, these? They’re just for lunch.” Just for lunch. I mean, honestly, that’s the kind of cooking that sticks with you—not the fancy dinner party stuff, but the real, everyday magic. That day, I learned that the best recipes aren’t always the ones you plan; sometimes they’re the ones you witness by accident. And these Quick Ham and Cheese Roll-Ups? They’ve been a staple in my kitchen ever since. Maybe you’ve been there—standing in someone else’s kitchen, realizing you’ve just found your new go-to recipe.
Why You’ll Love This Recipe
Let me tell you, after years of testing lunchbox ideas, these roll-ups are the undisputed champion in my house. They’re not just another recipe; they’re the one I turn to when I’m out of ideas, short on time, or just want to see a happy face at the lunch table. Here’s why they’ve earned a permanent spot in my rotation:
- Quick & Easy: From start to finish, you’re looking at about 10 minutes. Seriously. That’s faster than deciding what to order for takeout.
- Simple Ingredients: You likely have everything in your fridge right now. No special trips to the store, no obscure ingredients. Just ham, cheese, and bread.
- Perfect for Lunchboxes: These roll-ups are sturdy enough to survive a backpack toss but still feel like a treat. They’re the lunchbox hero you didn’t know you needed.
- Crowd-Pleaser: I’ve served these to kids, adults, picky eaters, and even my neighbor who “doesn’t do sandwiches.” They disappear every single time.
- Unbelievably Delicious: The combination of salty ham, gooey melted cheese, and a perfectly toasted bread roll is next-level comfort food. It’s simple, but it hits all the right notes.
What makes this recipe different from the rest? It’s the technique. Instead of just slapping ham and cheese between two slices of bread, we’re rolling them up and toasting them until the cheese is perfectly melted and the bread is golden. It’s a small twist that makes a huge difference. Honestly, this isn’t just another version—it’s my best version. It’s the kind of recipe that makes you close your eyes after the first bite. Comfort food reimagined—faster, simpler, but with the same soul-soothing satisfaction.
What Ingredients You Will Need
This recipe uses simple, everyday ingredients to deliver big flavor without any fuss. You probably already have most of these in your kitchen, which is exactly how I like it. Let’s break down what you’ll need and why each one matters.
- 8 slices of bread (white, whole wheat, or sourdough – your choice) – The bread is the foundation. I prefer a sturdy sandwich bread that won’t fall apart when rolled. Sourdough adds a nice tang, but plain white works beautifully too.
- 8 slices of ham (deli-style, thinly sliced) – Go for quality here. I like using honey ham or smoked ham for extra flavor. If you’re feeling fancy, try Black Forest ham for a deeper taste.
- 8 slices of cheese (Swiss, cheddar, or provolone work best) – Swiss is classic, but sharp cheddar adds a punch. Provolone melts like a dream. Use what you have on hand—just make sure it’s a good melting cheese.
- 2 tablespoons of butter (softened) – This is key for that golden, crispy exterior. I use salted butter for flavor, but unsalted works if you’re watching your sodium.
- 1 tablespoon of Dijon mustard (optional, but highly recommended) – A thin spread adds a little tang that cuts through the richness. You can skip it for picky eaters, but I think it makes the roll-ups sing.
- Optional: 1/4 cup of mayonnaise (for toasting instead of butter) – If you want an extra crispy, golden crust, try spreading a thin layer of mayo on the outside of the bread before toasting. Trust me on this—it’s a game-changer.
Ingredient Selection Tips: When buying ham, look for slices that are thin but not shaved—they need to hold up when rolled. For cheese, avoid pre-shredded varieties as they don’t melt as smoothly. I recommend Boar’s Head ham and Sargento cheese slices for consistent quality. If you’re using whole wheat bread, make sure it’s fresh and pliable; stale bread will crack when you try to roll it.
Substitution Guidance: Gluten-free? Use your favorite gluten-free sandwich bread—just handle it gently as it can be more fragile. Dairy-free? Swap the cheese for a plant-based melting cheese and use vegan butter. For a lower-carb option, try using large lettuce leaves or low-carb tortillas instead of bread. The roll-up concept is super versatile!
Equipment Needed
You don’t need fancy gadgets for this recipe, which is part of its charm. Here’s what I use every time:
- A rolling pin (or a clean wine bottle) – This flattens the bread so it rolls up neatly without cracking. If you don’t have one, just press the bread firmly with your hands.
- A sharp knife – For cutting the crusts off (if you’re fancy) and slicing the roll-ups into bite-sized pieces.
- A non-stick skillet or griddle – This gives you that even, golden toast. I’ve used my cast iron too, and it works great—just watch the heat.
- A spatula – For flipping the roll-ups without breaking them. A thin, flexible spatula is best.
- A cutting board – For assembly and slicing.
Budget-Friendly Options: Don’t have a rolling pin? Use your hands or a sturdy glass. No skillet? A regular frying pan works just fine—just keep an eye on the heat. I’ve even made these on an electric griddle for a big batch, and they turned out perfect.
Personal Experience: I used to skip the rolling pin step because I thought it was unnecessary. Big mistake. The first few roll-ups I made were lumpy and uneven. Now, I always take the extra 30 seconds to flatten the bread. It makes a world of difference in how evenly they toast and how neat they look.
Preparation Method

Ready to make these? Let’s get rolling—literally. Follow these steps, and you’ll have perfect ham and cheese roll-ups in no time.
- Flatten the bread. Take each slice of bread and use a rolling pin to flatten it until it’s about 1/4-inch thick. This makes the bread pliable and prevents it from cracking when you roll it. If you don’t have a rolling pin, press firmly with your hands or the bottom of a glass.
- Spread the mustard (optional). If you’re using Dijon mustard, spread a thin layer on one side of each flattened bread slice. Don’t overdo it—a little goes a long way. For kids, you can skip this step entirely or use honey mustard for a sweeter kick.
- Layer the ham and cheese. Place one slice of ham on each bread slice, followed by one slice of cheese. Make sure the cheese is centered so it melts evenly. If the ham is larger than the bread, fold it to fit.
- Roll it up. Starting from one edge, tightly roll the bread around the ham and cheese. Try to keep the roll snug but not so tight that the filling squishes out. Secure the roll with a toothpick if it’s being stubborn.
- Butter the outside. Using a pastry brush or your fingers, spread a thin layer of softened butter on the outside of each roll. This is what gives them that beautiful golden crust. For extra crispiness, use a thin layer of mayonnaise instead—it’s a chef’s secret.
- Heat the skillet. Place a non-stick skillet over medium heat. You want it hot but not smoking. If the pan is too hot, the bread will burn before the cheese melts. A good test: flick a drop of water on the pan—if it sizzles, you’re ready.
- Toast the roll-ups. Place the roll-ups seam-side down in the skillet. Cook for 2-3 minutes per side, turning carefully with a spatula, until all sides are golden brown and the cheese is melted. The roll-ups should feel firm to the touch when done.
- Let them rest. Transfer the cooked roll-ups to a cutting board and let them rest for 1-2 minutes. This allows the cheese to set slightly, making them easier to slice without everything oozing out.
- Slice and serve. Use a sharp knife to slice each roll-up into bite-sized pieces—about 4-5 pieces per roll. For lunchboxes, let them cool completely before packing to prevent sogginess.
Troubleshooting Tips: If your cheese isn’t melting, your pan might be too hot. Lower the heat and cover the skillet with a lid for the last minute of cooking—the trapped steam will help melt the cheese without burning the bread. If the roll-ups are falling apart, try securing them with toothpicks before toasting. Just remember to remove them before serving!
Sensory Cues: You’ll know the roll-ups are ready when the bread is a deep golden brown and you can hear a faint sizzle as they cook. The smell? It’s pure comfort—toasted bread, salty ham, and melted cheese. Your kitchen will smell like a cozy diner.
Cooking Tips & Techniques
I’ve made these roll-ups more times than I can count, and I’ve learned a few things along the way. Here are my best tips for getting them perfect every time.
The Bread Matters. Fresh bread is your friend. Day-old bread tends to crack when rolled. If your bread is a little stale, try warming it in the microwave for 10 seconds to make it more pliable. Sourdough and brioche work particularly well because they’re sturdy but soft.
Don’t Overstuff. I know it’s tempting to pile on the ham and cheese, but less is more. Too much filling makes the roll-ups hard to seal, and they’ll burst open in the pan. Stick to one slice of each per roll-up.
The Toothpick Trick. If your roll-ups keep unrolling in the pan, secure them with a toothpick before cooking. Just remember to remove them before serving—I’ve had a few close calls myself. Trust me, you don’t want to bite into a toothpick.
Multitasking Strategy. While the first batch is toasting, prep the next batch. Have your bread flattened, ham and cheese layered, and butter ready to go. This keeps the process moving and ensures everything is hot and fresh.
My Biggest Failure. The first time I made these, I used high heat to speed things up. The bread burned black on the outside, and the cheese was still solid. I learned the hard way that medium heat is your friend. Patience pays off.
Consistency Tip. For uniform roll-ups, use a ruler to measure your bread slices. I know it sounds obsessive, but it makes a difference in how evenly they toast. Plus, they look prettier in the lunchbox.
Variations & Adaptations
One of the best things about this recipe is how easy it is to adapt. Here are a few variations I’ve tried and loved.
- Vegetarian Version: Swap the ham for roasted vegetables like bell peppers, zucchini, or mushrooms. Add a spread of hummus or pesto for extra flavor. My sister-in-law makes these with roasted red peppers and mozzarella, and they’re incredible.
- Spicy Twist: Add a thin layer of sriracha or chipotle mayo before layering the ham and cheese. Use pepper jack cheese for an extra kick. My husband loves these with jalapeño slices tucked inside—just be careful not to overdo it.
- Breakfast Roll-Ups: Use scrambled eggs, bacon, and cheddar cheese instead of ham and cheese. Toast them the same way for a breakfast-on-the-go option. These are a lifesaver on busy school mornings.
- Low-Carb Option: Swap the bread for large lettuce leaves or low-carb tortillas. Follow the same rolling and toasting method, but reduce the cooking time since lettuce doesn’t need as much heat. My keto friend swears by this version.
- Sweet and Savory: Use honey ham and brie cheese for a fancy twist. Add a thin slice of apple for crunch. This is my go-to for adult lunchboxes—it feels indulgent but comes together in minutes.
Personal Variation: I once made these with leftover Thanksgiving turkey and cranberry sauce. It was a happy accident that turned into a yearly tradition. Don’t be afraid to experiment with whatever you have in the fridge.
Serving & Storage Suggestions
These roll-ups are incredibly versatile when it comes to serving and storing. Here’s how to get the most out of them.
Serving Temperature: These are best served warm, right after toasting. The cheese is gooey, the bread is crispy, and everything is just perfect. For lunchboxes, let them cool completely before packing to avoid sogginess. They’re still delicious at room temperature.
Presentation Ideas: Slice the roll-ups into pinwheels and arrange them on a plate with a side of fresh fruit or veggie sticks. For a fun lunchbox presentation, pack them in a bento box with cherry tomatoes, cucumber slices, and a small container of dipping sauce like ranch or honey mustard.
Complementary Dishes: These roll-ups pair beautifully with a simple tomato soup for a cozy lunch. For a heartier meal, serve them alongside a green salad or some roasted sweet potato wedges. They’re also great with a side of pickles or olives for a little tang.
Storage Instructions: Store leftover roll-ups in an airtight container in the refrigerator for up to 3 days. To reheat, place them in a toaster oven or skillet over medium heat for 2-3 minutes per side. Avoid microwaving—it makes the bread soggy.
Freezer Instructions: These roll-ups freeze beautifully. Assemble them up to the point of toasting, then place them on a baking sheet and freeze until solid. Transfer to a freezer bag and store for up to 3 months. Toast from frozen, adding 2-3 minutes to the cooking time.
Flavor Development: Honestly, these are best fresh, but I’ve found that the flavors meld together nicely after a few hours in the fridge. If you’re making them for lunchboxes, prepare them the night before and toast them in the morning—your future self will thank you.
Nutritional Information & Benefits
Here’s a rough estimate of what you’re getting per serving (1 roll-up, made with white bread, ham, Swiss cheese, and butter):
- Calories: Approximately 280
- Protein: 18g
- Fat: 14g
- Carbohydrates: 22g
- Fiber: 1g
- Sodium: 780mg
Health Benefits: Ham is a good source of high-quality protein, which helps keep you full and satisfied. Cheese provides calcium for strong bones and teeth. If you use whole wheat bread, you’ll also get a boost of fiber and complex carbohydrates for sustained energy.
Dietary Considerations: This recipe can be adapted for gluten-free, low-carb, and vegetarian diets (see Variations section). For a lower-sodium version, use low-sodium ham and cheese, and skip the added salt. If you’re watching your saturated fat intake, use reduced-fat cheese and a light spread of butter.
Potential Allergens: This recipe contains gluten (bread), dairy (cheese, butter), and may contain mustard. Check your ingredient labels if you have allergies. For a dairy-free version, use plant-based cheese and vegan butter.
Personal Wellness Perspective: I love that this recipe lets me pack a satisfying, homemade lunch without spending hours in the kitchen. It’s a reminder that healthy eating doesn’t have to be complicated—sometimes the simplest ingredients make the best meals.
Frequently Asked Questions
Can I make these ahead of time for the week?
Absolutely! You can assemble the roll-ups (without toasting) up to 3 days in advance. Store them in the refrigerator, then toast them fresh in the morning. For meal prep, I like to make a big batch on Sunday and toast them as needed throughout the week.
What’s the best bread to use for roll-ups?
Sturdy bread like sourdough, whole wheat, or brioche works best. Avoid very soft bread like white sandwich bread, as it can tear easily when rolled. If you only have soft bread, toast it lightly before rolling to add structure.
Can I use tortillas instead of bread?
Yes! Flour or corn tortillas work great for a gluten-free option. Just warm them slightly before rolling to prevent cracking. Toast them the same way in a skillet for a crispy exterior.
How do I keep the roll-ups from getting soggy in a lunchbox?
Let the roll-ups cool completely before packing. Wrap them in a paper towel to absorb any excess moisture, then place them in an airtight container. You can also pack the dipping sauce separately to avoid sogginess.
Can I add vegetables to the roll-ups?
Definitely! Thinly sliced bell peppers, spinach leaves, or roasted zucchini are great additions. Just make sure the vegetables are dry before adding them to avoid making the bread soggy. I love adding a few spinach leaves for extra nutrients.
Conclusion
These Quick Ham and Cheese Roll-Ups are more than just a lunchbox solution—they’re a little piece of everyday magic. They’re the recipe you’ll turn to when you’re short on time, low on inspiration, or just want to make someone’s day a little brighter. Honestly, I’ve made these for school lunches, road trips, lazy weekend breakfasts, and even last-minute picnics. They never disappoint.
I hope you give them a try and make them your own. Maybe you’ll add a smear of pesto, swap the ham for turkey, or tuck in a few spinach leaves. That’s the beauty of this recipe—it’s a blank canvas for your creativity. And when you do, I’d love to hear about it. Drop a comment below and tell me how your roll-ups turned out, or share a photo on Pinterest with your own twist. Your version might just inspire someone else’s next lunchbox masterpiece.
Until next time, happy rolling—and happy eating!
Pin This Recipe!
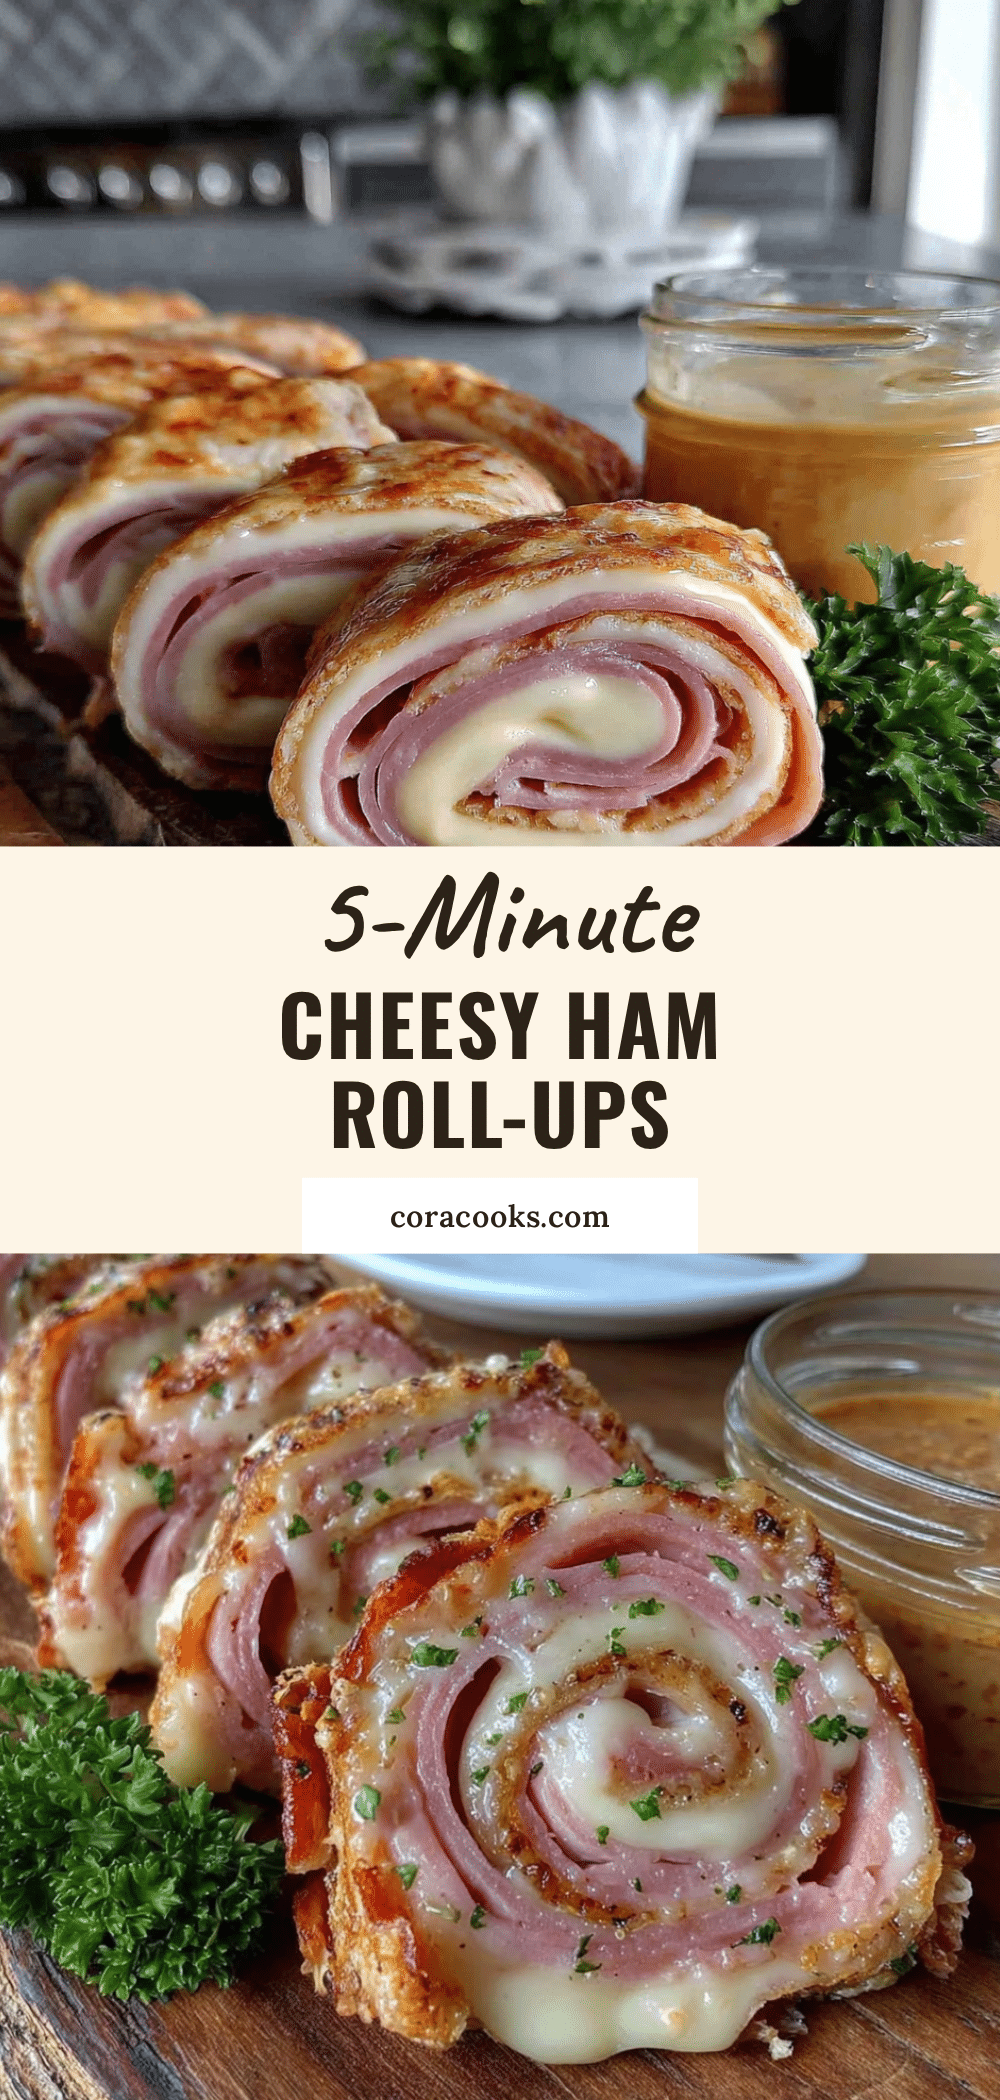
Quick Ham and Cheese Roll-Ups: Easy Lunchbox Idea

These Quick Ham and Cheese Roll-Ups are a simple, delicious lunchbox solution made with ham, cheese, and bread, toasted to golden perfection. Ready in just 10 minutes, they’re a crowd-pleasing, everyday magic recipe.
- Prep Time: 5 minutes
- Cook Time: 5 minutes
- Total Time: 10 minutes
- Yield: 8 servings 1x
- Category: Lunch
- Cuisine: American
Ingredients
- 8 slices of bread (white, whole wheat, or sourdough)
- 8 slices of ham (deli-style, thinly sliced)
- 8 slices of cheese (Swiss, cheddar, or provolone)
- 2 tablespoons of butter (softened)
- 1 tablespoon of Dijon mustard (optional)
- 1/4 cup of mayonnaise (optional, for toasting)
Instructions
- Flatten each slice of bread with a rolling pin until about 1/4-inch thick.
- Spread a thin layer of Dijon mustard on one side of each flattened bread slice (optional).
- Place one slice of ham on each bread slice, followed by one slice of cheese.
- Starting from one edge, tightly roll the bread around the ham and cheese. Secure with a toothpick if needed.
- Spread a thin layer of softened butter (or mayonnaise) on the outside of each roll.
- Heat a non-stick skillet over medium heat.
- Place the roll-ups seam-side down in the skillet. Cook for 2-3 minutes per side until golden brown and cheese is melted.
- Transfer to a cutting board and let rest for 1-2 minutes.
- Slice each roll-up into bite-sized pieces (about 4-5 pieces per roll). Serve warm or let cool completely for lunchboxes.
Notes
For extra crispiness, use mayonnaise instead of butter on the outside. If cheese isn’t melting, lower heat and cover skillet with a lid for the last minute. Secure roll-ups with toothpicks if they unroll. Let cool completely before packing in lunchboxes to avoid sogginess.
Nutrition
- Serving Size: 1 roll-up
- Calories: 280
- Sugar: 2
- Sodium: 780
- Fat: 14
- Saturated Fat: 7
- Carbohydrates: 22
- Fiber: 1
- Protein: 18
Keywords: ham and cheese roll-ups, easy lunchbox idea, quick lunch, kid-friendly lunch, ham and cheese recipe