Love this? Save it for later!
Share the inspiration with your friends
My husband had sworn off chocolate chip cookies for a solid decade. Ten years. He claimed they were always too sweet, too greasy, or too cakey—basically, a disappointment every single time. I’d watch him politely decline cookies at parties, and honestly, I felt a little sorry for him. Then last Thursday, I made this tiny batch just for myself, a little afternoon pick-me-up while I was testing recipes. I turned around from the sink to grab a paper towel, and there he was, halfway through his third cookie, caught red-handed with chocolate smeared on his thumb. “These are different,” he mumbled, reaching for another. And that, my friends, is how a skeptic became this recipe’s biggest fan.
This isn’t just another cookie recipe. It’s the one that proves you don’t need a whole mixer or a complicated list of ingredients to get that perfect balance of crispy edges and a soft, chewy center. I mean, let’s be real—sometimes you just want two or three perfect cookies, not a batch of three dozen that will sit on the counter tempting you for a week. Maybe you’ve been there too, staring at a recipe that makes way too much for just you or your small household. This recipe solves that exact problem, and it does it with ingredients you probably already have in your pantry.
The trick, I learned after a few failed attempts, is in the ratio of brown to white sugar and letting the dough rest for just a few minutes. It sounds simple, and honestly, it is. But that little bit of patience makes all the difference between a cookie that’s just okay and one that makes someone change their mind about an entire dessert category. I keep coming back to this recipe because it works every single time, and it never leaves me with a mountain of leftovers. It’s the perfect little secret for when you need a sweet moment that feels special but doesn’t require a whole production.
Why You’ll Love This Recipe
Let me tell you why this recipe has earned a permanent spot in my kitchen notebook. I’ve tested it at least a dozen times, tweaking the baking time and the sugar ratio until I got it just right. It’s the kind of recipe that feels like a cheat code for busy evenings.
- Quick & Easy: From start to finish, you’re looking at about 20 minutes. Seriously. No chilling required, though a short rest helps. Perfect for those random cookie cravings that hit after dinner.
- Simple Ingredients: You don’t need anything fancy. Butter, sugar, an egg, flour, baking soda, salt, and chocolate chips. That’s it. No weird extracts or specialty flours.
- Perfect for Small Households: This makes exactly six to eight cookies. No more, no less. Ideal for couples, singles, or anyone who doesn’t want a giant tin of cookies staring at them.
- Crowd-Pleaser: I’ve brought these to a few small gatherings, and they disappear fast. Even my cookie-skeptic husband can’t resist them.
- Unbelievably Delicious: The edges get perfectly golden and crisp, while the center stays soft and almost gooey. It’s the texture combo that makes you close your eyes after the first bite.
What makes this recipe different from the rest? It’s the technique of using melted butter instead of softened. It sounds small, but it changes everything. The melted butter gives the cookies a denser, chewier texture without making them greasy. Plus, the ratio of brown sugar to white sugar is just right—enough molasses flavor from the brown sugar to keep things interesting, but not so much that the cookies taste heavy. This isn’t just another version of chocolate chip cookies. It’s the best version for when you want something quick, reliable, and absolutely satisfying.
Honestly, there’s something deeply comforting about pulling a small batch of warm cookies out of the oven. It feels like a little act of kindness to yourself. And when you bite into one and get that perfect balance of sweet dough and melted chocolate, it’s hard not to feel like you’ve got life figured out, at least for a moment.
What Ingredients You Will Need
This recipe uses simple, wholesome ingredients that you probably have in your kitchen right now. Each one plays a specific role in creating that perfect texture and flavor. Let’s break it down.
For the Cookie Dough
- Unsalted butter, melted (4 tablespoons / 57 grams): Melting the butter is the key to that chewy texture. It coats the flour differently than creamed butter, giving you a denser, richer cookie. I use unsalted so I can control the salt level.
- Granulated sugar (3 tablespoons / 38 grams): This adds sweetness and helps with spreading. It also contributes to those crispy edges.
- Light brown sugar, packed (3 tablespoons / 43 grams): This is where the magic happens. The molasses in brown sugar adds moisture and a deeper, almost caramel-like flavor. It keeps the centers soft. I prefer light brown sugar for a milder flavor, but dark brown works too if you want a stronger molasses taste.
- 1 large egg yolk (plus 1 tablespoon of the white, if needed): Using just the yolk adds richness and fat without too much liquid, which helps keep the cookies from spreading too thin. If your dough feels too dry after mixing, add a splash of the reserved egg white—about a tablespoon.
- Vanilla extract (1/2 teaspoon): Pure vanilla is worth it here. It rounds out the sweetness and adds warmth. I like Nielsen-Massey, but any good brand works.
- All-purpose flour (1/2 cup plus 1 tablespoon / 75 grams): Standard all-purpose flour gives the perfect structure. Don’t overmeasure—spoon it into your measuring cup and level it off with a knife.
- Baking soda (1/4 teaspoon): This helps the cookies spread just a little and gives them a nice lift. Make sure it’s fresh.
- Salt (1/4 teaspoon): Salt balances the sweetness and enhances the chocolate flavor. I use fine sea salt. A tiny pinch of flaky salt on top before baking is optional but amazing.
- Semi-sweet chocolate chips (1/3 cup / 60 grams): Semi-sweet is my go-to because it’s not too sweet and not too bitter. You can use dark chocolate chips if you prefer a more intense flavor. I’ve tried Ghirardelli and Guittard—both are excellent. Chop a few of the chips roughly for nice chocolate pools in the dough.
Substitution Guidance: If you’re out of brown sugar, you can use all granulated sugar, but the cookies will be crisper and less chewy. For a dairy-free version, use vegan butter or coconut oil (solid, not melted). The texture will be slightly different—a bit more cakey with coconut oil—but still delicious. If you need to avoid eggs, try a flax egg (1 tablespoon ground flaxseed mixed with 3 tablespoons water, let sit for 5 minutes). The cookies will be a little less rich, but they’ll still hold together.
Equipment Needed
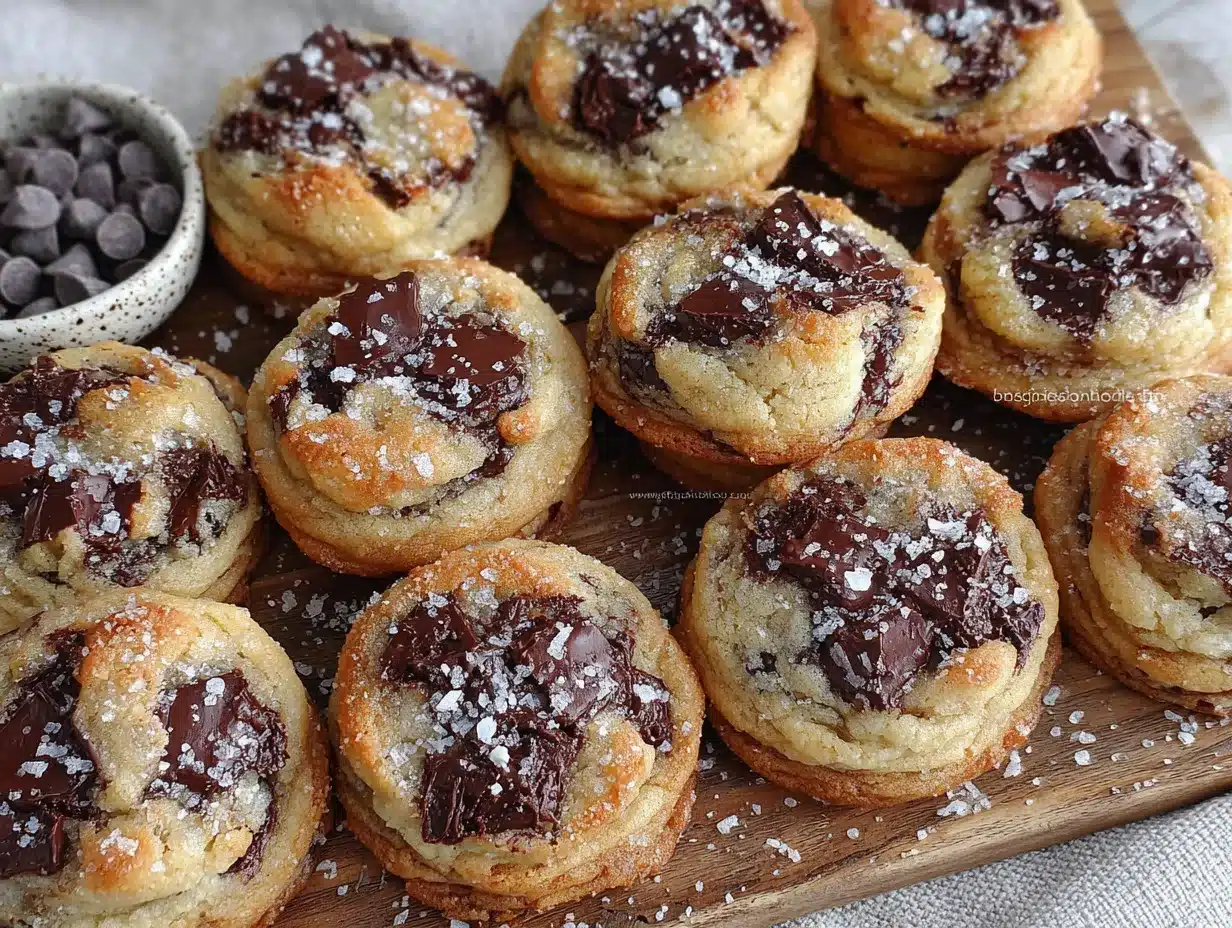
You don’t need a fancy kitchen to make these cookies. Here’s what you’ll need, along with a few tips from my own experience.
- Mixing bowls: One medium bowl for the wet ingredients and one small bowl for the dry. I use a glass bowl for the wet ingredients so I can see if everything is combined.
- Whisk: A simple whisk is perfect for mixing the melted butter and sugars. A fork works in a pinch, but a whisk is faster.
- Rubber spatula or wooden spoon: For folding in the flour and chocolate chips. I prefer a silicone spatula because it scrapes the bowl cleanly.
- Baking sheet: A standard half-sheet pan works great. No need to grease it—the cookies have enough butter. If you only have a dark non-stick pan, keep an eye on the baking time; they might brown faster.
- Parchment paper or silicone baking mat: This prevents sticking and makes cleanup a breeze. I always use parchment paper because it’s easy to find and disposable. A silicone mat works well too, but it can sometimes make cookies spread a bit more.
- Cookie scoop or tablespoon: For portioning the dough evenly. I use a #40 scoop (about 1.5 tablespoons). If you don’t have one, just use a regular tablespoon and make sure each portion is roughly the same size.
- Cooling rack: Letting the cookies cool on a rack stops the carryover cooking and keeps the bottoms from getting soggy. A simple wire rack is all you need.
One thing I learned the hard way: don’t skip the parchment paper. I once tried baking directly on a greased sheet, and the cookies spread into one giant, flat mess. Parchment paper gives them just the right amount of grip without sticking. Also, if you’re using a silicone mat, reduce the oven temperature by 25°F to prevent over-browning. Budget tip: you can reuse a piece of parchment paper for a second batch if it’s not too greasy.
Preparation Method
Let’s get to the fun part. Follow these steps, and you’ll have perfect cookies in no time. I’ve added little notes along the way based on my own trials and errors.
- Preheat your oven to 350°F (175°C). Line a baking sheet with parchment paper. Do this first so the oven is ready when your dough is. A hot oven is key for that initial set.
- Melt the butter. In a medium microwave-safe bowl, melt 4 tablespoons (57 grams) of unsalted butter in 20-second bursts. You want it just melted—not hot. Let it cool for a minute while you gather the other ingredients. If it’s too hot, it can melt the sugar too much and make the cookies greasy.
- Mix the sugars and butter. Add 3 tablespoons (38 grams) of granulated sugar and 3 tablespoons (43 grams) of packed light brown sugar to the melted butter. Whisk vigorously for about 30 seconds until the mixture looks smooth and slightly lighter in color. It should smell like caramel. This step helps dissolve some of the sugar, which contributes to that chewy texture.
- Add the egg yolk and vanilla. Whisk in 1 large egg yolk and 1/2 teaspoon of vanilla extract. Mix until everything is well combined and the mixture looks glossy. It might look a little separated at first, but keep whisking—it will come together.
- Combine the dry ingredients. In a small bowl, whisk together 1/2 cup plus 1 tablespoon (75 grams) of all-purpose flour, 1/4 teaspoon of baking soda, and 1/4 teaspoon of salt. Make sure there are no lumps. I like to use a fork for this if I’m too lazy to get out a whisk.
- Fold in the flour mixture. Add the dry ingredients to the wet mixture. Use a rubber spatula to fold gently until just combined. Don’t overmix—stop as soon as you don’t see any white streaks. Overmixing develops gluten, which can make the cookies tough. The dough will be thick and a little sticky.
- Add the chocolate chips. Fold in 1/3 cup (60 grams) of semi-sweet chocolate chips. If you want, chop a few of the chips roughly before adding them—this creates little chocolate pools in the baked cookies. Reserve a few chips to press into the tops of the dough balls before baking for a prettier look.
- Portion the dough. Using a cookie scoop or a tablespoon, scoop out 6 to 8 equal portions of dough. Roll each portion into a ball between your palms. Place them on the prepared baking sheet, spacing them about 2 inches apart. They will spread, so give them room. For a bakery-style look, press a few extra chocolate chips into the tops of each ball.
- Bake for 9 to 11 minutes. Bake until the edges are golden brown and the centers look slightly puffy and just set. The tops might look a little underdone—that’s perfect. For softer cookies, bake for 9 minutes. For crispier edges, go for 11 minutes. My sweet spot is 10 minutes. The cookies will continue to bake on the hot sheet as they cool.
- Cool on the baking sheet for 5 minutes. This is crucial. Let the cookies rest on the hot pan for exactly 5 minutes. This allows the centers to finish setting without over-baking the edges. Then transfer them to a wire rack to cool completely. Or, you know, eat one warm. I won’t judge.
Troubleshooting tip: If your cookies spread too much, your butter might have been too warm, or your dough might have been too soft. Next time, let the dough rest in the fridge for 10 minutes before baking. If they don’t spread enough, your flour might have been overmeasured—use the spoon-and-level method next time.
Cooking Tips & Techniques
Over the years, I’ve made plenty of cookie mistakes. I’ve had batches that turned into flat, greasy puddles and others that were dry as hockey pucks. Here’s what I learned so you don’t have to repeat my failures.
Don’t overmix the dough. This is the number one mistake I see. Once you add the flour, mix only until it disappears. If you keep stirring, the gluten develops and your cookies will be tough instead of tender. I once mixed for an extra 30 seconds because I was distracted by a phone call, and the cookies came out dense and chewy in a bad way.
Use a cookie scoop for even baking. When all the dough balls are the same size, they bake evenly. If you have one giant ball and one tiny one, the small one will burn before the big one is done. I use a #40 scoop (about 1.5 tablespoons), and it makes everything consistent. If you don’t have a scoop, use a measuring tablespoon and level it off.
Let the dough rest if you have time. While this recipe doesn’t require chilling, letting the dough rest in the fridge for 15 to 30 minutes can improve the flavor. The flour absorbs the moisture, and the sugars meld together. The cookies will be slightly thicker and more flavorful. I do this when I’m not in a rush, but honestly, they’re still amazing without it.
Rotate the pan halfway through. Every oven has hot spots. About halfway through the baking time (around the 5-minute mark), rotate the baking sheet front to back. This ensures even browning. I forgot to do this once, and half the batch came out dark while the other half was pale.
Use good chocolate. The chocolate is the star here, so don’t skimp. Semi-sweet chips are classic, but you can also chop up a good quality chocolate bar for more varied chocolate pieces. I love using a mix of chips and chopped chocolate for those melty pools. Ghirardelli 60% cacao chips are my go-to for a balanced flavor.
Timing strategy: While the oven preheats, I melt the butter and mix the wet ingredients. Then I measure the dry ingredients while the butter cools slightly. By the time the oven is ready, the dough is usually done. It’s a smooth workflow that takes about 15 minutes from start to oven.
Variations & Adaptations
One of the best things about this recipe is how easy it is to change up. Here are a few variations I’ve tried and loved.
- Double Chocolate Chip: Replace 1 tablespoon of the all-purpose flour with 1 tablespoon of unsweetened cocoa powder. The cookies will be darker and have a rich chocolate flavor. Add white chocolate chips or dark chocolate chunks for a nice contrast. I made these for a friend who loves chocolate, and she said they were the best cookies she’d ever had.
- Gluten-Free Version: Swap the all-purpose flour with a 1:1 gluten-free baking flour blend that contains xanthan gum. I’ve used King Arthur Measure-for-Measure with great results. The texture is slightly more delicate, but they still have that chewy center. Reduce the baking time by a minute or two, as gluten-free cookies can dry out faster.
- Nutty Crunch: Add 1/4 cup of chopped toasted walnuts or pecans along with the chocolate chips. Toast the nuts first in a dry pan for 3 to 4 minutes until fragrant—this brings out their flavor. The crunch adds a lovely texture contrast to the soft cookie.
- Sea Salt Finish: Just before baking, sprinkle a tiny pinch of flaky sea salt (like Maldon) on top of each dough ball. The salt enhances the sweetness and makes the chocolate pop. It’s a simple touch that feels fancy. I do this almost every time now.
- Vegan Adaptation: Use melted coconut oil or vegan butter instead of dairy butter, and replace the egg yolk with a flax egg (1 tablespoon ground flaxseed mixed with 3 tablespoons water, let sit for 5 minutes). The cookies will be a bit less rich but still delicious. I’ve made these for a vegan friend, and she couldn’t stop eating them.
My personal favorite variation is adding a handful of toffee bits along with the chocolate chips. The toffee gets all melty and creates these little caramelized pockets. It’s dangerously good. I found this combination by accident when I was cleaning out my pantry, and now it’s a regular thing.
Serving & Storage Suggestions
These cookies are best served warm, right after they’ve cooled for those 5 minutes on the baking sheet. The edges are crisp, the center is soft, and the chocolate is still melted. It’s the perfect moment. I like to serve them with a cold glass of milk or a hot cup of coffee. The contrast of warm cookie and cold milk is unbeatable.
For a prettier presentation, arrange the cookies on a small plate or a wooden board. You can dust them with a little powdered sugar or drizzle with melted chocolate if you’re feeling extra. But honestly, they look beautiful on their own with those golden edges and chocolate chips peeking out.
Storage: Store any leftover cookies (if there are any!) in an airtight container at room temperature for up to 3 days. Place a piece of bread in the container to keep them soft—the cookies will absorb the moisture from the bread. It sounds weird, but it works. I’ve been doing this for years.
Freezing: You can freeze the baked cookies for up to 2 months. Let them cool completely, then place them in a freezer-safe bag or container. To reheat, pop a frozen cookie in a 300°F oven for 5 minutes, or microwave for 10 to 15 seconds. They’ll taste almost fresh-baked. You can also freeze the raw dough balls on a baking sheet, then transfer them to a bag. Bake from frozen, adding 1 to 2 minutes to the baking time.
Flavor development: Honestly, these cookies are at their peak on day one. But if you store them properly, they’re still great on day two. The texture softens a bit, but the flavor remains. I’ve never had them last past day three in my house, so I can’t speak to beyond that.
Nutritional Information & Benefits
Let’s be real—these are cookies, not a health food. But knowing what’s in them can help you enjoy them mindfully. Here’s an approximate breakdown per cookie (based on 8 cookies):
- Calories: 180-200
- Fat: 11g (mostly from butter and chocolate)
- Carbohydrates: 22g
- Sugar: 14g
- Protein: 2g
- Fiber: 1g
While these aren’t low-calorie, they do offer a few benefits. The dark chocolate contains antioxidants called flavonoids, which can support heart health. Using semi-sweet chips means less sugar than milk chocolate. The butter provides vitamin A, and the egg yolk adds a little protein and healthy fats.
If you’re watching your sugar intake, you can reduce the granulated sugar by 1 tablespoon, but the texture will be slightly less crisp. For a lower-carb option, you can try using a sugar substitute like monk fruit sweetener, but I haven’t tested that myself, so results may vary. This recipe is naturally vegetarian and can be made gluten-free or vegan with the substitutions mentioned above. Potential allergens include dairy, eggs, and gluten.
My personal take? I believe in enjoying treats in moderation. Having one or two of these cookies after dinner feels like a small, satisfying indulgence that doesn’t derail a healthy eating pattern. It’s about balance, not deprivation.
Conclusion
If you’ve been searching for a small batch chocolate chip cookie recipe that actually delivers, this is it. It’s quick, uses simple ingredients, and produces cookies with that perfect combo of crispy edges and soft, chewy centers. I’ve made this recipe more times than I can count, and it never lets me down. It’s the kind of recipe you’ll memorize because you’ll make it so often.
I encourage you to make it your own. Add nuts, switch up the chocolate, or try the sea salt finish. The beauty of this recipe is its flexibility. And if you make a mess in the kitchen—like I always do—it’s totally worth it when you bite into that first warm cookie.
I’d love to hear how yours turn out! Did you try a variation? Did you manage to share them, or did you eat them all yourself? No judgment either way. Leave a comment below and let me know. And if you loved this recipe, please share it with a friend who needs a little cookie magic in their life. Happy baking!
Frequently Asked Questions
Can I double this recipe?
Absolutely. Simply double all the ingredients. The baking time should remain about the same, but you may need to bake in batches if your oven can’t fit two sheets at once. If baking two sheets, rotate them halfway through and swap the top and bottom racks.
Why did my cookies spread too much?
This usually happens if the butter was too warm or the dough was too soft. Make sure your melted butter has cooled slightly before mixing. You can also chill the dough balls for 10 to 15 minutes before baking to prevent excessive spreading.
Can I use margarine instead of butter?
I don’t recommend it. Margarine has a higher water content, which can make the cookies spread more and become greasy. Butter gives the best flavor and texture. If you need a dairy-free option, use a good quality vegan butter stick, not the spreadable kind in a tub.
How do I know when the cookies are done?
Look for golden brown edges and a center that looks slightly puffy and underdone. The top should be just set. They will continue to bake on the hot sheet for the 5-minute rest. If you overbake them, they’ll be crisp all the way through instead of soft in the middle.
Can I use milk chocolate chips instead of semi-sweet?
Yes, but the cookies will be sweeter. Milk chocolate chips have more sugar and less cocoa butter, so they melt a bit differently. If you use milk chocolate, consider reducing the granulated sugar by 1 tablespoon to balance the sweetness. I’ve tried it, and it’s still good, just different.
Pin This Recipe!
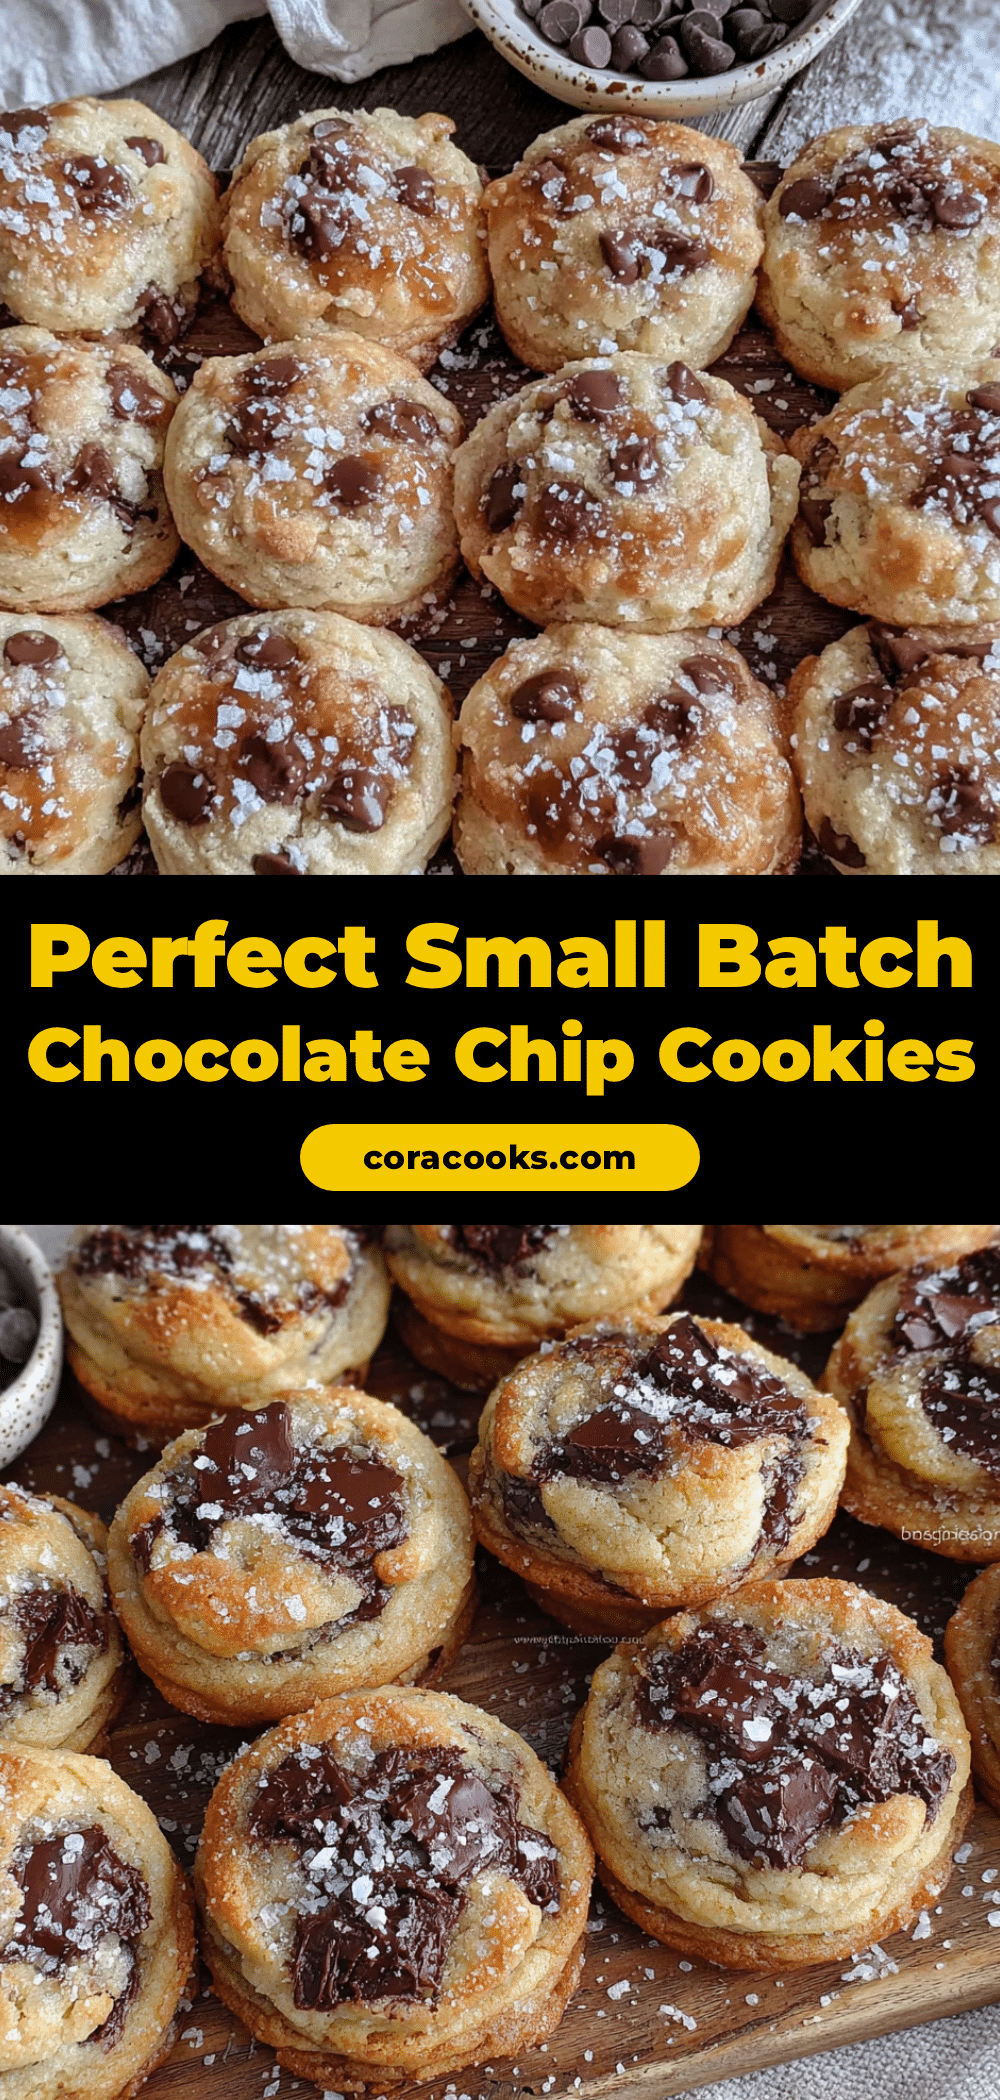
Perfect Small Batch Chocolate Chip Cookies: Easy Best Recipe

This small batch chocolate chip cookie recipe delivers perfectly crispy edges and a soft, chewy center using simple ingredients and melted butter for a denser texture. Ideal for small households, it makes six to eight cookies in about 20 minutes.
- Prep Time: 10 minutes
- Cook Time: 10 minutes
- Total Time: 20 minutes
- Yield: 6-8 cookies 1x
- Category: Dessert
- Cuisine: American
Ingredients
- 4 tablespoons (57 grams) unsalted butter, melted
- 3 tablespoons (38 grams) granulated sugar
- 3 tablespoons (43 grams) light brown sugar, packed
- 1 large egg yolk (plus 1 tablespoon of the white, if needed)
- 1/2 teaspoon vanilla extract
- 1/2 cup plus 1 tablespoon (75 grams) all-purpose flour
- 1/4 teaspoon baking soda
- 1/4 teaspoon salt
- 1/3 cup (60 grams) semi-sweet chocolate chips
Instructions
- Preheat your oven to 350°F (175°C). Line a baking sheet with parchment paper.
- Melt the butter in a medium microwave-safe bowl in 20-second bursts. Let it cool for a minute.
- Add granulated sugar and light brown sugar to the melted butter. Whisk vigorously for about 30 seconds until smooth and slightly lighter in color.
- Whisk in the egg yolk and vanilla extract until well combined and glossy.
- In a small bowl, whisk together the flour, baking soda, and salt.
- Add the dry ingredients to the wet mixture. Fold gently with a rubber spatula until just combined. Do not overmix.
- Fold in the chocolate chips. Reserve a few chips to press into the tops of the dough balls before baking.
- Using a cookie scoop or tablespoon, portion the dough into 6 to 8 equal balls. Place them on the prepared baking sheet, spacing about 2 inches apart. Press a few extra chocolate chips into the tops.
- Bake for 9 to 11 minutes, until edges are golden brown and centers look slightly puffy and just set.
- Cool on the baking sheet for 5 minutes, then transfer to a wire rack to cool completely.
Notes
For softer cookies, bake for 9 minutes; for crispier edges, bake for 11 minutes. If cookies spread too much, chill the dough for 10 minutes before baking. Use good quality semi-sweet chocolate for best results. Letting the dough rest in the fridge for 15-30 minutes can improve flavor.
Nutrition
- Serving Size: 1 cookie
- Calories: 190
- Sugar: 14
- Sodium: 120
- Fat: 11
- Saturated Fat: 6
- Carbohydrates: 22
- Fiber: 1
- Protein: 2
Keywords: small batch chocolate chip cookies, easy chocolate chip cookies, chewy chocolate chip cookies, quick cookies, small household cookies