Love this? Save it for later!
Share the inspiration with your friends
My colleague swore she hated decorating sugar cookies. For years. Then, one chaotic Friday afternoon at the office — right in the middle of a coffee break — she was caught meticulously frosting these sugar cookie pencils I’d brought “just to try out.” Honestly, I wasn’t sure she’d even nibble, let alone get lost in the process. But there she was, eyes narrowed in concentration, fingers dusted with powdered sugar, carefully adding those delicate touches to each cookie. It was like watching an artist at work, and suddenly, her long-held resistance to decorating melted away.
I mean, let’s face it — sugar cookies are often seen as cloyingly sweet or fussy, right? But this recipe? It’s different. It’s not just about sweetness; it’s about texture, balance, and those elegant decorations that make you pause and say, “Wow, I made that.” Maybe you’ve been there, staring at a piping bag, wondering if you’ll ever get those perfect lines. Let me tell you, this recipe has a way of gently pulling you in without making a fuss. And the best part? The cookie pencils are not only pretty but actually delicious, with just the right amount of crumb and that buttery snap.
This recipe has stuck with me because it’s approachable yet impressive — perfect for those moments when you want to surprise yourself (and others) without a stressful mess. Plus, there’s something quietly satisfying about turning simple sugar cookie dough into these charming little pencils, topped with frosting that looks like it belongs in a boutique bakery. So, if you’ve ever doubted your cookie decorating abilities, just wait until you give these a try. They might just catch you in the act of falling in love all over again.
Why You’ll Love This Recipe
After testing countless sugar cookie recipes and decoration techniques, this one stands out for good reasons. I’ve spent many weekends fiddling with doughs that either spread too much or tasted bland, but this version hits the sweet spot every time. Here’s why it’s become a go-to in my kitchen:
- Quick & Easy: The dough comes together in under 15 minutes, and the decorating step is straightforward enough for beginners but satisfying for seasoned bakers.
- Simple Ingredients: You don’t need any fancy extracts or specialty flours; the ingredients are pantry staples you likely already have on hand.
- Perfect for Gifting & Entertaining: These sugar cookie pencils are ideal for back-to-school treats, teacher gifts, or elegant party platters.
- Crowd-Pleaser: Kids love the fun pencil shape, and adults appreciate the subtle vanilla flavor and delicate decorations.
- Unbelievably Delicious: The cookie texture is crisp on the edges with a tender center, complemented by smooth, creamy frosting that’s just sweet enough.
What makes this recipe different is the balance between ease and elegance. The frosting technique uses a simple glaze that dries beautifully, allowing for intricate designs without hours of work. Plus, the recipe’s forgiving nature means you can customize colors and decoration styles without worrying about ruining the batch. It’s like having the best of both worlds: a recipe that looks fancy but feels friendly to make. Honestly, it’s the kind of treat that makes you close your eyes after the first bite, savoring the mix of buttery cookie and sweet, silky frosting.
What Ingredients You Will Need
This recipe uses simple, wholesome ingredients that work together to create a delightful texture and rich flavor without fuss. Most of these are pantry staples, and you can easily swap a few to suit your needs.
- For the Sugar Cookie Dough:
- 2 ¾ cups (345 g) all-purpose flour — I prefer King Arthur for consistent results
- 1 teaspoon baking powder
- ½ teaspoon salt
- 1 cup (227 g) unsalted butter, softened (adds richness and tenderness)
- 1 ½ cups (300 g) granulated sugar
- 1 large egg, room temperature
- 2 teaspoons pure vanilla extract (a must for that classic sugar cookie flavor)
- For the Frosting:
- 2 cups (240 g) powdered sugar, sifted
- 2–3 tablespoons milk (or dairy-free milk if preferred)
- 1 teaspoon vanilla extract
- Food coloring gels (optional, for that elegant pencil look)
- Edible markers or fine piping tips for details
- Additional Decoration:
- Mini chocolate chips or finely chopped nuts for the “eraser” tip
- Colored sugar or edible glitter for subtle sparkle
If you want a gluten-free option, almond flour works well but expect a slightly different texture. For a vegan twist, swap butter with coconut oil and use a flax egg (1 tablespoon ground flaxseed + 3 tablespoons water). Seasonal note: in autumn, a dash of cinnamon in the dough adds a cozy warmth that pairs beautifully with the vanilla frosting.
Equipment Needed
- Mixing bowls — one large for dough, one medium for frosting
- Electric mixer or stand mixer — makes creaming the butter and sugar effortless
- Rolling pin — I like using a silicone one to prevent sticking
- Pencil-shaped cookie cutter (about 4 inches / 10 cm long) — if you don’t have one, a sharp knife and a steady hand work too
- Baking sheets lined with parchment paper or silicone mats — helps cookies bake evenly and prevents sticking
- Cooling rack — essential for letting cookies cool completely before decorating
- Piping bags with fine round tips — for detail work, but a zip-top bag with a snipped corner can do the trick
- Small bowls or cups — for mixing different frosting colors
For those on a budget, basic mixing bowls and a wooden rolling pin work just fine, and you can improvise piping with a plastic bag. I’ve tried decorating without a cooling rack, but trust me, letting the cookies cool fully is non-negotiable to avoid frosting meltdowns. If you want to keep your cookie cutters crispy and clean, a quick dip in warm water before each batch helps tremendously.
Preparation Method
- Mix Dry Ingredients: In a medium bowl, whisk together 2 ¾ cups (345 g) flour, 1 teaspoon baking powder, and ½ teaspoon salt. Set aside. This step helps keep the dough smooth and prevents lumps. (Time: 5 minutes)
- Cream Butter and Sugar: In a large bowl, beat 1 cup (227 g) softened butter with 1 ½ cups (300 g) granulated sugar until light and fluffy — about 3–4 minutes with an electric mixer on medium speed. This is key for tender cookies. (Time: 5 minutes)
- Add Egg and Vanilla: Beat in 1 large egg and 2 teaspoons vanilla extract until fully combined. The mixture might look a bit grainy here; that’s normal. (Time: 2 minutes)
- Combine Wet and Dry: Gradually add the flour mixture to the butter mixture, mixing on low speed until just combined. Avoid overmixing to keep the cookies tender. The dough will be slightly sticky but should hold together well. (Time: 3 minutes)
- Chill the Dough: Wrap the dough in plastic wrap and chill for at least 1 hour (or up to overnight). This step prevents spreading and makes cutting easier. Honestly, I sometimes forget this part and end up with flat cookies — lesson learned!
- Preheat Oven and Prepare Baking Sheets: Preheat your oven to 350°F (175°C). Line baking sheets with parchment paper or silicone mats.
- Roll and Cut Dough: Roll the chilled dough to about ¼ inch (6 mm) thickness on a lightly floured surface. Use the pencil-shaped cutter to stamp out shapes. If you don’t have a cutter, cut rectangles about 4 inches (10 cm) long and taper one end to mimic a pencil tip. Place cookies 1 inch (2.5 cm) apart on prepared sheets. (Time: 15 minutes)
- Bake: Bake for 8–10 minutes, until edges are just starting to turn golden. Don’t overbake; you want a tender center. Cool on the baking sheet for 5 minutes, then transfer to a cooling rack completely. (Time: 10 minutes baking + 10 minutes cooling)
- Prepare Frosting: In a medium bowl, whisk together 2 cups (240 g) sifted powdered sugar, 2 tablespoons milk, and 1 teaspoon vanilla extract until smooth. Adjust milk for desired consistency — thicker for piping details, thinner for flooding. Divide into small bowls if using multiple colors.
- Decorate: Using piping bags or zip bags, outline the pencil shapes first, then fill in with thinner frosting. Add details like the eraser tip with mini chocolate chips or nuts while frosting is still wet. Let the frosting dry completely (about 2 hours) before stacking or packaging. (Tip: If frosting cracks, thin it slightly or apply in thinner layers.)
Cooking Tips & Techniques
One trick I learned the hard way is chilling the dough thoroughly. Skipping this step means your cookies spread too much and lose that crisp pencil shape. Also, when rolling the dough, try to keep it even in thickness; uneven dough means uneven baking and frosting challenges.
For frosting, consistency is everything. Too thick and it’s hard to pipe; too thin and it runs off the cookie. I usually start with 2 tablespoons of milk and add more drop by drop for flooding. Patience is key here — let each layer dry before adding details to avoid colors bleeding into each other.
Don’t be intimidated by piping details. Using a fine tip or a zip-top bag with a tiny cut corner can yield surprisingly neat lines. If you make a mistake, gently scrape off the wet frosting with a toothpick and try again once it sets a bit. I’ve found that decorating while the cookies are completely cool prevents frosting from melting or sliding off.
Timing-wise, baking and cooling can be multitasked with frosting preparation. I usually prep my frosting while the cookies bake, so I’m ready to decorate as soon as they cool. And remember — even if your first batch looks imperfect, they’ll still taste amazing and your skill will improve fast with practice.
Variations & Adaptations
- Flavor Twists: Add lemon zest or almond extract to the dough for a fresh change. A pinch of cinnamon or nutmeg adds warmth perfect for fall-themed pencils.
- Dietary Options: Swap all-purpose flour with gluten-free flour blends (like Bob’s Red Mill 1-to-1) for gluten-free cookies. Use vegan butter and flax egg to make this recipe dairy- and egg-free.
- Decoration Styles: Instead of royal icing, try a simple chocolate ganache glaze for a richer look. Or, use edible markers to draw on dried frosting for a hand-drawn effect that’s uniquely charming.
- Cooking Methods: These cookies can be made ahead and frozen after baking (unfrosted), then thawed and decorated just before serving.
- Personal Variation: I once swapped part of the granulated sugar for brown sugar, which added a subtle caramel note that surprisingly paired beautifully with the vanilla frosting.
Serving & Storage Suggestions
Serve these sugar cookie pencils at room temperature, ideally on a pretty platter that highlights their colors and delicate details. They pair wonderfully with a cup of tea or a glass of cold milk — the kind of combo that’s both nostalgic and satisfying.
Store leftover cookies in an airtight container at room temperature for up to 3 days. If you want them crispier, place a slice of bread in the container to absorb moisture. For longer storage, freeze unfrosted cookies in a single layer on a baking sheet, then transfer to a freezer-safe bag for up to 3 months. Thaw at room temperature before frosting.
When reheating, avoid microwave as it softens the cookie too much. Instead, warm briefly in a low oven (about 250°F / 120°C) for 5 minutes if you want a freshly baked feel. Over time, the frosting’s flavors meld beautifully, making these even more enjoyable the next day.
Nutritional Information & Benefits
Each frosted sugar cookie pencil contains approximately 150 calories, 7 grams of fat, 22 grams of carbohydrates, and 1 gram of protein. While these are treats, the use of real butter and vanilla extract offers a richer, more natural flavor compared to artificial alternatives.
The recipe is free from nuts by default, making it safer for many allergies, though cross-contamination can occur depending on your kitchen. Using powdered sugar and basic ingredients keeps it gluten-friendly if you swap the flour accordingly.
From a wellness perspective, this recipe balances indulgence with simplicity — no artificial colors or preservatives, just straightforward ingredients you can feel good about sharing. The decorations add charm without overwhelming the palate or the nutritional profile.
Conclusion
This recipe for perfect frosted sugar cookie pencils is definitely worth carving out time for. It’s approachable enough for beginners, yet elegant enough to impress guests or mark special occasions. Honestly, I keep coming back to it because it turns a humble sugar cookie into a little work of edible art that’s just as fun to make as it is to eat.
Feel free to tweak the flavors, colors, or decoration styles to match your mood or event. I love seeing how others make these their own — so leave a comment if you try your hand at these, share your favorite decoration tips, or tell me about your own cookie pencil stories. Let’s keep this sweet tradition going!
Happy baking, and here’s to many delicious, beautifully frosted pencils in your future.
FAQs
Can I make the dough ahead of time?
Yes! The dough can be wrapped tightly and refrigerated for up to 3 days or frozen for up to 3 months. Just thaw before rolling and cutting.
What if I don’t have a pencil-shaped cookie cutter?
No worries! Use a sharp knife to cut rectangles about 4 inches (10 cm) long and shape one end into a tapered point to mimic a pencil.
How do I prevent my frosting from cracking?
Make sure your frosting is not too thick and apply it in thin, even layers. Let each layer dry before adding more details to avoid cracking.
Can I use store-bought frosting?
You can, but homemade frosting here dries better and allows for smoother, more precise decorations.
What’s the best way to store decorated cookies?
Keep them in an airtight container at room temperature for up to 3 days. For longer storage, freeze them unfrosted and decorate after thawing.
Pin This Recipe!
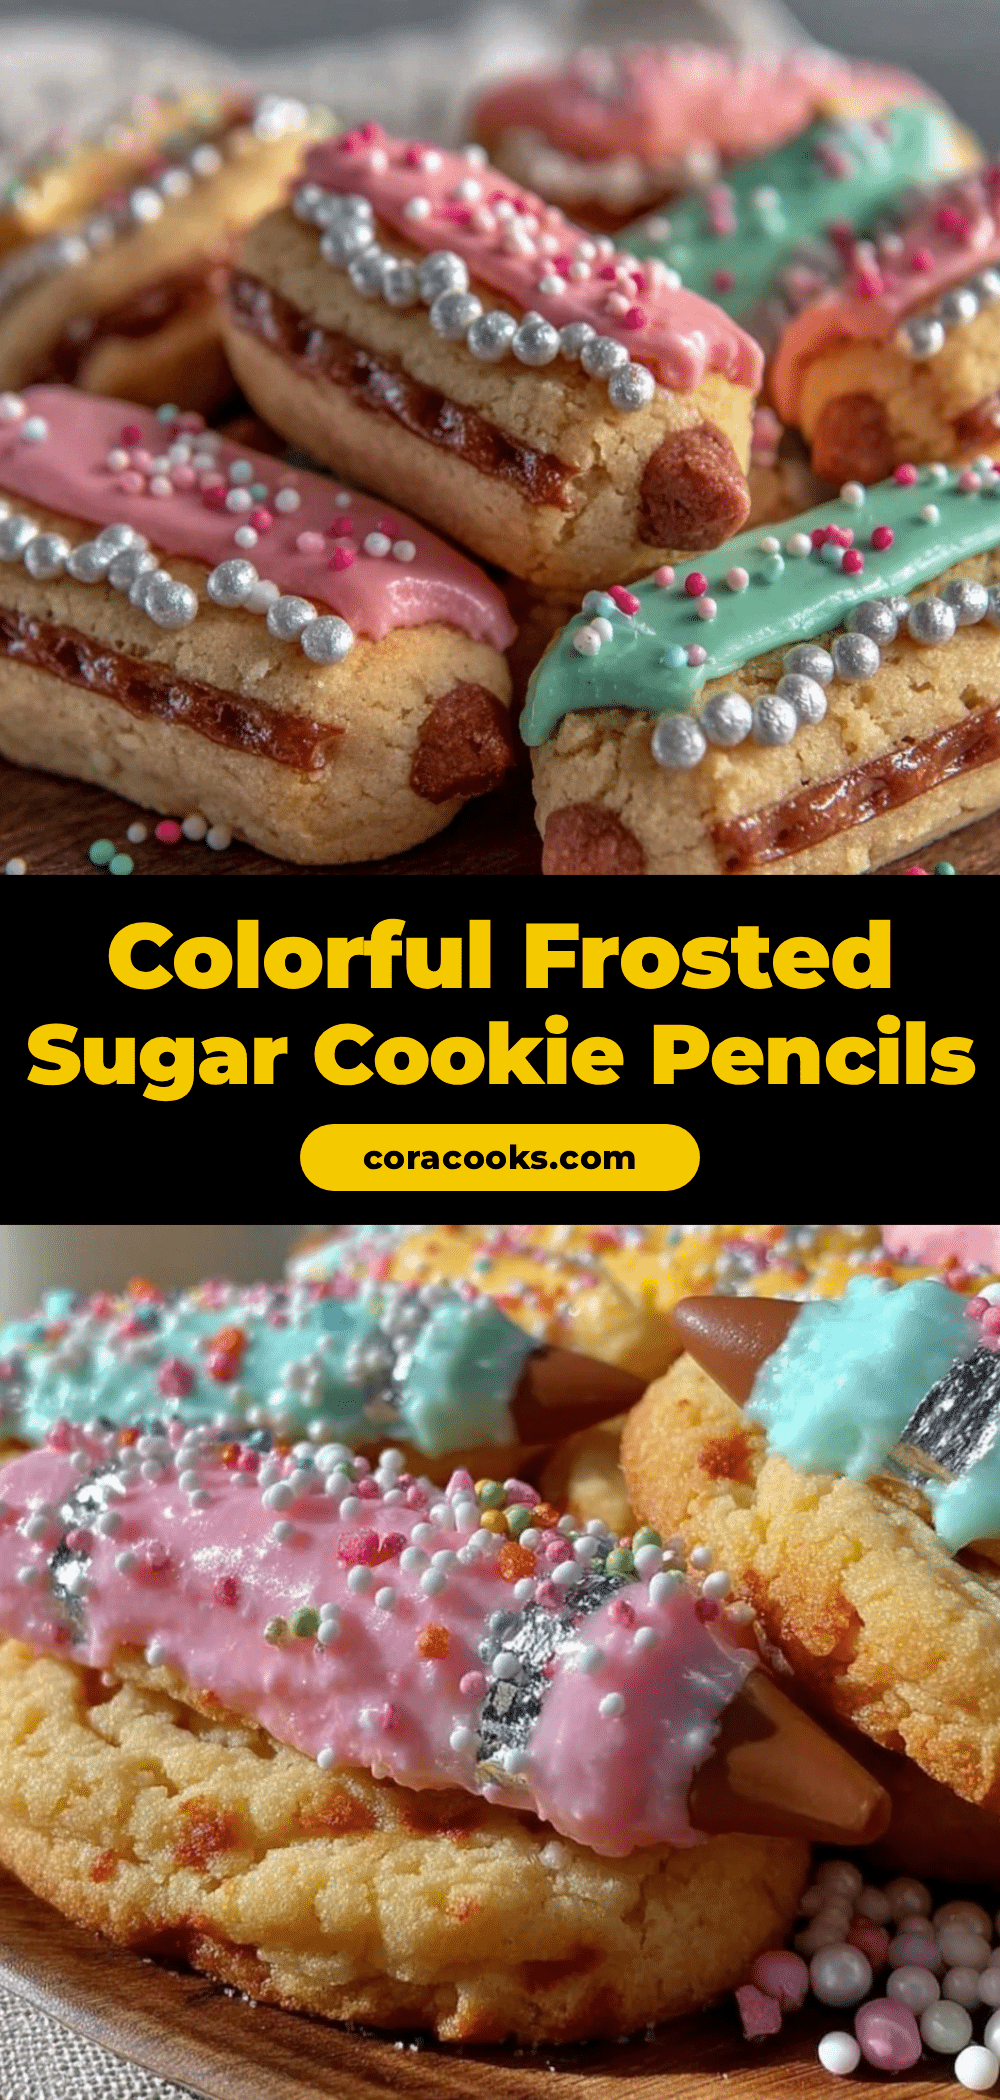
Perfect Frosted Sugar Cookie Pencils Easy Step-by-Step Decoration Guide
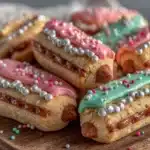
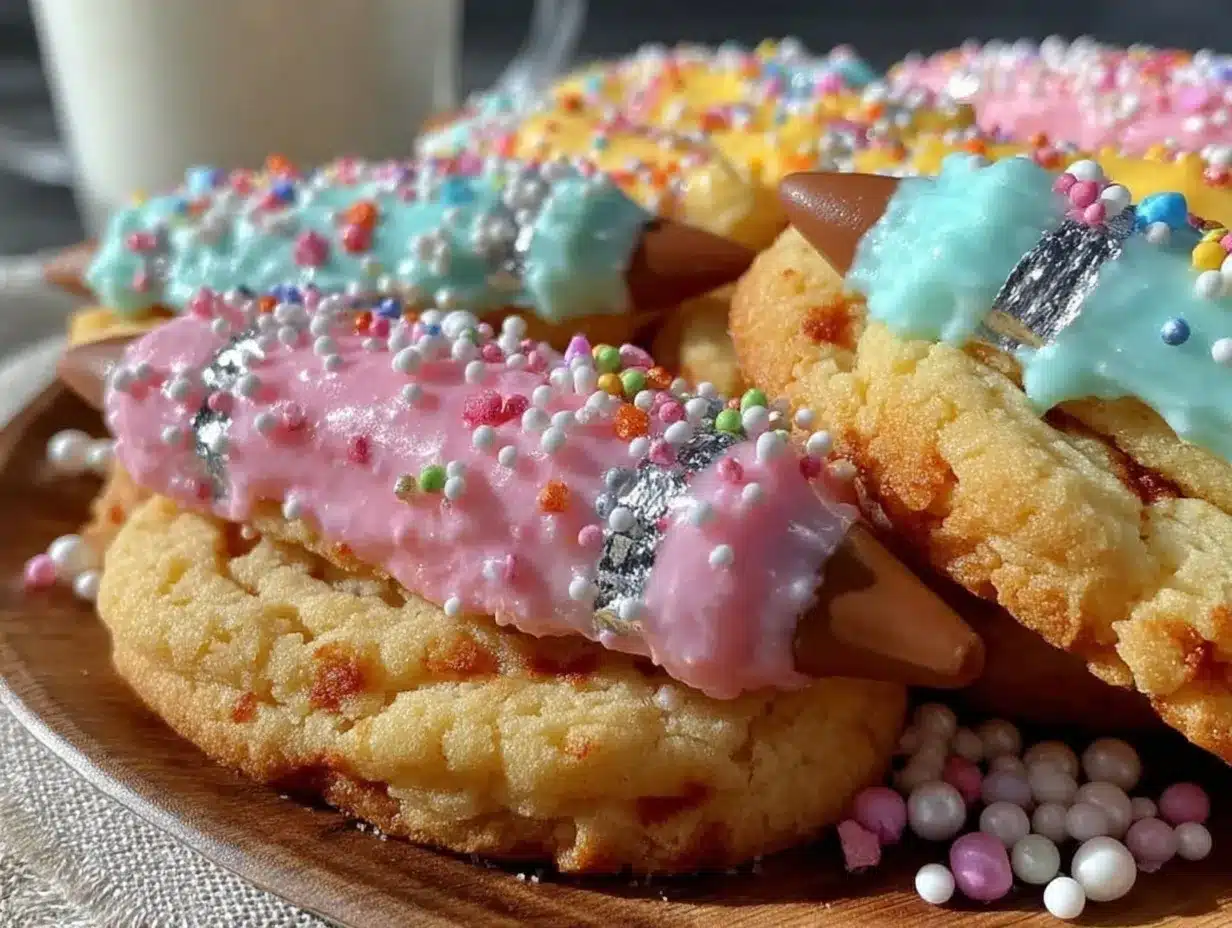
This recipe creates charming pencil-shaped sugar cookies with a tender center and crisp edges, topped with smooth, creamy frosting perfect for gifting and entertaining. The decorating process is approachable for beginners yet impressive enough for seasoned bakers.
- Prep Time: 15 minutes
- Cook Time: 10 minutes
- Total Time: 1 hour 25 minutes
- Yield: 24 cookies 1x
- Category: Dessert
- Cuisine: American
Ingredients
- 2 ¾ cups (345 g) all-purpose flour
- 1 teaspoon baking powder
- ½ teaspoon salt
- 1 cup (227 g) unsalted butter, softened
- 1 ½ cups (300 g) granulated sugar
- 1 large egg, room temperature
- 2 teaspoons pure vanilla extract
- 2 cups (240 g) powdered sugar, sifted
- 2–3 tablespoons milk (or dairy-free milk if preferred)
- 1 teaspoon vanilla extract
- Food coloring gels (optional)
- Edible markers or fine piping tips for details
- Mini chocolate chips or finely chopped nuts for the eraser tip
- Colored sugar or edible glitter for subtle sparkle
Instructions
- Mix dry ingredients: whisk together flour, baking powder, and salt in a medium bowl; set aside.
- Cream butter and sugar: beat softened butter with granulated sugar until light and fluffy, about 3–4 minutes.
- Add egg and vanilla: beat in egg and vanilla extract until fully combined.
- Combine wet and dry ingredients: gradually add flour mixture to butter mixture, mixing on low speed until just combined.
- Chill the dough: wrap dough in plastic wrap and chill for at least 1 hour or up to overnight.
- Preheat oven to 350°F (175°C) and line baking sheets with parchment paper or silicone mats.
- Roll and cut dough: roll dough to ¼ inch thickness on a floured surface; cut pencil shapes using cutter or knife; place cookies 1 inch apart on baking sheets.
- Bake for 8–10 minutes until edges start to turn golden; cool on baking sheet 5 minutes then transfer to cooling rack to cool completely.
- Prepare frosting: whisk powdered sugar, milk, and vanilla extract until smooth; adjust milk for desired consistency; divide for multiple colors if desired.
- Decorate: outline pencil shapes with thicker frosting, fill in with thinner frosting; add eraser details with mini chocolate chips or nuts; let frosting dry completely (about 2 hours) before stacking or packaging.
Notes
Chill dough thoroughly to prevent spreading and maintain shape. Let cookies cool completely before decorating to avoid frosting melting. Adjust frosting consistency for piping or flooding. Use a quick dip in warm water to clean cookie cutters between batches. Store cookies in airtight container at room temperature up to 3 days or freeze unfrosted for up to 3 months.
Nutrition
- Serving Size: 1 cookie pencil
- Calories: 150
- Fat: 7
- Carbohydrates: 22
- Protein: 1
Keywords: sugar cookies, pencil cookies, decorated cookies, easy sugar cookies, holiday cookies, back-to-school treats, cookie decorating