Love this? Save it for later!
Share the inspiration with your friends
My niece asked why I couldn’t just pour the Jello layers in reverse order. I started to explain why that wouldn’t work—then stopped. Honestly, I had no good reason. I just always did it the same way because that’s how my mom showed me years ago. So we tried it her way. The yellow layer sank straight to the bottom. We both just stared at the glass for a solid ten seconds before bursting out laughing.
That’s the thing about these Perfect Candy Corn Layered Jello Cups. They look like they require some kind of kitchen wizardry, but really, they just need a little patience and the right order of operations. I’ve been making these for fall parties and Halloween gatherings for years now, and I still get asked how I get those stripes so clean. The secret isn’t fancy equipment or a culinary degree—it’s letting each layer set properly before adding the next. That’s it. That’s the whole trick.
I’ll be honest with you, my first attempt was a total mess. The colors bled into each other like a bad watercolor painting. The orange and yellow turned into this muddy mess that looked nothing like candy corn. But I learned from that disaster, and now I’m sharing everything I figured out so you don’t have to make the same mistakes. Maybe you’ve been there—staring at a fridge full of half-set Jello, wondering if you should just dump it all in a bowl and call it a day.
What keeps me coming back to this recipe year after year is how it brings people together. There’s something about seeing those three distinct layers—orange, yellow, and white—that makes everyone smile. It’s nostalgic without being complicated. It’s festive without requiring a trip to a specialty store. And honestly, it’s just fun to make. Even after that failed attempt with my niece, we tried again the next weekend, and when those layers finally came out perfect, she looked at me and said, “See? My way taught us what not to do.” She wasn’t wrong.
Why You’ll Love This Recipe
These Perfect Candy Corn Layered Jello Cups are the kind of dessert that makes people think you spent hours in the kitchen when really, the hardest part is waiting for the layers to set. I’ve tested this recipe more times than I care to count, tweaking the ratios and timing until everything lined up just right. Here’s why I think you’ll love it as much as I do:
- No Baking Required: This is a no-oven, no-stove dessert that comes together with just boiling water and a refrigerator. Perfect for hot days when you don’t want to heat up the kitchen.
- Simple Ingredients: You only need three boxes of Jello, some cold water, and a little evaporated milk for the creamy white layer. Chances are you already have everything in your pantry.
- Perfect for Halloween Parties: These cups are the star of any fall gathering. Kids love the candy corn colors, and adults appreciate the nostalgic throwback to their own childhoods.
- Make-Ahead Friendly: You can prep these a day or two in advance, which makes party hosting so much less stressful. Just pull them out when guests arrive.
- Portion Control: Individual cups mean everyone gets their own serving, no cutting or scooping required. Plus, they look adorable sitting on a dessert table.
What makes this recipe different from other layered Jello desserts I’ve tried is the technique for getting the white layer just right. Most recipes use sour cream or cream cheese, but I found that evaporated milk gives you that creamy, opaque layer without altering the Jello’s texture. It sets up firm enough to hold its shape but stays soft and silky on the tongue. After countless batches and a few frustrating failures, this is the version that finally worked consistently. It’s not just another Jello recipe—it’s the one that finally made me stop searching for something better.
What Ingredients You Will Need
This recipe uses simple, store-bought ingredients to create something that looks far more complicated than it actually is. The magic happens through layering and patience, not expensive or hard-to-find items. Here’s what you’ll need to gather:
For the Orange Layer (Bottom)
- 1 box (3 oz) Jello, orange flavor (I prefer Jell-O brand for consistent setting, but store brands work fine too)
- 1 cup boiling water
- 1 cup cold water
For the Yellow Layer (Middle)
- 1 box (3 oz) Jello, lemon flavor
- 1 cup boiling water
- 1 cup cold water
For the White Layer (Top)
- 1 box (3 oz) Jello, unflavored gelatin (like Knox brand)
- 1/4 cup cold water
- 1/2 cup boiling water
- 1/2 cup evaporated milk (not sweetened condensed milk—they’re different!)
- 2 tablespoons sugar
- 1/2 teaspoon vanilla extract
A few notes on ingredients before we get started. The evaporated milk is the unsung hero here. I tried using regular milk once, and the layer came out translucent and sad-looking. Whole milk works in a pinch, but evaporated milk gives you that bright white, opaque finish that really makes the candy corn colors pop. If you’re dairy-free, full-fat coconut milk can work, though the flavor will be slightly different.
For the Jello flavors, stick with orange and lemon for the most authentic candy corn look. I’ve seen people try using peach or mango for the orange layer, but the color is never quite right. Lemon Jello has that specific bright yellow that matches the middle stripe of candy corn perfectly. Trust me on this one—I’ve tested the alternatives so you don’t have to.
The unflavored gelatin for the white layer might seem like an extra step, but it’s what gives that top layer its creamy texture and clean appearance. You can find it in the baking aisle near the flavored Jello boxes. If you absolutely can’t find it, you can use a box of white or vanilla flavored Jello, but the texture won’t be quite as smooth and the color might have a slight tint.
Equipment Needed
You don’t need much to make these Perfect Candy Corn Layered Jello Cups, which is part of what makes them so approachable. Here’s what I use every time:
- Clear plastic or glass cups: I use 9-ounce clear plastic cups for parties—they’re cheap, disposable, and show off the layers beautifully. For home, small glass tumblers or mason jars work great too. Just make sure they’re clear so the layers are visible.
- Three mixing bowls: You’ll need separate bowls for each layer to avoid cross-contamination of colors. I use medium-sized glass mixing bowls.
- Measuring cups and spoons: Accurate measurements matter here, especially for the white layer. A liquid measuring cup with a spout makes pouring easier.
- Whisk: A small whisk helps dissolve the gelatin completely without lumps. A fork works in a pinch, but whisking is faster and more thorough.
- Refrigerator space: This is honestly the most important piece of equipment. You need a flat, stable spot in your fridge where the cups can sit undisturbed for at least 4 hours total.
I bought a set of 12 clear plastic cups from a party supply store for about five dollars, and they’ve lasted through multiple Halloweens. If you’re using glass, just be careful when pouring hot liquid in—let the gelatin mixture cool slightly before adding it to glass cups to prevent cracking.
Preparation Method
Making these layered Jello cups is all about timing and patience. I’ve broken it down step by step so you can see exactly what to expect at each stage. Set aside a good chunk of time—most of it is waiting, but you need to be around to add each new layer.
Step 1: Prepare the Orange Layer (Bottom)
In a medium mixing bowl, empty the orange Jello powder. Add 1 cup of boiling water and whisk for about 2 minutes until the powder is completely dissolved. You shouldn’t see any granules floating around. Add 1 cup of cold water and stir to combine. Pour the mixture evenly into your cups, filling each about one-third of the way. For 6 cups, that’s roughly 1/3 cup per cup. Place the cups in the refrigerator and let them set for at least 1 hour, or until the Jello is firm to the touch. I usually give it 90 minutes to be safe.
Step 2: Prepare the Yellow Layer (Middle)
Once the orange layer is completely set—and I mean completely, not jiggly when you gently tap the cup—you can start the yellow layer. Repeat the same process with the lemon Jello: dissolve the powder in 1 cup of boiling water, add 1 cup of cold water, and stir. Let this mixture cool for about 10 minutes at room temperature before pouring. If it’s too warm, it can melt the top of the orange layer and cause bleeding. Gently pour the yellow mixture over the back of a spoon onto the orange layer to avoid disturbing it. Fill each cup another third of the way. Refrigerate for another 1 to 1.5 hours until firm.
Step 3: Prepare the White Layer (Top)
This step is a little different from the flavored Jello layers. In a small bowl, sprinkle the unflavored gelatin over 1/4 cup of cold water. Let it sit for about 5 minutes—this is called blooming, and it helps the gelatin dissolve smoothly. Add 1/2 cup of boiling water and whisk until the gelatin is fully dissolved. Stir in the sugar and vanilla extract until the sugar dissolves. Finally, whisk in the evaporated milk. The mixture should look opaque and creamy. Let it cool to room temperature—about 15 minutes—before pouring over the set yellow layer. Use the spoon trick again to pour gently. Refrigerate for at least 2 hours, or overnight for best results.
Step 4: Serve and Enjoy
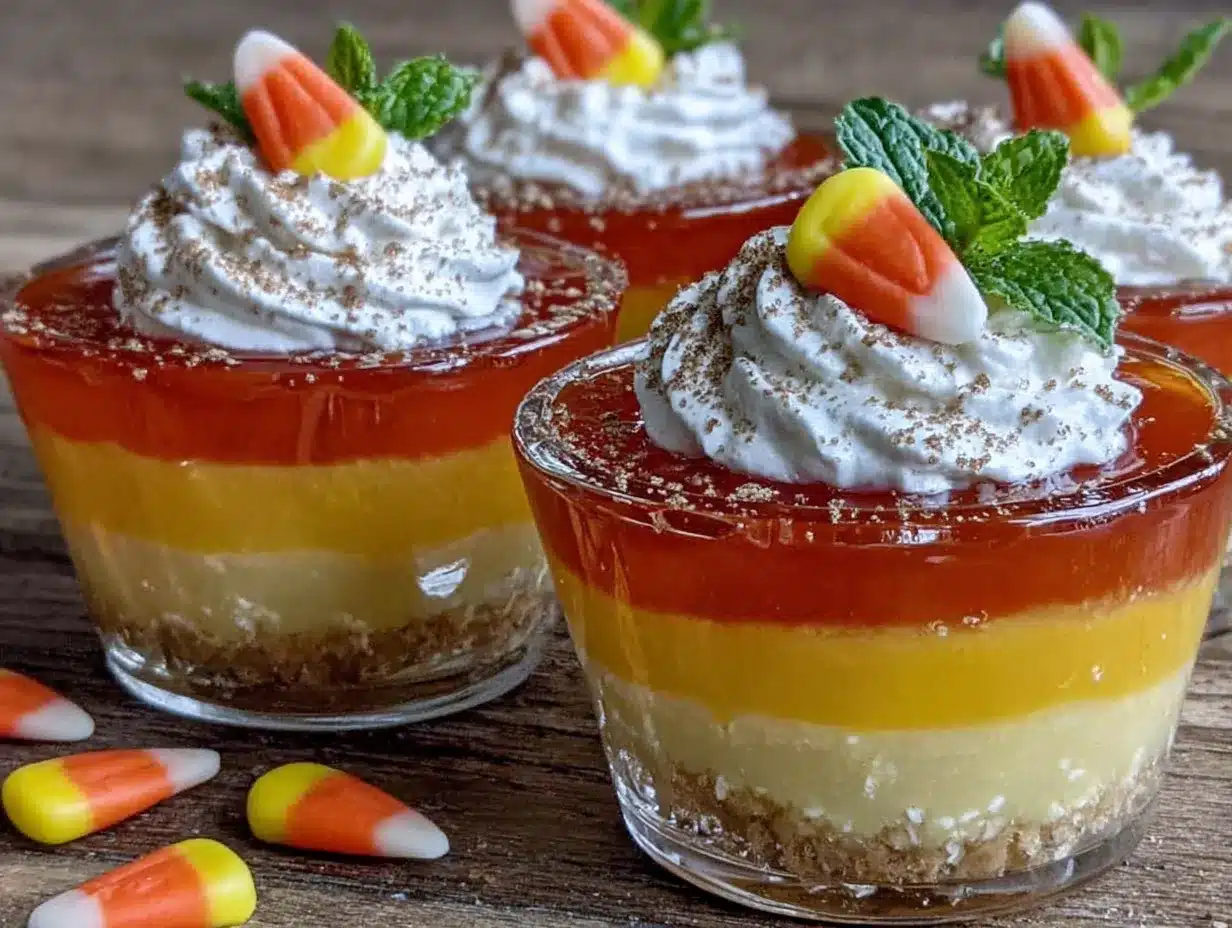
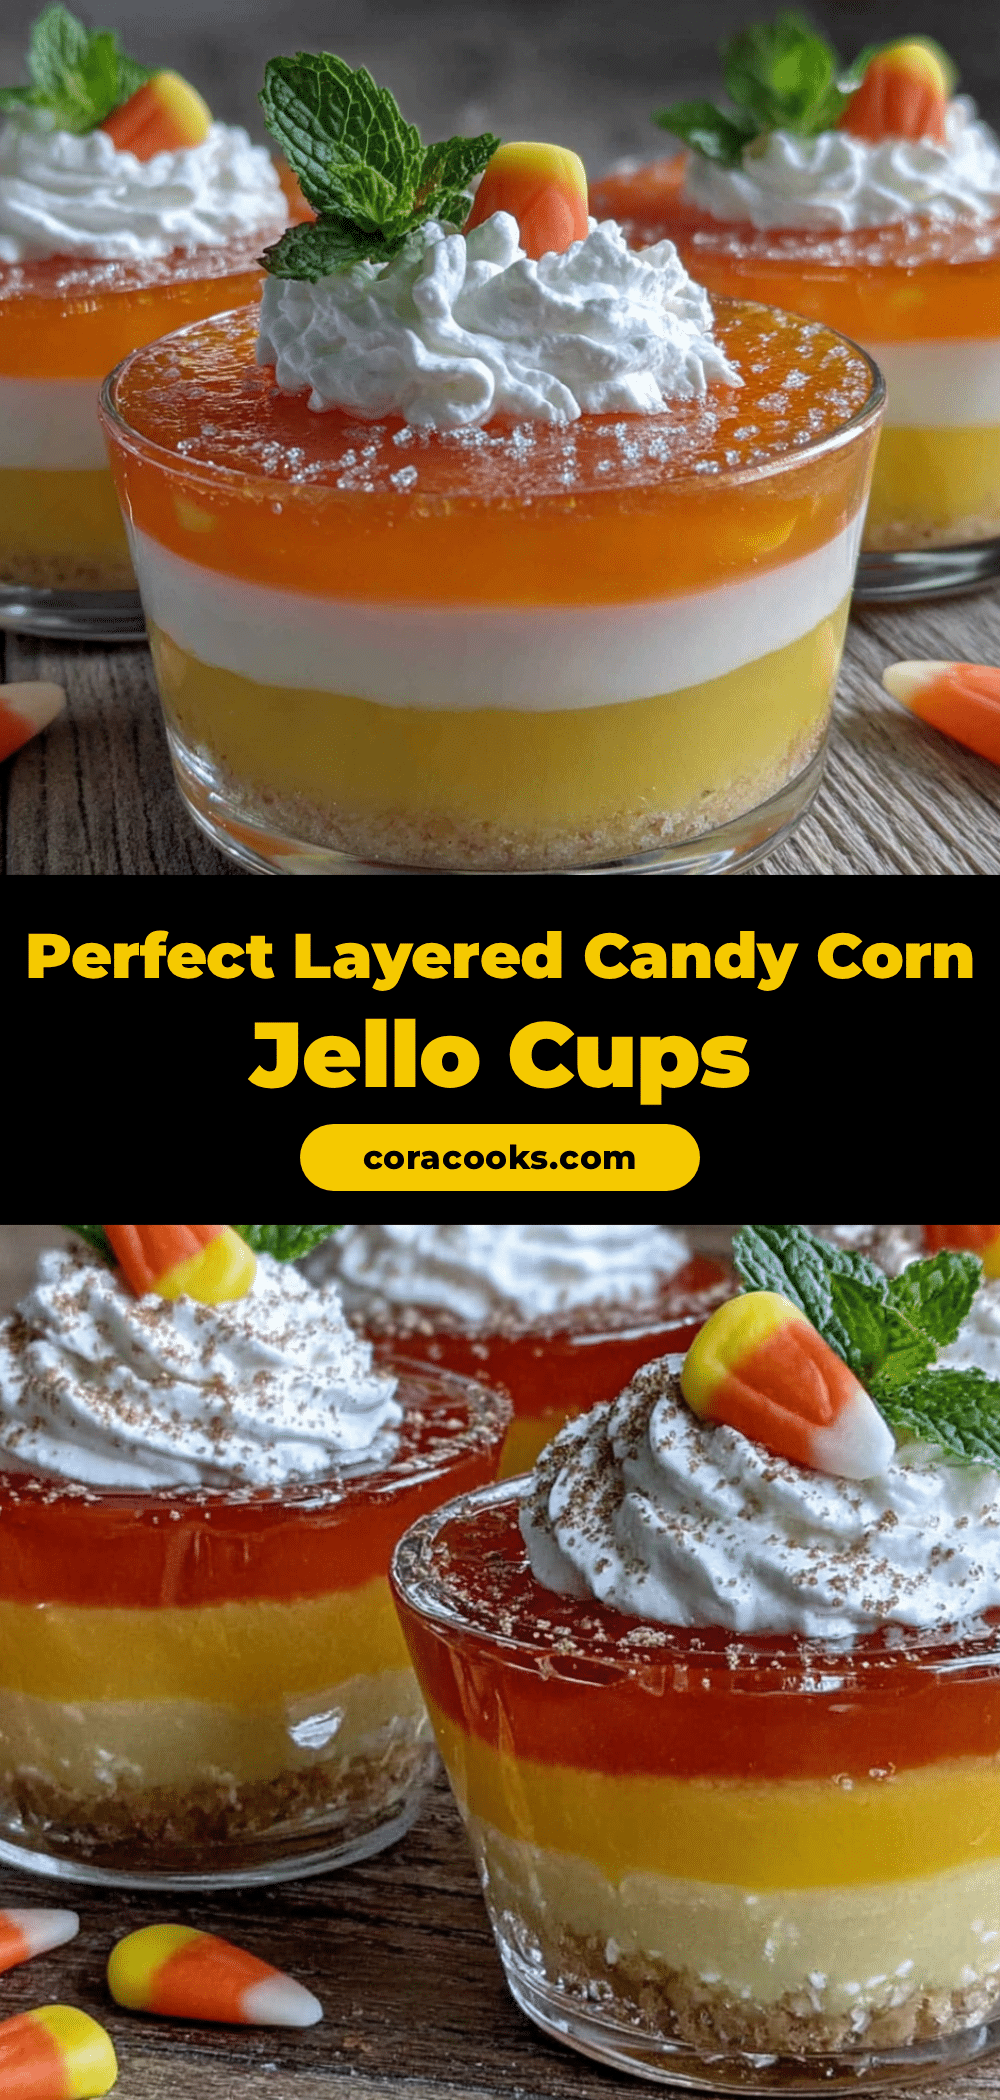
Once all three layers are fully set, your Perfect Candy Corn Layered Jello Cups are ready to serve. The cups should show three distinct, clean stripes: orange on the bottom, yellow in the middle, and white on top. If you’re serving these at a party, you can add a small candy corn on top of each cup for decoration. Keep them refrigerated until you’re ready to serve, as they can soften at room temperature after about 30 minutes.
Cooking Tips & Techniques
After making these cups more times than I can count, I’ve picked up a few tricks that make the process smoother and the results more consistent. Let me share what I’ve learned the hard way.
The biggest mistake I see people make is rushing the setting time. I get it—you’re excited, the colors look beautiful, and you want to see the final result. But if the orange layer isn’t fully firm before you add the yellow, you’ll end up with a muddy mess. I once tried to speed things up by putting the cups in the freezer for 20 minutes instead of the fridge for an hour. The edges set, but the center was still liquid, and the yellow layer sank right through. Learn from my impatience.
Temperature matters more than you think. When you pour each new layer, make sure it’s cooled to room temperature first. Hot liquid will melt the layer below it, causing those colors to bleed together. I usually let my mixtures sit on the counter for 10-15 minutes after stirring in the cold water. If you’re in a hurry, you can set the bowl in a larger bowl of ice water and stir gently until it cools, but don’t let it start setting in the bowl.
Pour over the back of a spoon. This is an old bartender trick that works perfectly for layered Jello. Hold a spoon upside down just above the set layer, and pour the new mixture slowly over the back of the spoon. This disperses the liquid gently instead of letting it drop directly onto the surface below. It takes a little longer, but the results are worth it.
Use clear cups for the best visual effect. I know I mentioned this in the equipment section, but it bears repeating. The whole point of these cups is the visual wow factor of those three distinct layers. Opaque cups hide all that hard work. Clear plastic cups from the party store are cheap and show off the stripes beautifully.
Variations & Adaptations
Once you’ve mastered the basic candy corn look, there are plenty of ways to make these cups your own. Here are some variations I’ve tried and loved:
Holiday Color Themes: The technique works for any holiday. For Christmas, try red, green, and white layers. For the Fourth of July, go with red, white, and blue. For Easter, pastel pink, yellow, and lavender. Just match your Jello flavors to the colors you want, and use the same evaporated milk white layer for the top or middle stripe.
Dairy-Free Version: Swap the evaporated milk for full-fat coconut milk from a can. Shake it well before measuring, and add an extra tablespoon of sugar to balance the coconut flavor. The texture will be slightly softer, but the color stays nice and white. I’ve made this version for friends with dairy allergies, and it’s always well-received.
Adult Version: For grown-up gatherings, substitute half the cold water in each layer with vodka or coconut rum. Keep in mind that alcohol can affect how well the gelatin sets, so you might need to add an extra half teaspoon of unflavored gelatin to each layer. The result is a boozy treat that still looks festive and fun.
Sugar-Free Option: Use sugar-free Jello boxes for the orange and yellow layers. For the white layer, use sugar-free unflavored gelatin and substitute the sugar with a granulated sweetener like Stevia or monk fruit. The texture will be slightly different—sugar-free Jello tends to be a bit softer—but the visual effect is the same.
Serving & Storage Suggestions
These cups are best served cold, straight from the refrigerator. I like to take them out about 10 minutes before serving so they’re not ice-cold, but any longer than that and they start to soften. For parties, I arrange them on a tray with a few candy corns scattered around for decoration. You can also top each cup with a dollop of whipped cream and a single candy corn for an extra special touch.
Storage is straightforward. Keep the cups covered with plastic wrap or their original lids in the refrigerator. They’ll stay fresh for up to 5 days, though the texture is best within the first 3 days. After that, the layers can start to weep a little moisture, and the white layer may become slightly grainy. I don’t recommend freezing these—the texture turns watery and unappetizing when thawed.
If you’re making these for a party, I recommend preparing them the day before. The extra time in the fridge helps the layers firm up nicely, and it’s one less thing to worry about on the day of your event. Just add any decorative toppings right before serving.
These cups pair beautifully with other Halloween treats. I’ve served them alongside pumpkin spice cookies and caramel apples at fall parties, and they always get compliments. For a simpler dessert table, they stand alone just fine—the visual impact is strong enough to carry the show.
Nutritional Information & Benefits
Let’s be real—these are a treat, not a health food. But here’s what you should know if you’re keeping track:
Per serving (one cup made with regular Jello and evaporated milk): approximately 120-140 calories, 2g fat, 28g carbohydrates, 3g protein. The sugar content is around 22g per cup, mostly coming from the Jello and the small amount of added sugar in the white layer.
On the positive side, gelatin is a good source of collagen, which supports joint health and skin elasticity. The evaporated milk adds a small amount of calcium and vitamin D. If you use sugar-free Jello, you can cut the sugar content down to about 5g per serving, making this a more diet-friendly option.
For those with dietary restrictions, note that this recipe contains dairy from the evaporated milk. It’s gluten-free as written, and the gelatin is not suitable for vegetarians or vegans. If you’re looking for a plant-based alternative, agar-agar can replace the gelatin, though the texture will be firmer and less silky.
I personally see these as a fun, occasional treat rather than an everyday dessert. They’re perfect for celebrations and holidays when you want something special without spending hours in the kitchen. Everything in moderation, right?
Conclusion
These Perfect Candy Corn Layered Jello Cups are one of those recipes that looks impressive but is secretly simple. The three layers capture the nostalgic look of candy corn without the sticky teeth or artificial aftertaste. Every time I bring these to a gathering, someone asks for the recipe, and I love watching their face when I tell them how easy they are.
I hope you give these a try, whether for Halloween, a fall potluck, or just because you’re craving something colorful and fun. Don’t be afraid to customize the colors or flavors to match your own celebrations. And if your first attempt isn’t perfect—if the colors bleed a little or the layers aren’t as straight as you’d like—that’s okay. My first batch was a mess, and I still ate the whole thing. It still tasted good.
I’d love to hear how yours turn out! Drop a comment below and let me know if you tried any variations or if you have tips of your own to share. And if you’re looking for more easy dessert ideas, check out my no-bake pumpkin cheesecake or these easy Halloween cookie bars for more festive fun. Happy layering!
Frequently Asked Questions
Can I use different flavors of Jello for the layers?
Absolutely! The technique works with any flavor combination. Just keep in mind that you want the colors to contrast nicely. For candy corn specifically, orange and lemon give the most authentic look, but you could try strawberry, lime, and blueberry for a different color scheme.
How long do these Jello cups need to set?
Each layer needs at least 1 hour to set firmly before you add the next one. The white layer needs 2 hours minimum. So total prep time is about 4-5 hours, plus cooling time between layers. I usually start them in the morning and they’re ready by evening.
Can I make these in a large dish instead of individual cups?
Yes, you can use a 9×13 glass dish or similar. Just pour each layer the same way, letting each set before adding the next. Once fully set, cut into squares with a sharp knife. The presentation isn’t quite as dramatic as individual cups, but it’s great for serving a crowd.
Why did my layers bleed together?
This usually happens for one of two reasons: either the layer below wasn’t fully set before you added the next one, or the new layer was too warm when you poured it. Make sure each layer is completely firm to the touch, and let your mixtures cool to room temperature before pouring. The spoon-pouring technique also helps prevent disturbance.
Can I use sweetened condensed milk instead of evaporated milk?
I don’t recommend it. Sweetened condensed milk is much thicker and sweeter than evaporated milk, and it will make the white layer too dense and overly sweet. The texture won’t be right, and the layer might not set properly. Stick with evaporated milk for the best results.
Pin This Recipe!
Perfect Candy Corn Layered Jello Cups: Easy 3-Layer Dessert
These Perfect Candy Corn Layered Jello Cups are a fun, no-bake dessert that captures the nostalgic look of candy corn with three distinct layers of orange, yellow, and white Jello. Simple ingredients and a little patience create a festive treat perfect for Halloween parties and fall gatherings.
- Prep Time: 15 minutes
- Cook Time: 0 minutes
- Total Time: 4 hours 30 minutes
- Yield: 6 servings 1x
- Category: Dessert
- Cuisine: American
Ingredients
- 1 box (3 oz) Jello, orange flavor
- 1 cup boiling water
- 1 cup cold water
- 1 box (3 oz) Jello, lemon flavor
- 1 cup boiling water
- 1 cup cold water
- 1 box (3 oz) Jello, unflavored gelatin
- 1/4 cup cold water
- 1/2 cup boiling water
- 1/2 cup evaporated milk
- 2 tablespoons sugar
- 1/2 teaspoon vanilla extract
Instructions
- Prepare the orange layer: In a medium bowl, dissolve orange Jello powder in 1 cup boiling water, whisking for 2 minutes. Add 1 cup cold water and stir. Pour evenly into clear cups, filling each about one-third full. Refrigerate for at least 1 hour until firm.
- Prepare the yellow layer: Once orange layer is set, dissolve lemon Jello powder in 1 cup boiling water, add 1 cup cold water, and stir. Let cool for 10 minutes at room temperature. Gently pour over the back of a spoon onto the orange layer, filling cups another third. Refrigerate for 1 to 1.5 hours until firm.
- Prepare the white layer: In a small bowl, sprinkle unflavored gelatin over 1/4 cup cold water and let sit for 5 minutes. Add 1/2 cup boiling water and whisk until dissolved. Stir in sugar and vanilla extract until sugar dissolves. Whisk in evaporated milk. Let cool to room temperature (about 15 minutes). Pour gently over the back of a spoon onto the yellow layer. Refrigerate for at least 2 hours or overnight.
- Serve: Once all layers are set, serve cold. Optionally top with a candy corn for decoration. Keep refrigerated until serving.
Notes
Ensure each layer is fully set before adding the next to prevent colors from bleeding. Let mixtures cool to room temperature before pouring. Use the back-of-spoon technique for gentle pouring. Evaporated milk is key for the white layer; do not substitute with sweetened condensed milk. For best results, prepare a day in advance.
Nutrition
- Serving Size: 1 cup
- Calories: 130
- Sugar: 22
- Sodium: 85
- Fat: 2
- Saturated Fat: 1
- Carbohydrates: 28
- Protein: 3
Keywords: candy corn, Jello cups, layered Jello, Halloween dessert, no-bake dessert, fall dessert, easy Jello recipe


