Love this? Save it for later!
Share the inspiration with your friends
My husband claimed to hate corn casserole for fifteen years. Fifteen years! He’d make a face anytime it showed up at a potluck or holiday table. “It’s just… mushy cornbread,” he’d say, waving a hand like he was dismissing a bad movie. I believed him. Honestly, I didn’t push it. Why would I? There are a million other side dishes in the world.
Then, last Thanksgiving, my sister-in-law brought a version to dinner. I set it on the buffet, not thinking much of it. Later, I walked back into the kitchen to grab a drink and found him standing at the counter, fork in hand, scraping the last bits from the baking dish. “What is this?” he asked, looking almost offended. “It’s corn casserole,” I said. He just shook his head and went back for another scoop. That’s when I knew I had to get the recipe. It took some serious begging, but she finally shared the secret: a box of Jiffy mix, a can of creamed corn, a mountain of sharp cheddar, and a small can of green chiles. It was a game-changer.
This kid-approved Jiffy corn casserole with cheddar and green chiles is the version that finally broke through a decade-and-a-half of stubborn refusal. It’s creamy, a little bit sweet, and has just enough savory kick from the cheese and chiles to keep things interesting. I’ve made it for every family dinner since, and it’s the first dish to disappear every single time. Maybe you’ve got a picky eater at your table who swears they don’t like something. I get it. This one might just change their mind, too.
Why You’ll Love This Recipe
Let me tell you why this recipe has earned a permanent spot in my weekly rotation. I’ve tested it a dozen times, tweaked the cheese ratio, and even tried it with different cornbread mixes. This version? It’s the one that works every single time.
- Quick & Easy: This comes together in about 10 minutes of active prep. The oven does the rest of the work. It’s perfect for a busy weeknight when you need a side dish that doesn’t demand your full attention.
- Simple Ingredients: You probably have most of these in your pantry right now. A box of Jiffy mix, canned corn, sour cream, butter, eggs, cheese, and green chiles. No fancy grocery trips needed.
- Perfect for Family Dinners: This dish bridges the gap between what adults want and what kids will actually eat. It’s creamy and mild, but the green chiles add a subtle warmth that keeps it from being boring.
- Crowd-Pleaser: I’ve served this at potlucks, holiday dinners, and casual weeknight meals. It gets rave reviews from kids and adults alike. My own kids, who are usually suspicious of anything green, gobble up the chiles without a second thought.
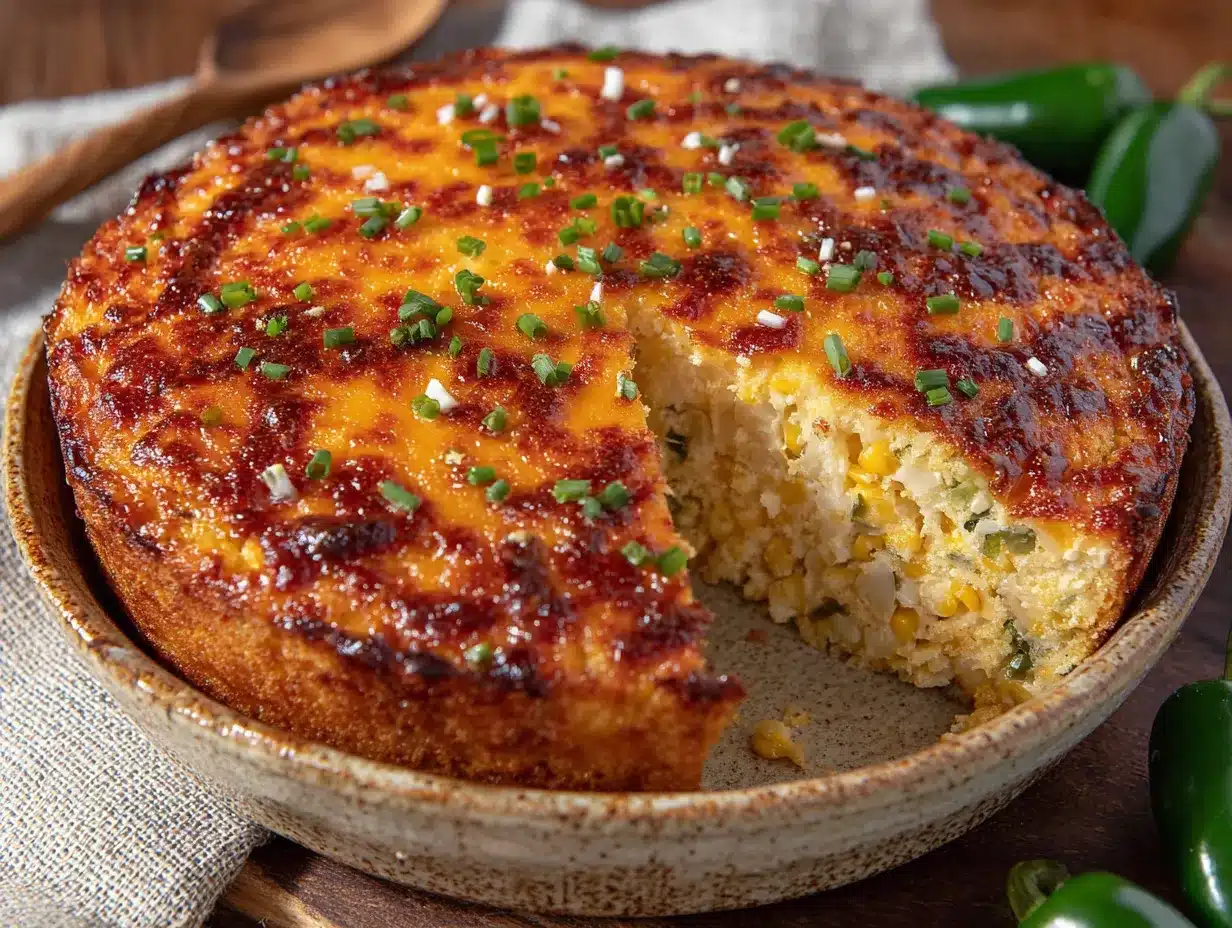
- Unbelievably Delicious: The texture is what gets you. It’s not dry like regular cornbread. It’s soft, almost pudding-like, with pockets of melted cheddar and little bursts of corn. It’s comfort food at its finest.
What makes this recipe different from the rest is the balance. The Jiffy mix gives it that familiar sweetness, but the sharp cheddar and green chiles cut through it with a savory, slightly tangy edge. It’s not just another corn casserole—it’s the one that makes you go back for seconds. And honestly? It’s the kind of dish that makes you close your eyes after the first bite. Pure satisfaction.
What Ingredients You Will Need
This recipe uses simple, everyday ingredients to build something that tastes far more complex than it is. Most of these are pantry staples, which makes this a great go-to when you need a side dish in a pinch.
For the Casserole Base
- 1 box (8.5 oz) Jiffy Corn Muffin Mix – This is the backbone of the recipe. I’ve tried other brands, but Jiffy gives the perfect sweetness and texture. Don’t substitute the honey variety here—the regular mix is what you want.
- 1 can (15 oz) whole kernel corn, drained – Adds texture and little bursts of sweetness. I prefer Del Monte or Green Giant for consistent quality.
- 1 can (15 oz) creamed corn – This is what makes the casserole so moist and creamy. It’s non-negotiable, honestly. The creamed corn adds body and richness that you can’t get from just milk or butter.
- 1 cup (8 oz) sour cream – Full-fat works best here for richness and structure. If you need to lighten it up, Greek yogurt works, but the texture will be slightly tangier and less tender.
- ½ cup (1 stick) unsalted butter, melted – Adds richness and helps the top get golden and slightly crisp. Salted butter works too—just reduce the added salt slightly.
- 2 large eggs, lightly beaten – Helps bind everything together and gives the casserole structure. Let them come to room temperature for best results.
For the Cheesy, Spicy Layer
- 2 cups (8 oz) sharp cheddar cheese, shredded – I use block cheese and shred it myself. Pre-shredded cheese has anti-caking agents that prevent it from melting as smoothly. Sharp cheddar gives the most flavor without being overwhelming.
- 1 can (4 oz) diced green chiles, drained – These are mild, so don’t worry about heat. They add a subtle earthiness and a little bit of texture. I prefer Ortega or Hatch brands for consistent flavor.
Optional Add-Ins
- ¼ cup chopped fresh cilantro – For garnish and a fresh finish.
- Pinch of cayenne pepper – If you want a little more heat, add this to the batter.
- ½ cup cooked, crumbled bacon – Because bacon makes everything better. Stir it in with the cheese for a smoky twist.
Equipment Needed
You don’t need a fancy kitchen to pull this off. Here’s what you’ll need:
- A 9×13-inch baking dish – Glass or ceramic works best. Metal pans can cause the edges to brown too quickly. If you only have a metal pan, reduce the oven temperature by 25°F.
- A large mixing bowl – Any big bowl will do. I use a simple stainless steel one.
- A whisk or wooden spoon – For mixing the batter. A whisk works best to break up any lumps in the Jiffy mix.
- A box grater or food processor – For shredding the cheese from a block. A box grater is cheap and works perfectly. If you use a food processor, use the shredding disc.
- Measuring cups and spoons – For accuracy. Baking is a science, even for a simple casserole.
- Non-stick cooking spray or butter – For greasing the baking dish. Don’t skip this step, or you’ll be scraping casserole off the bottom for days.
Preparation Method
Follow these steps carefully, and you’ll have a perfect casserole every time. I’ve included time estimates and sensory cues so you know exactly what to look for.
- Preheat your oven to 350°F (175°C). Spray a 9×13-inch baking dish with non-stick cooking spray or grease it lightly with butter. Set it aside while you prepare the batter.
- In a large mixing bowl, combine the dry ingredients. Add the box of Jiffy Corn Muffin Mix. If you’re adding a pinch of cayenne, stir it in now. Whisk briefly to break up any clumps.
- Add the wet ingredients. Pour in the drained whole kernel corn, the creamed corn, the sour cream, the melted butter, and the beaten eggs. Stir until just combined. The batter will be thick and slightly lumpy—that’s okay. Don’t overmix, or the casserole will be tough. You want a few small lumps remaining. The batter should look like a thick, chunky pancake batter.
- Fold in the cheese and chiles. Add 1 ½ cups of the shredded cheddar cheese and the drained green chiles. Reserve the remaining ½ cup of cheese for the top. Gently fold everything together with a spatula until the cheese and chiles are evenly distributed. The batter will look studded with little green flecks and orange cheese.
- Pour the batter into the prepared baking dish. Use a spatula to spread it evenly. The batter should be about 1 to 1 ½ inches thick in the dish. Don’t smooth it too much—a slightly uneven surface creates nice texture as it bakes.
- Sprinkle the remaining cheese on top. Evenly distribute the reserved ½ cup of shredded cheddar over the batter. This will create a golden, bubbly crust that’s absolutely irresistible.
- Bake for 45 to 50 minutes. The casserole is done when the edges are golden brown and slightly pulling away from the sides of the dish. The center should be set but still slightly jiggly—it will continue to set as it cools. A toothpick inserted into the center should come out clean or with a few moist crumbs. The top should be a deep golden brown with bubbling cheese.
- Let it rest for 10 minutes before serving. This is crucial. The casserole needs time to firm up so it doesn’t turn into a soupy mess when you cut into it. During this time, the residual heat will finish cooking the center. The aroma of melted cheese and sweet corn will fill your kitchen—it’s hard to wait, but trust me.
- Garnish and serve. Sprinkle fresh cilantro on top if you’re using it. Cut into squares and serve warm. The texture should be soft, creamy, and slightly custard-like, with a golden, slightly crisp top.
Cooking Tips & Techniques
I’ve made this casserole more times than I can count, and I’ve learned a few things the hard way. Here are my best tips for getting it right every time.
- Don’t overmix the batter. I know it’s tempting to keep stirring until it’s perfectly smooth, but that develops the gluten in the corn muffin mix and makes the casserole dense and tough. Stop mixing as soon as the dry ingredients are moistened. A few lumps are your friend.
- Shred your own cheese. I cannot stress this enough. Pre-shredded cheese is coated in cellulose and starches to prevent clumping, which also prevents it from melting smoothly. You’ll end up with a grainy texture instead of that luscious, gooey melt. A block of sharp cheddar and a box grater take two minutes, and the difference is night and day.
- Let the casserole rest. The first time I made this, I cut into it immediately because I couldn’t wait. It was a runny, disappointing mess. That 10-minute rest is non-negotiable. It allows the starches to set and the casserole to firm up into that perfect, sliceable texture.
- Watch your oven temperature. Ovens vary wildly. If your casserole is browning too quickly on top but still jiggly in the center, tent it loosely with foil for the last 15 minutes of baking. If it’s not browning at all, your oven might run cool—increase the temperature by 25°F next time.
- Use room temperature eggs. Cold eggs can cause the melted butter to seize up, creating a lumpy batter. Let your eggs sit on the counter for 15 minutes before you start. If you’re in a hurry, place them in a bowl of warm water for 5 minutes.
- Double the recipe for a crowd. This casserole disappears fast. If I’m taking it to a potluck or holiday dinner, I double everything and bake it in a 9×13-inch dish. It will need an extra 10-15 minutes of baking time, so keep an eye on it.
Variations & Adaptations
This recipe is incredibly flexible. Here are a few ways to make it your own.
- Spicy Southwest Version: Add ½ cup of diced jalapeños (fresh or pickled) and swap the sharp cheddar for pepper jack cheese. The heat level goes up a notch, but it’s still family-friendly. I made this for a game day party, and it was gone in 20 minutes.
- Bacon & Chive Twist: Cook 6 slices of bacon until crispy, crumble them, and stir them into the batter along with ¼ cup of chopped fresh chives. The smoky, salty bacon pairs beautifully with the sweet corn. This is my personal favorite variation for Sunday brunch.
- Vegetable-Packed Version: Sauté 1 cup of diced bell peppers (any color) and ½ cup of diced onion in a little butter until softened. Fold them into the batter along with the cheese and chiles. It adds color, texture, and a little extra nutrition. My kids didn’t even notice the peppers.
- Gluten-Free Option: Substitute the Jiffy mix with a gluten-free cornbread mix. I’ve used Bob’s Red Mill Gluten-Free Cornbread Mix with great results. The texture is slightly denser, but the flavor is still spot-on. Make sure all other ingredients are certified gluten-free.
- Dairy-Free Adaptation: Use dairy-free sour cream (I like Kite Hill or Tofutti), a plant-based butter like Miyoko’s, and a dairy-free shredded cheddar. The texture will be a bit less creamy, but it still holds together well. I tested this for a friend with a dairy allergy, and she said it was the best she’d had in years.
Serving & Storage Suggestions
This casserole is incredibly versatile when it comes to serving. Here’s how to make the most of it.
- Serving Temperature: Serve it warm, straight from the oven. The cheese should be melted and bubbly, and the texture should be soft and custard-like. If it cools down, you can pop it back in a 300°F oven for 10 minutes to reheat.
- Presentation: Cut it into squares and serve on a platter. Garnish with fresh cilantro, a sprinkle of smoked paprika, or a dollop of sour cream. For a casual dinner, I just set the baking dish on the table with a spatula—no need to be fancy.
- Complementary Dishes: This casserole pairs beautifully with grilled or roasted meats. Try it alongside smoky chipotle BBQ chicken, a simple roasted pork loin, or even a hearty chili. It also works as a side for breakfast—think scrambled eggs and bacon.
- Storage: Store leftovers in an airtight container in the refrigerator for up to 4 days. The flavors actually meld and deepen overnight, so it might taste even better the next day.
- Reheating: The best way to reheat is in the oven at 325°F for 10-15 minutes. The microwave works in a pinch, but the texture will be softer and less appealing. If you’re using the microwave, heat in 30-second intervals and stop as soon as it’s warm.
- Freezing: This casserole freezes beautifully. Bake it as directed, let it cool completely, then wrap it tightly in plastic wrap and foil. Freeze for up to 3 months. To serve, thaw overnight in the refrigerator and reheat in a 350°F oven for 20-25 minutes, or until warmed through. The texture remains remarkably close to fresh.
Nutritional Information & Benefits
Here’s a rough breakdown of what you’re getting in each serving. Keep in mind that these values are estimates and will vary based on specific brands and any substitutions you make.
| Nutrient | Per Serving (1/8 of recipe) |
|---|---|
| Calories | 320 |
| Total Fat | 18g |
| Saturated Fat | 10g |
| Cholesterol | 75mg |
| Sodium | 580mg |
| Total Carbohydrates | 32g |
| Dietary Fiber | 2g |
| Sugars | 8g |
| Protein | 10g |
Health Benefits: Corn is a good source of fiber and antioxidants like lutein and zeaxanthin, which support eye health. The cheddar cheese provides calcium and protein, essential for strong bones and muscles. While this isn’t a low-calorie dish, it’s a satisfying side that can help you feel full and reduce the urge to snack on less nutritious options.
Dietary Considerations: This recipe is vegetarian. It contains gluten, dairy, and eggs, so it’s not suitable for those with allergies to those ingredients. For a gluten-free or dairy-free version, see the variations above.
Conclusion
This kid-approved Jiffy corn casserole with cheddar and green chiles is more than just a side dish—it’s a story on a plate. It’s the recipe that broke through years of stubborn refusal and became a family staple. It’s proof that sometimes, the simplest combinations are the most rewarding.
I love this recipe because it’s forgiving. You can tweak it, double it, or add your own spin, and it always delivers. It’s the kind of dish that makes you feel like a good cook without any stress. Whether you’re feeding picky kids, impressing guests, or just treating yourself, this casserole delivers every single time.
I’d love to hear how it turns out for you. Did you add bacon? Swap the cheese? Did your own picky eater surprise you? Drop a comment below and let me know. And if you make it for your next family dinner, tag me on social media—I can’t wait to see your version. Happy cooking!
Frequently Asked Questions
Can I use a different brand of cornbread mix?
Yes, you can. I’ve tested this with store-brand cornbread mixes, and they work fine. The texture and sweetness will vary slightly. Jiffy is the sweetest, which balances the savory cheese and chiles perfectly. If you use a less sweet mix, you might want to add a tablespoon of sugar to the batter.
Can I make this casserole ahead of time?
Absolutely. You can assemble the casserole up to 24 hours in advance, cover it, and refrigerate it. When you’re ready to bake, let it sit at room temperature for 30 minutes, then bake as directed. You may need to add 5-10 minutes to the baking time since it’s starting from cold.
Can I use frozen corn instead of canned?
Yes, but you’ll need to thaw and drain it first. I recommend using frozen corn that has been thawed and patted dry with a paper towel to remove excess moisture. Canned corn is more convenient and gives a consistent texture, but frozen works in a pinch.
How do I know when the casserole is fully baked?
The edges should be golden brown and pulling away from the sides of the dish. The center should be set but still slightly jiggly—it will firm up as it cools. A toothpick inserted into the center should come out clean or with a few moist crumbs. The top should be a deep golden brown with bubbling cheese.
Can I make this in a smaller dish?
Yes. If you want a thicker casserole, use an 8×8-inch baking dish. The baking time will increase by 10-15 minutes because the batter is deeper. Keep an eye on it and test with a toothpick. If you want a thinner casserole, use a larger dish, but reduce the baking time by 5-10 minutes.
Pin This Recipe!

Kid-Approved Jiffy Corn Casserole with Cheddar & Green Chiles

This creamy, cheesy corn casserole uses Jiffy mix, creamed corn, sharp cheddar, and green chiles for a savory-sweet side dish that even picky eaters love. It’s quick to prepare and perfect for family dinners, potlucks, or holidays.
- Prep Time: 10 minutes
- Cook Time: 45 minutes
- Total Time: 55 minutes
- Yield: 8 servings 1x
- Category: Side Dish
- Cuisine: American
Ingredients
- 1 box (8.5 oz) Jiffy Corn Muffin Mix
- 1 can (15 oz) whole kernel corn, drained
- 1 can (15 oz) creamed corn
- 1 cup (8 oz) sour cream
- ½ cup (1 stick) unsalted butter, melted
- 2 large eggs, lightly beaten
- 2 cups (8 oz) sharp cheddar cheese, shredded
- 1 can (4 oz) diced green chiles, drained
- ¼ cup chopped fresh cilantro (optional, for garnish)
- Pinch of cayenne pepper (optional)
- ½ cup cooked, crumbled bacon (optional)
Instructions
- Preheat your oven to 350°F (175°C). Spray a 9×13-inch baking dish with non-stick cooking spray or grease it lightly with butter.
- In a large mixing bowl, combine the Jiffy Corn Muffin Mix. If adding cayenne, stir it in now. Whisk briefly to break up clumps.
- Add the drained whole kernel corn, creamed corn, sour cream, melted butter, and beaten eggs. Stir until just combined; batter will be thick and slightly lumpy.
- Fold in 1 ½ cups of the shredded cheddar cheese and the drained green chiles. Reserve the remaining ½ cup of cheese for the top.
- Pour the batter into the prepared baking dish and spread evenly.
- Sprinkle the reserved ½ cup of shredded cheddar over the top.
- Bake for 45 to 50 minutes, until edges are golden brown and pulling away from the dish, center is set but slightly jiggly, and a toothpick inserted comes out clean or with moist crumbs.
- Let the casserole rest for 10 minutes before serving.
- Garnish with fresh cilantro if desired. Cut into squares and serve warm.
Notes
Don’t overmix the batter; a few lumps are fine. Shred your own cheese for best melting. Let the casserole rest 10 minutes before cutting to allow it to set. For a spicier version, add diced jalapeños or use pepper jack cheese. To make ahead, assemble and refrigerate up to 24 hours; let sit at room temperature 30 minutes before baking, adding 5-10 minutes to bake time.
Nutrition
- Serving Size: 1/8 of recipe
- Calories: 320
- Sugar: 8
- Sodium: 580
- Fat: 18
- Saturated Fat: 10
- Carbohydrates: 32
- Fiber: 2
- Protein: 10
Keywords: corn casserole, Jiffy corn casserole, cheesy corn casserole, green chiles, kid-friendly, easy side dish, Thanksgiving side, potluck recipe