Love this? Save it for later!
Share the inspiration with your friends
My neighbor, Mrs. Gable, watched me trying to balance a piping bag, a cookie sheet, and my toddler on my hip one October afternoon. She didn’t say anything at first. Then she just reached into her apron pocket and pulled out a crumpled index card with a recipe written in pencil. “Forget the fancy frosting,” she said with a wink. “Make these with the kids instead.”
That card had “Candy Corn Sugar Cookie Bars” scrawled across the top in handwriting that looked like it had been written in a hurry, maybe while something was baking in the oven. I remember thinking, candy corn in a cookie bar? That seemed a little odd, honestly. But Mrs. Gable had raised four kids on a sensible budget, and her kitchen always smelled like something wonderful. So I trusted her.
I made them that very weekend, and let me tell you, the first bite was a revelation. The soft, buttery sugar cookie base, the chewy pockets of melted candy corn, the way it all came together in one pan without any fussy decorating—it was pure, simple magic. Maybe you’ve been there, standing in the aisle at the grocery store, wondering what to do with that bag of candy corn that seemed like a good idea at the time. This is the answer. These bars are the kind of treat that makes you feel like a kitchen hero without breaking a sweat or your budget.
And honestly, the best part? My kids helped me make them, and we didn’t fight over a single step. We just stood there, side-by-side, pressing candy corn into the dough, and I knew this recipe was a keeper. It’s become our go-to fall tradition, a little moment of sweetness we share every year when the leaves start to turn.
Why You’ll Love This Recipe
These aren’t just any cookie bars. They are the kind of recipe that gets passed around at school bake sales and disappears from the dessert table before you can blink. I’ve tested this recipe more times than I can count, tweaking the bake time and the candy corn placement until it was just right. Trust me, this is the best version.
- Quick & Easy: From mixing bowl to cooling rack in under 40 minutes. No chilling the dough, no rolling out individual cookies. Just one pan and you’re done.
- Simple Ingredients: You probably already have butter, sugar, eggs, and flour in your pantry. The only special addition is a bag of candy corn, which is everywhere come September.
- Perfect for Fall Gatherings: Great for Halloween parties, Thanksgiving dessert tables, or just a cozy afternoon snack with a glass of cold milk. They scream “autumn” without any effort.
- Crowd-Pleaser: Kids absolutely love them, and adults secretly do too. The combination of a soft sugar cookie and chewy candy corn is surprisingly addictive.
- Unbelievably Delicious: The texture is what gets you. A soft, almost cake-like cookie base with little pockets of chewy, sweet candy corn. It’s comfort food in bar form.
What makes this recipe different from the rest? It’s the method. By pressing the candy corn into the dough after it’s in the pan, rather than mixing it in, you get beautiful, distinct pockets of color and texture. No sad, melted blobs here. Just perfect, cheerful little bars that look like they came from a bakery.
What Ingredients You Will Need
This recipe uses simple, wholesome ingredients to deliver a treat that feels special without any fuss. Most of these are pantry staples, so you might not even need a trip to the store.
- For the Cookie Bar Base:
- 1 cup (2 sticks) unsalted butter, softened (I use Land O’Lakes for consistent results)
- 1 ½ cups granulated sugar
- 2 large eggs, room temperature
- 1 teaspoon vanilla extract
- 2 ½ cups all-purpose flour (spooned and leveled)
- 1 teaspoon baking powder
- ½ teaspoon salt
- For the Topping:
- 1 ½ cups candy corn (about half a standard 16-ounce bag)
Ingredient Selection Tips: Look for fresh, soft candy corn. If the bag feels hard or the pieces are stuck together in a solid block, it might be old. Fresh candy corn will soften as it bakes, creating that lovely chewy texture. For the butter, make sure it’s truly softened—not melted, not rock hard. If you forget to take it out of the fridge, cut it into small cubes and let it sit for 15 minutes.
Substitution Guidance: You can use salted butter, just reduce the added salt to ¼ teaspoon. For a slightly different flavor, try using brown sugar instead of granulated—it will give the bars a deeper, almost caramel-like taste. If you’re out of vanilla, a little almond extract works in a pinch, but use half the amount as it’s much stronger. For a gluten-free option, a 1:1 gluten-free baking flour blend works well here.
Equipment Needed
You don’t need a fancy kitchen to make these bars. Just a few basic tools you probably already own.
- 9×13-inch Baking Pan: This is the perfect size for these bars. A metal pan will give you a crisper edge, while a glass pan will yield a softer bar. I prefer metal for a slight crunch on the sides.
- Electric Mixer (Hand or Stand): You can cream the butter and sugar by hand, but it takes some serious elbow grease. A hand mixer works perfectly and is easier to clean.
- Mixing Bowls: One large bowl for the wet ingredients, one medium bowl for the dry ingredients.
- Rubber Spatula: For scraping down the sides of the bowl and spreading the dough evenly in the pan.
- Parchment Paper: This is your best friend. Lining the pan with parchment paper with an overhang on two sides makes lifting the entire batch of bars out a breeze. No scraping, no sticking.
- Wire Cooling Rack: Allows the bars to cool evenly so the center sets properly.
Budget-Friendly Options: If you don’t have parchment paper, you can grease the pan generously with butter and dust it with flour. It won’t be quite as easy to remove, but it works. No electric mixer? Grab a wooden spoon and a strong arm—it’s a great workout!
Preparation Method
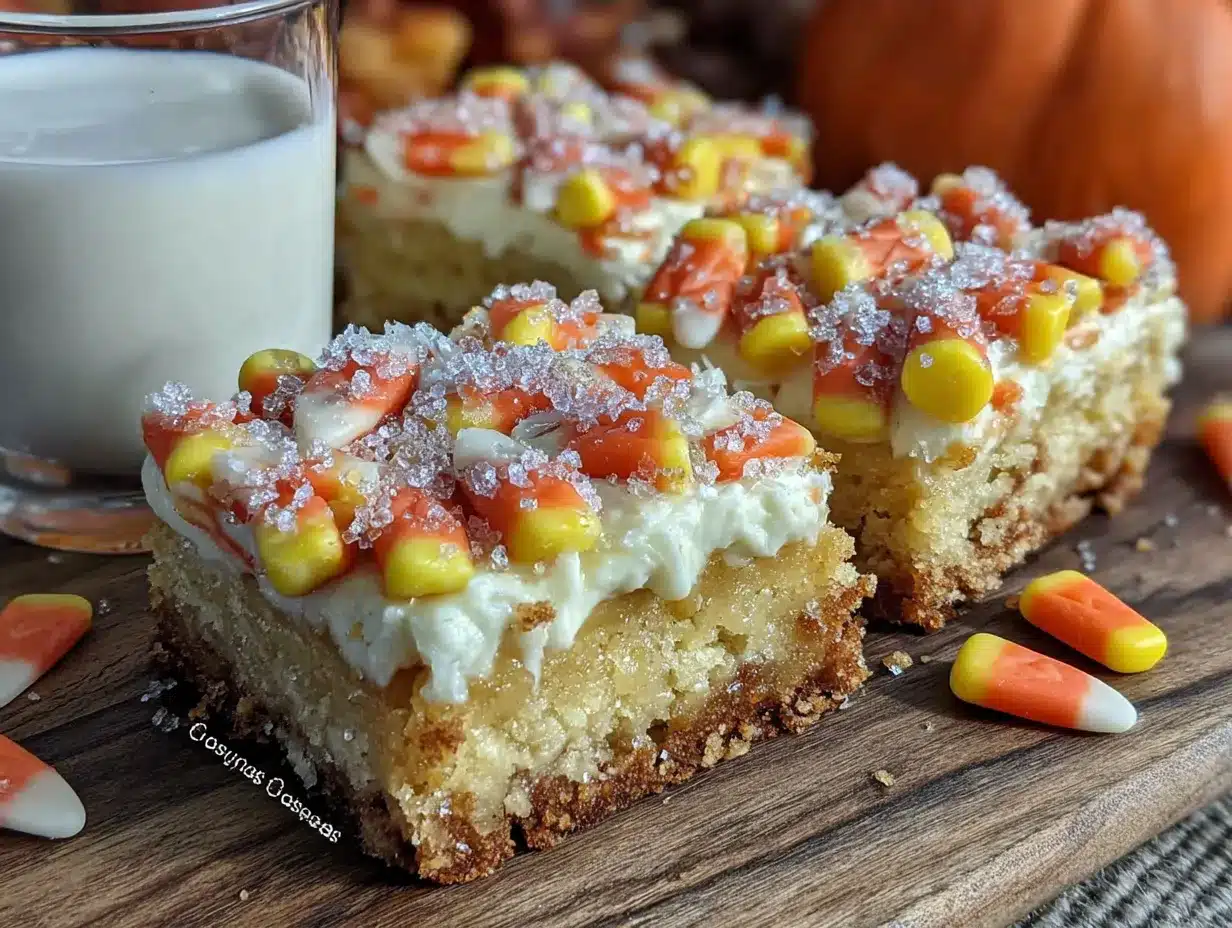
Let’s get baking. This is a straightforward recipe, but a few little tricks will make all the difference.
- Preheat and Prep: Preheat your oven to 350°F (175°C). Line your 9×13-inch baking pan with parchment paper, leaving a 2-inch overhang on the long sides. This creates “handles” for lifting the bars later.
- Cream the Butter and Sugar: In a large mixing bowl, beat the softened butter and granulated sugar together on medium speed until light and fluffy. This takes about 2-3 minutes. You’re looking for a pale yellow color and a texture that looks like thick, fluffy sand. Scrape down the sides of the bowl with your spatula.
- Add the Wet Ingredients: Add the eggs one at a time, beating well after each addition. Then, add the vanilla extract and beat until just combined. The mixture might look a little curdled at this point—don’t panic, that’s normal.
- Combine the Dry Ingredients: In a separate medium bowl, whisk together the all-purpose flour, baking powder, and salt. Whisking aerates the flour and ensures the baking powder is evenly distributed.
- Mix Wet and Dry: Gradually add the dry ingredients to the wet ingredients, mixing on low speed. Mix only until the flour disappears. Overmixing at this stage will make the bars tough. The dough will be thick and slightly sticky.
- Press into the Pan: Transfer the dough to your prepared baking pan. Using your hands or the back of a spatula (lightly greased if it’s sticking), press the dough into an even layer. Make sure it reaches all the corners. This is important for even baking.
- Add the Candy Corn: Now for the fun part. Take your 1 ½ cups of candy corn and gently press the pieces into the dough in a single layer. Don’t push them all the way in—leave the tops exposed so they stay colorful. Arrange them in rows or scatter them randomly; it’s your call. I like to make sure there’s a piece in every bite.
- Bake: Bake in the preheated oven for 20-25 minutes. The edges should be lightly golden brown, and the center should look set and no longer jiggly. A toothpick inserted into the center (avoiding a candy corn piece) should come out clean or with a few moist crumbs. The candy corn will soften and spread slightly—this is exactly what you want.
- Cool Completely: Place the pan on a wire cooling rack and let the bars cool completely in the pan. This is the hardest step, I know. But if you cut them while they are warm, they will crumble. Patience, my friend. It takes about 1-2 hours for them to fully set.
- Cut and Serve: Once completely cool, use the parchment paper overhang to lift the entire block of bars out of the pan. Place it on a cutting board. Using a sharp knife, cut into 24 squares (6 rows by 4 rows). For clean cuts, wipe the knife clean between each slice.
Cooking Tips & Techniques
I’ve made these bars more times than I can count, and I’ve learned a few things the hard way. Here are my best tips to guarantee success.
Don’t Overbake: This is the number one mistake. The bars will continue to cook slightly from the residual heat of the pan after you pull them out of the oven. If you wait until the center looks fully firm and the edges are dark brown, you’ll end up with dry, hard bars. Pull them out when the edges are just golden and the center is still soft. Trust the toothpick test.
Room Temperature Eggs: Cold eggs can seize the butter mixture, making the dough lumpy. If you forgot to take your eggs out of the fridge, place them in a bowl of warm (not hot) water for 5 minutes. This brings them to room temperature quickly.
Parchment Paper is Not Optional: I once tried to be lazy and just greased the pan. What a mess. The candy corn stuck to the bottom, and I ended up with a crumbled pile of delicious but ugly bars. Spend the 30 seconds to line the pan. You’ll thank me later.
Let Them Cool: I know the smell is intoxicating. I know you want a warm, gooey bar. But if you cut into them too soon, the structure hasn’t set, and they will fall apart. Let them cool completely. If you absolutely must have a warm one, microwave a cooled bar for 10 seconds. It’s just as good.
Multitasking Strategy: While the butter and sugar are creaming, measure out your dry ingredients. While the bars are baking, clean up your dishes. This way, when the bars are cooling, your kitchen is already clean, and you can sit down and relax.
Variations & Adaptations
This recipe is a great starting point for your own creativity. Here are a few ways I’ve adapted it over the years.
Chocolate Drizzle: After the bars have cooled, melt ½ cup of semi-sweet chocolate chips with 1 teaspoon of coconut oil in the microwave (30-second bursts, stirring in between). Drizzle it over the bars for a fancy touch. The combination of sweet candy corn and dark chocolate is incredible.
Autumn Spice Version: Add 1 teaspoon of cinnamon and ½ teaspoon of nutmeg to the dry ingredients. This gives the bars a warm, cozy fall flavor that pairs beautifully with the candy corn. It’s like a sugar cookie and a pumpkin spice latte had a baby.
Dietary Adaptation (Gluten-Free): I’ve made these with a 1:1 gluten-free baking flour blend (like Bob’s Red Mill) and they turned out perfectly. The texture is slightly more tender, but just as delicious. No one at my family gathering even noticed the swap.
Mix-In Magic: For extra texture, fold in ½ cup of white chocolate chips or chopped pecans along with the candy corn. The nuts add a nice crunch, and the white chocolate just adds more sweetness. It’s a little over the top, but sometimes that’s exactly what you need.
Halloween Colors: Swap the candy corn for a mix of candy corn and candy pumpkins (the little candy pumpkins are called “mellowcreme pumpkins”). It adds a pop of orange and makes the bars even more festive for a Halloween party.
Serving & Storage Suggestions
These bars are best served at room temperature. The texture is just right—soft, chewy, and satisfying. I like to arrange them on a simple white platter to let the colors of the candy corn pop. A dusting of powdered sugar over the top can make them look extra special for a party.
What to Serve with Them: A tall glass of cold milk is the classic pairing. For a grown-up twist, they are also fantastic with a cup of hot apple cider or a warm chai latte. The spices in the cider or chai complement the sweetness of the bars perfectly.
Storage Instructions: Store leftover bars in an airtight container at room temperature. They will stay fresh for up to 5 days. I like to layer them between sheets of parchment paper to prevent them from sticking together.
Freezer Instructions: These bars freeze like a dream. Place the cooled, cut bars in a single layer on a baking sheet and freeze for 1 hour. Then, transfer them to a freezer-safe bag or container. They will keep for up to 3 months. To thaw, just let them sit at room temperature for about 30 minutes.
Reheating: For that “fresh from the oven” feeling, pop a bar in the microwave for 10-15 seconds. The candy corn will soften up again, and the cookie bar will be wonderfully warm. The flavors actually deepen and meld together after a day or two, so these are a great make-ahead treat.
Nutritional Information & Benefits
Let’s be real—these are a treat, not a health food. But knowing what’s in them helps you enjoy them mindfully.
Estimated Nutritional Values (per bar, based on 24 bars):
| Nutrient | Amount |
|---|---|
| Calories | 195 |
| Fat | 9g |
| Carbohydrates | 28g |
| Sugar | 18g |
| Protein | 2g |
Health Benefits of Key Ingredients: While this isn’t a superfood, the butter provides a small amount of vitamin A, and the eggs add a bit of protein. The real benefit is the joy of baking with your family. The process of making these together—measuring, mixing, pressing in the candy corn—is a wonderful way to connect and create happy memories. That has its own kind of nutritional value for the soul.
Dietary Considerations: This recipe contains gluten (from the flour), dairy (from the butter), and eggs. It is not suitable for a vegan diet. For a dairy-free version, you can try using a plant-based butter stick, but the texture may be slightly different. The candy corn itself is typically gluten-free and vegan, but always check the label on your specific brand to be sure.
Conclusion
These Kid-Approved Candy Corn Sugar Cookie Bars are more than just a recipe. They are a little moment of fall, a chance to get your hands messy with the people you love, and a delicious way to use up that bag of candy corn that’s been sitting in your pantry. They are simple, affordable, and absolutely crowd-pleasing.
I love this recipe because it reminds me of Mrs. Gable and that day in her kitchen. It reminds me that the best recipes aren’t the most complicated ones. They are the ones that bring people together. I hope you make these bars and create your own happy memories. Maybe you’ll add a little cinnamon, or a chocolate drizzle, or just enjoy them exactly as they are.
So, go ahead and preheat that oven. Get the kids involved. And when you take that first bite of a warm, chewy, candy-corn-studded bar, I hope it makes you smile. If you give this recipe a try, I’d love to hear about it! Leave a comment below and tell me how they turned out, or share a photo on Pinterest. Happy baking, friends!
Frequently Asked Questions
Can I use salted butter instead of unsalted?
Yes, you can. Just reduce the added salt in the recipe from ½ teaspoon to ¼ teaspoon. The bars will still turn out perfectly delicious.
My candy corn melted into a big blob. What went wrong?
This usually happens if the candy corn is pressed too deep into the dough or if the bars are overbaked. Make sure you only gently press the candy corn so the tops are still exposed. Also, check your oven temperature with an oven thermometer—it might be running hot.
Can I make these bars ahead of time for a party?
Absolutely! These bars actually taste even better the next day as the flavors meld together. Bake them, let them cool completely, and store them in an airtight container at room temperature. They will be perfect for your party.
Can I use a different type of candy corn?
Yes! You can use the classic candy corn, or try the autumn mix with the little pumpkins. You can even use the s’mores-flavored candy corn for a different twist. Just avoid anything with a hard candy shell, as it won’t soften properly.
How do I get clean cuts when slicing the bars?
The key is patience. Let the bars cool completely before cutting. Use a sharp, non-serrated knife and wipe the blade clean with a damp paper towel between each cut. This prevents the candy corn from smearing and gives you beautiful, clean squares.
Pin This Recipe!
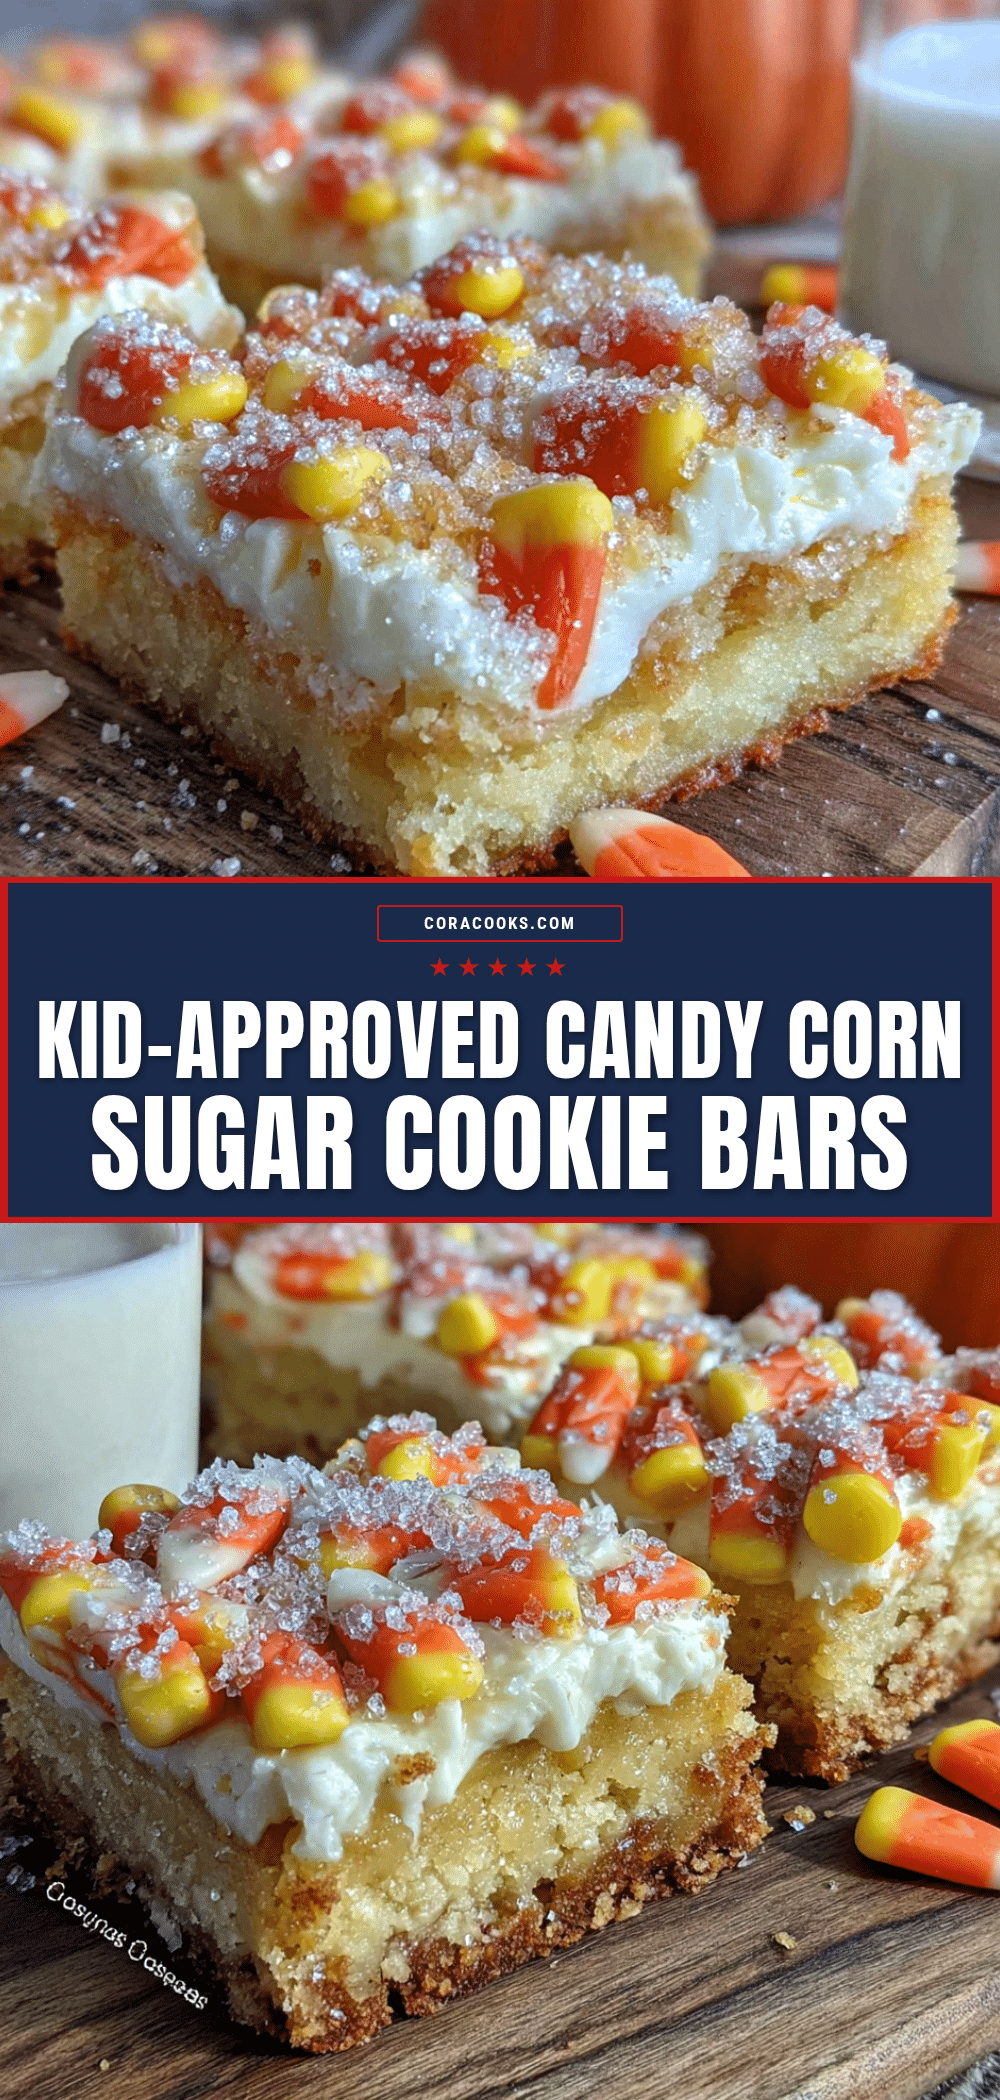
Kid-Approved Candy Corn Sugar Cookie Bars: Easy Fall Treat

Soft, buttery sugar cookie bars studded with chewy candy corn. An easy, one-pan fall treat that’s perfect for Halloween parties, bake sales, or a cozy afternoon snack.
- Prep Time: 15 minutes
- Cook Time: 25 minutes
- Total Time: 40 minutes
- Yield: 24 servings 1x
- Category: Dessert
- Cuisine: American
Ingredients
- 1 cup (2 sticks) unsalted butter, softened
- 1 ½ cups granulated sugar
- 2 large eggs, room temperature
- 1 teaspoon vanilla extract
- 2 ½ cups all-purpose flour, spooned and leveled
- 1 teaspoon baking powder
- ½ teaspoon salt
- 1 ½ cups candy corn (about half a standard 16-ounce bag)
Instructions
- Preheat your oven to 350°F (175°C). Line a 9×13-inch baking pan with parchment paper, leaving a 2-inch overhang on the long sides.
- In a large mixing bowl, beat the softened butter and granulated sugar together on medium speed until light and fluffy, about 2-3 minutes. Scrape down the sides of the bowl.
- Add the eggs one at a time, beating well after each addition. Then add the vanilla extract and beat until just combined.
- In a separate medium bowl, whisk together the all-purpose flour, baking powder, and salt.
- Gradually add the dry ingredients to the wet ingredients, mixing on low speed until just combined. Do not overmix. The dough will be thick and slightly sticky.
- Transfer the dough to the prepared baking pan. Using your hands or the back of a spatula, press the dough into an even layer, making sure it reaches all the corners.
- Gently press the candy corn into the dough in a single layer, leaving the tops exposed.
- Bake for 20-25 minutes, until the edges are lightly golden brown and the center is set. A toothpick inserted into the center (avoiding a candy corn piece) should come out clean or with a few moist crumbs.
- Place the pan on a wire cooling rack and let the bars cool completely in the pan (about 1-2 hours).
- Once completely cool, use the parchment paper overhang to lift the entire block of bars out of the pan. Place on a cutting board and cut into 24 squares (6 rows by 4 rows) with a sharp knife, wiping the blade clean between cuts.
Notes
Don’t overbake! Pull the bars out when the edges are just golden and the center is still soft. Let them cool completely before cutting to prevent crumbling. For clean cuts, wipe the knife clean between each slice. Store in an airtight container at room temperature for up to 5 days. Freeze for up to 3 months.
Nutrition
- Serving Size: 1 bar
- Calories: 195
- Sugar: 18
- Sodium: 95
- Fat: 9
- Saturated Fat: 5
- Carbohydrates: 28
- Protein: 2
Keywords: candy corn, sugar cookie bars, fall dessert, Halloween treat, easy cookie bars, kid-friendly, one-pan dessert


