Love this? Save it for later!
Share the inspiration with your friends
My niece Leo asked why I couldn’t just use marshmallow fluff instead of whipping egg whites. I started to explain why that wouldn’t work — then stopped. She was standing there with her paint-splattered smock, holding a spoon like it was a wand, completely convinced that the magic of Halloween cookies lay in shortcuts. I looked at the bowl of stiff, glossy peaks I’d spent twenty minutes beating, and then I looked at her hopeful, wide eyes. Honestly, I wanted to scream. I wanted to explain the science of protein structures and the delicate dance of sugar and air. But instead, I just shrugged and said, “Okay, let’s try your way.”
We ended up with a sad, sticky pile of pink goo that looked more like a Halloween monster than a ghost. It didn’t hold its shape. It didn’t crisp up. It just sat there, melting into the parchment paper. Leo was devastated, but I was secretly relieved. It reminded me why I love making these fluffy ghost meringue cookies with chocolate chip eyes. It’s not just about the result; it’s about the lesson that some things can’t be rushed or faked. The air in those egg whites is the secret ingredient, and you can’t cheat that part.
I remember the first time I made these for a neighborhood block party. I was so worried about them looking perfect that I over-whipped the whites until they looked dry and grainy. They collapsed in the oven. My neighbor, Mrs. Gable, ate one of the failed ones anyway and said it tasted like “angry clouds.” We both laughed until our sides hurt. That moment stuck with me. It taught me that baking is as much about humility as it is about precision.
You know that feeling when you’re trying to impress people with a fancy dessert, but you end up bonding over a disaster instead? That’s what these cookies do. They’re whimsical, slightly silly, and surprisingly delicate. Making them feels like a little ritual of patience in a world that wants everything instantly. When you finally pull that tray out of the oven and see those tiny chocolate chip eyes staring back at you, it’s worth every second of whisking.
I mean, let me tell you, there is something deeply satisfying about turning something as simple as egg whites and sugar into something that looks like it floated in from the spirit world. These ghost meringue cookies with chocolate chip eyes aren’t just a treat for kids. They’re a treat for anyone who needs a little bit of lightness in their life. And honestly, Leo was right about one thing: the magic is real. It’s just a little more complex than marshmallow fluff.
Why You’ll Love This Recipe
Why These Meringue Ghosts Are Different
Let’s be real for a second. There are a million meringue recipes out there. Some are Swiss meringues, some are Italian, and some are just… complicated. This one is French, simple, and incredibly forgiving once you get the hang of it. But what makes these fluffy ghost meringue cookies with chocolate chip eyes stand out isn’t just the technique; it’s the personality they bring to your baking tray.
These cookies are the perfect blend of childhood nostalgia and adult sophistication. They’re crisp on the outside, chewy in the center, and melt in your mouth like a cloud. The chocolate chip eyes add a salty-sweet contrast that keeps you coming back for more. It’s that specific crunch followed by the soft, airy interior that makes this recipe a crowd-pleaser every single time.
Here is why this recipe earns its spot in your rotation:
- Quick & Easy: Once you start whipping, it only takes about 10 to 15 minutes to get the peaks right. The rest is just waiting. Perfect for those rainy afternoons when you need a project that doesn’t require much effort.
- Simple Ingredients: You don’t need fancy flours or exotic spices. Just egg whites, sugar, vanilla, and cream of tartar. You likely have everything in your pantry right now. It’s minimalism at its finest.
- Perfect for Halloween: These are the ultimate seasonal treat. They look spooky but cute, making them ideal for parties, classroom exchanges, or just a midnight snack.
- Crowd-Pleaser: Kids love the shape, and adults love the texture. They’re light enough that you can eat a dozen without feeling heavy. It’s guilt-free indulgence.
- Unbelievably Delicious: The flavor is pure vanilla sweetness with a hint of tang from the cream of tartar. It’s not cloying; it’s balanced. It’s comfort food reimagined as a delicate confection.
What makes this recipe different from the rest is the attention to detail in the shaping. Most people just pipe circles. But with these, you’re creating a ghost. The tail at the bottom gives it character. And those chocolate chip eyes? They need to be placed while the meringue is still slightly tacky, which adds a tactile element to the baking process. It’s interactive. You’re not just baking; you’re crafting.
This recipe isn’t just good—it is the kind that makes you close your eyes after the first bite and smile. It’s simple, elegant, and surprisingly fun to make. Whether you’re hosting a Halloween party or just want to brighten up your Tuesday, these ghosts will do the trick.
What Ingredients You Will Need
The Foundation of Fluffiness
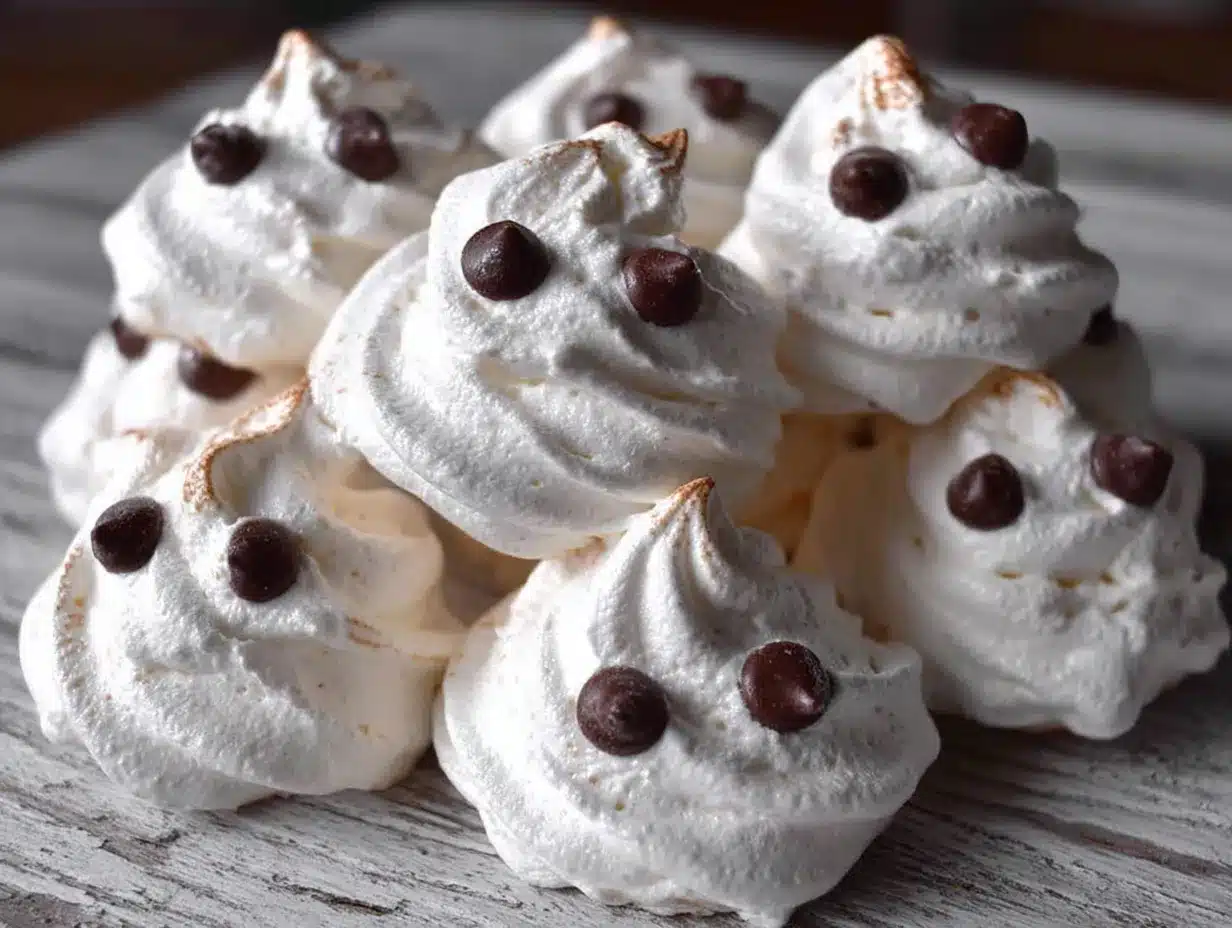
This recipe uses simple, wholesome ingredients to deliver bold flavor and satisfying texture without the fuss. The magic happens because of the ratio of sugar to egg whites. It’s a delicate balance, but once you get it right, the results are consistent every time. Here is what you need to get started.
For the Meringue Base
- Large Egg Whites: You will need 3 large egg whites, room temperature. Room temperature whites whip up faster and achieve greater volume. I’ve tried using cold eggs from the fridge, and they just never get that stiff peak look. Trust me on this one.
- Granulated Sugar: 1 ½ cups of white granulated sugar. This is the structure builder. Don’t use brown sugar; it has too much moisture and will make your meringues sticky. I recommend C&H Pure Cane Sugar because the crystals are fine and dissolve easily.
- Cream of Tartar: ½ teaspoon. This is the secret weapon. It stabilizes the egg whites and prevents them from collapsing. It also helps with the color, keeping them bright white. You can find this in the baking aisle next to the baking soda.
- Vanilla Extract: 1 teaspoon of pure vanilla extract. Avoid the imitation stuff. You want that real, rich vanilla flavor to complement the sweetness. McCormick is a reliable brand that I always keep in stock.
- Salt: A tiny pinch. Just a pinch to enhance the sweetness. It balances out the flavor profile so it doesn’t taste flat.
For the Ghost Details
- Mini Chocolate Chips: 6 to 8 mini chocolate chips. You need these for the eyes. Mini chips are easier to work with because they’re smaller and less likely to slide off the delicate meringue. If you can’t find mini chips, you can chop regular chips into tiny pieces, but that takes more time.
Substitution Notes
If you don’t have cream of tartar, you can use ½ teaspoon of lemon juice or white vinegar. It works, but the texture might be slightly less stable. For the sugar, caster sugar (superfine sugar) is even better because it dissolves instantly, but regular granulated sugar works fine if you whip it long enough. And for the vanilla, if you’re allergic to it, you can use almond extract, but use only ½ teaspoon because it’s stronger.
Equipment Needed
Tools for Success
You don’t need a lot of fancy gear to make these fluffy ghost meringue cookies with chocolate chip eyes, but having the right tools makes a huge difference. Here is what you’ll need.
- Electric Hand Mixer or Stand Mixer: This is non-negotiable. Whipping egg whites by hand is possible, but it’s a workout. An electric mixer will get you to stiff peaks in minutes. If you don’t have one, a whisk and a lot of arm strength will do, but it might take 20 minutes of continuous effort.
- Clean, Dry Glass or Metal Bowl: Make sure your bowl is completely free of grease. Even a tiny bit of oil from a previous batch can stop your egg whites from whipping. Glass bowls are great because you can see the texture clearly. Metal bowls are also good, but avoid plastic as it can retain oils.
- Piping Bag and Round Tip: A large piping bag fitted with a ½-inch round tip (like a Wilton 1M or similar) is perfect for shaping the ghosts. If you don’t have a piping bag, you can use a Ziploc bag with the corner cut off. It’s not as precise, but it works in a pinch.
- Parchment Paper: Line your baking sheets with parchment paper. This prevents sticking and makes cleanup a breeze. Silicone baking mats work too, but parchment gives a better non-stick surface for delicate meringues.
- Spatula: A rubber spatula is useful for scraping the bowl and folding in the vanilla if needed.
I once tried using a plastic bowl for a meringue project, and the whites just wouldn’t hold. It was frustrating. Lesson learned: always use glass or metal, and wash your hands thoroughly before starting. Grease is the enemy of fluffiness.
Preparation Method
Step-by-Step Instructions
Making these cookies is easier than it looks, but you need to pay attention to the details. Here is how to make them.
Step 1: Prep Your Station
Preheat your oven to 200°F (95°C). This low temperature is crucial. It dries out the meringues slowly without browning them. If the oven is too hot, they will crack or turn yellow. Line two baking sheets with parchment paper. Make sure your egg whites are at room temperature. If they’re cold, let them sit on the counter for 30 minutes. This takes about 5 minutes of prep time.
Step 2: Whip the Egg Whites
Place the egg whites in your clean, dry bowl. Add the cream of tartar and the pinch of salt. Start beating on medium speed. After about a minute, the whites will become foamy and bubbly. This is when you start adding the sugar. I like to add it one tablespoon at a time. It might seem slow, but adding it gradually helps it dissolve properly. If you dump it all in at once, you’ll get grainy meringues. Keep beating on medium-high speed.
Step 3: Add the Sugar
Continue adding the sugar one tablespoon at a time, beating constantly. This process takes about 8 to 10 minutes. You are looking for stiff, glossy peaks. To test this, lift the beaters. The peaks should stand up straight without drooping. If they curl over, keep beating. This is the most important step. Don’t rush it. If the peaks are soft, the ghosts will spread and lose their shape.
Step 4: Add Vanilla
Once you have stiff peaks, add the vanilla extract. Beat on low speed just until it’s incorporated. This takes about 30 seconds. Over-mixing at this stage can deflate the whites. Scrape down the sides of the bowl with a spatula to make sure everything is mixed evenly.
Step 5: Pipe the Ghosts
Scoop the meringue into your piping bag. Fit the bag with the round tip. Hold the bag perpendicular to the baking sheet. Squeeze out a dollop of meringue, about 2 inches wide. Then, pull the bag up slightly and release pressure to create a pointed top. For the ghost shape, you want a wider base and a narrower top. You can also drag the tip down the side to create a “tail” for the ghost. Practice makes perfect. If the first few look weird, don’t worry. They’ll still taste good.
Step 6: Add the Eyes
While the meringues are still slightly tacky (this takes about 5 minutes after piping), press two mini chocolate chips onto each ghost for eyes. Press them in gently. If you wait too long, the chips won’t stick. If you wait too short, they’ll sink in too much. You want them to sit on the surface.
Step 7: Bake and Cool
Place the trays in the oven. Bake for 1 hour and 30 minutes to 2 hours. The cookies are done when they can be lifted off the parchment paper easily and feel dry and crisp on the outside. Do not turn off the oven. Let the cookies cool completely in the turned-off oven with the door slightly ajar. This gradual cooling prevents cracking. This resting period takes about 1 hour.
Cooking Tips & Techniques
Pro Tips for Perfect Meringues
Making meringues can be tricky, but these tips will help you avoid common pitfalls.
- Check for Grease: Before you start, wipe your bowl and beaters with a paper towel dipped in vinegar or lemon juice. This removes any invisible oil residue. Even a tiny drop of yolk can ruin the batch. Separate your eggs carefully, and if any yolk gets in, start over. It’s frustrating, but it’s the only way.
- Humidity is the Enemy: Meringues are hygroscopic, meaning they absorb moisture from the air. If it’s a rainy day or you live in a humid climate, your meringues might stay soft. Try to make them on a dry day. You can also add 1 tablespoon of cornstarch to the sugar to help absorb moisture, though it’s not strictly necessary.
- Don’t Open the Oven: Resist the urge to peek. Opening the door lets in moisture and drops the temperature, which can cause cracking. Set a timer and wait. Patience is key.
- Test for Doneness: Rub a bit of the meringue between your fingers. If you feel any sugar grains, they need more time. The sugar must be fully dissolved. If they feel smooth and dry, they’re ready.
I once made meringues on a humid summer day, and they came out sticky. I learned to store them in an airtight container with a packet of silica gel or a slice of bread to absorb moisture. It’s a handy trick to keep them crisp.
Variations & Adaptations
Customize Your Ghosts
While the classic ghost is great, you can play around with flavors and colors. Here are some ideas.
- Colorful Ghosts: Add a drop of food coloring to the egg whites before whipping. Pink, purple, or orange ghosts look festive. Use gel food coloring, not liquid, as liquid can throw off the sugar balance. I tried purple ghosts once, and they looked like little aliens. Very cool.
- Chocolate Dipped: After the cookies cool, dip the bottom half in melted dark chocolate. It adds a rich contrast and makes them look like they’re emerging from the ground. Let the chocolate set before serving.
- Spiced Up: Add a pinch of cinnamon or nutmeg to the sugar. It gives the vanilla a warm, cozy flavor that’s perfect for fall. It’s a subtle change, but it adds depth.
- Gluten-Free: This recipe is naturally gluten-free. Just make sure your chocolate chips are certified gluten-free if you have a severe allergy.
I once made orange meringues with orange zest in the sugar. They tasted like candy oranges. It was a fun twist on the classic. Try experimenting with different colors to match your party theme.
Serving & Storage Suggestions
How to Store and Serve
These cookies are best served at room temperature. They pair well with a cup of hot tea or coffee. The warmth of the drink contrasts nicely with the light texture of the cookies.
Storage Instructions
Store the cookies in an airtight container at room temperature. They will keep for up to two weeks. If your kitchen is humid, store them in the pantry away from windows. Do not refrigerate them, as the moisture will make them soft. If they do get soft, you can crisp them up by placing them in a 200°F oven for 10 minutes.
I usually make these a few days before Halloween to ensure they’re fully dry. They actually get better after a day or two as the flavors meld. It’s a great make-ahead treat.
Nutritional Information & Benefits
Light and Airy
These cookies are primarily sugar and air, so they are low in fat and protein. Each cookie has approximately 15 calories. They are gluten-free and dairy-free, making them suitable for many dietary restrictions. However, they are high in sugar, so enjoy them in moderation. The egg whites provide a small amount of protein, but the main benefit is the joy they bring. It’s a treat for the senses, not a health food.
Conclusion
Wrap Up
Making fluffy ghost meringue cookies with chocolate chip eyes is a fun, rewarding experience. It teaches patience and precision, and the results are delightful. Whether you’re a beginner or an experienced baker, this recipe is worth trying. It’s a great way to get into the Halloween spirit without the stress.
I hope you enjoy making these as much as I do. They’re a small project with a big payoff. If you try this recipe, I’d love to hear how they turned out. Leave a comment below with your tips or variations. Share your photos on social media and tag me. Let’s celebrate the joy of baking together. Happy Halloween!
FAQs
Common Questions About Meringue Ghosts
Why did my meringues collapse?
They likely didn’t whip enough. Make sure you reach stiff, glossy peaks before piping. Also, check for grease in your bowl.
Can I use brown sugar?
No, brown sugar has too much moisture. It will make the meringues sticky and prevent them from drying out properly.
How do I know when they are done?
They should feel dry and crisp on the outside. You should be able to lift them off the parchment paper easily.
Can I make these ahead of time?
Yes, they keep well for up to two weeks in an airtight container. They actually improve in flavor after a day.
What if I don’t have a piping bag?
You can use a Ziploc bag with the corner cut off. It’s not as precise, but it works fine for home baking.
Pin This Recipe!
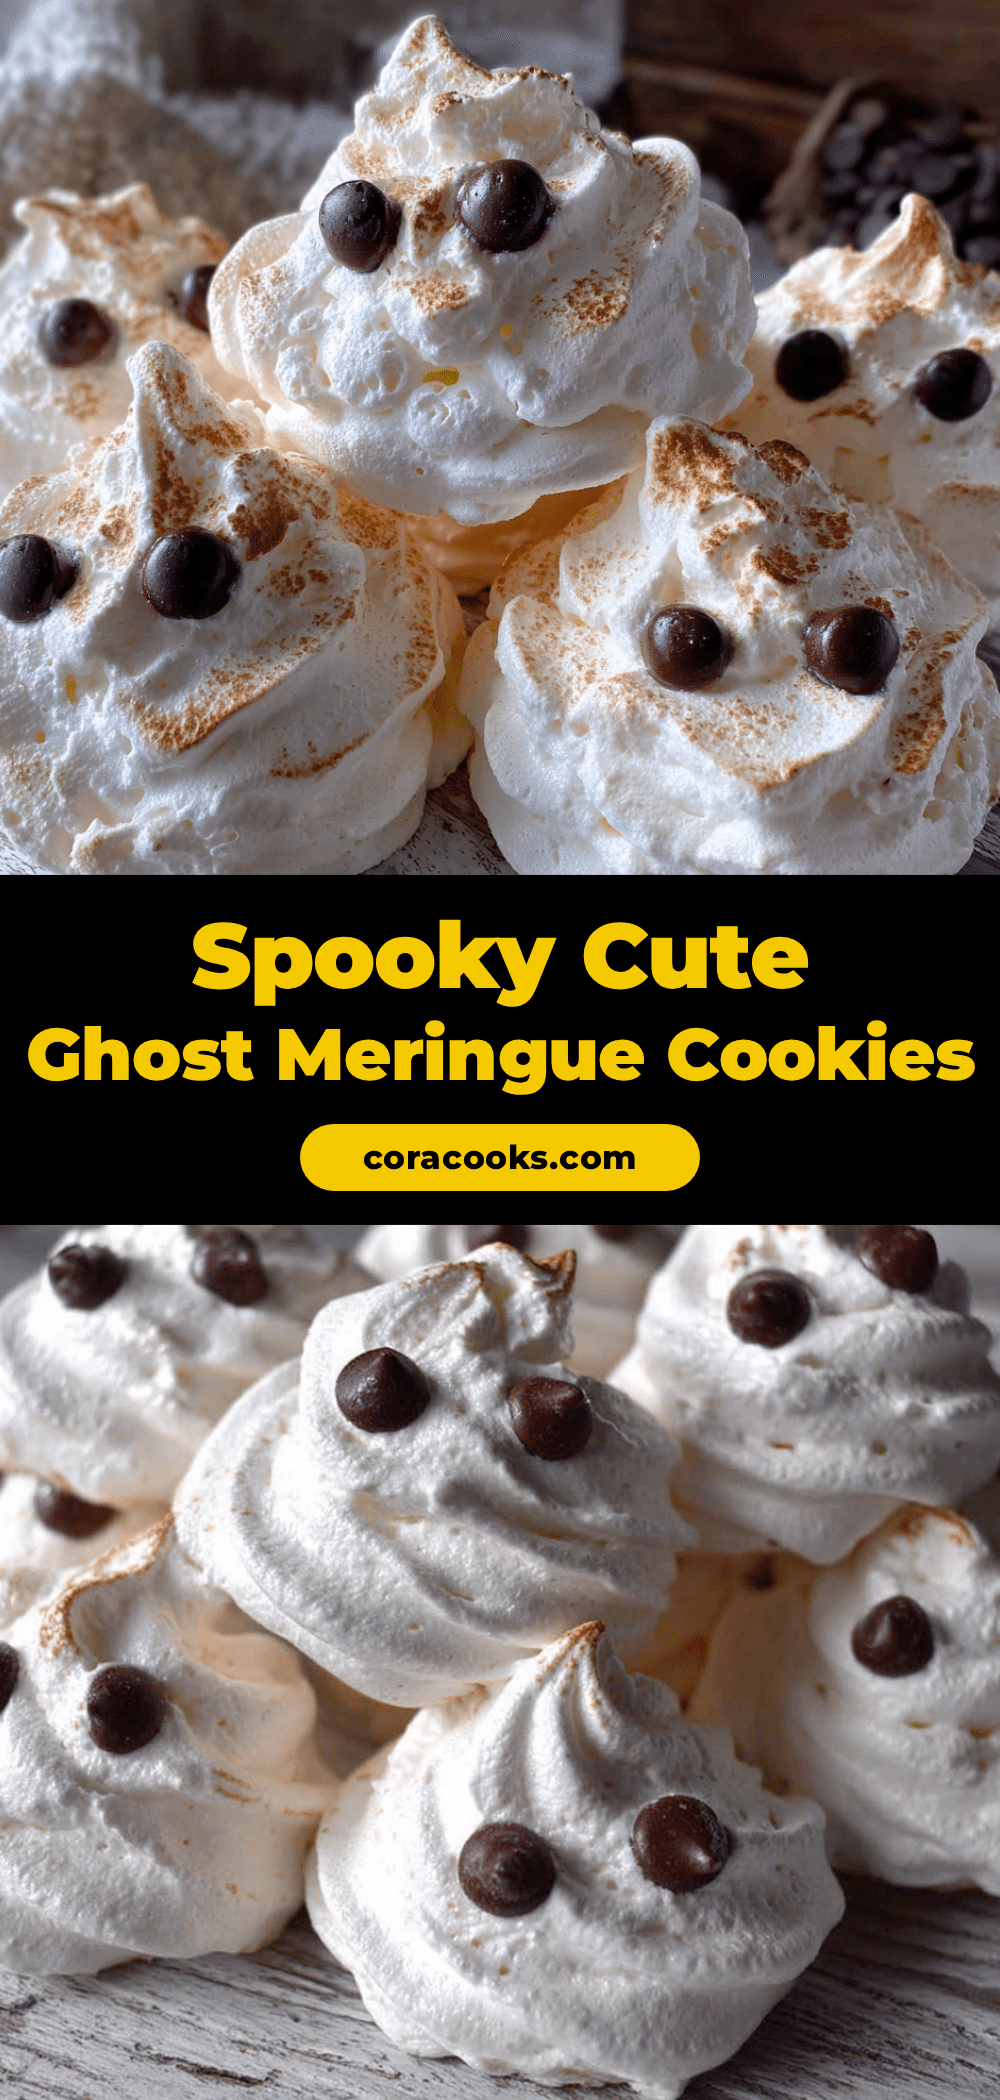
Fluffy Ghost Meringue Cookies: Easy Halloween Treat
These whimsical, crisp-on-the-outside and chewy-in-the-center meringue cookies are shaped like ghosts and decorated with chocolate chip eyes. They are a simple, gluten-free, and dairy-free Halloween treat that requires patience but delivers a delightful, airy texture.
- Prep Time: 15 minutes
- Cook Time: 1 hour 30 minutes to 2 hours
- Total Time: 2 hours 45 minutes
- Yield: Approximately 12-15 cookies 1x
- Category: Dessert
- Cuisine: American
Ingredients
- 3 large egg whites, room temperature
- 1 ½ cups granulated sugar
- ½ teaspoon cream of tartar
- 1 teaspoon pure vanilla extract
- A tiny pinch of salt
- 6 to 8 mini chocolate chips
Instructions
- Preheat oven to 200°F (95°C). Line two baking sheets with parchment paper.
- Place egg whites, cream of tartar, and salt in a clean, dry glass or metal bowl.
- Beat on medium speed until foamy. Gradually add sugar, one tablespoon at a time, beating on medium-high speed.
- Continue beating for 8-10 minutes until stiff, glossy peaks form.
- Add vanilla extract and beat on low speed just until incorporated.
- Scoop meringue into a piping bag fitted with a round tip. Pipe ghost shapes onto the baking sheets.
- While meringues are slightly tacky, press two mini chocolate chips onto each ghost for eyes.
- Bake for 1 hour and 30 minutes to 2 hours until dry and crisp.
- Turn off the oven and let cookies cool completely inside with the door slightly ajar (about 1 hour).
- Store in an airtight container at room temperature.
Notes
Ensure all equipment is completely free of grease or yolk, as this prevents egg whites from whipping. Do not use brown sugar as it adds moisture. If the kitchen is humid, consider adding 1 tablespoon of cornstarch to the sugar or storing cookies with a silica gel packet. Do not open the oven during baking to prevent cracking.
Nutrition
- Serving Size: 1 cookie
- Calories: 15
- Sugar: 4
- Sodium: 5
- Carbohydrates: 4
Keywords: Halloween cookies, meringue recipe, ghost cookies, gluten-free dessert, easy baking, kids baking, vanilla meringue


