Love this? Save it for later!
Share the inspiration with your friends
I was killing time in the checkout line at the grocery store last Saturday—my cart full of the usual weekend chaos—when a bright yellow bag of peanut butter chips caught my eye, and suddenly I was seven years old at my dad’s coworker’s Super Bowl party in a cramped living room that smelled like old carpet and victory. That specific, slightly artificial scent of peanut butter chips melting into chocolate is somehow hardwired into my memory, tangled up with the sound of grown-ups yelling at the TV and the sticky feeling of soda on my fingers. I couldn’t tell you who played in that game or who won, but I can describe exactly how those no-bake peanut butter bars tasted: sweet, fudgy, and absolutely perfect for a kid who cared more about dessert than down and distance.
That memory stuck with me all the way home. I mean, honestly, it was so vivid I almost missed my turn. So I did what any reasonable person would do when struck by a random childhood food memory—I bought the peanut butter chips and decided to build a whole dessert around them. But here’s the thing: I’m not the kind of person who can just leave a good thing alone. The standard peanut butter bar recipe is great, but I wanted something that felt like an event. Something that made people stop and say, “Wait, you made that?” So I grabbed a rectangular pan and started mapping out yard lines in my head. And let me tell you, these Easy No-Bake Peanut Butter Football Field Brownies were born from that exact moment of nostalgia mixed with a little too much ambition on a Saturday afternoon.
The best part? They’re no-bake. No oven needed, no timing anxiety, no standing over a hot stove wondering if you’ve ruined the chocolate. Just a few simple steps, some patience while they chill, and suddenly you’ve got a dessert that looks like you spent hours on it. Maybe you’ve been there—wanting to bring something impressive to a game day party or a potluck, but running low on time and energy. These brownies are the answer. They’re the recipe I keep coming back to because they work every single time, and they never fail to make people smile. That’s the kind of recipe worth keeping around.
Why You’ll Love This Recipe
Let me be real with you for a second. I’ve tested a lot of dessert recipes in my time—some that worked beautifully and some that ended up in the trash can with a side of frustration. These Easy No-Bake Peanut Butter Football Field Brownies fall firmly into the “win” column, and here’s exactly why they deserve a spot in your recipe collection:
- No Oven Required: This is the kind of recipe you can make in July when it’s 95 degrees outside and turning on the oven feels like a personal insult. Everything comes together on the stovetop or in the microwave.
- Simple Ingredients: You probably already have most of these in your pantry right now. No weird specialty items that you’ll use once and forget about for three years.
- Perfect for Game Day: Whether it’s the Super Bowl, a college tailgate, or just a regular Sunday with friends, this dessert is designed to impress football fans and dessert lovers alike.
- Crowd-Pleaser: I’ve brought these to four different gatherings now, and every single time, someone asks for the recipe before they’ve even finished their first piece.
- Looks Fancy, But Isn’t: The football field design with the yard lines and goal posts looks complicated, but it’s actually super forgiving. You don’t need to be a pastry chef to pull this off.
What makes this recipe different from every other peanut butter brownie out there? It’s the combination of textures, honestly. You get that dense, fudgy chocolate base from the brownie layer, then a creamy peanut butter topping that’s almost like a firm mousse, and finally the chocolate drizzle for the yard lines. It’s not just another bar cookie—it’s an experience. The kind of dessert that makes people close their eyes after the first bite and just enjoy the moment. Plus, it’s completely no-bake, which means less stress and more time actually enjoying the party instead of sweating in the kitchen.
What Ingredients You Will Need
This recipe uses simple, straightforward ingredients that work together to create something genuinely impressive. Most of these are pantry staples, and the ones that aren’t are easy to find at any grocery store. Here’s what you’ll need:
For the Brownie Base
- 2 cups semi-sweet chocolate chips (I prefer Ghirardelli for the smoothest melt, but any brand works)
- 1/2 cup unsalted butter, cut into small pieces (this helps it melt evenly)
- 1 can (14 ounces) sweetened condensed milk (this is the secret to the fudgy texture)
- 2 teaspoons vanilla extract (pure vanilla if you have it, imitation works fine too)
- 1/4 teaspoon salt (just to balance the sweetness)
- 2 cups crushed graham crackers (about 16 full sheets, crushed into fine crumbs)
- 1 cup powdered sugar, sifted (sifting prevents lumps in the final texture)
For the Peanut Butter Topping
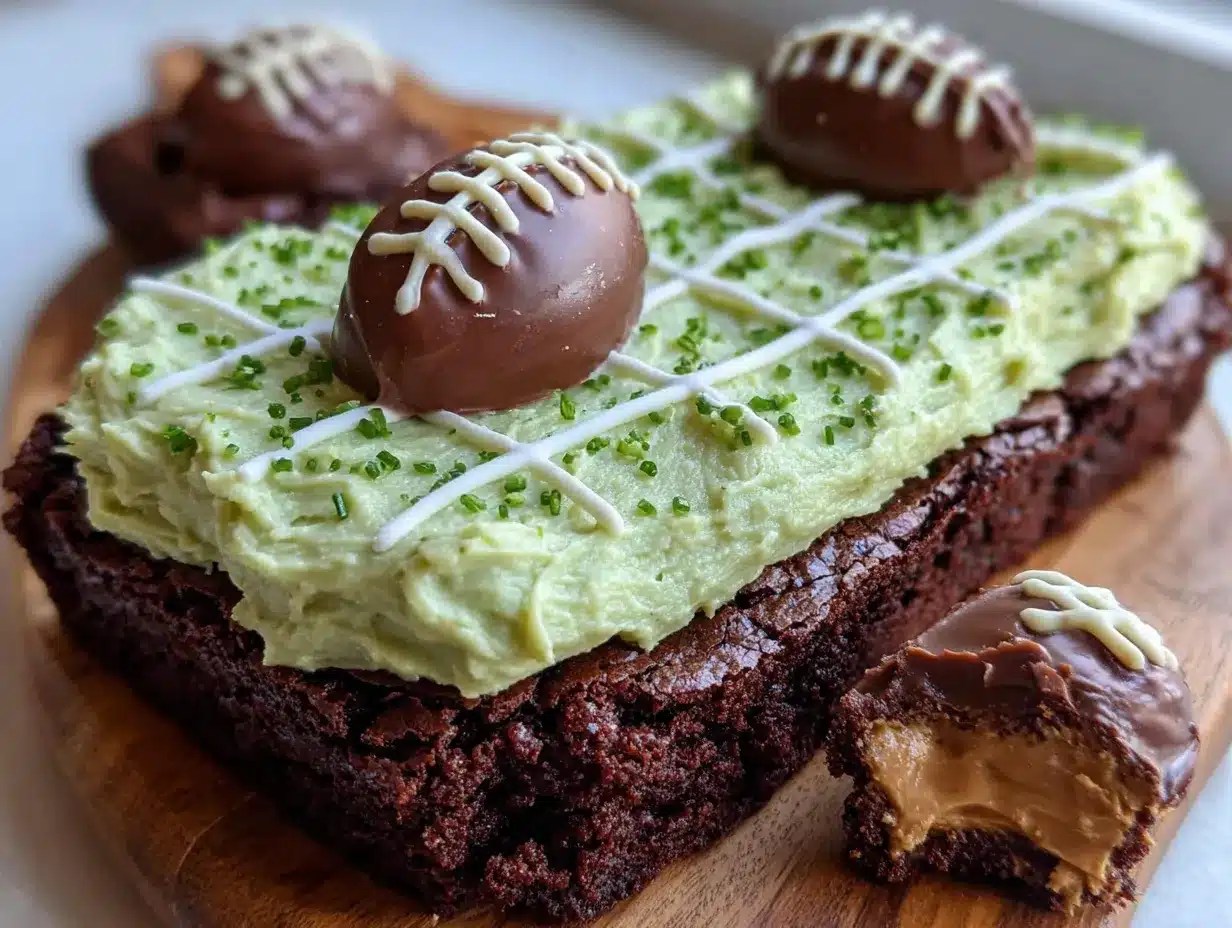
- 1 cup creamy peanut butter (I use Jif or Skippy—natural peanut butter can separate and make the topping greasy)
- 1/2 cup unsalted butter, softened to room temperature
- 2 cups powdered sugar, sifted
- 1 teaspoon vanilla extract
- 2-3 tablespoons milk (whole milk works best, but any kind you have is fine)
For the Football Field Decorations
- 1/2 cup semi-sweet chocolate chips (for the yard lines and goal posts)
- 1 teaspoon coconut oil or shortening (this helps the chocolate set smoothly)
- White frosting or white candy melts (for the yard line numbers and football markings)
- Green food coloring (optional, if you want to tint the peanut butter topping greener for the field effect)
A few notes on ingredients: The sweetened condensed milk is non-negotiable here—it’s what gives the brownie base that dense, almost fudge-like texture without any baking. If you try to substitute regular milk, it won’t set properly. For the peanut butter, stick with the processed stuff for this recipe. I know natural peanut butter is trendy, but it’s too oily and will cause the topping to separate as it chills. Trust me on this one—I learned the hard way during a test batch that ended up looking like a science experiment gone wrong. Also, if you want a deeper green color for the football field, you can add a few drops of green food coloring to the peanut butter topping. I usually skip it because the natural color is fine, but it’s an option if you want a more dramatic effect.
Equipment Needed
You don’t need any fancy equipment for this recipe, which is part of what makes it so approachable. Here’s what you’ll need:
- 9×13-inch baking pan (this is the standard size for a football field layout)
- Parchment paper or aluminum foil (for lining the pan so the brownies lift out easily)
- Medium saucepan (for melting the chocolate and butter together)
- Large mixing bowls (at least two—one for the brownie base and one for the peanut butter topping)
- Electric hand mixer or stand mixer (you can do this by hand, but the mixer makes the peanut butter topping much smoother)
- Spatula (for spreading the layers evenly)
- Measuring cups and spoons
- Piping bag or zip-top bag (for the chocolate yard lines—a zip-top bag with the corner snipped off works perfectly)
- Ruler or toothpick (for marking the yard lines evenly)
- Refrigerator space (you’ll need room to chill the pan flat)
If you don’t have a 9×13 pan, you can use a slightly smaller pan, but the layers will be thicker and you might need to adjust the chilling time. I’ve also made these in a disposable aluminum pan when I was bringing them to a party and didn’t want to worry about washing dishes later. It works fine, just make sure it’s sturdy enough to hold the weight. Oh, and if you don’t have a piping bag, seriously, just use a zip-top bag. I’ve done it that way dozens of times and it works like a charm. No need to buy special equipment for a single recipe.
Preparation Method
Alright, let’s get into the actual process. I’ve broken this down into clear steps, and I’ve included all the little details that make the difference between “pretty good” and “everyone asks for the recipe.” Take your time with each step—rushing is the enemy of clean layers.
- Prepare your pan. Line a 9×13-inch baking pan with parchment paper, leaving some overhang on the long sides. This creates handles that let you lift the entire block of brownies out later. If you’re using aluminum foil, lightly grease it so the brownies don’t stick. Set the pan aside.
- Make the brownie base. In a medium saucepan over low heat, combine 2 cups of semi-sweet chocolate chips, 1/2 cup of butter, and the can of sweetened condensed milk. Stir constantly with a spatula until everything is melted and smooth. This takes about 5-7 minutes. Don’t rush this step—if the heat is too high, the chocolate can seize up and become grainy. Remove from heat and stir in the vanilla extract and salt.
- Add the dry ingredients. In a separate bowl, whisk together the crushed graham crackers and sifted powdered sugar. Pour this mixture into the melted chocolate mixture and stir until everything is well combined. The mixture will be thick and fudgy—almost like a stiff brownie batter. Press this evenly into the prepared pan. I use the back of a spatula or even my clean hands (lightly greased) to press it down firmly. You want an even, compact layer. Place the pan in the refrigerator while you make the topping, about 15-20 minutes.
- Make the peanut butter topping. In a large mixing bowl, beat together the softened butter and peanut butter with an electric mixer until smooth and creamy, about 2 minutes. Add the sifted powdered sugar, vanilla extract, and 2 tablespoons of milk. Beat on low speed until combined, then increase to medium speed and beat for another 2-3 minutes until light and fluffy. If the mixture seems too thick, add the remaining tablespoon of milk. If it seems too thin, add a little more powdered sugar. You want a spreadable consistency that’s firm enough to hold its shape.
- Assemble the layers. Remove the pan from the refrigerator. Spread the peanut butter topping evenly over the chilled brownie base. Use a spatula to smooth the top as much as possible. This is your football field surface, so try to get it as flat and even as you can. Return the pan to the refrigerator and chill for at least 2 hours, or until the topping is firm to the touch.
- Create the yard lines. Once the topping is firm, it’s time to decorate. Melt the remaining 1/2 cup of chocolate chips with the coconut oil in the microwave in 30-second intervals, stirring between each, until smooth. Let it cool slightly so it doesn’t melt the peanut butter topping. Use a ruler to measure and mark the yard lines. A standard football field has lines every 10 yards, so for a 13-inch pan, you’ll want lines every 1.3 inches or so. I use a toothpick to lightly score the lines before piping. Transfer the melted chocolate to a piping bag or zip-top bag with a tiny corner snipped off, and pipe thin lines across the width of the pan at your marked intervals.
- Add the details. For the goal posts, pipe two small chocolate posts at each end of the field. You can also add a small chocolate football shape in the center if you want. Use the white frosting or melted white candy melts to add small numbers near the yard lines—just tiny dots or dashes are enough to suggest the numbers. Don’t stress about making it perfect. The charm is in the homemade look.
- Final chill. Return the pan to the refrigerator for another 30 minutes to set the chocolate decorations. Once everything is firm, use the parchment handles to lift the entire block out of the pan. Place it on a cutting board and use a sharp knife to cut into squares or rectangles. For the best presentation, cut them into 12 or 16 pieces, each one showing a section of the football field.
A quick note on timing: The total prep time is about 30 minutes, but you need at least 2.5 hours of chilling time. I usually make these the night before I need them, and they’re even better the next day after the flavors have had time to meld together. Just keep them covered in the refrigerator until you’re ready to serve.
Cooking Tips & Techniques
I’ve made this recipe more times than I can count, and I’ve picked up a few tricks along the way that make the process smoother and the results more consistent. Here are the things I wish someone had told me the first time:
Don’t skip the sifting. I know, sifting powdered sugar feels like an unnecessary step. But trust me, unsifted powdered sugar creates little lumps in both the brownie base and the peanut butter topping that you can’t mix out. Just sift it. It takes two extra minutes and makes a noticeable difference in the texture.
Let the chocolate mixture cool slightly before adding the graham crackers. If the mixture is too hot, it can make the graham crackers soggy instead of giving them that nice, slightly crunchy texture. I let it sit for about 5 minutes after removing it from the heat before stirring in the dry ingredients.
Use a wet spatula for the peanut butter layer. This is a trick I picked up from a pastry chef friend. Lightly wet your spatula with cold water before spreading the peanut butter topping. It prevents the mixture from sticking and gives you a much smoother, more even surface. Just shake off the excess water first—you don’t want drips landing in the topping.
Patience with the chilling. I’ve made the mistake of trying to cut these too early, and it’s a mess. The layers need to be fully set before you attempt to slice them. If you’re in a hurry, you can pop them in the freezer for 45 minutes instead of the refrigerator for 2 hours, but watch them carefully—if they freeze solid, they can be hard to cut cleanly.
One failure I’ll admit to: The first time I made these, I got impatient and tried to pipe the chocolate yard lines while the peanut butter layer was still slightly soft. The chocolate sank right into the topping and created a muddy, messy look. It still tasted good, but it didn’t look anything like a football field. So yes, wait until the topping is fully firm. Learn from my mistake.
Variations & Adaptations
One of the things I love about this recipe is how flexible it is. Here are some ways you can change it up to suit different tastes, dietary needs, or occasions:
Peanut-Free Version: If you’re making these for a peanut-free crowd, swap the peanut butter for sunflower seed butter or cookie butter (like Biscoff spread). The texture works the same way, and the flavor is delicious in its own right. Just make sure to use a brand that’s processed in a peanut-free facility if allergies are a concern.
Gluten-Free Adaptation: Use gluten-free graham crackers or gluten-free vanilla wafers for the base. Everything else in the recipe is naturally gluten-free, so this is an easy swap. I’ve tested this with Schär brand graham crackers and it worked beautifully.
Different Chocolate Options: If you’re not a fan of semi-sweet chocolate, you can use milk chocolate for a sweeter base or dark chocolate for a more intense, less sweet version. White chocolate also works, but it’s much sweeter, so you might want to reduce the powdered sugar slightly.
Seasonal Variations: For the Fourth of July, add red, white, and blue sprinkles on top of the peanut butter layer before adding the yard lines. For Halloween, swap the football field design for spider webs and use orange food coloring in the topping. For Christmas, add crushed candy canes on top. The base recipe is so versatile that you can really run with any theme.
My personal favorite variation: I once made these with a layer of salted caramel drizzled between the brownie base and the peanut butter topping. It added another dimension of flavor that was absolutely incredible. Just make sure the caramel is thick enough that it doesn’t soak into the base. A good store-bought caramel sauce works perfectly.
Serving & Storage Suggestions
These brownies are best served cold or at cool room temperature. I usually take them out of the refrigerator about 15 minutes before serving so they soften slightly, but not so long that the chocolate decorations start to soften. If you’re serving them at a party, keep the platter on ice or in a cool spot to maintain the clean lines of the football field design.
For presentation, I like to arrange the brownies on a large rectangular platter in the shape of a football field. It’s a small touch that makes a big impression. You can also add little flag picks or football-themed toothpicks for extra flair. If you’re serving these at a Super Bowl party, they’re guaranteed to be a conversation starter.
Storage Instructions: Store these brownies in an airtight container in the refrigerator for up to 5 days. The layers stay firm and the flavors actually improve after a day or two as everything melds together. To freeze, wrap the entire block (before cutting) tightly in plastic wrap, then in aluminum foil, and freeze for up to 3 months. Thaw in the refrigerator overnight before cutting and serving. I do not recommend freezing individual pieces because they tend to dry out faster.
Reheating Note: These are meant to be served cold, so no reheating is necessary. However, if you prefer a softer texture, let them sit at room temperature for 20-30 minutes before serving. Just don’t leave them out for too long, especially if it’s warm, because the chocolate decorations can start to melt and the peanut butter layer can become too soft.
Nutritional Information & Benefits
Let’s be honest—these are a treat, not a health food. But knowing what’s in them can help you enjoy them mindfully. Here’s the approximate nutritional breakdown for one serving (based on 16 servings per recipe):
| Nutrient | Amount Per Serving |
|---|---|
| Calories | 385 |
| Total Fat | 22g |
| Saturated Fat | 11g |
| Cholesterol | 25mg |
| Sodium | 210mg |
| Total Carbohydrates | 45g |
| Dietary Fiber | 3g |
| Sugars | 35g |
| Protein | 7g |
On the plus side, peanut butter provides a good amount of protein and healthy fats that help keep you full longer. Dark chocolate contains antioxidants, and graham crackers offer a small amount of fiber. But honestly, this is a dessert meant for celebrations and special occasions. I believe in enjoying treats like this in moderation—savor every bite, share them with people you love, and don’t feel guilty about it. Food is about joy, connection, and creating memories, and these brownies deliver on all three fronts.
Allergen Note: This recipe contains peanuts, dairy, and gluten. For allergen-free versions, see the Variations section above.
Conclusion
These Easy No-Bake Peanut Butter Football Field Brownies are everything I want in a dessert: impressive without being complicated, delicious without requiring a culinary degree, and fun without taking all day. They’re the kind of recipe that makes you look like a hero at a party while actually letting you enjoy the party yourself because you’re not stuck in the kitchen. That’s a win in my book.
I hope you give these a try, and I hope they bring you the same kind of joy they’ve brought me. Play around with the decorations, make them your own, and don’t stress about perfection. The best part of homemade food is the love and effort you put into it, not how straight the yard lines are. If you make these, I’d love to hear about it—leave a comment below and tell me how they turned out, what variations you tried, or what occasion you made them for. And if you share a photo on social media, tag me so I can see your beautiful creation. Happy cooking, friends!
Frequently Asked Questions
Can I use natural peanut butter for this recipe?
I don’t recommend it. Natural peanut butter has a higher oil content that can separate during chilling, making the topping greasy and unstable. Stick with processed peanut butter like Jif or Skippy for the best texture and results.
How far in advance can I make these brownies?
You can make them up to 3 days ahead of time. Store them in an airtight container in the refrigerator. The flavors actually improve after a day or two as everything melds together. For longer storage, freeze the whole block for up to 3 months.
Can I use milk chocolate instead of semi-sweet?
Absolutely. Milk chocolate will make the brownie base sweeter and slightly milder in flavor. If you have a sweet tooth, go for it. Just be aware that the overall dessert will be quite sweet with the peanut butter layer on top.
Do I have to decorate it like a football field?
Not at all! The base recipe works beautifully on its own. You can skip the decorations entirely and just enjoy the layered brownies. Or you can decorate them for any occasion—sprinkles for birthdays, festive colors for holidays, or just leave them plain for a simple treat.
My peanut butter topping is too soft. What did I do wrong?
This usually happens if the butter was too soft or if you added too much milk. Try chilling the topping in the refrigerator for 15-20 minutes before spreading it on the brownie base. If it’s still too soft, beat in a little more powdered sugar, one tablespoon at a time, until it firms up.
Pin This Recipe!
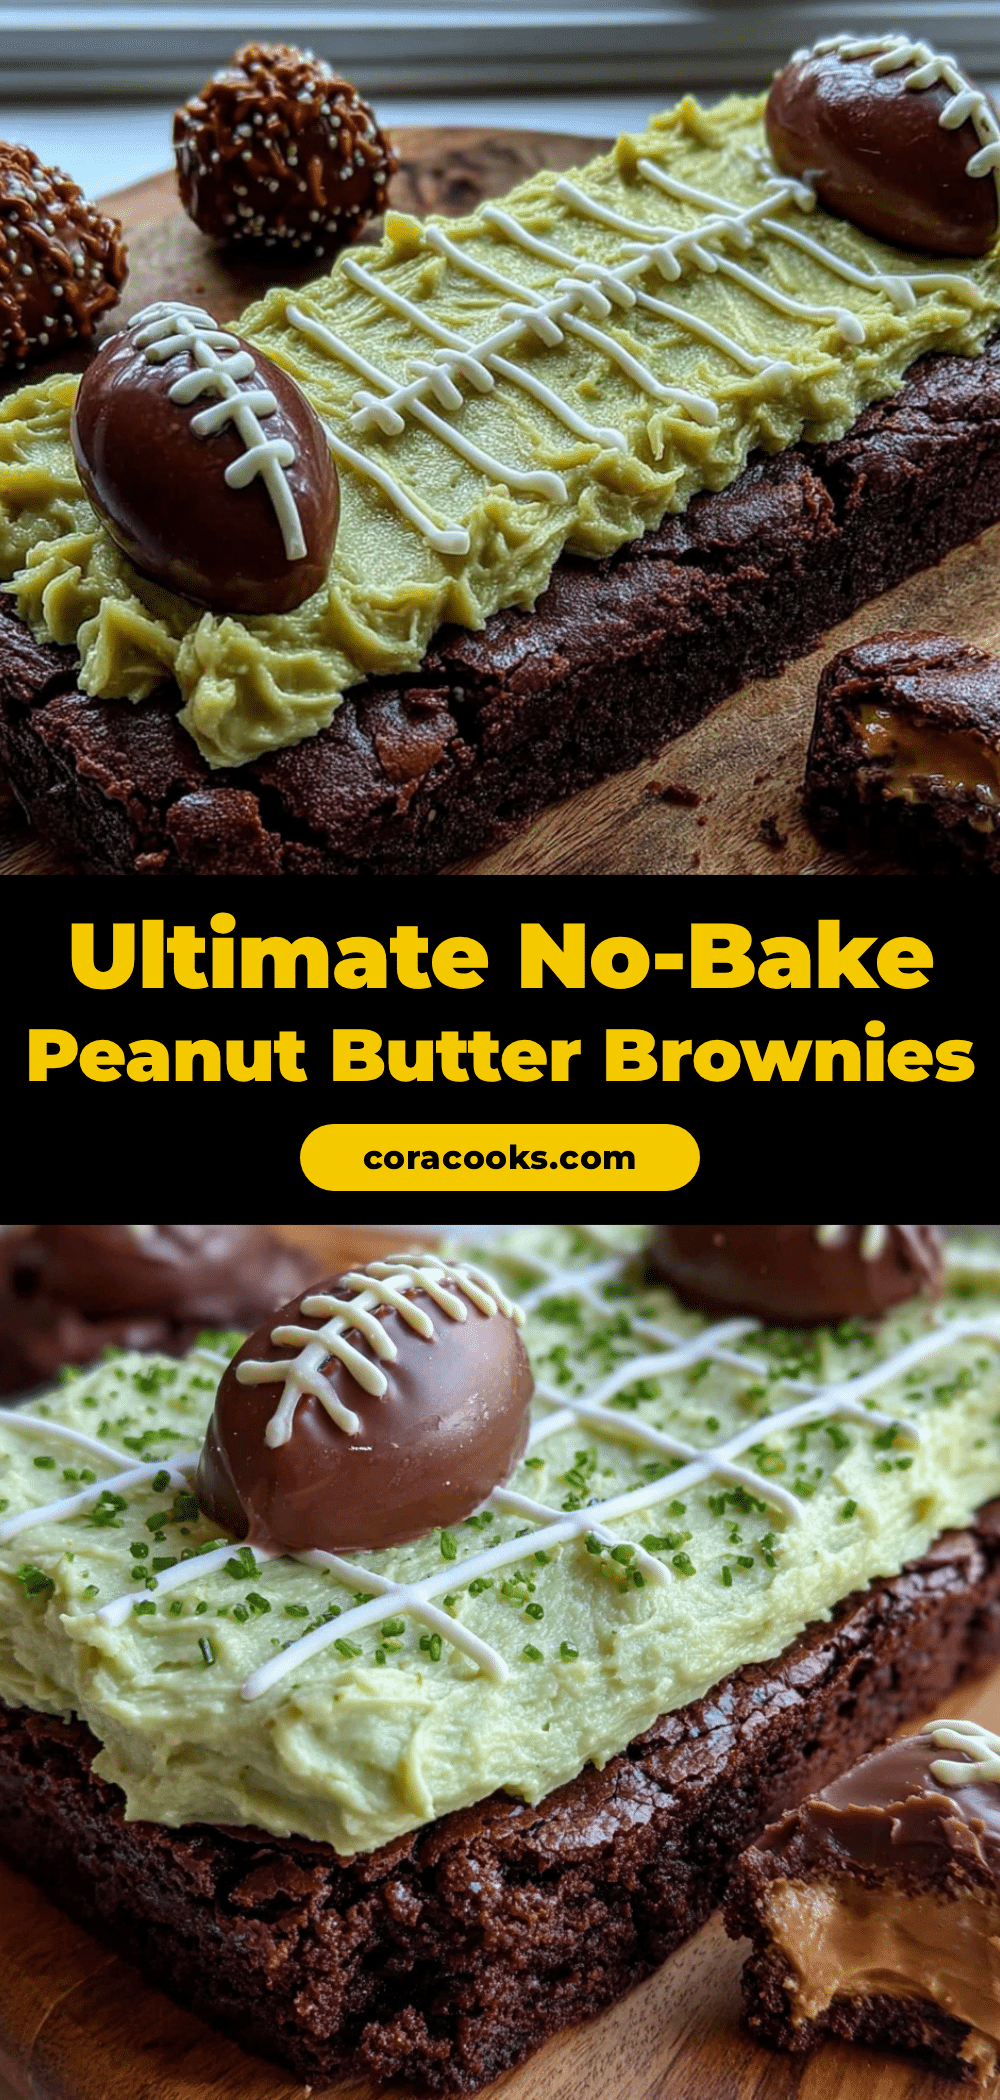
Easy No-Bake Peanut Butter Football Field Brownies
These no-bake peanut butter football field brownies are a fun and impressive dessert for game day. With a fudgy chocolate base, creamy peanut butter topping, and chocolate yard lines, they’re easy to make and guaranteed to be a crowd-pleaser.
- Prep Time: 30 minutes
- Cook Time: 0 minutes
- Total Time: 3 hours (includes chilling)
- Yield: 16 servings 1x
- Category: Dessert
- Cuisine: American
Ingredients
- 2 cups semi-sweet chocolate chips
- 1/2 cup unsalted butter, cut into small pieces
- 1 can (14 ounces) sweetened condensed milk
- 2 teaspoons vanilla extract
- 1/4 teaspoon salt
- 2 cups crushed graham crackers (about 16 full sheets)
- 1 cup powdered sugar, sifted
- 1 cup creamy peanut butter (e.g., Jif or Skippy)
- 1/2 cup unsalted butter, softened to room temperature
- 2 cups powdered sugar, sifted
- 1 teaspoon vanilla extract
- 2–3 tablespoons milk (whole milk preferred)
- 1/2 cup semi-sweet chocolate chips (for decorations)
- 1 teaspoon coconut oil or shortening
- White frosting or white candy melts (for yard line numbers)
- Green food coloring (optional)
Instructions
- Line a 9×13-inch baking pan with parchment paper, leaving overhang on the long sides. Set aside.
- In a medium saucepan over low heat, combine 2 cups semi-sweet chocolate chips, 1/2 cup butter, and sweetened condensed milk. Stir constantly until melted and smooth, about 5-7 minutes. Remove from heat and stir in vanilla extract and salt.
- In a separate bowl, whisk together crushed graham crackers and 1 cup sifted powdered sugar. Pour into the melted chocolate mixture and stir until well combined. Press evenly into the prepared pan. Refrigerate for 15-20 minutes.
- In a large mixing bowl, beat together softened butter and peanut butter with an electric mixer until smooth and creamy, about 2 minutes. Add 2 cups sifted powdered sugar, 1 teaspoon vanilla extract, and 2 tablespoons milk. Beat on low until combined, then increase to medium and beat for 2-3 minutes until light and fluffy. Add remaining milk if needed.
- Remove pan from refrigerator. Spread peanut butter topping evenly over the chilled brownie base. Smooth the top with a spatula. Refrigerate for at least 2 hours until firm.
- Melt remaining 1/2 cup chocolate chips with coconut oil in the microwave in 30-second intervals, stirring between each, until smooth. Let cool slightly.
- Use a ruler to mark yard lines every 1.3 inches across the pan. Lightly score with a toothpick. Transfer melted chocolate to a piping bag or zip-top bag with a snipped corner and pipe thin lines at the marked intervals.
- Pipe small chocolate goal posts at each end. Use white frosting or melted white candy melts to add small numbers near the yard lines.
- Refrigerate for another 30 minutes to set decorations. Use parchment handles to lift the block out of the pan. Cut into squares or rectangles with a sharp knife.
Notes
Don’t skip sifting the powdered sugar to avoid lumps. Let the chocolate mixture cool slightly before adding graham crackers to prevent sogginess. Use a wet spatula for spreading the peanut butter layer for a smoother surface. Ensure the peanut butter layer is fully firm before piping chocolate to prevent sinking. These can be made up to 3 days ahead and stored in the refrigerator. For freezing, wrap the whole block tightly and freeze for up to 3 months.
Nutrition
- Serving Size: 1 piece (1/16 of rec
- Calories: 385
- Sugar: 35
- Sodium: 210
- Fat: 22
- Saturated Fat: 11
- Carbohydrates: 45
- Fiber: 3
- Protein: 7
Keywords: no-bake brownies, peanut butter brownies, football field dessert, game day dessert, Super Bowl dessert, easy dessert, no-bake dessert


