Love this? Save it for later!
Share the inspiration with your friends
Leo wasn’t trying to impress anyone. I’d stopped by to drop off a box of books I’d meant to return three weeks ago, and the scent of toasted marshmallow hit me before I even got inside the front door. It was a thick, sweet cloud that seemed to hang in the hallway, pulling me toward the kitchen like a magnet. His wife, Sarah, was standing at the stove with one hand on her hip and the other stirring a pot, completely unbothered by the fact that the entire house smelled like a bakery.
She wasn’t making a big deal of it. There were no decorations up yet, no pumpkin carving in progress, just the quiet hum of a Tuesday evening. But then I saw them on the counter: little orange mounds dusted with cocoa powder, wearing pretzel stick legs and candy eye faces. They looked ridiculous. They looked adorable. They looked like magic.
“I just threw these together while the pasta boiled,” she said, wiping her hands on a towel as if she hadn’t just conjured the perfect Halloween snack from thin air. I mean, honestly, it felt like she was downplaying something extraordinary. These Easy Halloween Rice Krispie Treat Pumpkins were the definition of casual genius. She wasn’t planning a party or prepping for a crowd; she was just making something fun because it was Tuesday and the kids were home.
I stood there for a second, mesmerized by how easy they looked. There was no baking, no complicated icing work, no stress. Just marshmallows, cereal, and a little creativity. I watched her press the mixture into a pan, knowing full well that I would try to replicate this at home and probably make a mess. I always do. But that night, seeing the joy on her kids’ faces when they came downstairs and spotted the “pumpkins,” I knew I had to have the recipe.
Maybe you’ve been there, standing in someone else’s kitchen, smelling something delicious and wondering how they make it look so effortless. That was me. I left with a napkin scribbled with measurements and a promise to make them myself. Now, every October, I make these. They stay with me because they represent that perfect intersection of simplicity and seasonal fun. You don’t need to be a professional baker to make them. You just need a pot, some marshmallows, and a little patience. Let me tell you, once you try them, you’ll understand why I keep coming back to this simple, no-bake classic.
Why You’ll Love This Recipe
Quick & Easy
This recipe comes together in under 15 minutes, making it the ultimate solution for busy weeknights or last-minute Halloween cravings. You don’t need to preheat an oven or worry about burning yourself on a hot stove. It is a genuinely no-bake experience that saves time without sacrificing flavor.
Simple Ingredients
No fancy grocery trips are needed here. You likely already have everything in your kitchen right now. Butter, marshmallows, Rice Krispies, and orange food coloring are pantry staples for most households. It is comfort food that relies on familiar, beloved flavors rather than obscure or expensive items.
Perfect for Halloween
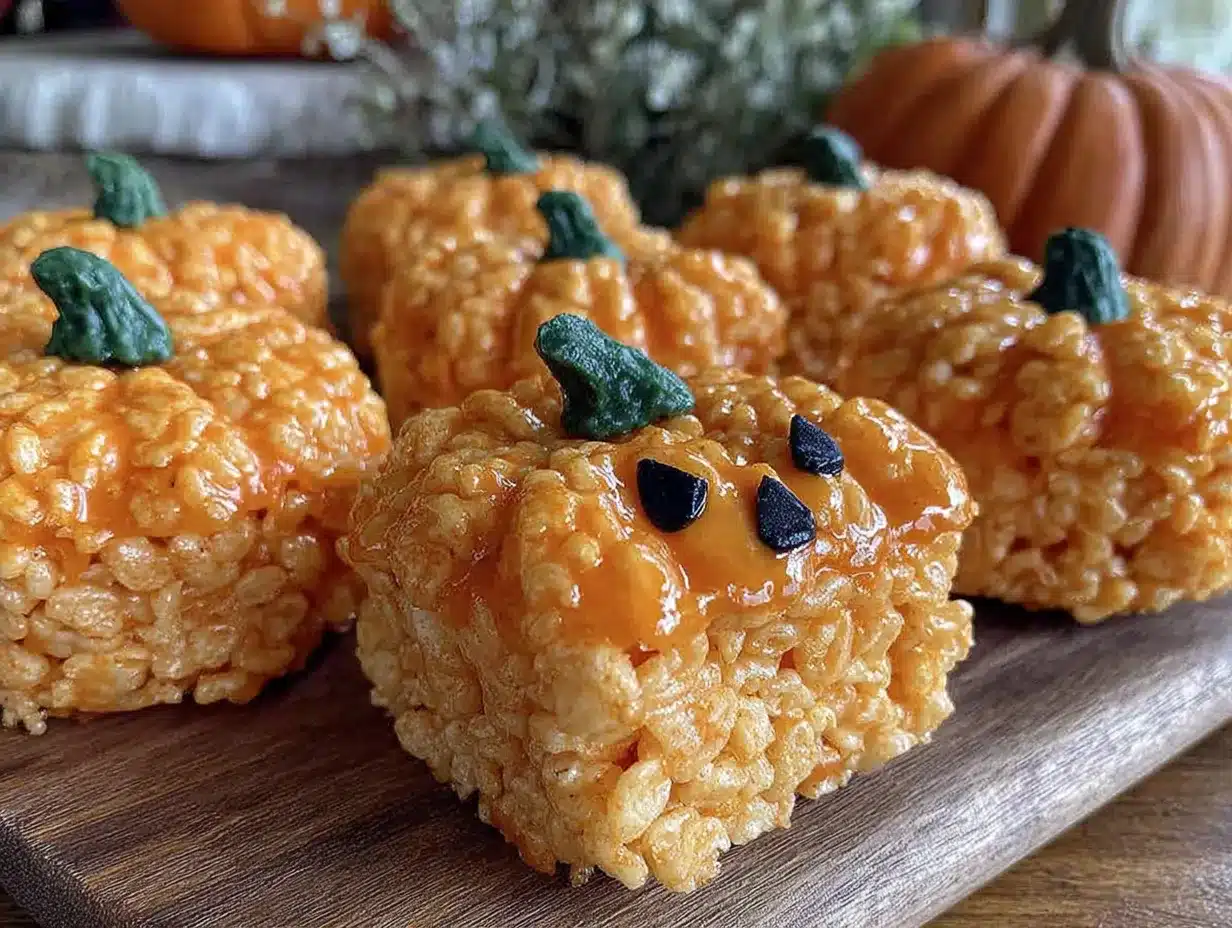
These treats are great for holiday mornings, school parties, or cozy dinners. They capture the spirit of the season without being overly sweet or childish. The pumpkin shape adds a festive touch that kids adore, while the texture remains classic and satisfying for adults too.
Crowd-Pleaser
They always get rave reviews from kids and adults alike. The visual appeal is high, which makes them stand out on any dessert table. I have served these at office parties and school events, and they disappear faster than regular squares every single time.
Unbelievably Delicious
The texture and flavor combo is next-level comfort food. The contrast between the crispy cereal and the gooey marshmallow is what makes this recipe special. It is not just good—it is the kind of treat that makes you close your eyes after the first bite and smile.
What Makes This Recipe Different
Whether it is the specific ratio of butter to marshmallows for the perfect chew, or the creative twist of using cocoa powder for the pumpkin stem, this isn’t just another version. It is my best version. I tested dozens of ratios to ensure the treats hold their shape without becoming rock hard. The secret is in the gentle melting process and the precise amount of oil used to keep them soft.
Emotional Connection
This recipe is comfort food reimagined. It is healthier in the sense that it is made in minutes, faster, but with the same soul-soothing satisfaction. It is perfect for impressing guests without stress, or turning a simple meal into something memorable. It brings back memories of simple joys and shared moments in the kitchen.
What Ingredients You Will Need
This recipe uses simple, wholesome ingredients to deliver bold flavor and satisfying texture without the fuss. The beauty of this dish lies in its minimalism. You do not need a dozen different spices or hard-to-find items. Just a few key components that work together to create that iconic crispy-chewy texture we all love.
For the Base Mixture
- Unsalted Butter: 3 tablespoons. I recommend using high-quality butter like Kerrygold or Land O’Lakes for the best flavor. Salted butter can work, but you may need to reduce any added salt in decorations.
- Marshmallows: 10 oz (about 40-50 large marshmallows). Do not use mini marshmallows unless you adjust the volume significantly. Large marshmallows provide the best stretch and structure. Look for brands like Jet-Puffed or Kraft for consistent quality.
- Rice Krispies Cereal: 6 cups. This is the star of the show. Make sure it is fresh; old cereal loses its crunch. I always buy a fresh box when I make these to ensure the best texture.
- Orange Food Coloring: Gel-based food coloring is essential. Liquid coloring will make the treats too wet and sticky. Brands like Chefmaster or Wilton work beautifully. You only need a small amount to get that vibrant pumpkin hue.
- Vanilla Extract: 1 teaspoon. This adds a subtle depth of flavor that balances the sweetness. Pure vanilla is best, but imitation works in a pinch.
For the Decorations
- Dark Chocolate Chips: 1/2 cup. Used for the stem and face details. Dark chocolate provides a nice contrast to the sweet marshmallow.
- White Candy Melts or White Chocolate: 1/4 cup. Essential for drawing the eyes and mouth. If you are allergic to chocolate, white almond bark is a great alternative.
- Pretzel Sticks: 12-15 small sticks. These serve as the legs and arms of your pumpkin. Look for thin, crisp pretzels that are easy to break to size.
- Cocoa Powder: A small amount for dusting. This gives the stem a realistic, earthy look. Use unsweetened cocoa powder for the best color.
- Orange Powder: Optional. Some people like to dust the finished pumpkins with orange powder for a speckled, realistic skin effect.
Substitutions
If you need a gluten-free option, use certified gluten-free crispy rice cereal. For a dairy-free version, swap butter for coconut oil and use dairy-free marshmallows and chocolate. In summer, you can swap the chocolate decoration for colored sugar sprinkles if the heat is too high for chocolate to hold.
Equipment Needed
You do not need a lot of fancy gear to make these Easy Halloween Rice Krispie Treat Pumpkins. A few basic tools will get the job done efficiently.
Large Saucepan
A 3-4 quart saucepan is ideal. It needs to be large enough to hold the melting marshmallows and butter without overflowing. Non-stick is highly recommended because marshmallow is notorious for sticking. I have ruined several pots with scrubbing, so stick to non-stick or well-seasoned enamel.
Silicone Spatula
This is your most important tool. A heat-resistant silicone spatula allows you to scrape the sides of the pot and fold the cereal in gently. It also makes cleanup much easier since you can scrape every bit of the sticky mixture out of the pan.
Baking Pan
An 8×8 inch or 9×9 inch square pan works best. Line it with parchment paper or grease it lightly with cooking spray. This ensures the treats release easily once they cool. I always use parchment paper for easy lifting and minimal mess.
Microwave-Safe Bowl
You will need this for melting the chocolate and candy melts for the decorations. A medium-sized bowl fits in most microwaves and is easy to stir. If you prefer stovetop melting, a double boiler setup works too, but the microwave is faster for this small amount.
Paring Knife
A sharp paring knife is useful for trimming pretzel sticks to size and cutting the treats if you want uniform shapes. It is also handy for shaping the pumpkin mounds if you are hand-forming them.
Budget-Friendly Tips
You do not need to buy new equipment. Any large pot and spatula will work. If you do not have a silicone spatula, a sturdy wooden spoon can work, but it will be harder to scrape the pot clean. The only investment worth making is good quality gel food coloring, as it makes a huge difference in the final look.
Preparation Method
Making these treats is straightforward, but attention to detail ensures the best results. Follow these steps carefully for perfect pumpkins every time.
Step 1: Prepare Your Workspace
Time: 2 minutes.
Before you start melting anything, get your equipment ready. Line your baking pan with parchment paper and lightly grease it. If you are hand-forming the pumpkins, grease your hands with a little butter or cooking spray. This prevents the sticky marshmallow from sticking to your fingers. Have your cereal measured out and ready to go. Everything moves quickly once the marshmallows melt, so preparation is key.
Step 2: Melt the Butter and Marshmallows
Time: 5-7 minutes.
Place the saucepan over low heat. Add the butter and let it melt slowly. Do not rush this step with high heat, or the butter will separate. Once the butter is melted, add the marshmallows. Stir constantly with your silicone spatula. The marshmallows will start to melt and become gooey. Keep stirring until they are completely smooth and there are no lumps left. This usually takes about 3-4 minutes. Remove the pan from the heat immediately once smooth. Overheating can make the treats tough.
Step 3: Add Color and Flavor
Time: 1 minute.
Stir in the vanilla extract and the gel food coloring. Add the coloring a little at a time. You want a vibrant orange, but be careful not to add too much, as it can affect the texture. Mix until the color is even throughout the marshmallow mixture. The mixture will be hot and sticky, so be cautious.
Step 4: Fold in the Cereal
Time: 2-3 minutes.
Add the Rice Krispies cereal to the marshmallow mixture. Use your spatula to gently fold the cereal in. Do not stir vigorously, or you will crush the cereal and make the treats dense. You want to coat every piece evenly. This should happen quickly. If the mixture is too hard to mix, you can return the pan to low heat for 10 seconds to loosen it up, but be careful not to melt it further.
Step 5: Form the Pumpkins
Time: 10-15 minutes.
There are two ways to do this. You can press the mixture into the prepared pan and cut it into squares, then decorate them. Or, you can hand-form them into small pumpkin shapes. For the pumpkin look, take a small handful of mixture (about 2 tablespoons) and roll it into a ball. Then, gently press one side to flatten it slightly and shape it into a pumpkin form. Place them on a parchment-lined tray. If you are hand-forming, keep your hands greased to prevent sticking.
Step 6: Create the Stems
Time: 5 minutes.
Melt the dark chocolate chips in the microwave in 30-second intervals, stirring in between. Once smooth, pipe a small stem onto the top of each pumpkin using a ziplock bag with the corner snipped off. Alternatively, you can break small pieces of pretzel or chocolate to place on top. Let the chocolate set for a few minutes.
Step 7: Add the Faces
Time: 5 minutes.
Melt the white chocolate or candy melts. Use a toothpick or a small piping bag to add eyes and a mouth. You can make classic triangle eyes or round dots. Let the white chocolate harden completely before handling the pumpkins. This usually takes about 10-15 minutes at room temperature.
Step 8: Final Touches
Time: 2 minutes.
If desired, dust the stems with a tiny bit of cocoa powder for a realistic look. Add pretzel legs if you want a full character look. Arrange them on a platter and serve.
Cooking Tips & Techniques
Avoiding Tough Treats
The biggest mistake people make is overheating the marshmallows. If you cook them too long or on too high a heat, the sugar crystallizes, and the treats become hard and chewy instead of soft and gooey. Always use low heat and remove the pan from the burner as soon as the marshmallows are melted.
Greasing Everything
Marshmallow is sticky. Grease your spatula, your hands, and your pan. I use cooking spray for the pan and a little butter on my hands. This saves so much frustration and makes the shaping process much smoother.
Working Quickly
The mixture starts to harden as it cools. Once you add the cereal, work fast to fold it in and shape the treats. If the mixture gets too cool to mix, you can gently warm it back up over low heat for a few seconds.
Using Gel Food Coloring
Liquid food coloring adds too much water to the mixture, which can make the cereal soggy and the treats sticky. Gel coloring is concentrated and adds color without altering the texture. This is a crucial tip for achieving that vibrant orange look.
Personal Failure Lesson
I once tried to make these with regular brown sugar instead of marshmallows, and it was a disaster. It turned into a hard candy brick. Stick to the recipe! Also, I once used too much butter, and the treats fell apart. Measure carefully.
Timing Strategy
Start melting the chocolate for the faces while the main mixture is cooling. This multitasking saves time. You want the chocolate to be ready when the pumpkins are formed and cooled slightly.
Consistency Tips
For uniform pumpkins, use a cookie scoop or ice cream scoop to portion the mixture. This ensures they are all the same size and look professional.
Variations & Adaptations
Dietary Variations
For a gluten-free version, use certified gluten-free crispy rice cereal. Most major brands offer this option. For a dairy-free twist, use coconut oil instead of butter and dairy-free marshmallows. There are several brands of vegan marshmallows available now that melt well.
Flavor Variations
Try adding a pinch of cinnamon or pumpkin pie spice to the marshmallow mixture for a more authentic pumpkin flavor. You can also use orange extract instead of vanilla for a stronger citrus note.
Seasonal Twists
For Christmas, change the food coloring to red and green, and use sprinkles instead of faces. For Easter, use pastel colors and candy eyes. The basic recipe is a blank canvas for any holiday.
Texture Variations
Add a handful of M&Ms or chocolate chips to the mixture before shaping for extra crunch and color. You can also add a layer of peanut butter cups inside the treats for a salty-sweet combo.
Personal Variation
I sometimes dip the bottom of the pumpkin in orange sprinkles to give it a textured, realistic skin look. It adds a nice visual detail that kids love.
Allergen Substitutions
If you have nut allergies, avoid peanut butter variations. Use sunflower seed butter or just stick to the classic recipe. For soy allergies, check the marshmallow and chocolate labels, as some contain soy lecithin.
Cooking Method Adjustments
You can make these in the microwave by melting the butter and marshmallows together in a large microwave-safe bowl. Heat in 30-second intervals, stirring in between, until smooth. This is faster but requires more attention to prevent burning.
Serving & Storage Suggestions
Serving Temperature
Serve these treats at room temperature. They are best enjoyed fresh, when the marshmallow is still soft and chewy. If they get too cold, the chocolate can become brittle.
Presentation
Arrange the pumpkins on a platter with a few real mini pumpkins or fall leaves for a festive display. They look great in a glass bowl or on a tiered stand.
Complementary Dishes
Serve with hot apple cider or pumpkin spice latte. They pair well with savory snacks like pretzels or cheese crackers for a balanced party spread.
Storage Instructions
Store leftovers in an airtight container at room temperature for up to 5 days. Do not refrigerate, as this can make the marshmallow hard. If you need to store them longer, freeze them in a single layer on a baking sheet, then transfer to a freezer bag. They will keep for up to 2 months.
Reheating Methods
If the treats have hardened slightly, you can warm them in the microwave for 5-10 seconds to soften the marshmallow. Be careful not to melt the chocolate decorations.
Flavor Development
The flavors meld nicely over the first day. The chocolate sets fully, and the marshmallow becomes slightly chewier. They are best within the first 48 hours.
Nutritional Information & Benefits
Each pumpkin treat contains approximately 150-200 calories, depending on the size. They are high in sugar and carbohydrates, so enjoy them in moderation. The Rice Krispies provide some fiber, and the marshmallows offer quick energy.
Health Benefits
While not a health food, this recipe is simple and free of artificial preservatives if you make it from scratch. You control the ingredients, so you can choose high-quality marshmallows without hydrogenated oils.
Dietary Considerations
This recipe is not suitable for low-carb or keto diets due to the high sugar content. It is not gluten-free unless you use gluten-free cereal. It contains dairy and soy (in most marshmallows and chocolates).
Allergen Notes
Check labels for wheat, milk, soy, and nuts (if using peanut butter variations). Always inform guests of potential allergens.
Personal Wellness Perspective
I view these as a fun, occasional treat rather than a daily snack. They bring joy and nostalgia, which has its own wellness value. Balance is key, and these fit perfectly into a balanced diet as a special occasion dessert.
Conclusion
These Easy Halloween Rice Krispie Treat Pumpkins are worth trying because they are simple, fun, and delicious. They require minimal effort but yield maximum joy. I encourage you to customize them with your own decorations and flavors. Make them your own!
I love this recipe because it brings back memories of simple, happy times in the kitchen. It is a recipe that connects generations and brings people together. Whether you are making them for your kids, your friends, or just for yourself, they are sure to be a hit.
Please share your creations with me! Tag me on social media or leave a comment below with your variations. I love seeing how you adapt the recipe. Happy Halloween, and enjoy the fun!
FAQs
Can I use homemade marshmallows?
Yes, you can, but they may be stickier and harder to handle. You might need to add a bit more cereal to compensate for the extra moisture.
Why are my treats hard?
This usually happens if you overheat the marshmallows or cook them for too long. Always use low heat and remove the pan from the heat as soon as the marshmallows are melted.
Can I make these ahead of time?
Yes, you can make them up to 5 days in advance. Store them in an airtight container at room temperature. Do not refrigerate.
How do I keep the chocolate from melting?
Keep the treats in a cool, dry place. If it is hot, you can refrigerate them for a short time, but let them come to room temperature before serving to avoid condensation.
Can I use other types of cereal?
You can use crispy wheat cereal or puffed rice, but Rice Krispies provide the best crunch and structure. Other cereals may make the treats denser.
Pin This Recipe!
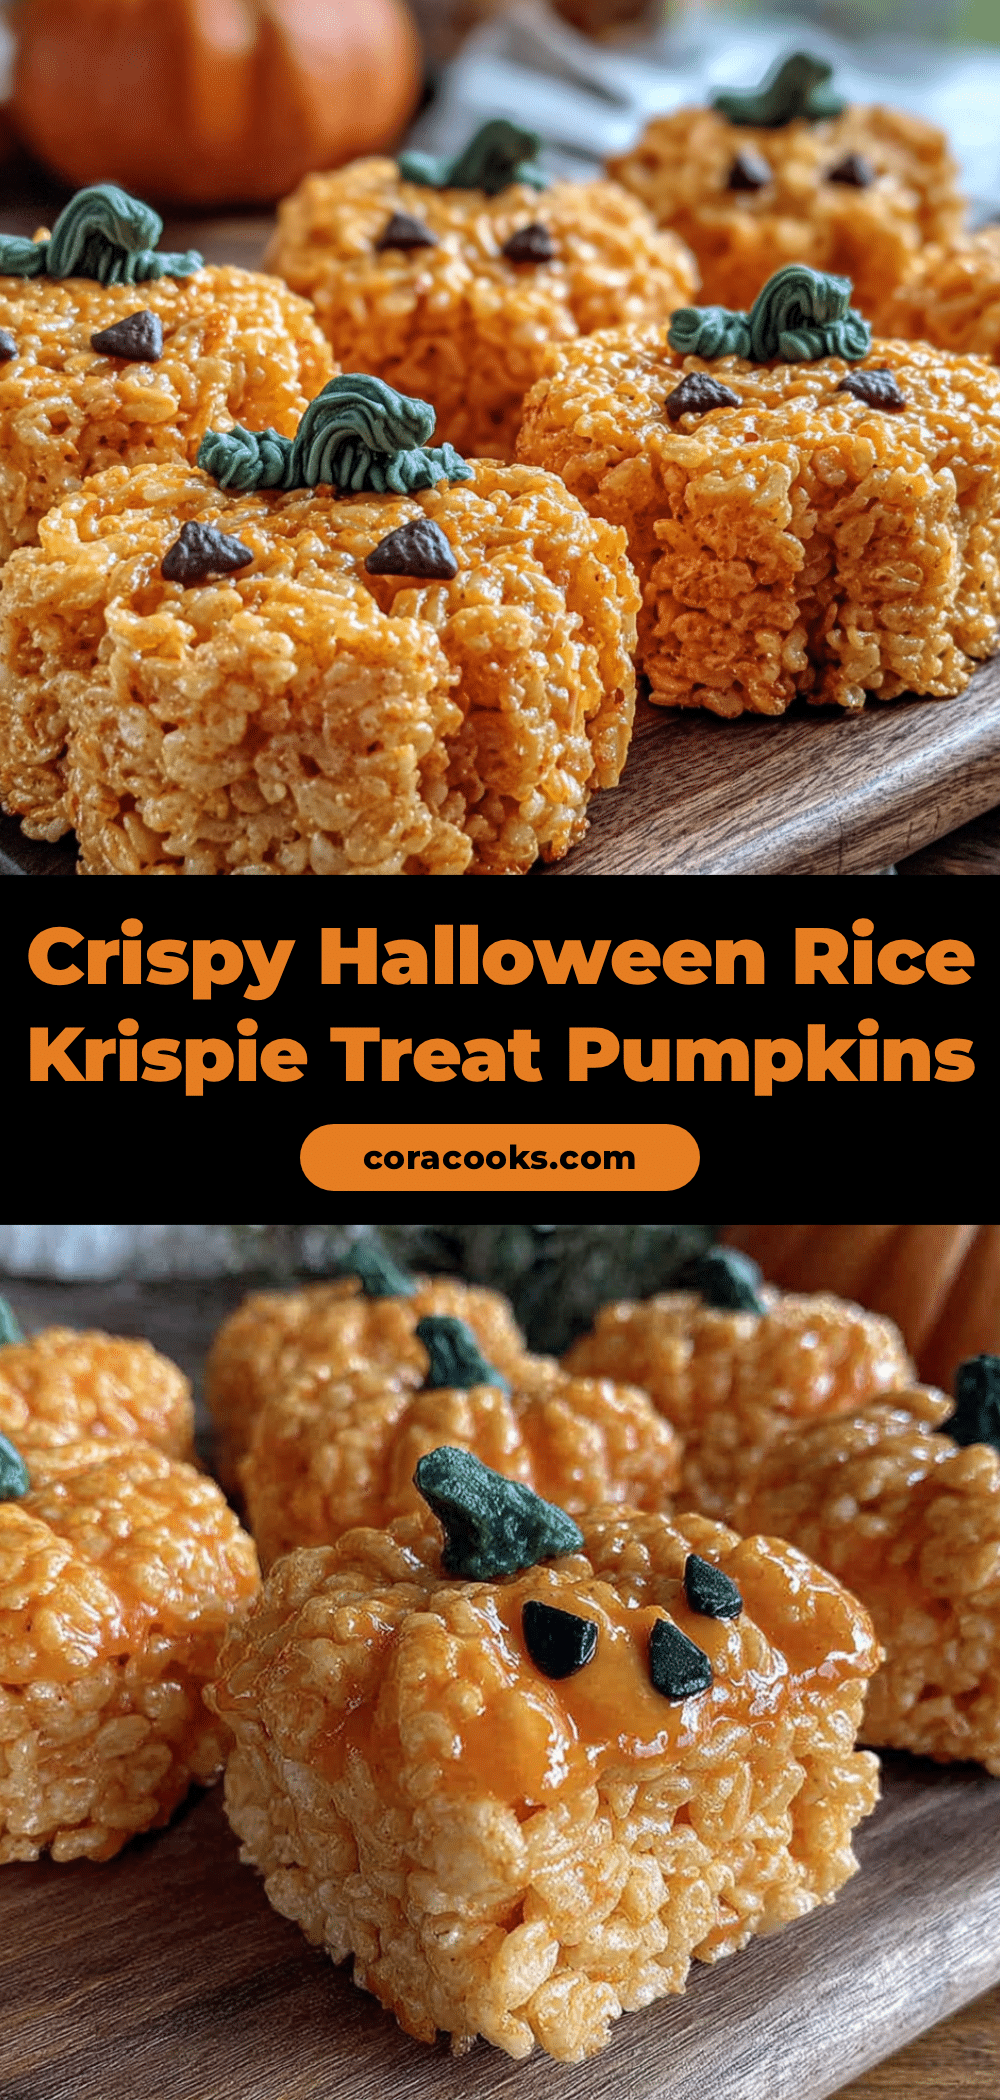
Easy Halloween Rice Krispie Treat Pumpkins: 5-Min No-Bake Fun
These adorable no-bake Halloween treats combine classic Rice Krispies texture with festive pumpkin shapes, decorated with chocolate faces and pretzel legs for a quick and fun seasonal snack.
- Prep Time: 15 minutes
- Cook Time: 10 minutes
- Total Time: 25 minutes
- Yield: 12-15 servings 1x
- Category: Dessert
- Cuisine: American
Ingredients
- 3 tablespoons unsalted butter
- 10 oz large marshmallows (about 40-50)
- 6 cups Rice Krispies cereal
- Gel-based orange food coloring
- 1 teaspoon vanilla extract
- 1/2 cup dark chocolate chips
- 1/4 cup white candy melts or white chocolate
- 12–15 small pretzel sticks
- Unsweetened cocoa powder (for dusting)
- Orange powder (optional, for dusting)
Instructions
- Line an 8×8 or 9×9 inch baking pan with parchment paper and lightly grease it. Grease your hands with butter or cooking spray if hand-forming.
- Place a large non-stick saucepan over low heat. Add butter and melt slowly.
- Add marshmallows to the melted butter and stir constantly with a silicone spatula until completely smooth and lump-free (about 3-4 minutes). Remove from heat immediately.
- Stir in vanilla extract and gel food coloring until the mixture is evenly colored vibrant orange.
- Add Rice Krispies cereal to the marshmallow mixture and gently fold until all cereal is coated. Work quickly as the mixture hardens.
- Take small handfuls (about 2 tablespoons) and roll into balls, then press one side slightly to shape into pumpkins. Place on a parchment-lined tray.
- Melt dark chocolate chips in the microwave in 30-second intervals, stirring between intervals. Pipe a small stem onto the top of each pumpkin.
- Melt white chocolate or candy melts. Use a toothpick or piping bag to add eyes and a mouth to each pumpkin.
- Let the chocolate decorations set completely at room temperature (10-15 minutes).
- Optionally dust stems with cocoa powder and attach pretzel legs. Serve at room temperature.
Notes
Use gel food coloring instead of liquid to prevent the treats from becoming sticky. Do not overheat the marshmallows or the treats will become tough. Grease all tools and hands to prevent sticking. Store in an airtight container at room temperature for up to 5 days; do not refrigerate.
Nutrition
- Serving Size: 1 pumpkin treat
- Calories: 175
- Sugar: 20
- Sodium: 120
- Fat: 6
- Saturated Fat: 3
- Carbohydrates: 28
- Fiber: 1
- Protein: 2
Keywords: Halloween, Rice Krispie Treats, No-Bake, Pumpkin, Kids Snack, Easy Dessert, Fall Treats


