Love this? Save it for later!
Share the inspiration with your friends
My sister had sworn she hated Brussels sprouts for fifteen years. Fifteen years of wrinkled noses at holiday tables, of pushing them to the side of her plate, of declaring them “those little bitter cabbages.” Then last Thanksgiving, I caught her standing over the stove, picking caramelized pieces straight from the roasting pan with her fingers. She didn’t even realize I was watching. That’s the thing about these crispy maple bacon Brussels sprouts—they don’t give you time to argue with yourself. One bite and your whole history with this vegetable just… resets.
Honestly, I get it. Brussels sprouts have a bad reputation for a reason. Boiled, steamed, or just barely roasted—they can turn into sad, sulfurous little orbs that nobody wants on their plate. I spent years trying to convince people otherwise, and let me tell you, I failed more times than I succeeded. But this version? This one actually works. The trick is getting the edges so dark and shattery that they crunch when you bite into them, then letting the maple syrup do its sticky, sweet thing while the bacon renders down into salty, meaty perfection.
Maybe you’ve been that person pushing Brussels sprouts around your plate, searching for an escape route. Or maybe you’re the cook who’s tired of watching your beautiful side dish get ignored. Either way, I think we can fix that. These sprouts come out of the oven looking like something from a food magazine—all glossy and caramelized, with the bacon crisped up into little flavor bombs throughout. I’ve been making them for three Thanksgivings now, and they’re the first dish to disappear every single time. The first dish. That’s not nothing.
Why You’ll Love This Recipe
Let me be straight with you—there are a lot of Brussels sprouts recipes out there. I’ve tested probably twenty different versions over the years, and this one keeps winning. Here’s why it stands apart from the rest:
- Quick & Easy: Comes together in about 35 minutes, with only 10 minutes of active prep. Perfect for when you’re juggling a dozen other dishes on Thanksgiving morning.
- Simple Ingredients: You need exactly six main ingredients, and five of them are probably in your kitchen right now. No special trips to fancy grocery stores.
- Perfect for Thanksgiving: This side dish holds up well on a buffet table, doesn’t need last-minute fussing, and looks gorgeous next to turkey and mashed potatoes.
- Crowd-Pleaser: I’ve served these to self-proclaimed Brussels sprouts haters at three different holiday gatherings. Every single person asked for the recipe. Every. Single. One.
- Unbelievably Delicious: The combination of crispy edges, sticky maple coating, and salty bacon creates a texture and flavor profile that’s honestly addictive. You’ll find yourself picking at the pan long after dinner is over.
What makes this recipe different from all the others? It’s the technique. Most recipes tell you to toss everything together and roast it, which leaves you with soggy bacon and steamed sprouts. I’ve learned that separating the bacon fat from the sprouts initially, then combining them at the right moment, gives you that perfect crispy texture. Plus, I add the maple syrup halfway through cooking rather than at the beginning, which prevents burning and creates that glossy, caramelized finish that makes these sprouts look as good as they taste.
This isn’t just another vegetable side dish. It’s the kind of recipe that makes people close their eyes after the first bite, that gets passed around the table with murmured compliments, that turns skeptics into believers. It’s comfort food disguised as a vegetable—healthier than you’d expect, but with the same soul-soothing satisfaction as your favorite indulgence.
What Ingredients You Will Need
This recipe uses simple, wholesome ingredients to deliver big, bold flavor without any fuss. Most of these are pantry staples, though you’ll want to pick up fresh Brussels sprouts and good-quality bacon for the best results.
- Brussels sprouts, 1½ pounds (680g) – Look for bright green, firm sprouts that feel heavy for their size. Avoid any with yellowing leaves or soft spots. I prefer medium-sized sprouts because they’re easier to halve evenly. (Fresh is non-negotiable here—frozen sprouts release too much water and won’t crisp up properly.)
- Bacon, 6 slices (about 180g) – Thick-cut bacon works best here because it renders more fat and stays meaty after cooking. I personally use Wright Brand or Nueske’s for their smoky flavor. Regular bacon works fine too, just watch the cooking time since it crisps faster.
- Pure maple syrup, 3 tablespoons (60ml) – Please use real maple syrup, not pancake syrup. The flavor is deeper and less cloyingly sweet. Grade A dark amber is my favorite for this recipe because it has a stronger maple taste that stands up to the bacon. (If you only have light syrup, add an extra teaspoon of brown sugar to deepen the flavor.)
- Olive oil, 2 tablespoons (30ml) – A good-quality extra virgin olive oil adds richness and helps the sprouts brown evenly. You can substitute avocado oil if you prefer a neutral flavor.
- Salt, ½ teaspoon (3g) – I use fine sea salt. The bacon adds saltiness too, so don’t overdo it. Start with less and adjust at the end.
- Black pepper, ¼ teaspoon (0.5g) – Freshly ground black pepper makes a noticeable difference here. The slight heat cuts through the sweetness of the maple syrup beautifully.
- Optional: Red pepper flakes, ¼ teaspoon (0.5g) – I add these when I want a little kick. They’re completely optional, but the tiny bit of heat balances the sweet and salty flavors perfectly.
- Optional: Balsamic glaze, for drizzling – A light drizzle right before serving adds tangy complexity. I keep a bottle of store-bought balsamic glaze in my pantry for exactly this purpose.
Equipment Needed
You don’t need fancy equipment for this recipe, which is part of why I love it so much. Here’s what you’ll need:
- Large rimmed baking sheet (half-sheet pan) – A rimmed sheet pan is essential for catching the bacon fat as it renders. I’ve tried making these on a cookie sheet without rims, and let me tell you, cleaning bacon grease out of the bottom of my oven was not fun. A half-sheet pan (18×13 inches) gives you enough room to spread the sprouts in a single layer.
- Parchment paper or aluminum foil – Lining the pan makes cleanup infinitely easier. I prefer parchment paper because nothing sticks to it, but foil works fine too. If using foil, give it a light spray of cooking oil.
- Chef’s knife and cutting board – A sharp chef’s knife makes quick work of halving the Brussels sprouts. Dull knives tend to crush the sprouts instead of cutting cleanly through them.
- Large mixing bowl – For tossing the sprouts with oil and seasonings before roasting. Any medium-to-large bowl will work.
- Small bowl or measuring cup – For mixing the maple syrup glaze separately before adding it to the pan.
- Spatula or tongs – For flipping the sprouts halfway through cooking. Tongs give you more control, but a wide spatula works perfectly too.
If you don’t have a rimmed baking sheet, you can use a 9×13-inch baking dish, but the sprouts will be slightly less crispy since they’re more crowded. Just increase the cooking time by 5-7 minutes and stir them more frequently.
Preparation Method
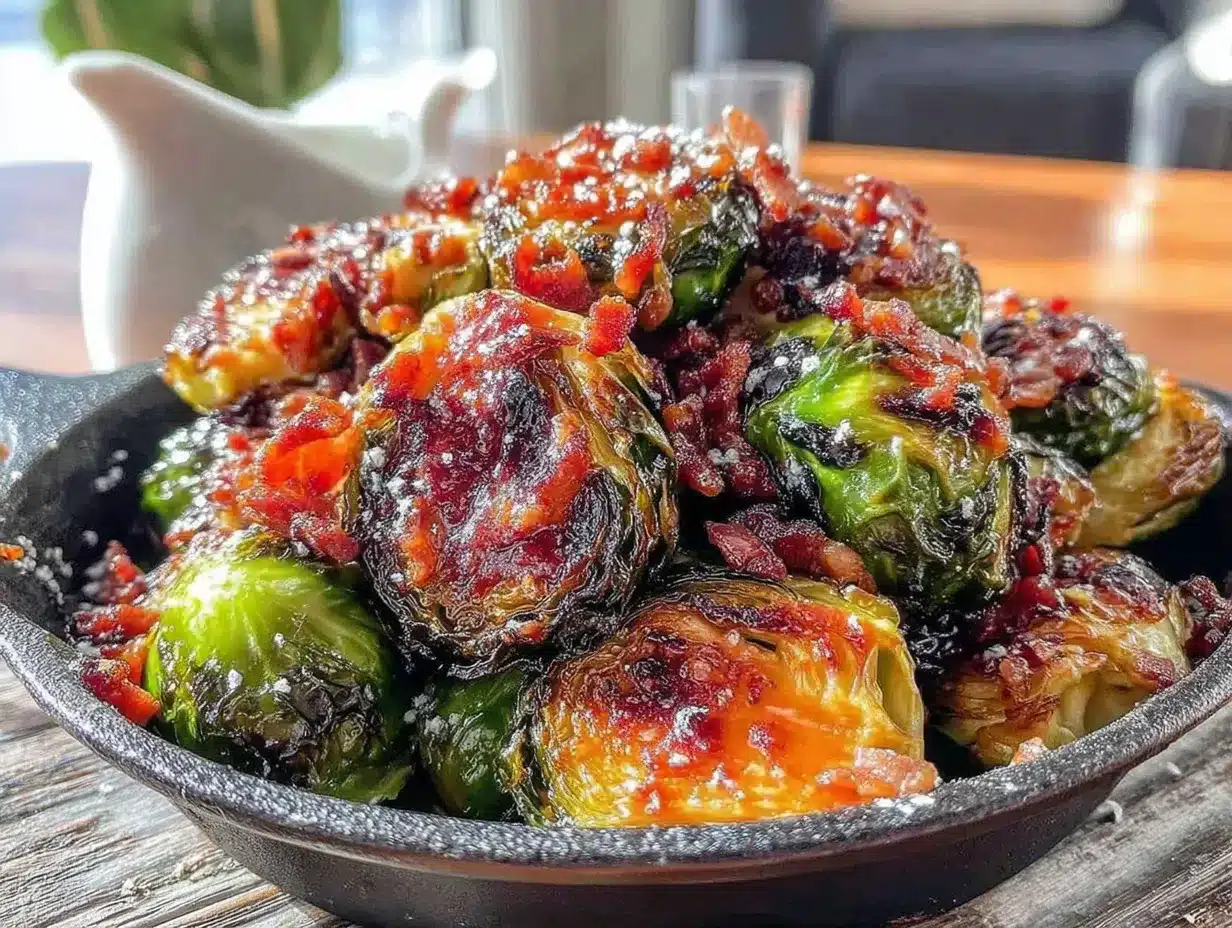
Alright, let’s get cooking. I’ve tested this method about eight times to get the timing just right, so trust the process even if it feels a little unusual at first.
- Preheat your oven to 400°F (200°C). Position the rack in the middle of the oven. Getting the temperature right is crucial—too low and the sprouts will steam instead of crisp; too high and the maple syrup will burn before the sprouts are tender.
- Prep the Brussels sprouts. Rinse 1½ pounds (680g) of Brussels sprouts under cold water and pat them completely dry with a clean kitchen towel. Any moisture left on the sprouts will create steam in the oven, which is the enemy of crispiness. Trim the tough stem ends, then cut each sprout in half lengthwise through the stem. If you have any really large sprouts, cut them into quarters so they’re roughly the same size as the others. (Uneven sizes lead to uneven cooking—some will be burnt while others are still raw.)
- Cook the bacon partially. Lay 6 slices of thick-cut bacon on your lined baking sheet in a single layer. Pop them in the oven for 8 minutes. You’re not looking for fully crispy bacon here—just partially cooked with the fat beginning to render. The bacon will continue cooking with the sprouts later. This step is the secret to getting crispy bacon instead of flabby, chewy pieces.
- While the bacon cooks, season the sprouts. In a large mixing bowl, toss the halved Brussels sprouts with 2 tablespoons (30ml) olive oil, ½ teaspoon (3g) salt, and ¼ teaspoon (0.5g) black pepper. Use your hands to really coat every surface—this helps the sprouts brown evenly. If you’re using red pepper flakes, add them now.
- Remove the bacon from the oven. Use tongs to transfer the partially cooked bacon to a cutting board. Don’t discard the rendered bacon fat on the baking sheet—that’s liquid gold. Leave it right where it is. Let the bacon cool for a minute, then cut it crosswise into 1-inch pieces. (I use kitchen shears for this; it’s faster and less messy than using a knife.)
- Arrange the sprouts on the baking sheet. Pour the seasoned Brussels sprouts onto the same baking sheet with the bacon fat. Spread them in a single layer, making sure each sprout half is cut-side down. This is important—the cut sides need direct contact with the hot pan to caramelize properly. Don’t crowd the pan; if the sprouts are touching too much, they’ll steam instead of roast.
- Roast for 15 minutes. Place the baking sheet in the oven and set a timer. Don’t stir them yet. Let them roast undisturbed so the cut sides develop that deep golden-brown color.
- Add the maple syrup and bacon. After 15 minutes, remove the pan from the oven. Sprinkle the cut bacon pieces over the sprouts. Drizzle 3 tablespoons (60ml) pure maple syrup evenly over everything. Use a spatula to toss everything together gently, then spread it back into a single layer with the cut sides down as much as possible.
- Roast for another 10-15 minutes. Return the pan to the oven and roast until the sprouts are tender when pierced with a fork and deeply caramelized on the edges. The bacon should be crispy and the maple syrup should be sticky and glossy. Watch closely during the last 5 minutes—maple syrup can go from perfectly caramelized to burnt very quickly.
- Rest and serve. Remove the pan from the oven and let the sprouts rest for 2-3 minutes. This allows the caramelized coating to set slightly. Transfer to a serving platter, drizzle with balsamic glaze if using, and serve immediately. The sprouts are best when they’re still hot and crispy.
Cooking Tips & Techniques
I’ve made this recipe enough times to learn what works and what doesn’t. Here are the things I wish someone had told me when I first started:
Pat those sprouts bone-dry. This is the single most important step, and I learned it the hard way. The first time I made these, I rinsed the sprouts and just shook off the excess water before roasting. They came out soggy and pale, with none of that beautiful caramelization. Water creates steam, and steam prevents browning. Take the extra 30 seconds to dry each sprout thoroughly with a clean kitchen towel.
Don’t skip the partial bacon cook. I know it adds an extra step, but trust me on this. When I first tried making these, I just tossed raw bacon pieces in with the sprouts from the beginning. The bacon ended up chewy and flabby because it was steaming in the moisture released by the vegetables. Pre-cooking the bacon for 8 minutes renders out the fat (which then flavors the sprouts) and gives the bacon a head start on crisping up.
Use a hot pan technique. Here’s a pro tip I discovered by accident: after the bacon comes out, put the baking sheet back in the oven for 2 minutes to reheat before adding the sprouts. The sizzle when the cold sprouts hit the hot pan is incredible, and it jumpstarts the caramelization process. Just be careful—the pan handle will be hot!
Watch the maple syrup timing. Maple syrup burns faster than you’d think. Adding it at the beginning of roasting guarantees burnt, bitter sprouts. Adding it at the halfway point gives it enough time to caramelize and coat the sprouts without crossing over into burnt territory. If your oven runs hot, check the sprouts at the 8-minute mark after adding the syrup instead of waiting the full 10-15 minutes.
Give them space. Crowded pans are the enemy of crispy vegetables. If your baking sheet is too small, use two pans or roast in batches. The sprouts need room for hot air to circulate around them; otherwise, they’ll steam in their own moisture and turn out sad and limp.
Variations & Adaptations
One of the things I love about this recipe is how flexible it is. Here are some variations I’ve tried and loved:
Maple-Dijon Version: Whisk 1 tablespoon of Dijon mustard into the maple syrup before drizzling it over the sprouts. The mustard adds a tangy sharpness that cuts through the sweetness beautifully. I made this version for Easter brunch, and my brother-in-law, who claims to hate mustard, ate half the pan before anyone noticed.
Spicy Honey Alternative: Swap the maple syrup for honey and add an extra ½ teaspoon of red pepper flakes. The honey creates a slightly different caramelization—stickier and glossier—while the extra heat balances the sweetness. This version is fantastic with roasted pork or chicken.
Vegan Option: Replace the bacon with 3 tablespoons of coconut oil (use the rendered fat from the pan) and add ½ teaspoon of smoked paprika plus ¼ teaspoon of liquid smoke. The smoky flavor mimics the bacon without using any animal products. My vegan friend Sarah requested this version for our Friendsgiving last year, and honestly, I couldn’t tell the difference.
Balsamic-Bacon Variation: Reduce the maple syrup to 2 tablespoons and add 1 tablespoon of balsamic vinegar along with it. The vinegar adds acidity that brightens the whole dish. This is my go-to version when I’m serving these sprouts alongside a rich, heavy main course like beef tenderloin or braised short ribs.
Air Fryer Adaptation: Cook the bacon in the air fryer at 375°F (190°C) for 5 minutes, then cut it into pieces. Toss the sprouts with oil, salt, and pepper, then air fry at 375°F (190°C) for 12 minutes, shaking the basket halfway through. Add the bacon and maple syrup, toss, and air fry for another 5-7 minutes until caramelized. This method is faster and produces incredibly crispy results, though you’ll need to work in batches depending on your air fryer size.
Serving & Storage Suggestions
These Brussels sprouts are at their absolute best straight from the oven, when the edges are still shatteringly crisp and the maple coating is warm and sticky. Here’s how to serve and store them:
Serving: Transfer the hot sprouts to a warmed serving platter. A light drizzle of balsamic glaze adds visual appeal and a tangy counterpoint to the sweetness. Sprinkle a few flakes of flaky sea salt over the top just before serving—the crunch of the salt crystals against the tender sprouts is wonderful. These pair beautifully with roasted turkey, glazed ham, prime rib, or even a simple roast chicken. For a complete Thanksgiving plate, serve them alongside mashed potatoes, stuffing, and cranberry sauce.
Storage: Leftover sprouts will keep in an airtight container in the refrigerator for up to 4 days. The texture will soften as they sit, but the flavor actually gets better as the maple-bacon coating melds with the sprouts overnight. I often make a double batch specifically for leftovers because they’re so good cold, straight from the fridge—like a sweet-and-salty salad.
Reheating: The best way to revive leftover sprouts is in a hot oven or air fryer. Spread them on a baking sheet and reheat at 400°F (200°C) for 5-7 minutes until hot and re-crisped. The microwave will work in a pinch, but the sprouts will be much softer. If you’re reheating in the microwave, add a splash of maple syrup to refresh the glaze.
Make-Ahead Tip: You can prep the Brussels sprouts up to 2 days in advance. Wash, dry, trim, and halve them, then store them in a sealed container in the refrigerator. You can also cook the bacon partially and cut it into pieces ahead of time. When you’re ready to serve, just toss everything together and roast. This makes Thanksgiving morning so much less stressful!
Nutritional Information & Benefits
These Brussels sprouts are a surprisingly nutritious side dish, even with the bacon and maple syrup. Here’s the estimated breakdown per serving (based on 6 servings):
- Calories: Approximately 220-250 per serving
- Protein: 8-10g
- Fat: 14-16g (mostly from bacon and olive oil)
- Carbohydrates: 18-20g
- Fiber: 5-6g
- Sugar: 10-12g (naturally occurring plus maple syrup)
Health Benefits: Brussels sprouts are packed with vitamin K (essential for bone health), vitamin C (immune support), and fiber (digestive health). They’re also rich in antioxidants, particularly kaempferol, which has been linked to reduced inflammation and cancer prevention. The olive oil provides heart-healthy monounsaturated fats, while the bacon adds protein and B vitamins. Yes, the bacon and maple syrup add sugar and saturated fat, but the overall dish is still a nutrient-dense option compared to many traditional Thanksgiving sides.
Dietary Considerations: This recipe is naturally gluten-free and nut-free. For a lower-carb option, reduce the maple syrup to 1½ tablespoons and add an extra tablespoon of olive oil. The sprouts will be less sweet but still deliciously caramelized. If you’re watching your sodium intake, use low-sodium bacon and reduce or omit the added salt.
Conclusion
Here’s the thing about these crispy maple bacon Brussels sprouts—they’re not trying to be fancy or complicated. They’re just honest, delicious food that happens to convert people who thought they hated Brussels sprouts. I’ve watched it happen at three different Thanksgivings now, and it never gets old. There’s something genuinely satisfying about seeing someone take that first hesitant bite, pause, then reach for seconds without saying a word.
I hope you’ll try this recipe, maybe for your own Thanksgiving table or just for a regular Tuesday night dinner. Play with the variations, adjust the maple syrup to your taste, make it your own. That’s the beauty of cooking—the recipe is just a starting point, and the best version is always the one that makes you happy.
If you make these, I’d love to hear about it. Leave a comment below and tell me how they turned out, or share your own twist on the recipe. Did your Brussels sprouts skeptic convert? Did you discover a new favorite variation? Let’s keep this conversation going—because honestly, the best recipes are the ones we share with each other.
Happy cooking, and here’s to crispy edges and sweet, sticky perfection!
Frequently Asked Questions
Can I use frozen Brussels sprouts for this recipe?
I really don’t recommend it. Frozen Brussels sprouts contain a lot of water, which releases during roasting and prevents that crispy, caramelized texture we’re going for. Fresh sprouts are absolutely worth the extra effort here. If frozen is all you have, thaw them completely, pat them extremely dry with paper towels, and increase the roasting time by about 10 minutes. They won’t be quite as crispy, but they’ll still taste good.
How do I prevent the maple syrup from burning?
The key is adding the maple syrup halfway through roasting rather than at the beginning. This gives it just enough time to caramelize without burning. Also, keep an eye on your oven temperature—if your oven runs hot, reduce the temperature to 375°F (190°C) after adding the syrup. And whatever you do, don’t walk away during the last 5 minutes of cooking. Maple syrup can go from perfectly golden to burnt black in what feels like seconds.
Can I make this recipe dairy-free?
This recipe is naturally dairy-free! The only potential dairy concern would be if your bacon contains dairy-based flavorings, but most traditional bacon is dairy-free. Just check the label if you’re serving someone with a dairy allergy. The olive oil and maple syrup are both dairy-free, so you’re good to go.
How do I get the bacon extra crispy?
Two tricks: First, cook the bacon partially before adding it to the sprouts. Eight minutes at 400°F (200°C) gives it a good head start. Second, cut the bacon into smaller pieces before adding it back to the pan. Smaller pieces crisp up faster and more evenly than larger strips. If you want even crispier bacon, cook it for 10 minutes initially instead of 8, but watch it carefully so it doesn’t burn during the second roast.
Can I double this recipe for a crowd?
Absolutely, but you’ll need to use two baking sheets instead of one. Crowding the pan is the fastest way to end up with steamed, soggy sprouts. Divide the ingredients evenly between two pans, making sure each pan has a single layer of sprouts with space between them. Rotate the pans halfway through cooking (swap top and bottom racks) to ensure even browning. The cooking time might increase by 2-3 minutes since the oven has more food to heat.
Pin This Recipe!
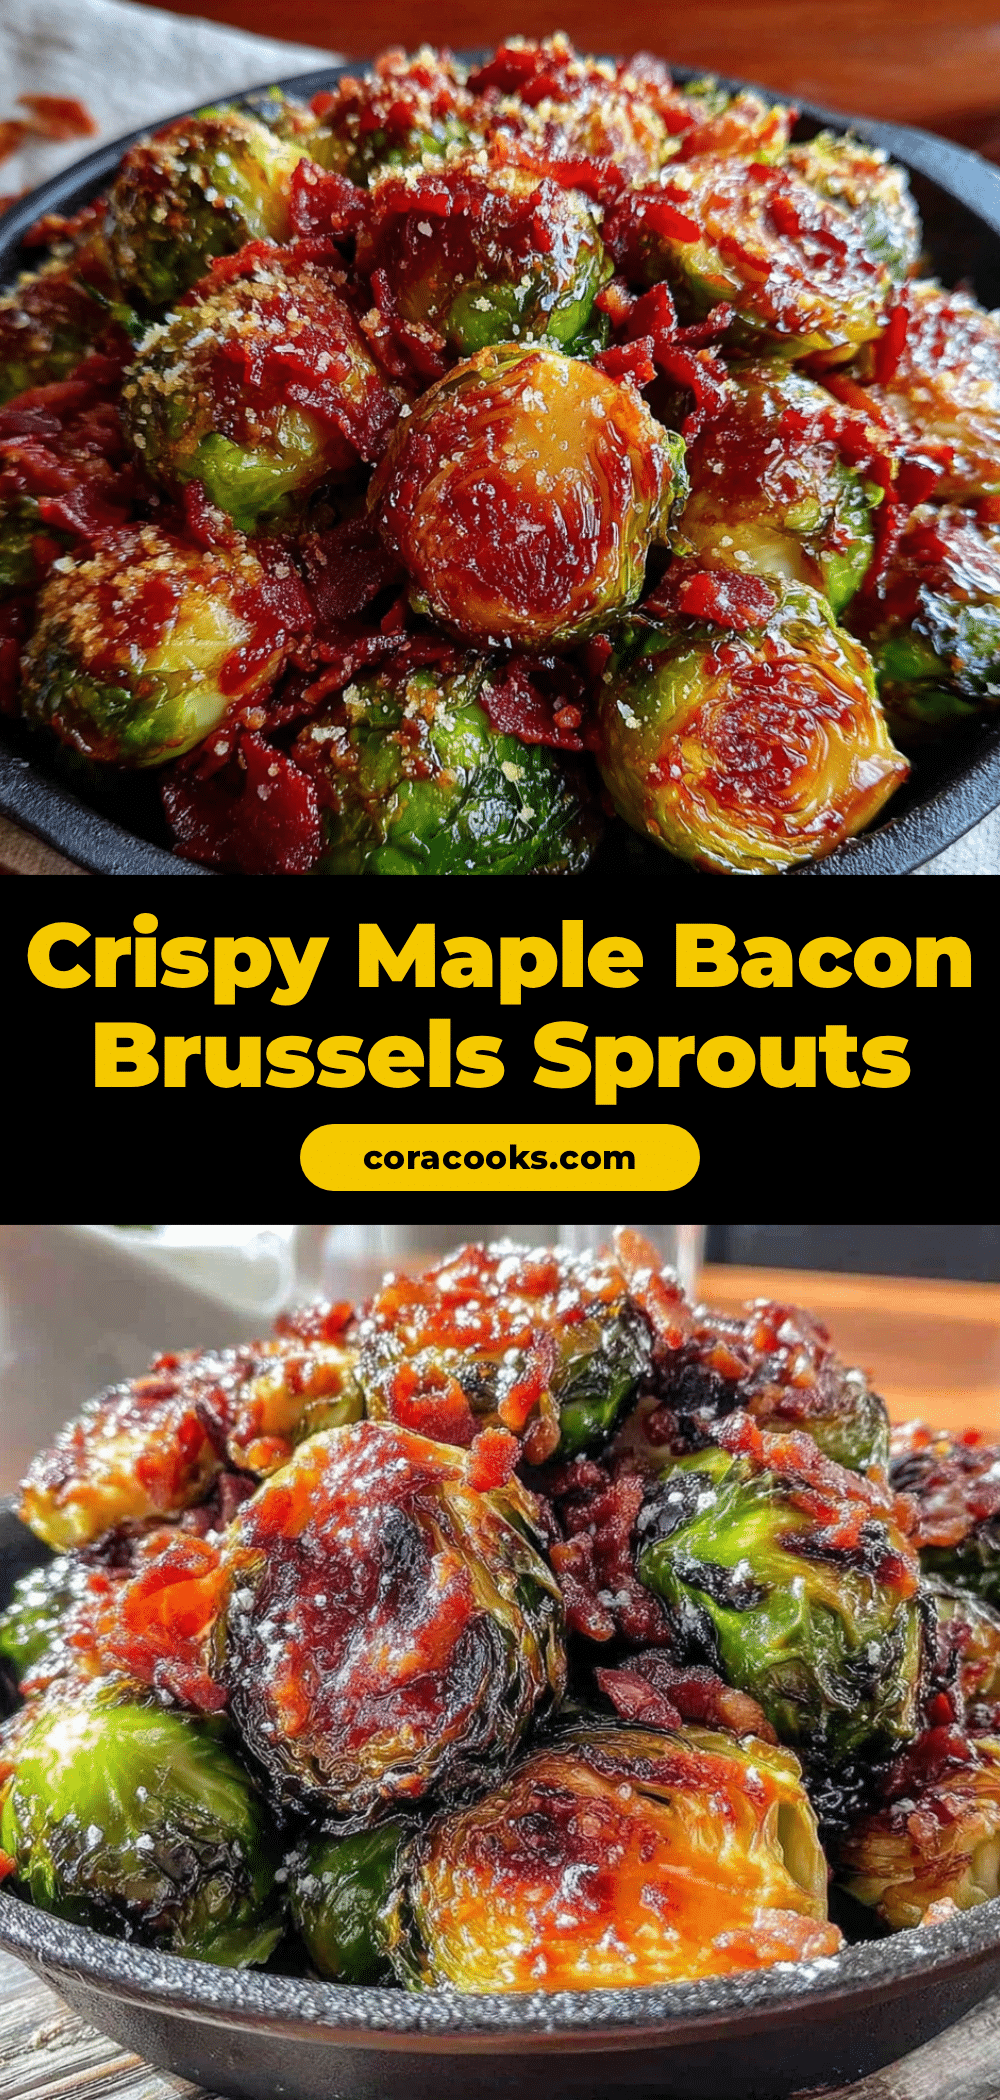
Crispy Maple Bacon Brussels Sprouts Best Thanksgiving Side
These crispy maple bacon Brussels sprouts are the perfect Thanksgiving side dish. The combination of crispy edges, sticky maple coating, and salty bacon creates an addictive flavor that converts even the most stubborn Brussels sprouts skeptics.
- Prep Time: 10 minutes
- Cook Time: 25 minutes
- Total Time: 35 minutes
- Yield: 6 servings 1x
- Category: Side Dish
- Cuisine: American
Ingredients
- 1½ pounds (680g) Brussels sprouts, fresh
- 6 slices (about 180g) thick-cut bacon
- 3 tablespoons (60ml) pure maple syrup
- 2 tablespoons (30ml) olive oil
- ½ teaspoon (3g) fine sea salt
- ¼ teaspoon (0.5g) freshly ground black pepper
- ¼ teaspoon (0.5g) red pepper flakes (optional)
- Balsamic glaze for drizzling (optional)
Instructions
- Preheat your oven to 400°F (200°C). Position the rack in the middle of the oven.
- Rinse 1½ pounds (680g) of Brussels sprouts under cold water and pat them completely dry. Trim the tough stem ends, then cut each sprout in half lengthwise through the stem. Quarter any large sprouts so they are roughly the same size.
- Lay 6 slices of thick-cut bacon on a lined baking sheet in a single layer. Bake for 8 minutes until partially cooked with fat beginning to render.
- While the bacon cooks, in a large mixing bowl, toss the halved Brussels sprouts with 2 tablespoons (30ml) olive oil, ½ teaspoon (3g) salt, and ¼ teaspoon (0.5g) black pepper. Add red pepper flakes if using.
- Remove the bacon from the oven. Transfer to a cutting board, let cool slightly, then cut crosswise into 1-inch pieces. Leave the rendered bacon fat on the baking sheet.
- Pour the seasoned Brussels sprouts onto the same baking sheet with the bacon fat. Spread in a single layer, cut-side down.
- Roast for 15 minutes without stirring.
- After 15 minutes, remove the pan from the oven. Sprinkle the cut bacon pieces over the sprouts. Drizzle 3 tablespoons (60ml) pure maple syrup evenly over everything. Toss gently, then spread back into a single layer with cut sides down as much as possible.
- Roast for another 10-15 minutes until sprouts are tender when pierced with a fork and deeply caramelized on the edges. Watch closely during the last 5 minutes.
- Remove from the oven and let rest for 2-3 minutes. Transfer to a serving platter, drizzle with balsamic glaze if using, and serve immediately.
Notes
Pat sprouts bone-dry to ensure crispiness. Don’t skip the partial bacon cook. Use a hot pan technique for better caramelization. Watch the maple syrup timing to prevent burning. Give sprouts space on the pan to avoid steaming.
Nutrition
- Serving Size: 1 serving
- Calories: 235
- Sugar: 11
- Sodium: 480
- Fat: 15
- Saturated Fat: 4
- Carbohydrates: 19
- Fiber: 5
- Protein: 9
Keywords: Brussels sprouts, maple bacon, Thanksgiving side, crispy Brussels sprouts, holiday side dish, bacon Brussels sprouts


