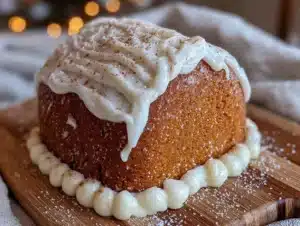
Love this? Save it for later!
Share the inspiration with your friends
My neighbor, a pastry chef named Maria, watched me wrestle with a batch of gingerbread dough that had turned into a sticky, unworkable mess. I was about to throw the whole thing in the trash, honestly. She didn’t say anything at first, just leaned against my kitchen counter with this knowing smile. Then she reached into my pantry, pulled out a new bag of flour, and said, “Start over. I’ll show you how my grandmother does it.” That was three winters ago, and I haven’t used another gingerbread recipe since.
Maria’s grandmother wasn’t a professional baker—she was a busy mom in a small Italian town who needed a gingerbread house that wouldn’t collapse before Christmas morning. Her secret wasn’t fancy techniques or hard-to-find ingredients. It was a specific ratio of butter to sugar and a trick with the chilling time that I’d never seen before. I adapted it a bit for my own kitchen, swapping in molasses for part of the honey because that’s what I had on hand, and honestly? It worked even better.
This quick foolproof gingerbread house dough has saved my sanity every December since. Maybe you’ve been there—staring at a pile of sticky dough at 10 PM, wondering why you thought this was a good idea. I get it. Building a gingerbread house is supposed to be fun, not a test of your patience. This dough rolls out like a dream, holds its shape perfectly during baking, and doesn’t puff up or spread. You know that feeling when a recipe just works? This is that recipe.
What makes this one stay in my rotation is how forgiving it is. You can overwork it a little, chill it for longer than planned, even reroll the scraps multiple times, and it still behaves. It’s the kind of dough that makes you look like a pro even if you’re just winging it. And honestly, isn’t that what we all want during the holiday chaos?
Why You’ll Love This Recipe
Let me tell you why this quick foolproof gingerbread house dough has become my go-to for every holiday baking session. I’ve tested it in three different ovens, at high altitude and sea level, and it never fails. Here’s what makes it special:
- Fast Preparation: From start to fridge in under 20 minutes. No waiting for butter to soften, no complicated mixing methods. Just dump, mix, and chill.
- Simple Pantry Ingredients: You probably have everything already. Butter, sugar, molasses, flour, spices, and an egg. No specialty flours or obscure extracts needed.
- Perfect for Busy Weeknights: Want to build a gingerbread house on a Tuesday after work? This dough comes together while you’re unloading the dishwasher.
- Zero Spreading: The edges stay sharp. Your walls won’t look like melted snowmen.
- Strong Enough for Construction: Royal icing actually sticks to this dough. It doesn’t crumble or crack when you’re trying to assemble walls.
What really sets this recipe apart is the texture. Most gingerbread house doughs are either too soft to work with or so dry they crack when you roll them. This one hits that sweet spot—firm enough to hold detail, pliable enough to roll without fighting you. I’ve taught my niece how to make gingerbread houses with this dough, and she’s seven. If a seven-year-old can handle it, so can you.
This isn’t just another gingerbread recipe. It’s the one that makes you actually enjoy the process instead of stressing about whether your walls will stand up straight. And when you light it up on Christmas Eve, with the warm glow coming through those candy windows? That’s the kind of moment that makes all the effort worth it.
What Ingredients You Will Need
This quick foolproof gingerbread house dough uses simple, everyday ingredients that work together to create a sturdy, flavorful structure. Here’s what you need and why each one matters:
- 3 cups (375g) all-purpose flour – The backbone of the dough. I recommend Gold Medal or King Arthur for consistent results. Don’t use bread flour—it makes the dough too tough to roll.
- 1 teaspoon baking powder – Just enough lift to prevent the dough from becoming a brick. Too much and your walls will puff up unevenly.
- 1/2 teaspoon salt – Balances the sweetness and strengthens the gluten structure.
- 2 teaspoons ground ginger – This is gingerbread, after all. Freshly ground tastes brighter, but jarred works fine.
- 2 teaspoons ground cinnamon – Adds warmth and that classic holiday smell.
- 1/2 teaspoon ground cloves – A little goes a long way. Skip it if you’re not a fan, but it adds depth.
- 1/2 cup (113g) unsalted butter – Cold, cut into small cubes. Cold butter creates flakier dough that holds its shape better. I use Kerrygold for the flavor.
- 1/2 cup (100g) packed brown sugar – Light or dark both work. Dark brown gives richer color and molasses flavor.
- 1/2 cup (170g) molasses – Not blackstrap! Use regular or mild molasses. Blackstrap is too bitter and makes the dough sticky. Grandma’s Molasses is my go-to brand.
- 1 large egg – Room temperature. It incorporates more evenly than cold egg.
- 1 teaspoon vanilla extract – Optional, but it rounds out the spice flavors beautifully.
For the spices, feel free to adjust based on what you have. I’ve made this with just cinnamon and ginger when I ran out of cloves, and it still tasted wonderful. The molasses is the real star here—it gives the dough its dark color, chewy texture, and that unmistakable gingerbread taste.
If you’re making this for someone with egg allergies, you can substitute the egg with 1/4 cup of applesauce. The dough will be slightly softer, so add an extra tablespoon of flour if needed. For a dairy-free version, use cold vegan butter sticks—not the spreadable kind in a tub, which has too much water.
Equipment Needed
You don’t need a professional bakery setup for this quick foolproof gingerbread house dough. Here’s what you’ll actually use:
- Large mixing bowl – Any bowl works, but a wide one makes mixing easier. I use my grandmother’s old ceramic bowl because it chills the dough faster.
- Whisk or fork – For mixing the dry ingredients together.
- Pastry cutter or two knives – To cut the cold butter into the flour. A food processor works too, but I find hand-cutting gives me more control.
- Rolling pin – A standard rolling pin is fine. If you have a French rolling pin (no handles), it gives you better feel for even thickness.
- Parchment paper – Absolute lifesaver. Roll the dough between two sheets and you won’t need extra flour, which can dry out the dough.
- Baking sheets – Heavy-duty ones prevent burning. I use Nordic Ware because they heat evenly.
- Sharp knife or pizza cutter – For cutting out your house pieces. A pizza cutter works faster for straight lines.
- Ruler – Not strictly necessary, but it helps keep your walls even. I use a cheap plastic one from the dollar store.
- Cookie cutters – For windows, doors, and decorations. Star and heart shapes are my favorites.
- Cooling rack – Lets air circulate so your pieces cool flat and don’t warp.
If you don’t have a pastry cutter, two butter knives work surprisingly well. Just cross them through the butter-flour mixture until it looks like coarse sand. And if you don’t have a rolling pin? A clean wine bottle works in a pinch—just make sure it’s not chilled.
Preparation Method
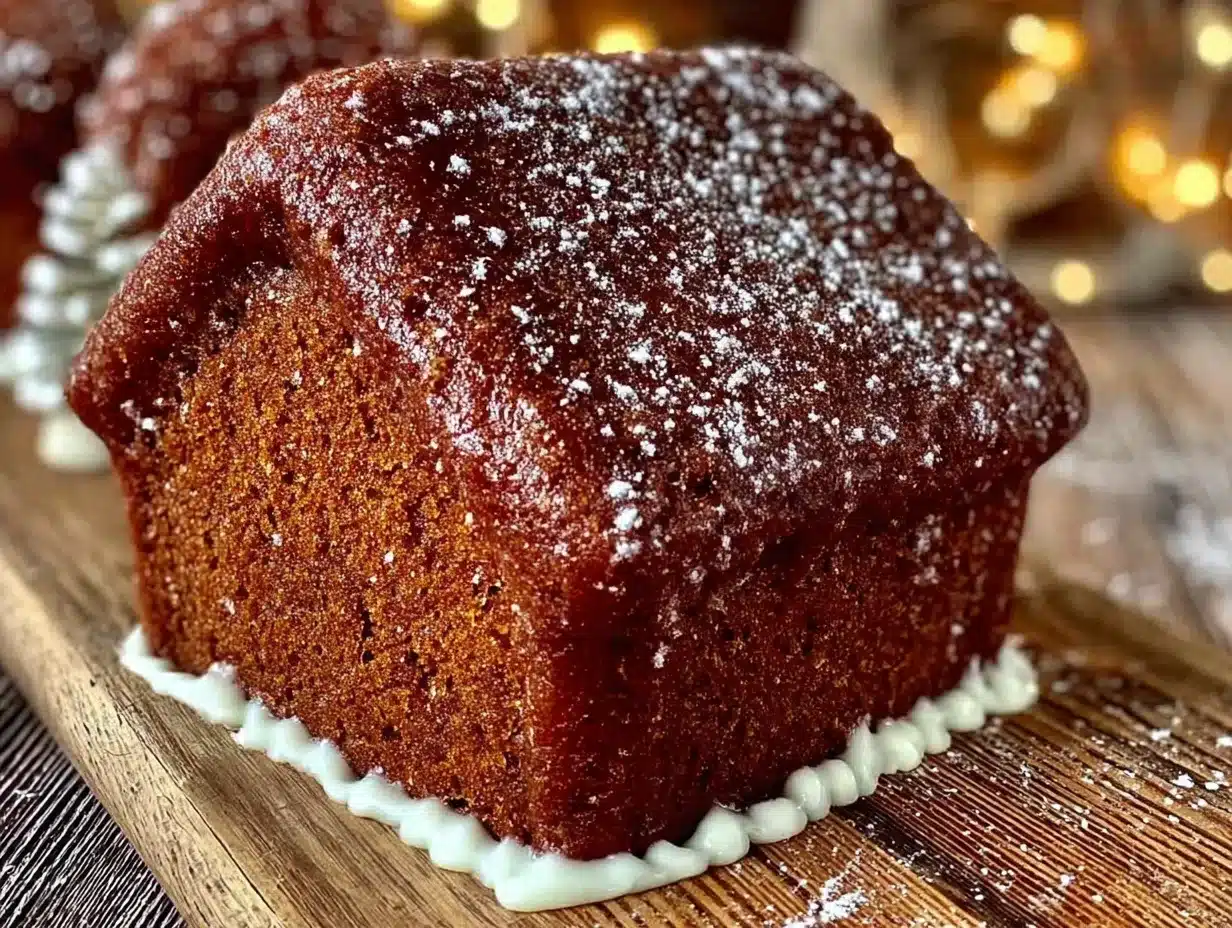
Making this quick foolproof gingerbread house dough is straightforward, but a few tricks make all the difference. Follow these steps, and you’ll have perfect dough every time.
- Mix the dry ingredients – In your large bowl, whisk together the flour, baking powder, salt, ginger, cinnamon, and cloves. Make sure there are no lumps. This takes about 30 seconds.
- Cut in the cold butter – Add the cold butter cubes to the flour mixture. Using your pastry cutter or two knives, cut the butter into the flour until the mixture looks like coarse meal with some pea-sized butter pieces remaining. Don’t overdo it—those little butter bits create flakiness. This takes about 3-4 minutes.
- Combine the wet ingredients – In a small bowl, whisk together the molasses, brown sugar, egg, and vanilla until smooth. The brown sugar should mostly dissolve. This takes about 1 minute.
- Bring it together – Pour the wet mixture into the flour-butter mixture. Stir with a wooden spoon or spatula until a shaggy dough forms. It will look dry at first—that’s normal. Keep mixing until no dry flour remains. This takes about 2 minutes.
- Knead briefly – Turn the dough onto a lightly floured surface. Knead it just 4-5 times to bring it together. Over-kneading develops gluten and makes the dough tough. You want it smooth but not elastic. This takes about 30 seconds.
- Divide and flatten – Split the dough into two equal discs. Flatten each disc to about 1-inch thick. This helps them chill faster and more evenly.
- Chill thoroughly – Wrap each disc tightly in plastic wrap. Refrigerate for at least 2 hours, but overnight is better. The dough needs this time to relax the gluten and firm up the butter. If you’re in a hurry, 1 hour in the freezer works—just watch that it doesn’t freeze solid.
- Roll it out – Place one disc between two sheets of parchment paper. Roll from the center outward, turning the paper occasionally to ensure even thickness. Aim for 1/4-inch thickness for walls, 1/8-inch for decorations. If the dough gets too soft, slide the whole thing onto a baking sheet and refrigerate for 10 minutes.
- Cut your pieces – Peel off the top parchment. Use your templates or cookie cutters to cut out your shapes. Leave about 1/2 inch between pieces for expansion. Don’t remove the pieces from the parchment yet—just cut around them.
- Chill again before baking – Slide the parchment with cut pieces onto a baking sheet. Refrigerate for 15-20 minutes. This is crucial—chilled dough holds its shape perfectly in the oven.
- Bake – Preheat your oven to 350°F (175°C). Bake one sheet at a time for 12-15 minutes. The edges should be just barely darker than the center. They’ll firm up as they cool.
- Cool completely – Let the pieces cool on the baking sheet for 5 minutes, then transfer to a cooling rack. Wait until they’re completely cool before moving or decorating—warm gingerbread is fragile and will crack.
A few things I’ve learned the hard way: If your dough cracks at the edges while rolling, it’s too cold. Let it sit at room temperature for 5 minutes. If it sticks to the parchment, it’s too warm. Pop it in the fridge for 10 minutes. And if your pieces puff up in the oven? That means your baking powder was too fresh or your oven was too hot. Try reducing the baking powder to 3/4 teaspoon next time.
Cooking Tips & Techniques
After making this quick foolproof gingerbread house dough more times than I can count, I’ve picked up a few tricks that save time and prevent disasters. Let me share what I’ve learned—including the mistakes.
The biggest mistake I made? Not chilling the dough long enough. The first time I tried this recipe, I was in a rush and only chilled it for 30 minutes. The dough spread in the oven, and my walls came out looking like melted candles. Now I set a timer and actually walk away. Two hours minimum, no shortcuts.
Rolling between parchment is the single best tip I can give you. It means you don’t need extra flour on the dough, which keeps it tender. Plus, cleanup is almost nothing. I buy the big rolls of parchment from Costco and go through them fast during December.
For perfect edges, use a ruler and a pizza cutter. Trace your template onto the dough, then cut in one smooth motion. Don’t saw back and forth—that creates jagged edges that won’t fit together neatly. If you’re making a standard house, measure your walls to be exactly the same size. I learned this after building a lopsided house that leaned like the Tower of Pisa.
Timing your bake is everything. Start checking at 10 minutes, even if your recipe says 12-15. Ovens vary wildly, and gingerbread goes from perfectly baked to burnt in about 90 seconds. Look for the edges to be slightly darker than the center. The centers should feel firm to the touch but not hard.
Multitasking strategy: While your first batch bakes, roll out the second disc of dough and cut those pieces. By the time the first batch is cooling, the second batch is ready to go in. This cuts your total time almost in half.
One thing I wish someone had told me: Don’t reroll scraps more than once. The more you work the dough, the tougher it gets. I keep a separate pile of “scrap pieces” for decorations—small stars, trees, or just random shapes that kids can decorate however they want.
Variations & Adaptations
This quick foolproof gingerbread house dough is flexible enough to handle all kinds of changes. Here are some variations I’ve tried and loved:
Gluten-Free Version – Substitute the all-purpose flour with a 1:1 gluten-free baking blend that contains xanthan gum. I’ve used King Arthur Measure for Measure with great results. The dough will be slightly more delicate, so handle it gently and chill it for an extra 30 minutes before baking.
Spice It Up – Add 1/4 teaspoon of black pepper for a subtle kick, or swap the cloves for cardamom. I made a batch with cardamom last year, and it smelled incredible—like a chai latte in cookie form. My neighbor Maria approved, which is high praise.
Chocolate Gingerbread – Replace 1/4 cup of the flour with unsweetened cocoa powder. Reduce the ginger to 1 teaspoon so the chocolate flavor shines. This version looks stunning with white royal icing and silver dragées.
Vegan Adaptation – Use cold vegan butter sticks (like Miyoko’s or Earth Balance) and replace the egg with 1/4 cup of applesauce or a flax egg (1 tablespoon ground flaxseed mixed with 3 tablespoons water). The texture will be slightly softer, so add an extra tablespoon of flour if needed.
Mini House Version – Roll the dough to 1/8-inch thickness and use small cookie cutters for a village of tiny houses. Bake for 8-10 minutes instead of 12-15. These make adorable gifts or place settings for a holiday dinner.
I’ve also tried adding orange zest to the dough, which gives it a bright, citrusy note that cuts through the molasses. That one’s become my personal favorite—it reminds me of the orange slices my grandmother used to put in her Christmas stockings.
Serving & Storage Suggestions
This quick foolproof gingerbread house dough is meant to be built and admired, but let’s talk about what to do with it before and after assembly.
Baked pieces can be stored in an airtight container at room temperature for up to 2 weeks. Layer them between sheets of parchment paper so they don’t stick together. I keep mine in a big plastic bin in the pantry, and they’re always ready when I have time to assemble.
Unbaked dough freezes beautifully. Wrap each disc tightly in plastic wrap, then in foil, and freeze for up to 3 months. When you’re ready to use it, thaw in the refrigerator overnight. Don’t microwave it—that melts the butter unevenly and ruins the texture.
Assembled houses will last for weeks if kept in a cool, dry place. Don’t put them in the refrigerator—the humidity softens the gingerbread and makes the royal icing weep. I display mine on a cake stand in the dining room, away from direct sunlight and heat vents.
For serving, gingerbread houses are more for decoration than eating, but the pieces are perfectly edible. If you want to eat yours, break it apart and enjoy within a few days of assembly. The cookies soften slightly from the icing, but they’re still delicious—especially the ones with candy decorations.
Reheating tip: If your baked pieces have gone slightly stale, pop them in a 300°F oven for 3-4 minutes. They’ll crisp right back up. Let them cool completely before decorating.
Nutritional Information & Benefits
Let’s be real—gingerbread houses aren’t health food, but this quick foolproof gingerbread house dough has a few redeeming qualities. Here’s the breakdown per serving (one wall piece, approximately 30g):
- Calories: 120
- Fat: 4g
- Carbohydrates: 19g
- Protein: 2g
- Fiber: 0.5g
- Sugar: 8g
The molasses is actually a decent source of iron, potassium, and calcium—not that you’re eating enough gingerbread to make a difference. But it does add a rich flavor without relying on processed sugar alone. The ginger and cinnamon have anti-inflammatory properties, and cloves are packed with antioxidants. So while this isn’t a health food, it’s not empty calories either.
For those with dietary restrictions, this recipe is naturally nut-free and can be made vegan or gluten-free with simple substitutions. It does contain dairy and gluten in its standard form, so keep that in mind if you’re baking for a crowd with allergies.
My personal take? Gingerbread houses are about tradition and creativity, not nutrition. I’d rather enjoy a small piece of a beautifully decorated house than worry about the sugar content. Life’s too short for that.
Conclusion
This quick foolproof gingerbread house dough has become a December tradition in my kitchen, and I hope it becomes one in yours too. It’s forgiving enough for beginners, reliable enough for pros, and delicious enough that you’ll actually want to eat the scraps. The best part? It doesn’t add stress to your holiday season—it adds joy.
I encourage you to make this recipe your own. Add your favorite spices, experiment with different shapes, or get the kids involved in decorating. The beauty of this dough is that it handles whatever you throw at it. And if your house ends up a little crooked? That’s character. Some of my favorite houses have been the wonky ones.
I’d love to hear how your gingerbread house turns out. Leave a comment below and tell me about your creation—did you go traditional or get creative? Share it with someone who needs a little holiday cheer, and don’t forget to pin this recipe for next year. Happy building, and may your walls stay straight and your icing hold strong!
Frequently Asked Questions
Can I make this dough ahead of time?
Absolutely. You can prepare the dough up to 3 days in advance and keep it wrapped tightly in the refrigerator. You can also freeze it for up to 3 months. Just thaw overnight in the fridge before rolling.
Why did my gingerbread dough crack when I rolled it?
This usually means the dough is too cold. Let it sit at room temperature for 5-10 minutes before rolling. If it’s still cracking, the dough might be too dry—sprinkle it with a teaspoon of water and knead gently.
Can I use this dough for gingerbread cookies?
Yes! This dough makes excellent cut-out cookies. Roll it to 1/4-inch thickness and bake for 10-12 minutes. They’re sturdy enough for decorating but still tender enough to eat.
How do I prevent my gingerbread house from collapsing?
Make sure your walls are cut at exactly the same height and your royal icing is thick enough to act as glue. Let the icing set for at least 30 minutes between each step—walls first, then roof. Patience is key here.
Can I use honey instead of molasses?
You can, but the texture and color will be different. Honey makes the dough lighter and slightly softer. If you substitute, reduce the sugar by 2 tablespoons since honey is sweeter than molasses.
PrintQuick Foolproof Gingerbread House Dough Recipe

This quick foolproof gingerbread house dough rolls out like a dream, holds its shape perfectly during baking, and doesn’t puff up or spread. It’s forgiving enough for beginners, reliable enough for pros, and delicious enough that you’ll actually want to eat the scraps.
- Prep Time: 20 minutes
- Cook Time: 15 minutes
- Total Time: 2 hours 35 minutes (includes chilling)
- Yield: 1 gingerbread house (approximately 4-6 servings) 1x
- Category: Dessert
- Cuisine: Italian-American
Ingredients
- 3 cups (375g) all-purpose flour
- 1 teaspoon baking powder
- 1/2 teaspoon salt
- 2 teaspoons ground ginger
- 2 teaspoons ground cinnamon
- 1/2 teaspoon ground cloves
- 1/2 cup (113g) unsalted butter, cold and cut into small cubes
- 1/2 cup (100g) packed brown sugar (light or dark)
- 1/2 cup (170g) molasses (not blackstrap; use regular or mild)
- 1 large egg, room temperature
- 1 teaspoon vanilla extract (optional)
Instructions
- Mix the dry ingredients: In a large bowl, whisk together the flour, baking powder, salt, ginger, cinnamon, and cloves until no lumps remain (about 30 seconds).
- Cut in the cold butter: Add the cold butter cubes to the flour mixture. Using a pastry cutter or two knives, cut the butter into the flour until the mixture looks like coarse meal with some pea-sized butter pieces remaining (about 3-4 minutes).
- Combine the wet ingredients: In a small bowl, whisk together the molasses, brown sugar, egg, and vanilla until smooth and the brown sugar mostly dissolves (about 1 minute).
- Bring it together: Pour the wet mixture into the flour-butter mixture. Stir with a wooden spoon or spatula until a shaggy dough forms and no dry flour remains (about 2 minutes).
- Knead briefly: Turn the dough onto a lightly floured surface. Knead just 4-5 times to bring it together until smooth but not elastic (about 30 seconds).
- Divide and flatten: Split the dough into two equal discs. Flatten each disc to about 1-inch thick.
- Chill thoroughly: Wrap each disc tightly in plastic wrap. Refrigerate for at least 2 hours, but overnight is better. For a quicker option, freeze for 1 hour (do not freeze solid).
- Roll it out: Place one disc between two sheets of parchment paper. Roll from the center outward, turning the paper occasionally, to 1/4-inch thickness for walls or 1/8-inch for decorations. If dough gets too soft, refrigerate on a baking sheet for 10 minutes.
- Cut your pieces: Peel off the top parchment. Use templates or cookie cutters to cut out shapes, leaving about 1/2 inch between pieces. Do not remove pieces from parchment yet.
- Chill again before baking: Slide the parchment with cut pieces onto a baking sheet. Refrigerate for 15-20 minutes.
- Bake: Preheat oven to 350°F (175°C). Bake one sheet at a time for 12-15 minutes, until edges are just barely darker than the center. They will firm up as they cool.
- Cool completely: Let pieces cool on the baking sheet for 5 minutes, then transfer to a cooling rack. Wait until completely cool before moving or decorating.
Notes
For best results, chill dough at least 2 hours. Roll between parchment to avoid extra flour. Do not reroll scraps more than once. If dough cracks while rolling, let it sit at room temperature for 5 minutes. If it sticks to parchment, refrigerate for 10 minutes. For egg allergy, substitute with 1/4 cup applesauce and add 1 tablespoon extra flour if needed. For dairy-free, use cold vegan butter sticks (not spreadable).
Nutrition
- Serving Size: 1 wall piece (approx
- Calories: 120
- Sugar: 8
- Sodium: 95
- Fat: 4
- Saturated Fat: 2.5
- Carbohydrates: 19
- Fiber: 0.5
- Protein: 2
Keywords: gingerbread house, gingerbread dough, holiday baking, Christmas, foolproof, quick, easy, gingerbread cookies