Love this? Save it for later!
Share the inspiration with your friends
The oven was already off, but the smoke detector was still having a quiet meltdown from the previous batch of burnt cookies. I stood in the kitchen, staring at the empty space where a complex layered cake was supposed to be cooling on the counter. It was July, and the heat was oppressive, sticking my shirt to my back like a second skin. I had planned to make a traditional sponge cake with fresh berries, but life, as it often does, had other plans. I was tired, the power had flickered out twice that afternoon, and I really just wanted something cold and sweet without turning my kitchen into a sauna.
I looked at the fridge and saw a stack of vanilla wafers I’d bought for a party that never happened, a tub of heavy cream that needed using up, and a bag of blueberries that were starting to soften. Honestly, I was ready to just eat cereal. But then I remembered an old trick my grandmother used to pull when the electricity went out in the countryside. She didn’t bake; she built. She layered cookies and cream in a dish and let the fridge do the heavy lifting. It wasn’t elegant. It wasn’t what I had planned. But I was desperate for something that tasted like summer.
So I grabbed the wrong bowl, a mixing whisk that was bent slightly from a previous drop, and started throwing things together. I whipped the cream until my arm burned, folded in the sweetened condensed milk, and arranged the cookies in a frantic, messy pattern. I didn’t have a plan for the colors. I just wanted blue. So I mashed some of those blueberries into the cream, creating a swirling, imperfect navy blue layer. Then I tossed some fresh red strawberries on top for good measure. What came out was nothing like the plan — and better.
This was supposed to be a structured dessert for a dinner party, but it turned into a messy, beautiful, no-bake masterpiece that tasted like relief. I mean, who needs a perfect sponge when you have creamy, cookie-soaked layers that melt in your mouth? It was chaotic, yes. But that creamy no-bake red white and blueberry icebox cake became my go-to for every hot day after that. You know that feeling when you stop trying to control everything and just let the ingredients do their thing? That’s where the magic happens.
Why You’ll Love This Recipe
Let’s be real for a second. Most people think baking requires a mountain of patience, precise temperatures, and a serious amount of cleanup. This recipe flips that script entirely. I’ve tested this creamy no-bake red white and blueberry icebox cake dozens of times, and the consistency is always spot-on. It’s not just about convenience; it’s about the texture. The way the vanilla wafers absorb the cream mixture creates a soft, cake-like layer that is incredibly satisfying without being heavy.
Here is why this dish keeps me coming back to the kitchen:
* **Quick & Easy:** You spend about fifteen minutes assembling this. No oven preheating, no cooling racks, no waiting for layers to set on a counter. It’s perfect for those last-minute weeknight cravings or when you’re hosting friends and realize you forgot to make dessert.
* **Simple Ingredients:** You likely have everything in your pantry right now. Vanilla wafers, heavy cream, condensed milk, and berries. No fancy flours or obscure extracts. It’s wholesome and straightforward.
* **Perfect for Summer Gatherings:** This is the ultimate pool party or barbecue dessert. It looks stunning with its patriotic red, white, and blue swirls, but it’s cool enough to eat even on the hottest day of the year.
* **Crowd-Pleaser:** Kids love the cookie texture, and adults appreciate the sophisticated balance of tart berries and sweet cream. It’s a hit at picnics, potlucks, and casual dinners.
* **Unbelievably Delicious:** The flavor combo is next-level comfort food. The contrast between the crunchy (then soft) wafer and the silky cream is addictive.
What makes this version different from the rest is the attention to the berry integration. Many recipes just drop whole berries in, which can make the layers soggy or uneven. I’ve found that mashing a portion of the berries into the cream base creates a natural, beautiful swirl that holds its shape. It’s not just another icebox cake; it’s your best version. This recipe isn’t just good—it is the kind that makes you close your eyes after the first bite. It’s comfort food reimagined—healthier, faster, but with the same soul-soothing satisfaction.
What Ingredients You Will Need
This recipe uses simple, wholesome ingredients to deliver bold flavor and satisfying texture without the fuss. The magic here is in the balance of fats and sugars, which creates that rich, creamy mouthfeel. You don’t need anything exotic, just high-quality basics that you can trust.
**For the Cream Base:**
* **Heavy whipping cream:** You need the full-fat version for stability. I recommend using a brand like Organic Valley or Clover for the best whipping consistency. If the cream is too low in fat, it won’t hold the layers.
* **Sweetened condensed milk:** This is the sweetener and thickener. Don’t skim on quality here. A can of Eagle Brand works perfectly. It adds that distinct caramel-like sweetness that pairs well with vanilla.
* **Vanilla extract:** Use real vanilla bean paste or high-quality extract. It enhances the vanilla wafers and ties the whole flavor profile together. Skip the imitation stuff if you can.
* **Cream cheese (optional but recommended):** Adding a quarter cup of softened cream cheese stabilizes the mixture and adds a slight tang that cuts through the sweetness.
**For the Layers:**
* **Vanilla wafers:** Look for sturdy, crisp cookies. Nabisco brand is a classic choice, but any high-quality vanilla wafer will work. Avoid the ones that are too thin or crumbly, as they might disintegrate too quickly.
* **Fresh blueberries:** These provide the blue layer. Choose firm, dark blue berries. If they are mushy, they will turn your cream gray instead of pretty blue.
* **Fresh strawberries:** These add the red. Make sure they are ripe and sweet. If they are too tart, the flavor balance might be off.
* **Honey or maple syrup:** A drizzle on top adds a nice glossy finish and extra floral notes.
**Substitution Guidance:**
* **Dairy-Free Option:** Swap the heavy cream for full-fat coconut cream (chilled overnight) and use a dairy-free condensed milk alternative. The texture will be slightly different but still delicious.
* **Gluten-Free:** Use gluten-free vanilla wafers or shortbread cookies. Note that GF cookies may absorb moisture faster, so assemble closer to serving time.
* **Lower Sugar:** You can use a sugar-free condensed milk alternative, but be aware that the sweetness level will be much lower, which might make the cream taste more tart.
Equipment Needed
You don’t need a fancy kitchen to make this creamy no-bake red white and blueberry icebox cake. Here is what you’ll need to get it done smoothly.
* **Large mixing bowl:** A wide bowl is best for whipping the cream. Glass or stainless steel works well because it stays cool. If you can, chill your bowl in the fridge for 15 minutes before starting.
* **Electric hand mixer or stand mixer:** This saves your arm. Whipping cream by hand takes effort and time. A hand mixer with beaters is sufficient, but a stand mixer with a whisk attachment is faster and more consistent.
* **Rubber spatula:** Essential for folding the berries into the cream without deflating it. A flexible spatula ensures you get all the mixture into the dish without waste.
* **8×8 inch square baking dish:** This is the standard size for icebox cakes. It gives you nice, thick layers. You can also use a 9×13 dish if you want thinner layers for a larger crowd.
* **Colander:** For rinsing and draining the berries. Make sure they are completely dry before using them, or excess water will make the cake soggy.
* **Measuring cups and spoons:** Precision matters, especially with the liquid ratios.
If you don’t have a hand mixer, you can use a whisk, but you’ll need to put in some elbow grease. I once made this with just a whisk and a strong will, and it worked, but my arms were sore for a day. Also, if your baking dish isn’t glass, be aware that it might not chill as evenly. Glass is best for retaining the cold temperature.
Preparation Method
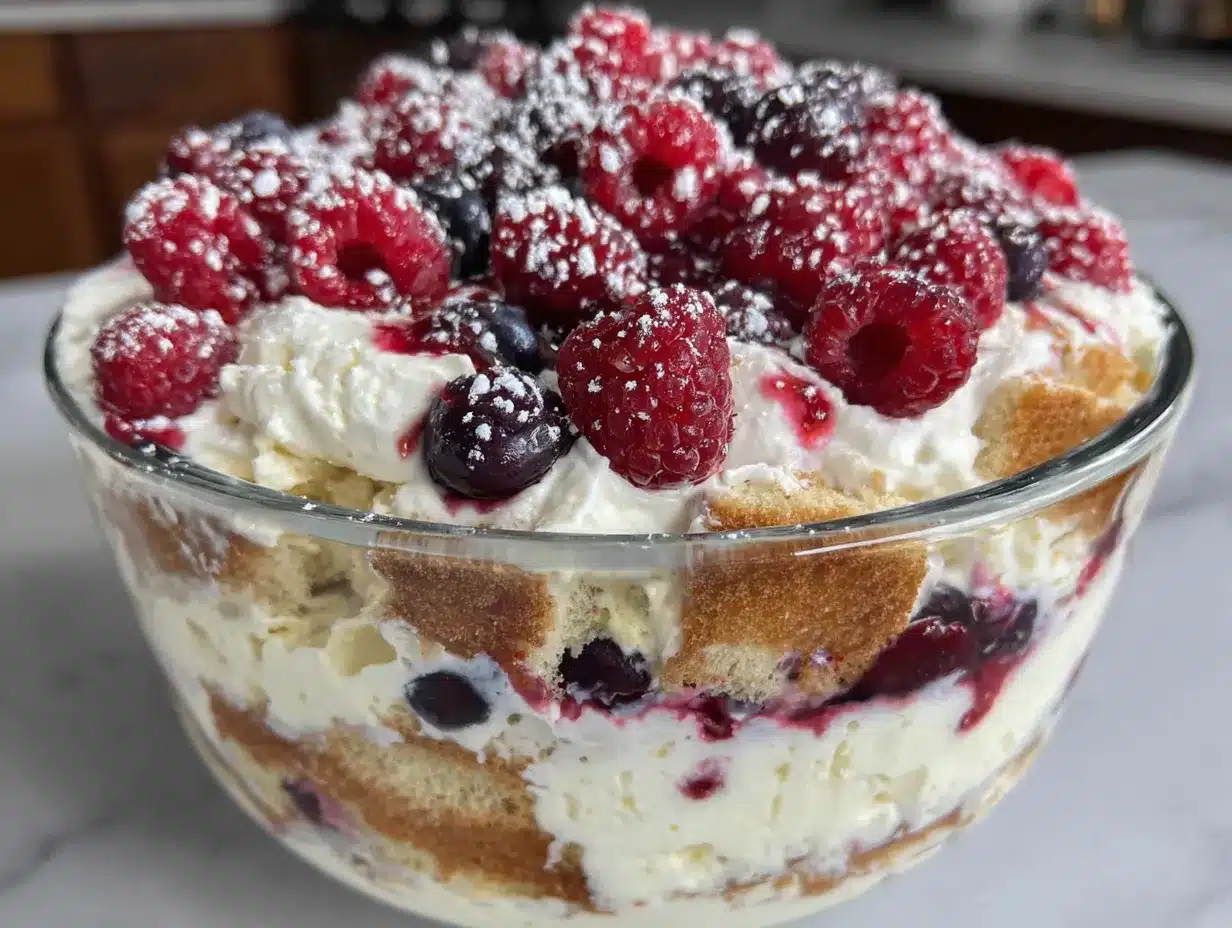
Making this cake is straightforward, but there are a few key steps to ensure the layers set properly and the flavors meld beautifully.
1. **Prepare the Berries (10 minutes):** Wash your blueberries and strawberries thoroughly. Pat them completely dry with paper towels. This is crucial. If they are wet, they will slide around and make the cake messy. Chop the strawberries into small, uniform pieces. Leave the blueberries whole or gently mash half of them if you want a swirled effect.
2. **Whip the Cream (5 minutes):** In your chilled large bowl, pour the heavy whipping cream. Using your electric mixer, beat on medium-high speed until stiff peaks form. This means when you lift the beaters, the cream stands up straight. Do not overbeat, or it will turn into butter.
3. **Make the Sweetened Mixture (5 minutes):** In a separate medium bowl, whisk together the sweetened condensed milk, vanilla extract, and softened cream cheese (if using) until smooth. Gently fold this mixture into the whipped cream. Use your rubber spatula and move slowly. You want to keep the air in the cream so the texture stays light.
4. **Create the First Layer (2 minutes):** Spread a thin layer of the cream mixture on the bottom of your 8×8 baking dish. This acts as glue for the first layer of cookies.
5. **Add the Cookie Layer (2 minutes):** Place a single layer of vanilla wafers over the cream. Try to keep them flat. If they curve up, press them down gently.
6. **Add the Berry and Cream Layers (5 minutes):** Spread half of the remaining cream mixture over the cookies. Now, add your blueberries. Scatter them evenly. Then, add another layer of cookies. Repeat the process with the remaining cream and the strawberries on top. For the final touch, you can swirl some of the mashed blueberries into the top layer of cream for a pretty blue-white mix.
7. **Chill (4-6 hours):** Cover the dish tightly with plastic wrap. Place it in the fridge. This is the most important step. The cookies need time to soften and absorb the cream. Don’t rush this. Ideally, let it sit overnight.
8. **Serve:** Before serving, you can drizzle a little honey on top and add a few fresh berries for garnish. Slice with a sharp knife for clean edges.
Cooking Tips & Techniques
There are a few tricks I’ve learned over the years to make this cake fail-proof.
* **Temperature Control:** Keep everything cold. Warm cream won’t whip. Warm cookies will dissolve too fast. If your kitchen is hot, work quickly or put your bowl back in the fridge between steps.
* **Don’t Skip the Dry Berries:** I cannot stress this enough. Wet berries are the enemy of a good icebox cake. Use paper towels. If you’re in a hurry, let them air dry for a few minutes.
* **Layering Consistency:** Try to keep your layers even. If one layer is thicker, the cake might collapse when you slice it. Use a ruler or your eye to gauge the height.
* **Patience with the Chill Time:** If you cut into it too soon, it will be a mess. The cookies need at least four hours to soften. Overnight is best. If you’re in a rush, freeze it for 30 minutes to speed up the setting process, but be careful not to freeze it solid.
* **Mixing Technique:** When folding the condensed milk into the cream, use a gentle hand. Overmixing deflates the air, resulting in a dense, heavy cake. You want it light and airy.
I once rushed this step and ended up with a dense brick. It tasted good, but the texture was off. Don’t make my mistake. Take your time with the folding.
Variations & Adaptations
While the classic red, white, and blue version is a favorite, there are plenty of ways to adapt this recipe to your taste or dietary needs.
* **Tropical Twist:** Swap the berries for mango and pineapple chunks. Use coconut cream and add a hint of lime zest to the mixture. It’s refreshing and perfect for spring.
* **Chocolate Lovers:** Replace the vanilla wafers with chocolate wafers or Oreos. Add a layer of chocolate chips or a drizzle of chocolate sauce between the layers.
* **Nut-Free Option:** If you have nut allergies, ensure your wafers and cream are certified nut-free. You can also add crushed graham crackers for a different crunch.
* **Seasonal Berry Swap:** In the fall, use cranberries and apples. In winter, use pomegranate seeds and orange zest. The recipe is flexible.
* **Alcohol Infusion:** For an adult version, add a tablespoon of Grand Marnier or rum to the cream mixture. It adds a sophisticated depth of flavor.
I’ve tried adding a layer of lemon curd in the middle, and it was surprisingly tangy and delicious. Don’t be afraid to experiment.
Serving & Storage Suggestions
This cake is best served chilled. Let it sit in the fridge for at least 30 minutes before slicing to ensure clean cuts.
* **Presentation:** Dust the top with powdered sugar or fresh mint leaves for a professional look. It’s very photogenic, especially for social media.
* **Complementary Dishes:** Serve with a side of fresh fruit salad or a simple green salad if you’re making it for a larger meal. It pairs well with iced tea or lemonade.
* **Storage:** Store in the fridge in an airtight container for up to 3 days. The flavors actually improve after the first day as the cookies fully soften.
* **Freezing:** You can freeze this cake, but the texture of the berries may change slightly upon thawing. Wrap tightly in plastic and foil. Thaw in the fridge overnight.
* **Reheating:** Do not reheat. This is a cold dessert. Eat it straight from the fridge.
Nutritional Information & Benefits
While this is a dessert, it does offer some nutritional benefits.
* **Calcium:** The dairy components provide a good source of calcium, which is important for bone health.
* **Vitamins:** The fresh berries are packed with Vitamin C and antioxidants, which help combat inflammation.
* **Dietary Considerations:** This recipe is not gluten-free unless you use GF cookies. It is also high in sugar and saturated fat, so enjoy in moderation.
* **Wellness Perspective:** I see this as a treat, not a health food. But using real fruit and quality dairy makes it a better choice than processed store-bought cakes. It’s about balance.
Conclusion
This creamy no-bake red white and blueberry icebox cake is more than just a dessert. It’s a reminder that sometimes the best things in life come from happy accidents and simple ingredients. It’s easy to make, delicious to eat, and beautiful to look at. I hope you try it and make it your own. Feel free to swap berries, change the cookies, or add your own twist.
If you make this recipe, I’d love to hear how it turns out. Leave a comment below or share a photo on social media. Tag me so I can see your creations. Thanks for reading, and happy baking (or rather, no-baking)!
FAQs
Can I use frozen berries instead of fresh?
Yes, but you must thaw and drain them completely. Frozen berries release a lot of water, which can make the cake soggy. Pat them dry thoroughly before adding them to the layers.
How long does it take for the cookies to soften?
It usually takes about 4-6 hours for the cookies to soften enough to eat like cake. Overnight is best for the softest texture.
Can I make this ahead of time?
Absolutely. In fact, it’s better when made ahead. You can assemble it the day before you plan to serve it.
What if I don’t have heavy cream?
You can use whipped topping (like Cool Whip) mixed with cream cheese, but the texture will be different. Heavy cream gives the best richness and stability.
Is this recipe gluten-free?
Not traditionally, as it uses vanilla wafers. However, you can substitute with gluten-free vanilla wafers or shortbread cookies to make it gluten-free.
Pin This Recipe!
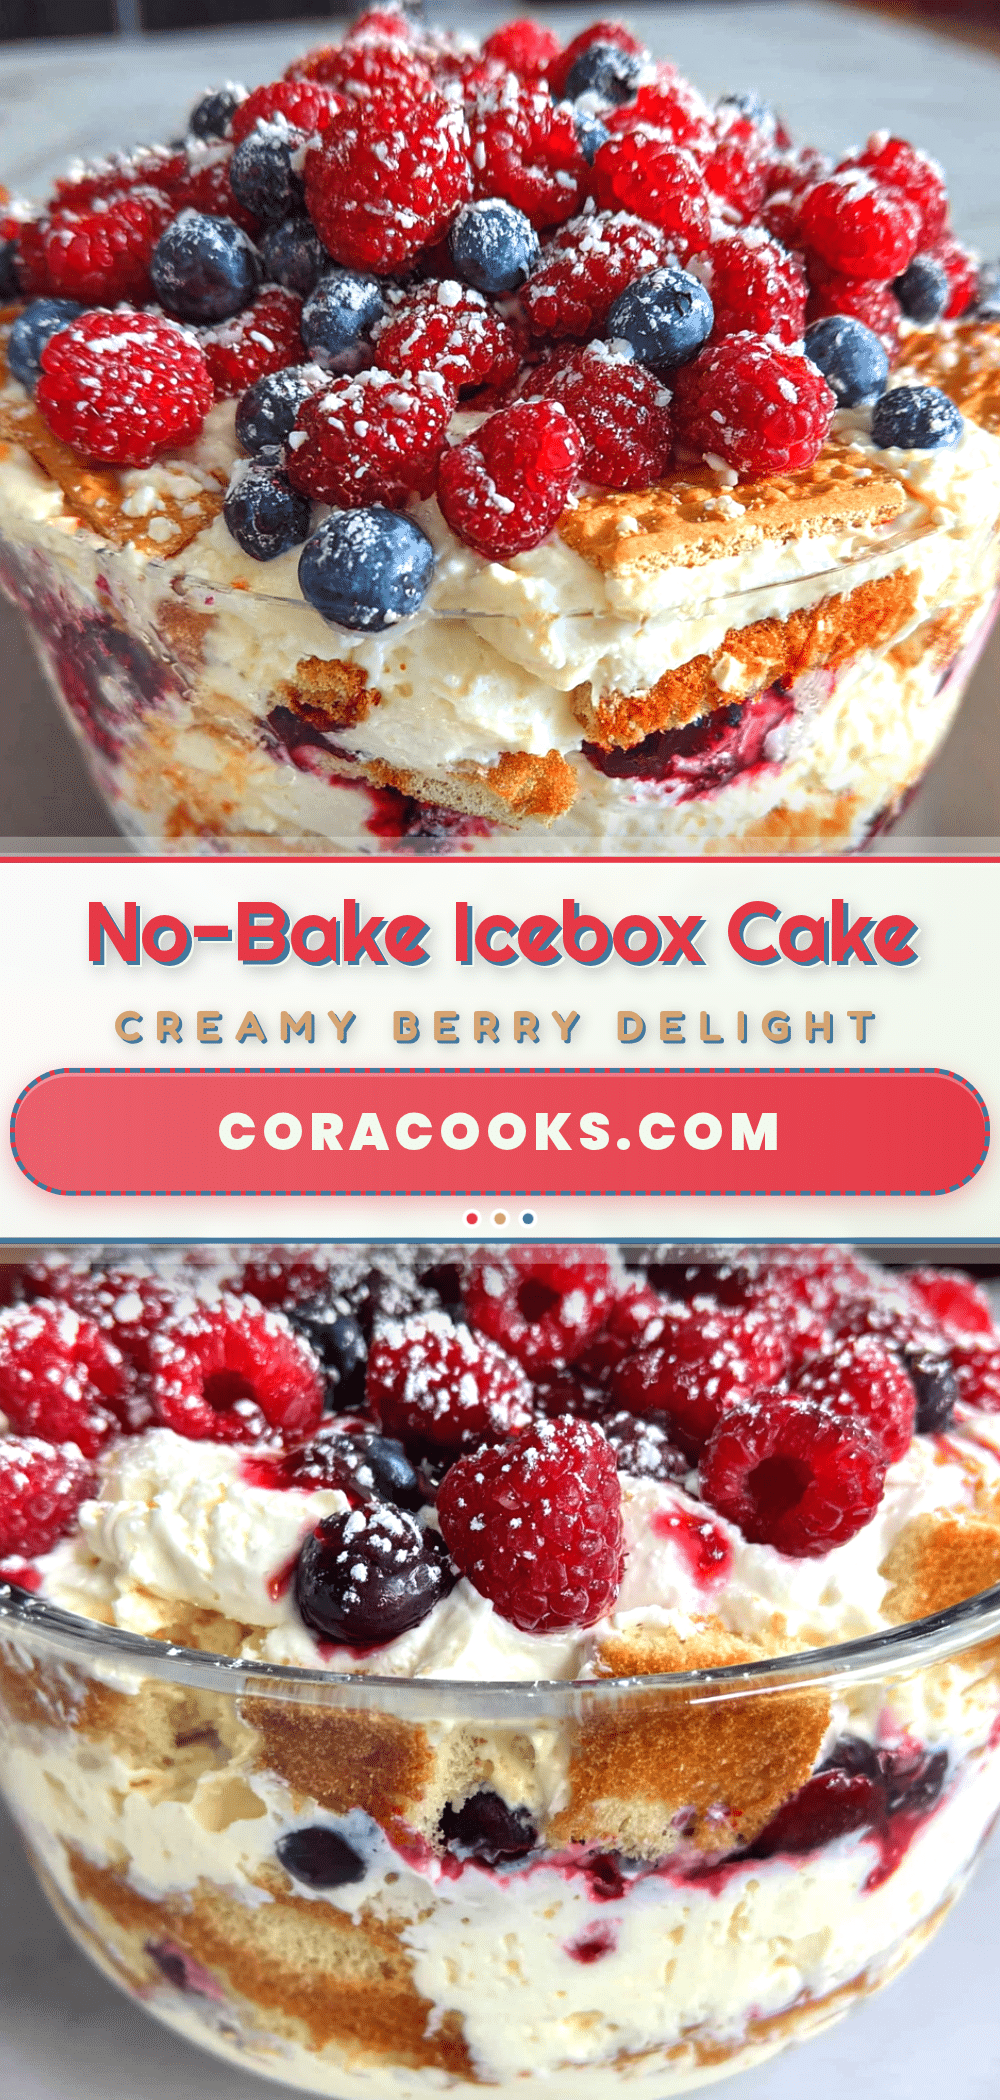
Creamy No-Bake Red White and Blueberry Icebox Cake
A refreshing, no-bake dessert featuring layers of vanilla wafers, whipped cream, sweetened condensed milk, and fresh berries. This easy-to-make cake requires no oven and is perfect for summer gatherings.
- Prep Time: 15 minutes
- Cook Time: 0 minutes
- Total Time: 4 hours 15 minutes
- Yield: 8 servings 1x
- Category: Dessert
- Cuisine: American
Ingredients
- 2 cups heavy whipping cream (full-fat)
- 1 can (14 oz) sweetened condensed milk
- 1 tsp vanilla extract
- 1/4 cup cream cheese, softened (optional)
- 1 package (approx. 30-40) vanilla wafers
- 1 cup fresh blueberries
- 1 cup fresh strawberries, chopped
- Honey or maple syrup for drizzling
Instructions
- Wash and thoroughly dry the blueberries and strawberries. Chop strawberries into small pieces. Leave blueberries whole or mash half for a swirled effect.
- In a chilled large mixing bowl, whip the heavy cream using an electric mixer on medium-high speed until stiff peaks form.
- In a separate bowl, whisk together the sweetened condensed milk, vanilla extract, and softened cream cheese until smooth.
- Gently fold the condensed milk mixture into the whipped cream using a rubber spatula to maintain airiness.
- Spread a thin layer of the cream mixture on the bottom of an 8×8 inch baking dish.
- Place a single layer of vanilla wafers over the cream.
- Spread half of the remaining cream over the cookies, scatter blueberries evenly, add another layer of cookies, and repeat with remaining cream and strawberries on top.
- Cover the dish tightly with plastic wrap and refrigerate for at least 4-6 hours, preferably overnight, to allow cookies to soften.
- Before serving, drizzle with honey or maple syrup and garnish with fresh berries if desired. Slice with a sharp knife.
Notes
Ensure berries are completely dry to prevent sogginess. Keep all ingredients cold for best whipping results. The cake improves in flavor after sitting overnight. Do not reheat; serve chilled.
Nutrition
- Serving Size: 1 slice
- Calories: 350
- Sugar: 28
- Sodium: 120
- Fat: 22
- Saturated Fat: 14
- Carbohydrates: 35
- Fiber: 2
- Protein: 4
Keywords: no-bake, icebox cake, summer dessert, berry dessert, easy recipe, patriotic dessert, red white and blue, creamy cake, quick dessert


