Love this? Save it for later!
Share the inspiration with your friends
There used to be a tiny bakery tucked between a laundromat and a dusty antique shop on the edge of town called “The Whimsy Cup.” They made the most charming ghost cupcakes I had ever seen — little vanilla clouds with the sweetest buttercream faces that somehow managed to look both spooky and cheerful at the same time. When they closed their doors three years ago (the landlord raised the rent, the cashier told me with a shrug), I honestly felt a little lost. Those ghost cupcakes had become my October tradition, you know? The one thing I looked forward to when the air got crisp and the leaves started turning.
After twelve tries — yes, twelve, and I still have the lopsided ones to prove it — I finally cracked the code. The secret wasn’t in some fancy technique or expensive ingredient. It was in getting the buttercream just soft enough to pipe those adorable faces without them sliding off. The first few batches looked more like sad melted snowmen than cozy ghosts. But last Tuesday, with flour dusted across my counter and my favorite playlist humming in the background, I pulled out a tray of perfect little ghosts. My neighbor Maria, who happened to be walking her dog past my window, got the first one. She took one bite, closed her eyes, and said, “This tastes like a hug.” That’s when I knew I had to share it with you. Maybe you’ve been chasing a memory like this too — a taste from somewhere that no longer exists. Well, here it is, recreated with love and a whole lot of butter.
Why You’ll Love This Recipe
These Cozy Ghost Vanilla Cupcakes aren’t just another Halloween treat. They’re the kind of recipe that makes you feel like you’ve got this whole baking thing figured out, even on days when nothing else goes right. I’ve tested this recipe more times than I care to admit, and let me tell you — it’s foolproof when you follow the steps.
- Quick & Easy : From start to finish, you’re looking at about 45 minutes. Perfect for those evenings when the kids suddenly announce they need treats for tomorrow’s class party. (Not that that’s ever happened to me. Okay, it has. Twice.)
- Simple Ingredients : Everything on this list is probably already in your pantry. No hunting down obscure extracts or specialty flours. I mean, I used to think you needed something fancy for bakery-quality cupcakes. Nope. Just butter, sugar, eggs, and a little patience.
- Perfect for Halloween Fun : These ghosts are adorable without being terrifying, which means they work for all ages. My three-year-old niece calls them “friendly spookies” and refuses to eat anything else during October.
- Crowd-Pleaser : I brought a batch to my book club last week, and they disappeared before we even discussed chapter three. The buttercream faces got actual gasps of delight — grown adults, gasping over cupcakes!
- Unbelievably Delicious : The vanilla flavor is pure comfort, and the buttercream has this silky texture that melts on your tongue. It’s the kind of cupcake that makes you close your eyes after the first bite. Honestly, it’s next-level comfort food disguised as a Halloween treat.
What makes this recipe different from all the other ghost cupcakes out there? It’s the technique. Most recipes have you pipe the ghosts directly onto the cupcake, which sounds great until your buttercream starts drooping. I figured out that chilling the piped ghosts for just ten minutes before adding the faces makes all the difference. Plus, the vanilla cupcake itself is incredibly moist — we’re talking buttermilk and a touch of sour cream for that tender crumb. It’s not just another version. It’s my best version, born from twelve batches of trial and error and a deep, personal need to recreate a memory.
What Ingredients You Will Need
This recipe relies on simple, honest ingredients to create something truly special. The magic happens when everyday pantry staples come together with a little love and attention to detail.
For the Vanilla Cupcakes
- 1 ½ cups all-purpose flour (scoop and level for accuracy — don’t pack it down)
- 1 ½ teaspoons baking powder (make sure it’s fresh; stale baking powder ruins the rise)
- ¼ teaspoon salt (I use fine sea salt for even distribution)
- ½ cup unsalted butter, softened to room temperature (I prefer Kerrygold for its rich flavor)
- 1 cup granulated sugar
- 2 large eggs, room temperature (cold eggs can make the batter seize)
- 2 teaspoons vanilla extract (use pure vanilla, not imitation, for the best flavor)
- ½ cup buttermilk, room temperature (adds tenderness and a subtle tang)
- ¼ cup sour cream, room temperature (this is my secret for extra moisture)
For the Buttercream Frosting
- 1 cup unsalted butter, softened (let it sit out for at least an hour — cold butter creates lumpy frosting)
- 3 ½ cups powdered sugar, sifted (sifting prevents those annoying little lumps)
- 2 teaspoons vanilla extract
- 2 tablespoons heavy cream (or whole milk in a pinch)
- Pinch of salt (balances the sweetness)
For the Ghost Faces
- ¼ cup black gel food coloring (I like Wilton brand — it doesn’t thin out the frosting)
- Small round piping tip (size #2 or #3 works perfectly)
- Mini chocolate chips (optional, for an easier face option — just press them in)
For the buttermilk, if you don’t have any on hand, you can make a quick substitute: add 1 tablespoon of lemon juice or white vinegar to a ½ cup measuring cup, then fill with milk. Let it sit for 5 minutes until it curdles slightly. Works like a charm! And if you’re dairy-free, swap the buttermilk for almond milk with the same lemon trick, use dairy-free butter, and replace the sour cream with coconut cream. I’ve tested that version too, and honestly, it’s still delicious.
Equipment Needed
- 12-cup muffin tin (standard size, not mini)
- Paper cupcake liners (white ones look best for the ghost theme, but any color works)
- Electric hand mixer or stand mixer (you can do this by hand, but your arm will thank you for using a mixer)
- Large mixing bowls (at least two)
- Whisk and rubber spatula
- Cooling rack (wire rack is best for even cooling)
- Piping bags (disposable ones are my favorite — no cleanup)
- Large round piping tip (size 1A or similar for the ghost bodies)
- Small round piping tip (size #2 or #3 for the faces)
- Offset spatula (for smoothing, though a butter knife works too)
If you don’t have piping bags, you can use a sturdy zip-top bag with the corner snipped off. It’s not quite as precise, but it gets the job done. I actually did that for my first five batches before I invested in proper bags. And if you’re just starting out, don’t worry about buying a whole set of piping tips — a large round tip and a small round tip are all you need for these ghosts.
Preparation Method
Let’s make some ghosts! Preheat your oven to 350°F (175°C) and line your muffin tin with paper liners. This recipe makes exactly 12 standard cupcakes, so no need to worry about extra batter.
- Whisk the dry ingredients together. In a medium bowl, combine the flour, baking powder, and salt. Whisk them for about 20 seconds — this aerates the flour and ensures the baking powder is evenly distributed. Set aside.
- Cream the butter and sugar. In a large bowl, beat the softened butter and granulated sugar together on medium speed for 3-4 minutes. You’re looking for a light, fluffy texture that’s pale in color. Don’t rush this step! Proper creaming is what gives your cupcakes that tender crumb. Scrape down the sides of the bowl halfway through.
- Add the eggs and vanilla. Beat in the eggs one at a time, mixing well after each addition. The batter might look slightly curdled at this point — don’t panic, that’s normal. Add the vanilla extract and mix until combined.
- Alternate the dry and wet ingredients. With the mixer on low speed, add about one-third of the flour mixture. Mix until just combined. Then add half of the buttermilk. Mix again. Repeat with another third of flour, the remaining buttermilk, and finally the last of the flour. Stop mixing as soon as the flour disappears — overmixing will make your cupcakes tough. Fold in the sour cream gently with a spatula.
- Fill the liners. Divide the batter evenly among the 12 liners, filling each about two-thirds full. I use a cookie scoop for this — it keeps things even and less messy. The batter should be thick and smooth.
- Bake. Place the muffin tin in the preheated oven and bake for 18-20 minutes. The cupcakes are done when a toothpick inserted into the center comes out clean or with a few moist crumbs. The tops should be lightly golden and spring back when touched. Let them cool in the pan for 5 minutes, then transfer to a wire rack to cool completely. This is important — warm cupcakes will melt your buttercream into a sad puddle.
- Make the buttercream. While the cupcakes cool, beat the softened butter on medium speed for 2-3 minutes until it’s smooth and creamy. Gradually add the sifted powdered sugar, one cup at a time, mixing on low speed to avoid a sugar cloud. Add the vanilla, heavy cream, and salt. Increase the speed to medium-high and beat for 3-4 minutes until the frosting is light, fluffy, and spreadable. If it’s too thick, add another tablespoon of cream. Too thin? Add a little more powdered sugar.
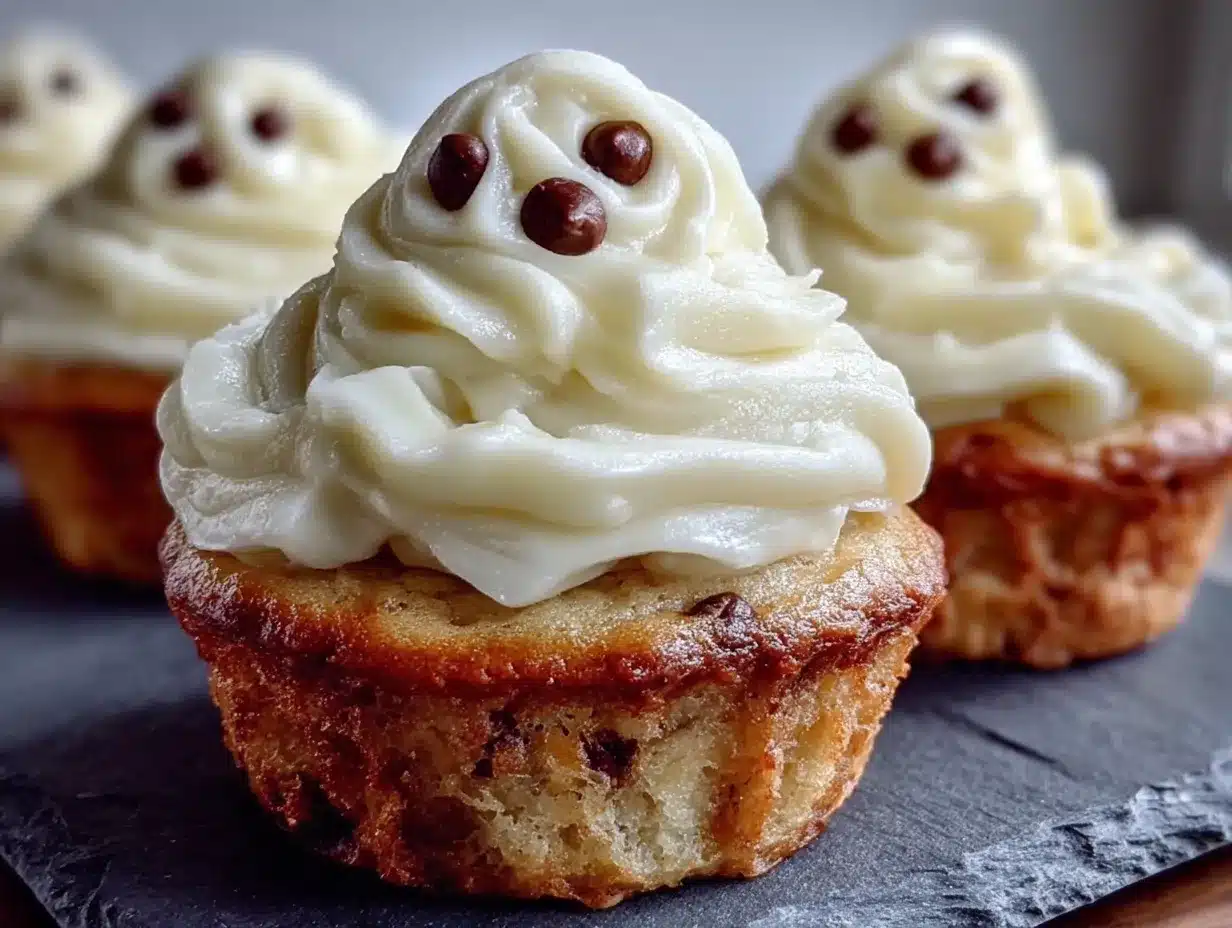
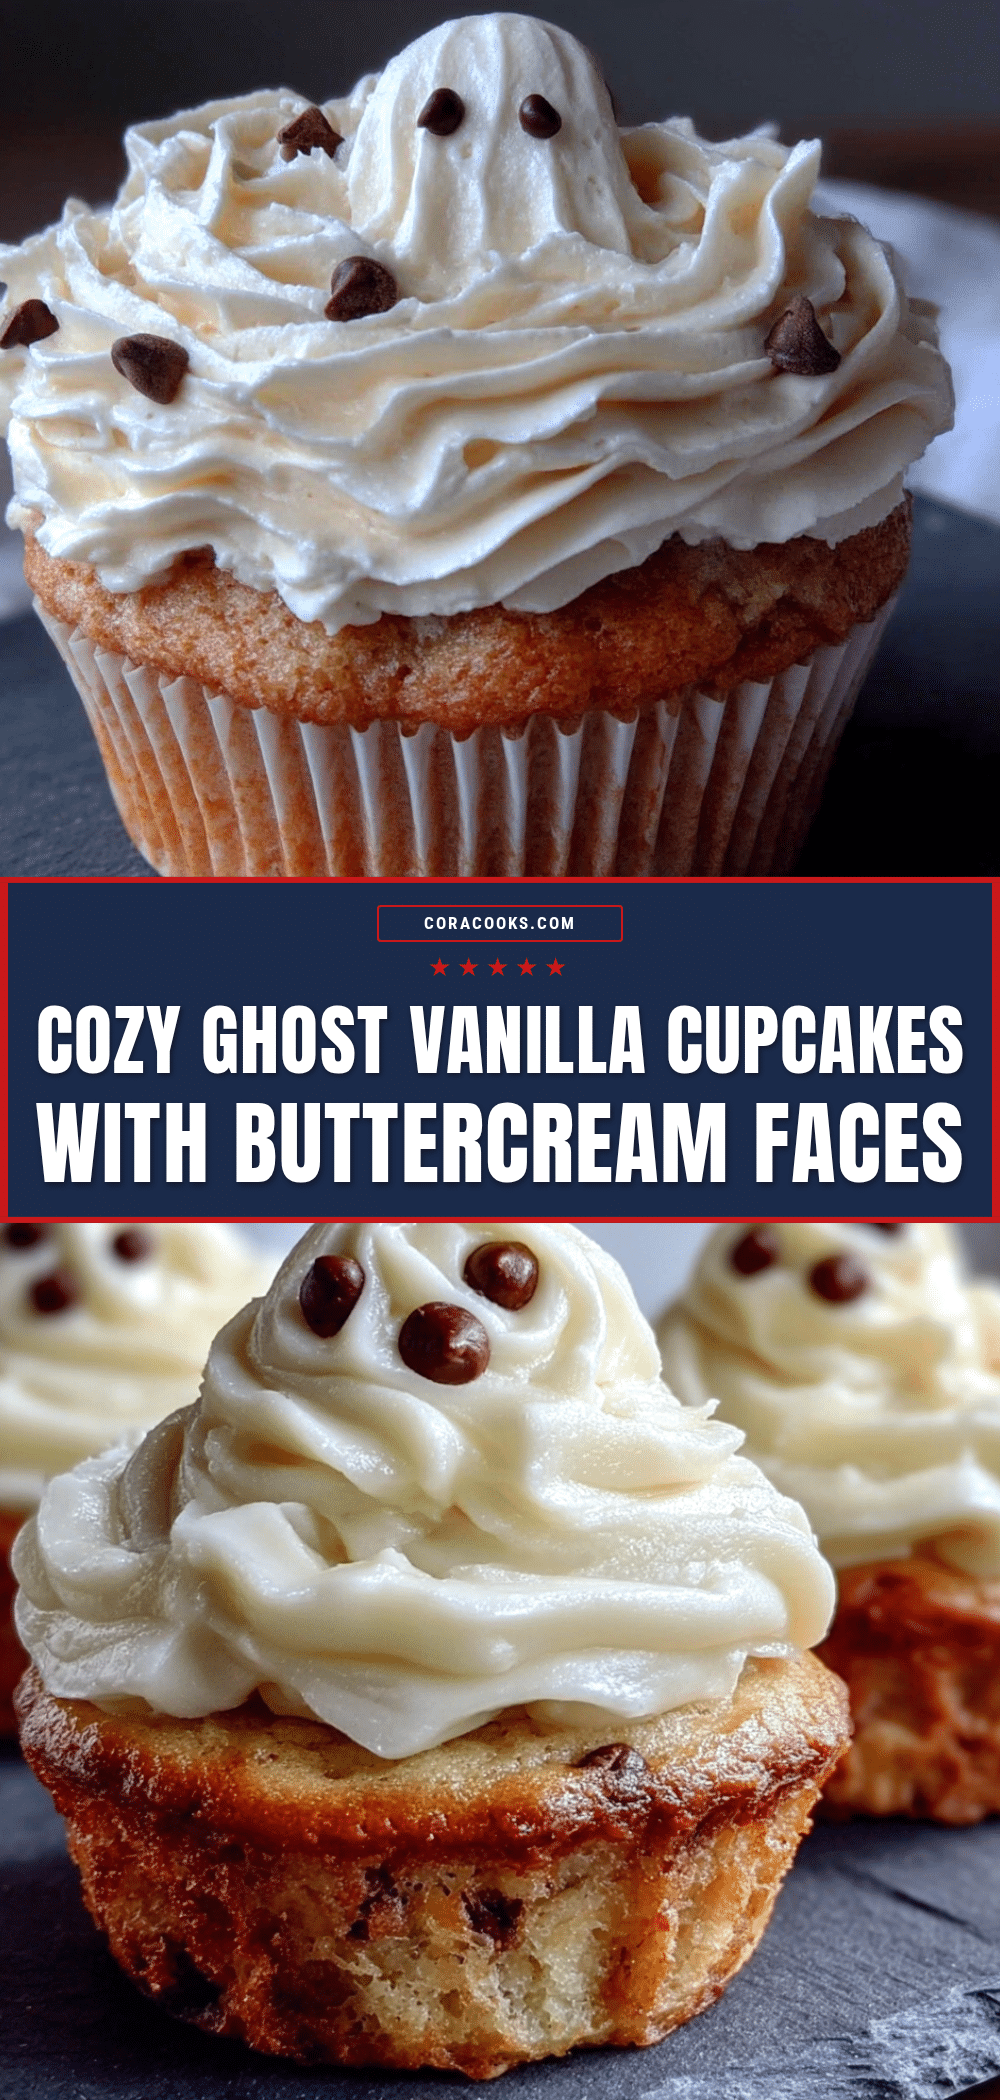
- Pipe the ghost bodies. Fit a piping bag with your large round tip and fill it with buttercream. Starting from the center of each cooled cupcake, pipe a tall swirl, pulling upward as you squeeze. Release pressure and pull away to create a little peak on top — that’s the ghost’s head. Don’t worry if they look uneven; ghosts are supposed to be a little wobbly.
- Chill the ghosts. Place the piped cupcakes in the refrigerator for 10-15 minutes. This step is non-negotiable — it firms up the buttercream so the faces stay crisp and don’t sink in.
- Add the faces. While the cupcakes chill, prepare a small piping bag fitted with the #2 or #3 tip. Fill it with a small amount of buttercream mixed with black gel food coloring. (You can also use store-bought black frosting in a tube for convenience.) Once the cupcakes are chilled, pipe two small dots for eyes and a little “o” shape for the mouth. You can make them look surprised, happy, or even a little mischievous. I like to vary the expressions for a more playful look.
Let the cupcakes sit at room temperature for about 10 minutes before serving. The buttercream will soften slightly, making each bite perfectly creamy.
Cooking Tips & Techniques
I learned most of these tips the hard way — through batches that didn’t quite work out. Let me save you some trouble.
Room temperature ingredients matter more than you think. I know, I know, it’s tempting to use cold eggs straight from the fridge. But cold ingredients don’t emulsify properly, which means your batter can end up dense or greasy. Take the eggs, butter, and buttermilk out of the fridge about an hour before you start baking. If you forget, place the eggs in a bowl of warm water for 5 minutes, and microwave the buttermilk for 10 seconds.
Don’t overmix the batter. This was my biggest mistake in the early batches. Once you add the flour, mix only until you can’t see any white streaks. Overmixing develops the gluten, and you’ll end up with tough, rubbery cupcakes instead of tender, fluffy ones. I actually stopped my mixer mid-stroke on batch number seven and noticed the difference immediately.
The chilling trick is everything. The first few times I tried piping faces directly onto room-temperature buttercream, the eyes just sank into the frosting like tiny black holes. It looked more scary than cute. Chilling the piped ghosts for at least 10 minutes creates a firm surface that holds the details perfectly. Trust me on this one.
For consistent ghost shapes, hold the piping bag straight up and down, not at an angle. Squeeze from the top of the bag, not the middle, and keep steady pressure as you pull upward. If your first ghost looks more like a blob than a ghost, just scrape off the buttercream and try again. No one’s judging — I redid at least three on my first successful batch.
Timing is everything. Bake the cupcakes the day before if you’re making these for a party. They actually taste better the next day — the flavors have time to meld. Just store them in an airtight container at room temperature and frost them the next morning. This also means you’re not rushing through everything at once.
Variations & Adaptations
One of the best things about this recipe is how easily it adapts to different needs and moods. Here are some variations I’ve tried and loved.
Gluten-Free Version: Substitute the all-purpose flour with a good gluten-free baking blend that contains xanthan gum. I’ve had great results with Bob’s Red Mill 1-to-1 Baking Flour. The texture is slightly more delicate, so handle the batter gently. Everything else stays the same, and honestly, no one at my gluten-free friend’s party could tell the difference.
Chocolate Ghost Cupcakes: For a richer twist, replace ¼ cup of the flour with unsweetened cocoa powder. The dark chocolate ghosts look stunning against white buttercream, and the flavor combination is divine. I made these for a Halloween movie night, and they were gone before the first scream in the movie.
Pumpkin Spice Ghosts: Add 1 teaspoon of pumpkin pie spice and ¼ cup of pumpkin puree to the batter (reduce the buttermilk by 2 tablespoons to compensate). The warm spices pair beautifully with the vanilla buttercream, and the orange undertone gives the ghosts a subtle autumnal glow. This version has become my personal favorite for November.
Vegan Adaptation: Use flax eggs (1 tablespoon ground flaxseed mixed with 3 tablespoons water per egg), coconut oil instead of butter, and almond milk with lemon juice for buttermilk. The texture is a bit denser but still delicious. For the buttercream, use vegan butter and coconut cream. I tested this for my sister who’s vegan, and she ate three in one sitting.
Mini Ghost Bites: Use a mini muffin tin and bake for just 10-12 minutes. These are perfect for Halloween parties where people want to sample multiple treats. You’ll get about 24 mini ghosts from one batch of batter.
Serving & Storage Suggestions
These Cozy Ghost Vanilla Cupcakes are best served at room temperature, so take them out of the fridge about 20 minutes before you plan to serve. The buttercream softens beautifully, and the vanilla flavor really shines when it’s not cold.
For a cozy Halloween spread, arrange the ghosts on a vintage cake stand or a wooden board. I like to scatter a few candy corn around the base for color, or add some fake cobwebs for a spooky touch. They pair wonderfully with hot apple cider, spiced chai, or a warm mug of coffee. Honestly, they’re also perfect with a glass of cold milk — some things never go out of style.
Storage: Store unfrosted cupcakes in an airtight container at room temperature for up to 3 days. Frosted cupcakes should be kept in the refrigerator, but bring them to room temperature before serving. The buttercream faces might soften slightly in the fridge, but they’ll still look adorable.
Freezing: You can freeze the unfrosted cupcakes for up to 3 months. Wrap each one individually in plastic wrap, then place them in a freezer-safe bag. Thaw at room temperature, then frost and decorate. I actually do this regularly — baking a double batch and freezing half for last-minute Halloween emergencies. The buttercream itself doesn’t freeze well, so always make it fresh.
Make-Ahead Tip: The buttercream can be made up to 5 days in advance and stored in an airtight container in the refrigerator. Let it come to room temperature, then re-whip it for a minute before using. This saves so much time on party day!
One thing I love about these ghosts is that the flavors actually get better overnight. Something about the buttercream settling into the cupcake makes the whole thing taste more cohesive. So if you can, make them a day ahead — your future self will thank you.
Nutritional Information & Benefits
Let’s be real — these are cupcakes, not health food. But that doesn’t mean they can’t have a place in a balanced life. Each cupcake (with frosting) contains approximately 380 calories, 18g of fat, 52g of carbohydrates, and 3g of protein. The exact numbers depend on your specific ingredients and portion sizes.
On the bright side, the butter provides a good source of vitamin A, and the eggs add protein and healthy fats. The sour cream contains calcium and probiotics, which are great for gut health. And honestly? There’s something to be said for the mental health benefits of baking and sharing something beautiful. I’ve had tough days turned around by the simple act of piping buttercream faces.
For those with dietary concerns, this recipe contains dairy, gluten, and eggs. The gluten-free and vegan variations above offer alternatives. If you’re watching your sugar intake, you can reduce the sugar in the cupcake batter by ¼ cup without significantly affecting the texture — though the frosting is harder to adjust without changing the consistency.
These cupcakes are nut-free if you use the standard recipe, making them a safe choice for school events. Always check your ingredient labels, especially for vanilla extract, which can sometimes contain traces of nuts depending on the brand.
Conclusion
These Cozy Ghost Vanilla Cupcakes with Buttercream Faces are more than just a Halloween recipe. They’re a little piece of joy that you can create in your own kitchen, no matter where you live or what your baking skills look like. I’ve made them on good days and bad days, for parties and for quiet Tuesday nights when I just needed something to look forward to. Every single time, those little faces staring back at me make me smile.
I hope you give them a try — and I hope you make them your own. Maybe you’ll add a sprinkle of cinnamon to the buttercream, or pipe little rosy cheeks on the ghosts. Maybe you’ll make them with your kids and laugh at the lopsided faces. However you make them, they’ll be yours. And that’s the best part of any recipe, isn’t it? The way it becomes part of your story.
If you do make these, I’d love to hear about it. Drop a comment below and tell me how your ghosts turned out — did you give them happy faces or surprised ones? Did you try any of the variations? Share a photo on Pinterest and tag me so I can see your creations. There’s nothing that makes my day quite like seeing someone else fall in love with a recipe I poured my heart into.
Happy baking, and may your ghosts always be friendly!
Frequently Asked Questions
Can I use a different frosting instead of buttercream?
Absolutely! Cream cheese frosting works beautifully with these vanilla cupcakes, though it’s softer and won’t hold the ghost faces as crisply. If you want to use cream cheese frosting, chill the piped ghosts for at least 20 minutes before adding the faces. You could also use a stabilized whipped cream, but it won’t be as sweet or sturdy.
Why did my cupcakes sink in the middle?
This usually happens for one of three reasons: your oven temperature was too low, you opened the oven door too early, or your baking powder is expired. Make sure your oven is properly preheated and avoid opening the door during the first 15 minutes of baking. And always check the expiration date on your baking powder — it loses potency after about 6 months.
Can I make these cupcakes without a piping bag?
Yes, and I’ve done it many times! For the ghost bodies, use a sturdy zip-top bag with the corner snipped off. It won’t be as precise, but ghosts are supposed to look a little irregular anyway. For the faces, you can use a toothpick dipped in black food coloring to draw the eyes and mouth directly onto the chilled buttercream. It’s actually a fun, rustic look.
How far in advance can I decorate these cupcakes?
You can decorate them up to 24 hours in advance if you store them in the refrigerator. Just make sure to bring them to room temperature for about 20 minutes before serving. If you’re making them more than a day ahead, I recommend freezing the unfrosted cupcakes and decorating them the day you plan to serve them.
My buttercream turned out too runny. What went wrong?
Runny buttercream is usually caused by butter that was too soft (almost melted) or by adding too much liquid. If your buttercream is too thin, pop it in the refrigerator for 15-20 minutes to firm up, then re-whip it. You can also add more sifted powdered sugar, one tablespoon at a time, until it reaches the right consistency. If it’s still runny after that, you might need to start over with slightly cooler butter.
Pin This Recipe!
Cozy Ghost Vanilla Cupcakes with Easy Buttercream Faces
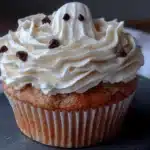
These adorable ghost cupcakes feature moist vanilla cupcakes topped with silky buttercream and cute faces. Perfect for Halloween, they’re quick to make with simple ingredients and guaranteed to bring smiles.
- Prep Time: 15 minutes
- Cook Time: 20 minutes
- Total Time: 45 minutes
- Yield: 12 servings 1x
- Category: Dessert
- Cuisine: American
Ingredients
- 1 ½ cups all-purpose flour
- 1 ½ teaspoons baking powder
- ¼ teaspoon salt
- ½ cup unsalted butter, softened
- 1 cup granulated sugar
- 2 large eggs, room temperature
- 2 teaspoons vanilla extract
- ½ cup buttermilk, room temperature
- ¼ cup sour cream, room temperature
- 1 cup unsalted butter, softened (for frosting)
- 3 ½ cups powdered sugar, sifted
- 2 teaspoons vanilla extract (for frosting)
- 2 tablespoons heavy cream
- Pinch of salt (for frosting)
- ¼ cup black gel food coloring
- Small round piping tip (size #2 or #3)
- Mini chocolate chips (optional)
Instructions
- Preheat oven to 350°F (175°C). Line a 12-cup muffin tin with paper liners.
- In a medium bowl, whisk together flour, baking powder, and salt for about 20 seconds. Set aside.
- In a large bowl, beat softened butter and granulated sugar on medium speed for 3-4 minutes until light and fluffy. Scrape down sides halfway through.
- Beat in eggs one at a time, mixing well after each. Add vanilla extract and mix until combined.
- With mixer on low, add one-third of the flour mixture, mixing until just combined. Add half of the buttermilk, mix. Repeat with another third of flour, remaining buttermilk, and final third of flour. Stop mixing when flour disappears. Fold in sour cream gently with a spatula.
- Divide batter evenly among liners, filling each about two-thirds full.
- Bake for 18-20 minutes, until a toothpick inserted in center comes out clean or with a few moist crumbs. Cool in pan for 5 minutes, then transfer to a wire rack to cool completely.
- For buttercream: Beat softened butter on medium speed for 2-3 minutes until smooth. Gradually add sifted powdered sugar, one cup at a time, mixing on low. Add vanilla, heavy cream, and salt. Increase speed to medium-high and beat for 3-4 minutes until light and fluffy.
- Fit a piping bag with a large round tip and fill with buttercream. Pipe a tall swirl from the center of each cooled cupcake, pulling upward to create a peak.
- Refrigerate piped cupcakes for 10-15 minutes to firm up the buttercream.
- Mix a small amount of buttercream with black gel food coloring. Fit a small piping bag with a #2 or #3 tip and fill with black buttercream. Pipe two dots for eyes and an ‘o’ shape for the mouth on each chilled ghost.
- Let cupcakes sit at room temperature for 10 minutes before serving.
Notes
Room temperature ingredients are crucial for best texture. Chill piped ghosts for at least 10 minutes before adding faces to prevent sinking. Cupcakes can be baked a day ahead and stored in an airtight container at room temperature. Buttercream can be made up to 5 days in advance and refrigerated; bring to room temperature and re-whip before using.
Nutrition
- Serving Size: 1 cupcake
- Calories: 380
- Sugar: 38
- Sodium: 180
- Fat: 18
- Saturated Fat: 11
- Carbohydrates: 52
- Protein: 3
Keywords: ghost cupcakes, vanilla cupcakes, Halloween cupcakes, buttercream faces, easy Halloween treats, spooky cupcakes, cozy ghosts