Love this? Save it for later!
Share the inspiration with your friends
The church potluck was in twelve hours and I’d completely forgotten. You know that feeling when your stomach drops? I was staring into my pantry like it held the answers to the universe, but really I was just hoping a fully prepared dish would magically appear. Everyone else would be bringing those elaborate layered salads and slow-cooked briskets that took all weekend. I had a box of Jiffy corn muffin mix, a tub of sour cream, and half a block of cheddar. Not exactly a winning hand, let me tell you. I was this close to grabbing a bag of chips and calling it a day. Honestly, I’d made peace with being the person who brought the sad store-bought option. But then I remembered my neighbor, Mrs. Gable, telling me about this casserole she threw together when her oven was on the fritz. She made it sound so simple, I figured what did I have to lose? I mean, the worst that could happen is I’d have a pan of mediocre cornbread to eat alone in my kitchen. So I mixed everything in a bowl, scraped it into a dish, and slid it into the oven, not expecting much. What came out was this golden, bubbling, slightly puffed-up thing that smelled like pure comfort. I brought it to the potluck feeling sheepish, honestly. I set it down next to a fancy quinoa salad and waited for the judgment. But then people started going back for seconds. And thirds. Someone asked for the recipe before I’d even had a bite myself. The casserole won that day — not because it was fancy, but because it was exactly what everyone wanted to eat. And that’s why I keep making it, even when there’s no potluck in sight.
Why You’ll Love This Recipe
This Jiffy corn casserole with sour cream and cheddar isn’t just another side dish — it’s the one that disappears first every single time. I’ve tested this recipe more times than I can count, and let me tell you, the balance of sweet cornbread, tangy sour cream, and sharp cheddar is pure magic. It’s the kind of dish that makes you close your eyes after the first bite.
- Quick & Easy: Comes together in under 10 minutes of prep time. Perfect for those days when you need a dish fast.
- Simple Ingredients: No fancy grocery trips needed. You likely already have everything in your kitchen right now.
- Perfect for Any Gathering: Great for potlucks, Thanksgiving, Easter brunch, or just a cozy weeknight dinner.
- Crowd-Pleaser: Always gets rave reviews from kids and adults alike. I’ve yet to meet someone who doesn’t love it.
- Unbelievably Delicious: The texture is incredible — creamy on the inside, golden and slightly crisp on top.
What makes this version different? It’s the ratio. I’ve played around with the amounts of sour cream and cheddar until I found the sweet spot where the cornbread stays moist but not soggy, and the cheese melts into every bite without overwhelming the corn flavor. This isn’t just another corn casserole — it’s your new go-to.
What Ingredients You Will Need
This recipe uses simple, wholesome ingredients that come together to create something truly special. Most of these are pantry staples, which makes this dish perfect for last-minute occasions.
For the Casserole Base
- 2 boxes (8.5 oz each) Jiffy corn muffin mix — I prefer Jiffy for its slightly sweet flavor and tender texture. It’s the secret to that classic corn casserole taste.
- 1 cup (240 ml) sour cream — Full-fat sour cream gives the best richness. If you need to lighten it up, Greek yogurt works well too.
- 1/2 cup (120 ml) unsalted butter, melted — Adds moisture and that buttery flavor we all love. I use salted butter in a pinch and just reduce the added salt slightly.
- 2 large eggs, room temperature — Room temperature eggs blend more smoothly into the batter. If you’re in a hurry, place them in warm water for 5 minutes.
- 1 can (15 oz or 425g) whole kernel corn, drained — I use canned corn for convenience, but frozen corn (thawed and drained) works beautifully too.
- 1 can (15 oz or 425g) cream-style corn — This is non-negotiable. The cream-style corn adds moisture and sweetness that makes the casserole so tender.
- 1 1/2 cups (170g) sharp cheddar cheese, shredded — I recommend shredding your own cheese from a block. Pre-shredded cheese has anti-caking agents that prevent it from melting as smoothly.
- 1/2 teaspoon salt — Just a pinch to balance the sweetness.
- 1/4 teaspoon black pepper — Adds a tiny bit of warmth without being noticeable.
For the Topping

- 1/2 cup (55g) sharp cheddar cheese, shredded — Reserve this for sprinkling on top during the last few minutes of baking.
- Optional: 2 tablespoons chopped fresh parsley or chives — For a pop of color and freshness before serving.
Ingredient Tip: Look for cream-style corn that’s thick and creamy, not watery. I’ve found that the store brand works just as well as name brands here. If you’re feeling adventurous, try adding a diced jalapeño or some crumbled bacon to the mix — it’s incredible.
Equipment Needed
You don’t need a fancy kitchen to make this casserole. Here’s what you’ll need:
- 9×13-inch baking dish — Glass or ceramic works best. I’ve used metal pans too, just keep an eye on the baking time as they can cook faster.
- Large mixing bowl — Any large bowl will do. I use my grandmother’s old ceramic one because it feels right.
- Whisk or wooden spoon — A whisk works great for smoothing out lumps, but a sturdy wooden spoon gets the job done too.
- Measuring cups and spoons — For accuracy, though this recipe is forgiving enough that you can eyebit it.
- Can opener — Unless you’re using fresh or frozen corn.
- Cheese grater — If you’re shredding your own cheese, which I highly recommend.
- Aluminum foil — For covering the dish if the top browns too quickly.
Budget-Friendly Tip: Don’t have a 9×13 dish? Use an 8×8 square pan or even a cast-iron skillet. Just adjust the baking time — smaller dishes will need a few extra minutes. I’ve made this in a disposable aluminum pan for potlucks and it turned out perfectly.
Preparation Method
Let’s get cooking! This recipe is almost embarrassingly easy, but the results are anything but.
- Preheat your oven to 350°F (175°C). While it’s heating up, lightly grease your 9×13 baking dish with butter or non-stick spray. I use butter because it adds a little extra flavor to the edges.
- Melt the butter. Pop 1/2 cup of unsalted butter in the microwave for 30-45 seconds until just melted. Set it aside to cool slightly while you prepare the other ingredients.
- In your large mixing bowl, combine the wet ingredients. Add 1 cup of sour cream, 2 room-temperature eggs, and the melted butter. Whisk them together until smooth and well combined. The mixture should look pale yellow and creamy.
- Add the corn. Stir in the drained whole kernel corn and the can of cream-style corn. Mix until everything is evenly distributed. Don’t worry if it looks a little loose — that’s exactly how it should be.
- Fold in the dry ingredients. Add both boxes of Jiffy corn muffin mix, 1/2 teaspoon of salt, and 1/4 teaspoon of black pepper. Stir gently until just combined. Be careful not to overmix — a few small lumps are totally fine. Overmixing can make the casserole tough.
- Add the cheese. Fold in 1 1/2 cups of shredded sharp cheddar cheese. Reserve the remaining 1/2 cup for the topping. The batter will be thick and chunky at this point, almost like a thick pancake batter.
- Pour the batter into your prepared dish. Use a spatula to spread it evenly. It should reach all the corners without needing too much coaxing.
- Bake for 40-45 minutes. Place the dish in the center of the oven. After 35 minutes, check on it. The edges should be golden brown and pulling away from the sides slightly. The center should be set but still a tiny bit jiggly — it will continue to cook as it rests.
- Add the topping. Sprinkle the remaining 1/2 cup of shredded cheddar over the top. Return to the oven for another 5-7 minutes until the cheese is melted and bubbly. If you want a deeper golden crust, switch the oven to broil for the last 1-2 minutes, but watch it closely so it doesn’t burn.
- Let it rest. Remove from the oven and let the casserole sit for 10-15 minutes. This is crucial — it allows the casserole to set up so you get clean slices instead of a mushy mess. I know it’s tempting to dig in right away, but trust me on this one.
- Garnish and serve. Sprinkle with fresh parsley or chives if you’re feeling fancy. Serve warm and watch it disappear.
Sensory Cue: When it’s done, the kitchen will smell like buttered cornbread and melted cheese. The top should be golden with little browned spots from the cheese. If you gently shake the dish, the center should have a slight wobble but not be liquid.
Cooking Tips & Techniques
I’ve made this casserole more times than I can count, and I’ve learned a few things along the way. Let me save you from my mistakes.
Don’t overmix the batter. I learned this the hard way. The first time I made this, I whisked the batter like I was trying to win a competition. The result was a dense, tough casserole that nobody wanted seconds of. Stir until the dry ingredients are just moistened. A few lumps are your friends here.
Room temperature ingredients matter. I know, I know, who has time for that? But cold eggs and cold sour cream can make the melted butter seize up, leaving you with a lumpy batter. If you forget to take them out ahead of time, place the eggs in a bowl of warm water for 5 minutes and let the sour cream sit on the counter while you preheat the oven.
Check your oven temperature. Ovens lie. I’m convinced of it. My old oven ran 25 degrees hot, and I burned the bottom of this casserole twice before I figured it out. Get an oven thermometer — they’re cheap and they’ll save your dishes.
Let it rest. I cannot stress this enough. If you cut into this casserole straight out of the oven, you’ll end up with a soupy mess. The resting time allows the starches to set and the moisture to redistribute. Ten minutes minimum, fifteen is better.
Toast the cheese topping. If you want that gorgeous golden crust, switch to broil for the last minute or two. But don’t walk away! I’ve burned more cheese toppings than I’d like to admit. Watch it like a hawk.
Variations & Adaptations
This recipe is incredibly versatile. Here are some of my favorite ways to change it up:
Spicy Southwest Version
Add 1 diced jalapeño (seeds removed if you want less heat), 1/2 cup of canned diced green chiles, and swap the cheddar for pepper jack cheese. The heat pairs beautifully with the sweet corn. I made this for a game day party and it was gone in minutes.
Bacon Lover’s Dream
Cook 6 strips of bacon until crispy, crumble them, and fold half into the batter. Sprinkle the remaining bacon on top along with the cheese. The smoky, salty flavor is incredible against the sweet cornbread. Fair warning: this version is highly addictive.
Vegetable-Packed Version
Fold in 1 cup of finely chopped bell peppers (any color), 1/2 cup of diced zucchini, and 1/2 cup of corn kernels (fresh or frozen). This adds color, texture, and a little extra nutrition. My kids don’t even notice the veggies.
Gluten-Free Adaptation
Use a gluten-free corn muffin mix instead of Jiffy. I’ve tried several brands and they all work well. Just make sure your cream-style corn is also gluten-free — some brands add wheat starch. Everything else in the recipe is naturally gluten-free.
Dairy-Free Version
Use dairy-free sour cream (I like the one from Kite Hill), vegan butter, and your favorite dairy-free shredded cheese. The texture will be slightly different, but it’s still delicious. I’ve served this to dairy-free guests and they didn’t feel like they were missing out.
Serving & Storage Suggestions
This casserole is best served warm, straight from the oven. The cheese is melty, the cornbread is tender, and everything is just right. I like to serve it alongside roasted chicken, grilled pork chops, or a simple green salad. It also pairs beautifully with a bowl of chili or a hearty soup.
For a holiday table, this casserole fits right in next to turkey, ham, or roast beef. It’s become a Thanksgiving staple in my house, right up there with mashed potatoes and stuffing.
Storage: Leftovers keep well in the refrigerator for up to 4 days. Store them in an airtight container. The texture will be a bit denser the next day, but the flavor gets even better as the ingredients meld together.
Reheating: The best way to reheat is in the oven at 300°F (150°C) for about 10-15 minutes. This helps restore some of the crispy edges. You can also microwave individual servings for 60-90 seconds, but the top won’t be as crispy. If you’re in a rush, the microwave works fine.
Freezing: This casserole freezes beautifully. Bake it completely, let it cool, then wrap it tightly in plastic wrap and aluminum foil. Freeze for up to 3 months. To serve, thaw in the refrigerator overnight and reheat in a 350°F (175°C) oven until warmed through, about 20-25 minutes.
Flavor Note: The flavors actually deepen after a day in the fridge. If you can, make this a day ahead and reheat it. It tastes even better the second day.
Nutritional Information & Benefits
Here’s the estimated nutritional breakdown per serving (based on 12 servings):
- Calories: 320
- Total Fat: 18g
- Saturated Fat: 10g
- Cholesterol: 65mg
- Sodium: 520mg
- Total Carbohydrates: 34g
- Dietary Fiber: 2g
- Sugars: 8g
- Protein: 9g
This casserole offers some surprising nutritional benefits. Corn provides fiber, B vitamins, and antioxidants like lutein and zeaxanthin, which are great for eye health. The eggs add high-quality protein and choline, which supports brain function. Cheese contributes calcium and protein, while sour cream adds a bit of vitamin A.
For those watching their intake, this recipe can be lightened up by using reduced-fat sour cream, low-fat cheese, and reducing the butter to 1/4 cup. The texture will be slightly less rich, but still delicious.
Allergen Note: This recipe contains dairy (butter, sour cream, cheese) and eggs. It also contains wheat (from the Jiffy mix). For gluten-free or dairy-free options, see the variations section above.
Conclusion
This Jiffy corn casserole with sour cream and cheddar is more than just a side dish — it’s the recipe that saves you when you’ve got nothing else. It’s the dish that makes people ask for seconds without even knowing what they’re eating. It’s comfort food at its finest, made from ingredients you probably already have in your pantry.
I love this recipe because it reminds me that you don’t need fancy techniques or exotic ingredients to make something truly delicious. Sometimes the simplest things are the best. Whether you’re bringing it to a potluck, serving it at Thanksgiving, or just making it for a quiet Tuesday dinner, this casserole delivers every single time.
Now I want to hear from you! Have you tried this recipe? Did you add your own twist? Drop a comment below and let me know how it turned out. And if you loved it, share it with a friend who needs a little comfort food in their life. Happy cooking, friends!
Frequently Asked Questions
Can I make this Jiffy corn casserole ahead of time?
Absolutely! You can assemble the casserole up to 24 hours in advance. Just cover it and refrigerate. When you’re ready to bake, add about 10 minutes to the baking time since you’re starting from cold. The flavor actually gets better as it sits.
Can I use fresh corn instead of canned?
Yes, fresh corn works great! You’ll need about 2 cups of fresh corn kernels (from about 4 ears of corn). Just cut the kernels off the cob and use them in place of the canned whole kernel corn. For the cream-style corn, you’ll still need the canned version unless you make your own by blending some of the fresh corn with a little milk.
Why is my corn casserole runny in the middle?
This usually happens for one of two reasons: either the casserole wasn’t baked long enough, or it wasn’t allowed to rest after baking. Make sure you’re baking until the edges are golden and the center is mostly set with just a slight jiggle. Then let it rest for 10-15 minutes before cutting. The resting time is crucial for the casserole to set up properly.
Can I use a different brand of corn muffin mix?
You can, but the results will vary. Jiffy has a specific sweetness and texture that works perfectly in this recipe. If you use another brand, you may need to adjust the sugar or liquid. I’ve tried a few other brands and always come back to Jiffy for the best results.
How do I make this casserole more savory?
If you prefer a less sweet casserole, try adding 1/2 teaspoon of garlic powder, 1/2 teaspoon of onion powder, and an extra 1/4 teaspoon of salt. You can also add some chopped fresh herbs like thyme or rosemary. The cheese and sour cream already add savory notes, so these small adjustments make a big difference.
Pin This Recipe!
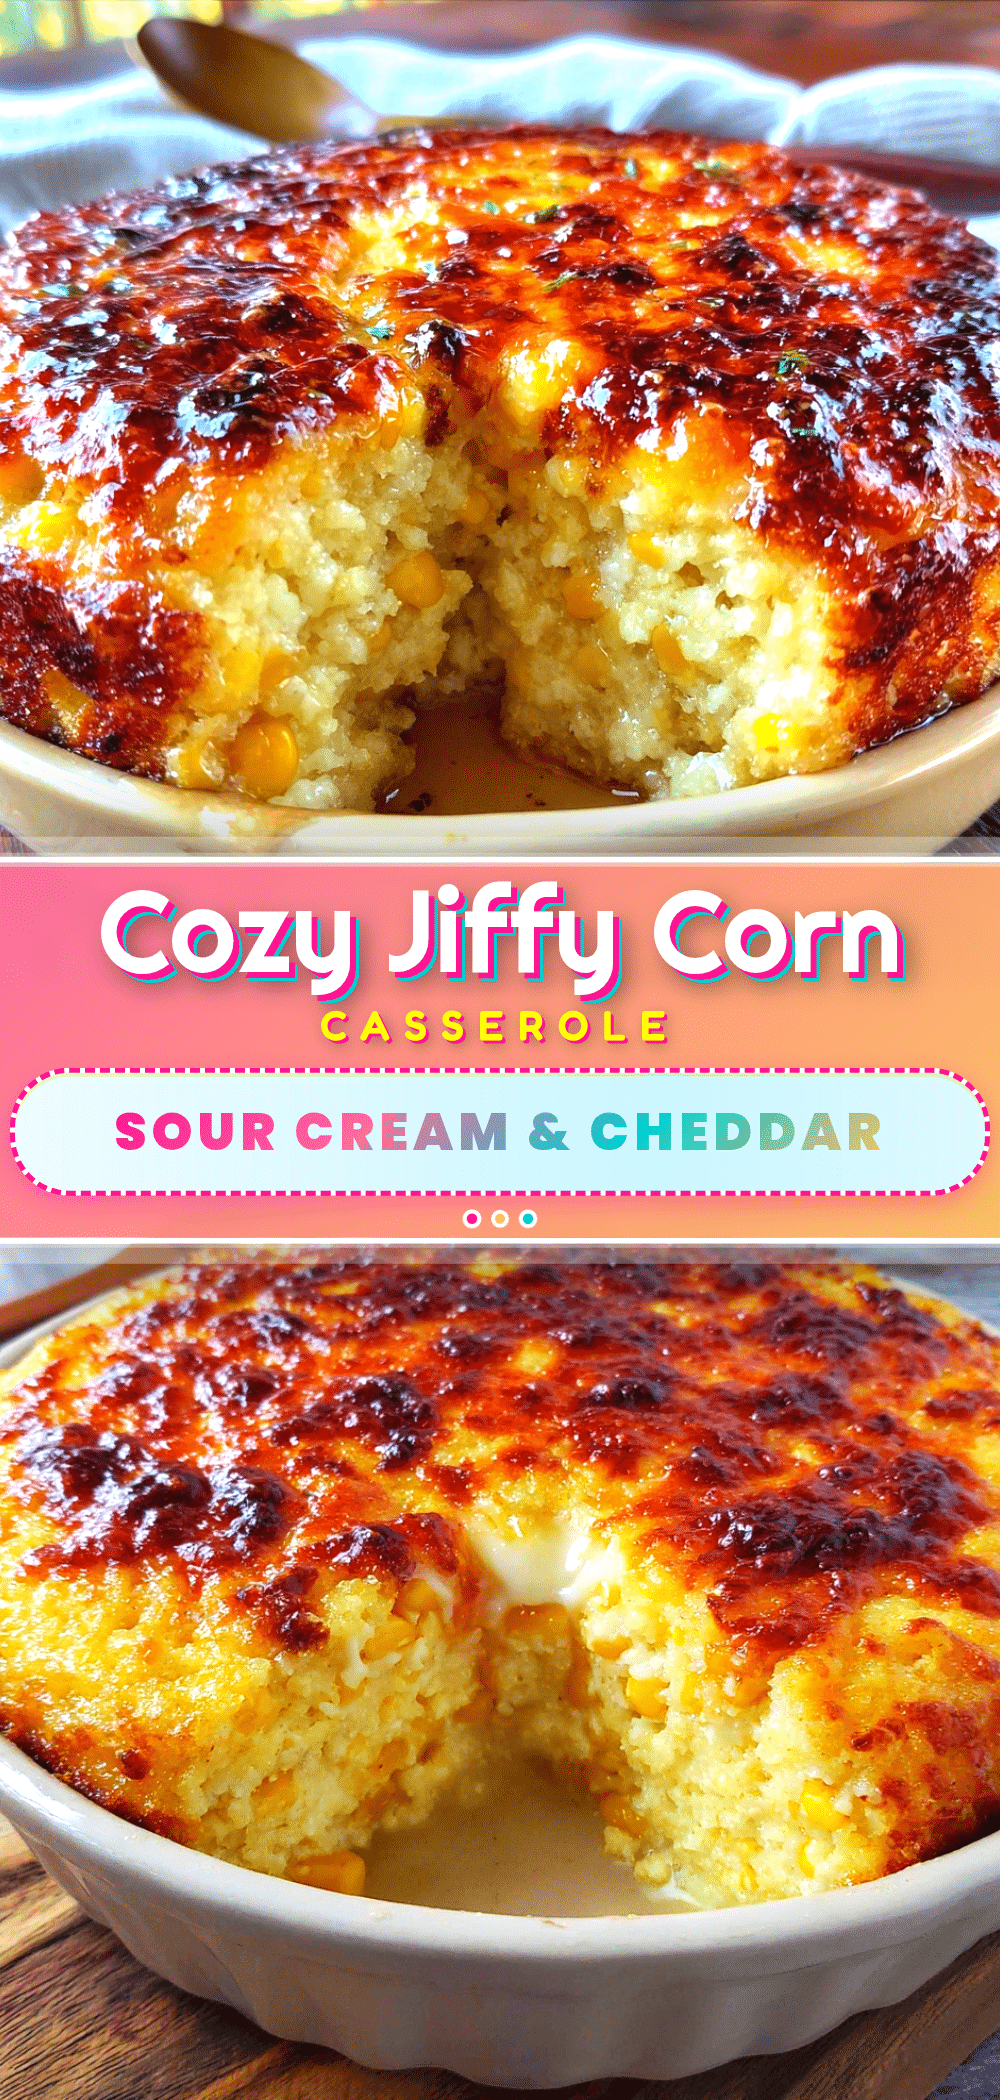
Best Jiffy Corn Casserole with Sour Cream and Cheddar

This Jiffy corn casserole with sour cream and cheddar is a quick, easy, and crowd-pleasing side dish perfect for potlucks, holidays, or weeknight dinners. It combines sweet cornbread, tangy sour cream, and sharp cheddar for a creamy, golden, and utterly delicious casserole.
- Prep Time: 10 minutes
- Cook Time: 45 minutes
- Total Time: 55 minutes
- Yield: 12 servings 1x
- Category: Side Dish
- Cuisine: American
Ingredients
- 2 boxes (8.5 oz each) Jiffy corn muffin mix
- 1 cup (240 ml) sour cream
- 1/2 cup (120 ml) unsalted butter, melted
- 2 large eggs, room temperature
- 1 can (15 oz or 425g) whole kernel corn, drained
- 1 can (15 oz or 425g) cream-style corn
- 1 1/2 cups (170g) sharp cheddar cheese, shredded
- 1/2 teaspoon salt
- 1/4 teaspoon black pepper
- 1/2 cup (55g) sharp cheddar cheese, shredded (for topping)
- Optional: 2 tablespoons chopped fresh parsley or chives
Instructions
- Preheat your oven to 350°F (175°C). Lightly grease a 9×13-inch baking dish with butter or non-stick spray.
- Melt 1/2 cup of unsalted butter in the microwave for 30-45 seconds until just melted. Set aside to cool slightly.
- In a large mixing bowl, combine 1 cup of sour cream, 2 room-temperature eggs, and the melted butter. Whisk until smooth and well combined.
- Stir in the drained whole kernel corn and the can of cream-style corn. Mix until evenly distributed.
- Add both boxes of Jiffy corn muffin mix, 1/2 teaspoon of salt, and 1/4 teaspoon of black pepper. Stir gently until just combined. Do not overmix.
- Fold in 1 1/2 cups of shredded sharp cheddar cheese. Reserve the remaining 1/2 cup for topping.
- Pour the batter into the prepared dish and spread evenly with a spatula.
- Bake for 40-45 minutes. After 35 minutes, check that the edges are golden brown and the center is set but slightly jiggly.
- Sprinkle the remaining 1/2 cup of shredded cheddar over the top. Return to the oven for another 5-7 minutes until the cheese is melted and bubbly. For a deeper golden crust, broil for the last 1-2 minutes, watching closely.
- Remove from the oven and let the casserole rest for 10-15 minutes before cutting.
- Garnish with fresh parsley or chives if desired. Serve warm.
Notes
Don’t overmix the batter; a few lumps are fine. Room temperature ingredients help the batter come together smoothly. Let the casserole rest for 10-15 minutes after baking to set properly. For a spicier version, add diced jalapeño or green chiles. For a gluten-free version, use a gluten-free corn muffin mix and ensure cream-style corn is gluten-free.
Nutrition
- Serving Size: 1 serving
- Calories: 320
- Sugar: 8
- Sodium: 520
- Fat: 18
- Saturated Fat: 10
- Carbohydrates: 34
- Fiber: 2
- Protein: 9
Keywords: Jiffy corn casserole, corn casserole with sour cream, corn casserole with cheddar, easy corn casserole, potluck corn casserole, Thanksgiving side dish