Love this? Save it for later!
Share the inspiration with your friends
I was at my neighbor Carol’s house last October, dropping off a casserole dish I’d borrowed, when the smell hit me before I even got through the screen door. It wasn’t a fancy dinner party or a holiday gathering—she was just making a cake on a random Thursday afternoon because, and I quote, “the leaves are changing and I felt like it.” That’s the thing about Carol. She doesn’t make a big deal out of anything, especially not her baking. She handed me a fork and said, “Tell me if it’s too sweet,” like she hadn’t just created something that smelled like autumn had taken physical form in her kitchen.
I took one bite of that Reese’s peanut butter fall harvest cake and honestly, I forgot what I was doing for a second. It had this incredible balance—rich peanut butter, tender cake, and just enough apple and spice to make you feel like you’re wrapped in a cozy sweater. Carol shrugged and said it was just something she threw together with what she had. I mean, can you imagine? “Just something she threw together.” Meanwhile I’m standing there trying to figure out how to casually ask for the recipe without sounding like I’m about to cry over cake. Maybe you’ve been there—that moment when you taste something so unexpectedly perfect that you know you’ll be thinking about it for weeks.
I finally convinced her to write it down, and after making it about six times in my own kitchen (and messing up the frosting ratio twice), I’ve got it dialed in. This is the kind of cake that makes people close their eyes when they take the first bite. It’s the kind you bring to a fall gathering and watch disappear before the pumpkin pie even gets touched. And the best part? It’s actually pretty simple to pull off. Carol made it on a random Thursday, after all.
Why You’ll Love This Recipe
Let me tell you why this Reese’s peanut butter fall harvest cake has earned a permanent spot in my fall baking rotation. I’ve tested this recipe multiple times, tweaked the ratios, and even brought it to a few gatherings to get honest feedback from friends and family. It’s not just another cake recipe—it’s the one that gets requested every single year.
- Quick & Easy: You can have this cake mixed and in the oven in about 15 minutes. No complicated techniques or stand mixer required. It’s perfect for those days when you want something impressive but don’t have hours to spend in the kitchen.
- Simple Ingredients: Most of what you need is probably already in your pantry. The fall harvest twist comes from a few seasonal additions that are easy to find at any grocery store.
- Perfect for Fall Gatherings: This cake was made for Thanksgiving, Friendsgiving, Halloween parties, or just a cozy Sunday afternoon. It’s got that autumn vibe without being too on-the-nose.
- Crowd-Pleaser: I’ve served this to kids, adults, and even my picky uncle who “doesn’t do dessert.” Everyone loves it. The combination of peanut butter and fall flavors is just unbeatable.
- Unbelievably Delicious: The texture is incredibly moist, the peanut butter flavor is rich without being overwhelming, and the fall spices tie everything together in a way that feels like comfort in every bite.
What makes this recipe different from the dozens of other fall cakes out there is the way the peanut butter interacts with the apple and spice components. It’s not just a chocolate cake with peanut butter frosting slapped on top. The peanut butter is actually baked into the cake itself, creating this subtle nutty flavor that pairs perfectly with cinnamon and nutmeg. Then the Reese’s cups add pockets of melty chocolate-peanut butter goodness throughout. Trust me, this isn’t just another version of a fall cake—it’s the best version.
What Ingredients You Will Need
This recipe uses simple, wholesome ingredients that come together to create something truly special. Most of these are pantry staples, but I’ve included a few notes on what to look for to get the best results.
For the Cake
- 2 cups all-purpose flour (I prefer Gold Medal for consistent results)
- 1 teaspoon baking powder
- 1 teaspoon baking soda
- 1/2 teaspoon salt
- 1 teaspoon ground cinnamon
- 1/2 teaspoon ground nutmeg (freshly grated if you have it)
- 1/4 teaspoon ground cloves
- 1 cup unsalted butter, softened (adds richness and moisture)
- 1 cup granulated sugar
- 1/2 cup packed brown sugar (adds depth and keeps the cake tender)
- 3 large eggs, room temperature
- 1 teaspoon vanilla extract
- 1 cup creamy peanut butter (I recommend Jif or Skippy for best texture)
- 1 cup buttermilk (or make your own by adding 1 tablespoon lemon juice to 1 cup milk)
- 1 cup finely chopped apple (Granny Smith or Honeycrisp work great)
- 1 cup chopped Reese’s peanut butter cups (plus more for topping)
For the Peanut Butter Frosting
- 1/2 cup unsalted butter, softened
- 1 cup creamy peanut butter
- 2 cups powdered sugar
- 2-3 tablespoons heavy cream (or milk if needed)
- 1 teaspoon vanilla extract
- Pinch of salt
For the Fall Harvest Topping
- 1/2 cup chopped Reese’s peanut butter cups
- 1/4 cup chopped pecans or walnuts (optional, for crunch)
- Caramel drizzle (store-bought or homemade)
- Flaky sea salt for finishing
When it comes to the apples, I like using Granny Smith because their tartness balances the sweetness of the cake. But if you prefer a sweeter flavor, Honeycrisp or Fuji work beautifully too. Just make sure to chop them finely so they distribute evenly throughout the batter. And for the peanut butter—please use the regular kind, not natural or oily peanut butter. The stabilizers in processed peanut butter help the cake maintain its structure and give you that classic Reese’s flavor we’re going for.
Equipment Needed
You don’t need a ton of fancy equipment for this Reese’s peanut butter fall harvest cake, which is part of what makes it so great. Here’s what you’ll need:
- Two 9-inch round cake pans: If you don’t have round pans, you can use a 9×13 inch baking dish instead—just adjust the baking time by about 10 minutes.
- Electric mixer: A hand mixer works perfectly fine, though a stand mixer makes things a bit easier. I’ve made this with both and honestly, the hand mixer does the job just as well.
- Mixing bowls: You’ll need at least two medium bowls and one large bowl.
- Parchment paper: This is not optional. Trust me on this one. I learned the hard way when my first attempt stuck to the pan like glue.
- Cooling rack: Essential for getting the cakes to cool evenly. If you don’t have one, you can use the racks from your oven—just make sure they’re clean.
- Offset spatula: For smooth frosting application. A butter knife works in a pinch, but an offset spatula makes it look so much more professional.
- Chef’s knife and cutting board: For chopping the apples and Reese’s cups.
I picked up my offset spatula at a kitchen supply store for about five dollars, and it’s honestly one of the best investments I’ve made for my baking. You don’t need to spend a lot to get good results.
Preparation Method
Alright, let’s get baking. I’ve broken this down into clear steps with all the little details I’ve picked up from making this cake more times than I care to admit.
- Preheat your oven to 350°F (175°C). Grease two 9-inch round cake pans and line the bottoms with parchment paper. This step is crucial—I once skipped the parchment paper and spent 20 minutes trying to get the cake out in one piece. Don’t be like me.
- In a medium bowl, whisk together the dry ingredients: 2 cups flour, 1 teaspoon baking powder, 1 teaspoon baking soda, 1/2 teaspoon salt, 1 teaspoon cinnamon, 1/2 teaspoon nutmeg, and 1/4 teaspoon cloves. Set this aside. Make sure your spices are fresh—old spices lose their punch and your cake will taste flat.
- In a large bowl, cream together the butter and sugars: Beat 1 cup softened butter with 1 cup granulated sugar and 1/2 cup packed brown sugar until light and fluffy, about 3-4 minutes. This is where you want to be patient. Properly creamed butter and sugar creates air pockets that help your cake rise beautifully.
- Add the eggs one at a time, beating well after each addition. Then mix in 1 teaspoon vanilla extract. The batter should look smooth and slightly glossy at this point.
- Mix in the peanut butter: Add 1 cup creamy peanut butter and beat until fully incorporated. Scrape down the sides of the bowl to make sure everything is evenly mixed. The batter will be thick and smell incredible already.
- Alternate adding the dry ingredients and buttermilk: Start with about 1/3 of the flour mixture, mix until just combined, then add half the buttermilk. Repeat with another third of flour, the remaining buttermilk, and finish with the last of the flour. Mix until just combined—overmixing will make your cake tough. A few streaks of flour are okay at this point.
- Fold in the chopped apple and Reese’s cups: Gently fold in 1 cup finely chopped apple and 1 cup chopped Reese’s peanut butter cups. Use a rubber spatula and be gentle. You want the chunks distributed evenly without deflating the batter.
- Divide the batter evenly between the two prepared pans. Use a spatula to smooth the tops. Give the pans a gentle tap on the counter to release any air bubbles.
- Bake for 28-32 minutes, or until a toothpick inserted in the center comes out clean or with a few moist crumbs. The cakes should be golden brown and the edges will start pulling away from the pan. My oven runs hot, so I start checking at 25 minutes. Every oven is different, so trust your instincts and the toothpick test.
- Cool the cakes in the pans for 10 minutes, then turn them out onto a wire rack to cool completely. Don’t rush this step. If you try to frost warm cake, you’ll end up with a melty mess. I learned this lesson after my first attempt looked like a crime scene.
- While the cakes cool, make the frosting: Beat 1/2 cup softened butter and 1 cup peanut butter until smooth. Gradually add 2 cups powdered sugar, beating on low speed. Add 1 teaspoon vanilla and a pinch of salt. Then add heavy cream, one tablespoon at a time, until you reach your desired consistency. You want it spreadable but not runny.
- Assemble the cake: Place one cake layer on your serving plate. Spread about 1/3 of the frosting evenly on top. Place the second layer on top and use the remaining frosting to cover the top and sides. Don’t worry about perfection—a rustic look works great for a fall harvest cake.
- Add the topping: Sprinkle chopped Reese’s cups and pecans on top. Drizzle with caramel sauce and finish with a pinch of flaky sea salt. The salt really makes the flavors pop.
Cooking Tips & Techniques
After making this Reese’s peanut butter fall harvest cake more times than I can count, I’ve picked up a few tricks that make a real difference. Let me share what I’ve learned so you don’t have to make the same mistakes I did.
The biggest mistake people make is overmixing the batter. I know it’s tempting to keep stirring until everything looks perfectly smooth, but that’s exactly what leads to a dense, tough cake. Mix until the flour just disappears into the batter, then stop. A few lumps are fine—they’ll bake out.
Another common issue is not bringing your ingredients to room temperature. Cold eggs and cold butter don’t cream together properly, which means your cake won’t rise as well. I usually take my butter and eggs out of the fridge about an hour before I start baking. If I’m in a hurry, I’ll put the eggs in a bowl of warm water for 5 minutes and microwave the butter for 10 seconds at a time until it’s softened but not melted.
For the most even layers, I use a kitchen scale to weigh the batter between the two pans. It takes an extra 30 seconds and guarantees your cakes bake evenly. If you don’t have a scale, use a measuring cup and count your scoops to make sure each pan gets the same amount.
When it comes to the apples, make sure you chop them finely—about 1/4 inch pieces. Big chunks of apple can release too much moisture and make the cake soggy. Also, toss the chopped apples in a teaspoon of flour before folding them into the batter. This helps prevent them from sinking to the bottom of the cake.
Timing is everything with this cake. I like to bake the layers the day before, wrap them tightly in plastic wrap once they’re completely cool, and frost them the next day. The cake actually tastes better the next day because the flavors have time to meld together. Plus, it makes hosting so much less stressful.
Variations & Adaptations
One of the things I love about this Reese’s peanut butter fall harvest cake is how adaptable it is. Here are some variations I’ve tried and loved:
Gluten-Free Version: Substitute the all-purpose flour with a 1:1 gluten-free baking flour blend. I’ve had great results with King Arthur’s measure-for-measure blend. Just add an extra tablespoon of buttermilk to compensate for the extra absorbency of gluten-free flours.
Dairy-Free Adaptation: Use vegan butter sticks (not tub margarine) and substitute the buttermilk with almond milk mixed with a tablespoon of apple cider vinegar. For the frosting, use dairy-free butter and canned coconut cream instead of heavy cream. The taste is slightly different but still delicious.
Pumpkin Spice Twist: Replace the chopped apple with 1/2 cup pumpkin puree and add an extra 1/2 teaspoon of pumpkin pie spice. The pumpkin adds moisture and pairs beautifully with the peanut butter. Just note that the cake might need an extra 5 minutes in the oven.
Chocolate Lover’s Version: Add 1/4 cup unsweetened cocoa powder to the dry ingredients and increase the buttermilk by 2 tablespoons. This creates a chocolate-peanut butter dream that’s even more indulgent than the original.
Mini Cupcake Variation: This batter makes about 36 mini cupcakes. Bake for 10-12 minutes and top with a small Reese’s cup on each one. They’re perfect for parties and portion control.
I’ve tried all of these variations at one point or another, and my personal favorite is the pumpkin spice twist. Something about the combination of peanut butter, pumpkin, and warm spices just hits different in the fall.
Serving & Storage Suggestions
This Reese’s peanut butter fall harvest cake is best served at room temperature. If you’ve refrigerated it, let it sit out for about 30 minutes before serving. The flavors are much more pronounced when the cake isn’t cold.
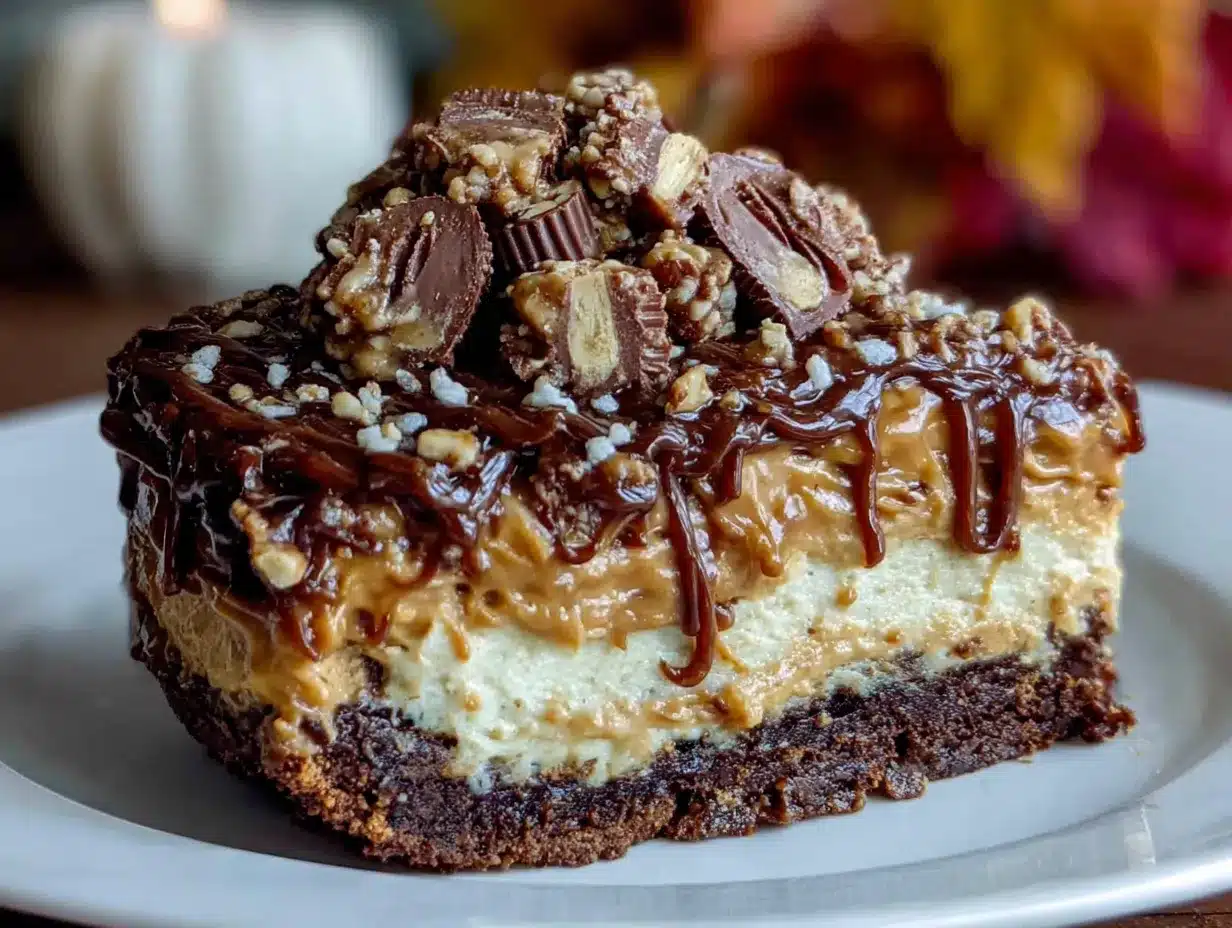
For presentation, I like to serve this cake on a rustic wooden cake stand or a simple white platter. The contrast between the dark chocolate, golden cake, and caramel drizzle looks gorgeous. A few cinnamon sticks and star anise arranged around the base of the cake add a nice fall touch.
What to serve with it: A scoop of vanilla bean ice cream is my go-to pairing. The cold, creamy ice cream against the rich, spiced cake is absolute perfection. A dollop of whipped cream and a drizzle of extra caramel sauce also work beautifully. For drinks, a hot cup of apple cider or a pumpkin spice latte complements the flavors perfectly.
Storage instructions: This cake keeps well at room temperature for up to 3 days if stored in an airtight container. If you live in a warm climate, you might want to refrigerate it to prevent the frosting from getting too soft. Just bring it back to room temperature before serving.
Freezing tips: You can freeze the unfrosted cake layers for up to 3 months. Wrap each layer tightly in plastic wrap, then again in aluminum foil. When you’re ready to use them, thaw overnight in the refrigerator and bring to room temperature before frosting. The frosted cake can also be frozen for up to 2 months—just place it in the freezer unwrapped for an hour to firm up the frosting, then wrap it carefully.
How flavors develop: Honestly, this cake tastes even better on day two. The spices have time to meld with the peanut butter, and the apple flavor becomes more pronounced. If you can resist eating it all on day one, you’re in for a treat on day two.
Nutritional Information & Benefits
Let’s be real—this is a treat, not a health food. But that doesn’t mean it doesn’t have some redeeming qualities. Here’s a rough estimate of the nutritional values per serving (based on 12 servings):
| Nutrient | Amount per Serving |
|---|---|
| Calories | 520 |
| Total Fat | 32g |
| Saturated Fat | 12g |
| Cholesterol | 75mg |
| Sodium | 380mg |
| Total Carbohydrates | 55g |
| Dietary Fiber | 3g |
| Sugars | 38g |
| Protein | 10g |
Health benefits of key ingredients: Peanut butter provides protein and healthy fats that help keep you full. Apples add fiber and vitamin C. Cinnamon has anti-inflammatory properties and can help regulate blood sugar. So while this cake isn’t exactly health food, it’s not completely devoid of nutritional value either.
Dietary considerations: This recipe contains gluten, dairy, eggs, peanuts, and tree nuts (if you add pecans). For a gluten-free version, see the variations section. For a dairy-free version, the substitutions listed above work well.
My personal take: I believe in balance. This cake is meant to be enjoyed in moderation as part of a special occasion or a cozy fall day. One slice won’t derail your healthy eating goals, and the joy it brings is absolutely worth it.
Conclusion
This Reese’s peanut butter fall harvest cake is more than just a dessert—it’s the kind of recipe that becomes a tradition. Every time I make it, I think about that random Thursday at Carol’s house, and how the simplest moments can lead to the most memorable recipes. It’s the cake I bring to every fall gathering, the one my family requests for Thanksgiving, and the one I make just because the leaves are changing and I feel like it.
I hope you give this recipe a try and make it your own. Maybe you’ll add extra cinnamon, swap the apples for pears, or double the Reese’s cups on top. That’s the beauty of baking—there’s always room for your personal touch. And when you take that first bite, I hope it makes you close your eyes and smile, just like I did at Carol’s kitchen table.
If you make this cake, I’d love to hear about it! Drop a comment below and let me know how it turned out, what variations you tried, or if you have any questions. And if you’re looking for more fall baking inspiration, check out my Reese’s peanut butter cookies and apple cider donut cake recipes. Happy baking, friends!
Frequently Asked Questions
Can I use natural peanut butter in this recipe?
I wouldn’t recommend it. Natural peanut butter has a different fat content and can separate during baking, which can affect the texture of your cake. Stick with regular creamy peanut butter like Jif or Skippy for the best results.
Can I make this cake ahead of time?
Absolutely! In fact, I prefer making the cake layers a day ahead. Once they’re completely cool, wrap them tightly in plastic wrap and store them at room temperature. Frost and assemble the cake the next day. The flavors actually meld together beautifully overnight.
Can I use a different type of apple?
Yes, you can use any apple you like. Granny Smith apples add a nice tartness that balances the sweetness, but Honeycrisp, Fuji, or Gala work great too. Just make sure to chop them finely so they distribute evenly throughout the batter.
How do I know when the cake is done baking?
Insert a toothpick into the center of the cake. If it comes out clean or with just a few moist crumbs, it’s done. The edges should also be pulling away from the sides of the pan slightly. Start checking at 25 minutes to avoid overbaking.
Can I freeze this cake?
Yes! You can freeze unfrosted cake layers for up to 3 months. Wrap each layer tightly in plastic wrap and then aluminum foil. Thaw overnight in the refrigerator and bring to room temperature before frosting. You can also freeze the fully frosted cake for up to 2 months.
Pin This Recipe!
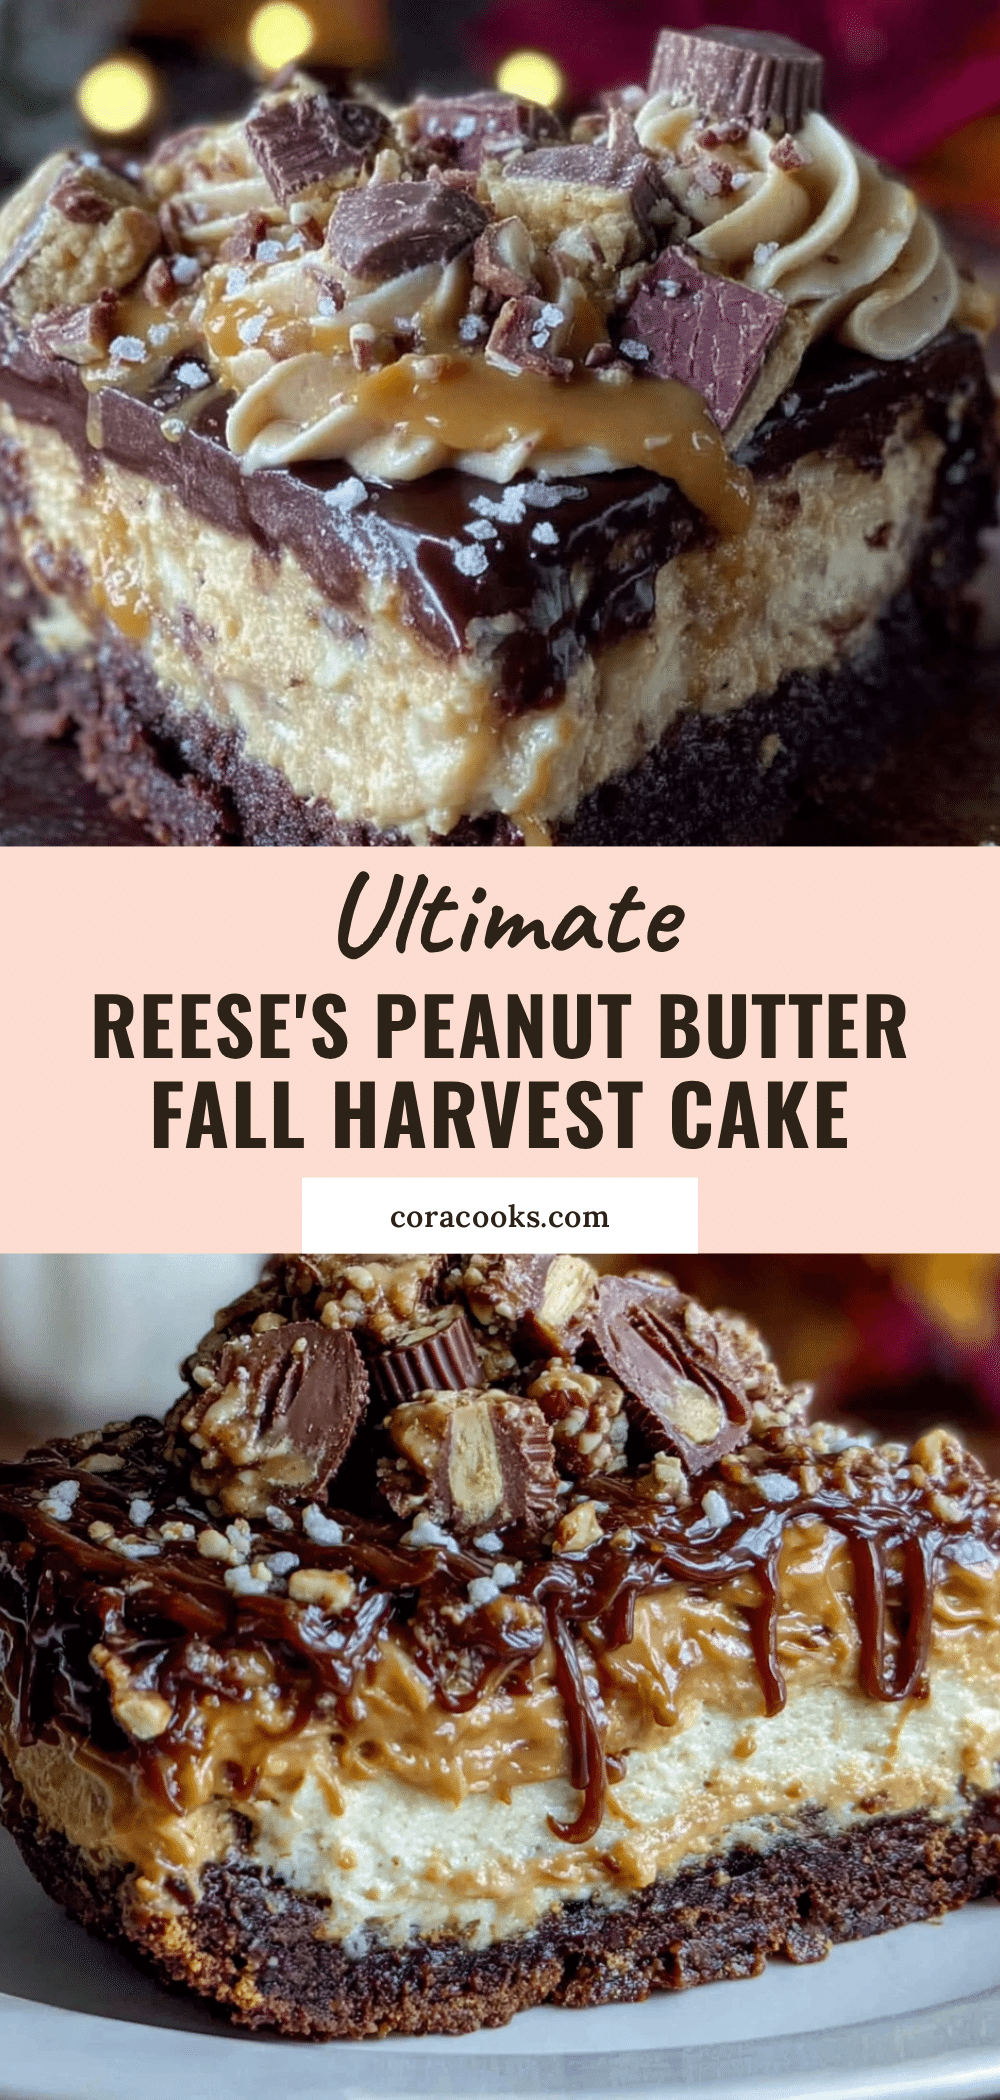
Best Homemade Reeses Peanut Butter Fall Harvest Cake

A moist and flavorful fall cake with rich peanut butter, tender apple pieces, and melty Reese’s cups, topped with a creamy peanut butter frosting and caramel drizzle. Perfect for autumn gatherings and cozy days.
- Prep Time: 15 minutes
- Cook Time: 30 minutes
- Total Time: 45 minutes
- Yield: 12 servings 1x
- Category: Dessert
- Cuisine: American
Ingredients
- 2 cups all-purpose flour
- 1 teaspoon baking powder
- 1 teaspoon baking soda
- 1/2 teaspoon salt
- 1 teaspoon ground cinnamon
- 1/2 teaspoon ground nutmeg
- 1/4 teaspoon ground cloves
- 1 cup unsalted butter, softened
- 1 cup granulated sugar
- 1/2 cup packed brown sugar
- 3 large eggs, room temperature
- 1 teaspoon vanilla extract
- 1 cup creamy peanut butter
- 1 cup buttermilk
- 1 cup finely chopped apple (Granny Smith or Honeycrisp)
- 1 cup chopped Reese’s peanut butter cups (plus more for topping)
- 1/2 cup unsalted butter, softened (for frosting)
- 1 cup creamy peanut butter (for frosting)
- 2 cups powdered sugar
- 2–3 tablespoons heavy cream
- 1 teaspoon vanilla extract (for frosting)
- Pinch of salt (for frosting)
- 1/2 cup chopped Reese’s peanut butter cups (for topping)
- 1/4 cup chopped pecans or walnuts (optional)
- Caramel drizzle (store-bought or homemade)
- Flaky sea salt for finishing
Instructions
- Preheat your oven to 350°F (175°C). Grease two 9-inch round cake pans and line the bottoms with parchment paper.
- In a medium bowl, whisk together the dry ingredients: 2 cups flour, 1 teaspoon baking powder, 1 teaspoon baking soda, 1/2 teaspoon salt, 1 teaspoon cinnamon, 1/2 teaspoon nutmeg, and 1/4 teaspoon cloves. Set aside.
- In a large bowl, cream together the butter and sugars: Beat 1 cup softened butter with 1 cup granulated sugar and 1/2 cup packed brown sugar until light and fluffy, about 3-4 minutes.
- Add the eggs one at a time, beating well after each addition. Then mix in 1 teaspoon vanilla extract.
- Mix in the peanut butter: Add 1 cup creamy peanut butter and beat until fully incorporated. Scrape down the sides of the bowl.
- Alternate adding the dry ingredients and buttermilk: Start with about 1/3 of the flour mixture, mix until just combined, then add half the buttermilk. Repeat with another third of flour, the remaining buttermilk, and finish with the last of the flour. Mix until just combined.
- Fold in the chopped apple and Reese’s cups: Gently fold in 1 cup finely chopped apple and 1 cup chopped Reese’s peanut butter cups.
- Divide the batter evenly between the two prepared pans. Smooth the tops and tap the pans gently on the counter to release air bubbles.
- Bake for 28-32 minutes, or until a toothpick inserted in the center comes out clean or with a few moist crumbs.
- Cool the cakes in the pans for 10 minutes, then turn them out onto a wire rack to cool completely.
- While the cakes cool, make the frosting: Beat 1/2 cup softened butter and 1 cup peanut butter until smooth. Gradually add 2 cups powdered sugar, beating on low speed. Add 1 teaspoon vanilla and a pinch of salt. Then add heavy cream, one tablespoon at a time, until you reach your desired consistency.
- Assemble the cake: Place one cake layer on your serving plate. Spread about 1/3 of the frosting evenly on top. Place the second layer on top and use the remaining frosting to cover the top and sides.
- Add the topping: Sprinkle chopped Reese’s cups and pecans on top. Drizzle with caramel sauce and finish with a pinch of flaky sea salt.
Notes
For best results, use regular creamy peanut butter (not natural). Bring ingredients to room temperature. Chop apples finely and toss in a teaspoon of flour to prevent sinking. The cake tastes even better the next day. For a gluten-free version, use a 1:1 gluten-free flour blend. For dairy-free, use vegan butter and almond milk with apple cider vinegar.
Nutrition
- Serving Size: 1 slice
- Calories: 520
- Sugar: 38
- Sodium: 380
- Fat: 32
- Saturated Fat: 12
- Carbohydrates: 55
- Fiber: 3
- Protein: 10
Keywords: Reese's peanut butter cake, fall harvest cake, peanut butter cake, apple cake, fall dessert, Thanksgiving cake, peanut butter frosting


