Love this? Save it for later!
Share the inspiration with your friends
My daughter asked why I couldn’t just stir the peppermint syrup into the hot chocolate instead of making a whole separate coffee drink. I started to explain why that wouldn’t work — then stopped. Honestly, I had no good reason. I was just being stubborn about how a “real” mocha should be made. So I handed her the jar of chocolate sauce and the peppermint syrup and let her have at it.
She dumped way too much chocolate in her mug, added a splash of milk that looked more like a splash of coffee, and topped it all with a mountain of whipped cream. I braced myself for a syrupy disaster. But when she handed me the spoon to taste, I had to admit — it was actually pretty good. Not just good, but better than what I’d been making for years.
That moment of being wrong stuck with me. Here I was, the “adult” who had been making peppermint mochas every December since college, and my ten-year-old figured out a better ratio in one try. She didn’t overthink it. She just made what tasted good to her. And that’s exactly what this recipe is about — not being precious about technique, but making something that actually tastes amazing and makes everyone happy.
So this copycat Starbucks peppermint mocha is her version, not mine. It’s richer, more chocolaty, and way more forgiving than any coffee shop recipe. And the best part? You can make a whole batch for what you’d spend on two drinks at the drive-thru. Maybe you’ve been there — staring at that $6 price tag and wondering if there’s a better way. There is. And it starts with letting go of the rules.
Why You’ll Love This Recipe
This homemade peppermint mocha isn’t just another copycat recipe. It’s the one my family fought over during our last snow day, and I’m pretty sure it’ll become your new winter tradition too. Here’s why it works so well for busy families on a budget:
- Costs pennies per serving — A whole batch costs less than one Starbucks drink. I’m not joking. We’re talking about $1.50 per mug versus $6.50.
- Uses pantry staples — You probably already have cocoa powder, sugar, and milk in your kitchen right now. No special syrups or fancy equipment needed.
- Comes together in 10 minutes — Faster than driving to the coffee shop and waiting in line. Even on school mornings when we’re running late.
- Picky-eater approved — My kids who swear they hate coffee love this drink. The chocolate and peppermint mask any bitterness, and you can adjust the coffee strength for each person.
- Scalable for a crowd — Double it for holiday brunch, half it for a quiet Tuesday night. It’s flexible like that.
What makes this recipe different is the technique. Most copycat recipes use heavy cream or complicated syrups. This one uses whole milk and a simple stovetop chocolate base that emulsifies perfectly without separating. I tested it six times before landing on this version — three times with different milks, twice with different cocoa powders, and once with a disastrous attempt at using dark chocolate chips that seized up on me. Learn from my mistakes. This version works every time.
There’s something about holding a warm mug on a cold afternoon that just feels right. This drink is that feeling — cozy, indulgent, and completely worth every calorie. It’s the kind of thing that makes you close your eyes after that first sip and forget about the laundry waiting in the basement.
What Ingredients You Will Need
This recipe uses simple, wholesome ingredients to deliver that rich, minty chocolate flavor without any artificial stuff. Most of these are things you probably already have in your pantry or can grab on your regular grocery run.
- 2 cups whole milk (or 2% — I’ve used both. Whole milk gives a creamier texture, but 2% works fine in a pinch. Avoid skim milk here; it makes the drink watery.)
- 1/4 cup unsweetened cocoa powder (I prefer Ghirardelli for its deep chocolate flavor. Hershey’s works too, but you might need an extra tablespoon.)
- 1/4 cup granulated sugar (You can adjust this up or down depending on your sweet tooth. My kids like it sweeter; I cut it to 3 tablespoons for myself.)
- 1/2 cup strong brewed coffee or espresso (I use whatever I have leftover from the morning pot. Fresh is better, but day-old coffee works surprisingly well here. For decaf, just use decaf grounds.)
- 1/2 teaspoon peppermint extract (This is the key. Pure peppermint extract, not mint extract. They’re different — peppermint is sharper and more authentic to the Starbucks taste. Mint extract tastes more like toothpaste, trust me.)
- 1/4 cup heavy cream (For the whipped cream topping. Optional but highly recommended. You can also use store-bought whipped cream if you’re short on time.)
- 1 tablespoon powdered sugar (For sweetening the whipped cream. Again, optional.)
- Crushed candy canes or peppermint candies (For garnish. We crush ours in a zip-top bag with a rolling pin. It’s messy but the kids love doing it.)
If you’re feeding a crowd, just multiply everything by the number of people. I made a quadruple batch for our holiday open house last year and it disappeared in 20 minutes. For a dairy-free version, use oat milk and coconut cream. Oat milk froths better than almond milk, so that’s my recommendation.
Equipment Needed
You don’t need a fancy espresso machine for this. I’ve made it with just basic kitchen tools and it turns out perfectly every time.
- Medium saucepan — Any 2-quart pot works. I use my old Calphalon that’s seen better days but still heats evenly.
- Whisk — A balloon whisk is best for getting the cocoa powder to dissolve smoothly. A fork works in a pinch but takes more elbow grease.
- Measuring cups and spoons — Accurate measurements matter here, especially for the peppermint extract. Too much and it tastes like mouthwash.
- Mugs — 12-ounce mugs are perfect. I have a set of mismatched thrift store mugs that I use for cozy drinks like this.
- Hand mixer or stand mixer — For the whipped cream. You can also use a jar with a tight lid and shake it like crazy for about 3 minutes. It works, I promise.
- Zip-top bag and rolling pin — For crushing the candy canes. A meat mallet works too. Just don’t use your good rolling pin unless you want peppermint dust in your cinnamon rolls for the next month.
If you have a milk frother, great. But honestly, I’ve made this dozens of times without one and nobody has ever complained. The stovetop method creates enough heat and agitation to give you a nice, creamy texture.
Preparation Method

This comes together faster than you think. Here’s exactly how to make it, step by step.
- Make the chocolate base. In your medium saucepan, whisk together the cocoa powder and sugar until there are no lumps. Add about 1/4 cup of the milk and whisk into a smooth paste. This step is important — if you dump all the milk in at once, you’ll end up with floating cocoa clumps. I learned this the hard way on my first attempt.
- Add the remaining milk. Pour in the rest of the milk and whisk until everything is combined. Place the saucepan over medium heat. Don’t crank it to high — you want gentle heating, not a boil. Stir occasionally with your whisk.
- Heat until steaming. This takes about 4-5 minutes. You’ll see small bubbles forming around the edges of the pan, but don’t let it come to a full boil. Boiling can make the milk scald and give it a weird, cooked taste. If you see steam rising steadily, you’re there.
- Add the coffee. Pour in your brewed coffee or espresso and stir to combine. This is where you can adjust the coffee strength. For my kids, I use about 1/4 cup of coffee. For myself, I use closer to 3/4 cup. The recipe calls for 1/2 cup as a happy medium.
- Stir in the peppermint extract. Remove the saucepan from heat and add the peppermint extract. Stir well. Taste it here and adjust if needed. Remember, you can always add more but you can’t take it out. Start with 1/4 teaspoon if you’re nervous about it being too strong.
- Make the whipped cream. While the mocha is heating, pour the heavy cream and powdered sugar into a mixing bowl. Use a hand mixer on medium speed for about 2-3 minutes, until soft peaks form. You want it thick enough to hold its shape but not so stiff that it looks like butter. If you’re using store-bought whipped cream, skip this step.
- Crush the candy canes. Put 2-3 candy canes in a zip-top bag and seal it. Use a rolling pin or heavy pan to crush them into small pieces. Don’t pulverize them into powder — you want some texture. Tiny chunks are perfect.
- Assemble and serve. Pour the hot mocha into mugs, leaving about an inch of space at the top. Add a generous dollop of whipped cream. Sprinkle crushed candy canes on top. Serve immediately while it’s hot.
The whole process takes about 10 minutes from start to finish. On busy mornings, I make the chocolate base the night before and just reheat it with the coffee in the morning. It saves me about 5 minutes, which is huge when you’re trying to get everyone out the door.
Cooking Tips & Techniques
I’ve made this recipe at least 30 times, and I’ve made every mistake you can imagine. Here’s what I’ve learned.
Don’t skip the paste step. I know it seems fussy, but whisking the cocoa powder and sugar with just a splash of milk first prevents those annoying lumps. I tried skipping it once because I was in a hurry, and I spent the next 10 minutes fishing cocoa clumps out of my drink with a fork. Not worth it.
Temperature matters. If you overheat the milk, it can scald and develop a thin skin on top. That skin is not pleasant in a drink. Keep the heat at medium and watch for steam rather than bubbles. If you see bubbles forming across the entire surface, you’ve gone too far. Pull it off the heat immediately.
The peppermint extract is potent. I cannot stress this enough. Start with less than you think you need. I once added a full teaspoon because I thought “more is better” and the whole batch tasted like a candy cane exploded in a mouthwash factory. My husband still brings it up. 1/2 teaspoon is the sweet spot.
Make it ahead for parties. You can make the mocha base (everything except the whipped cream and garnish) up to two days in advance. Store it in the fridge and reheat gently on the stovetop or in the microwave. The flavor actually gets better as it sits — the chocolate and peppermint meld together overnight.
Double-check your coffee strength. If your coffee is weak, your mocha will be weak too. I use a 1:1 ratio of coffee to water when I’m brewing specifically for this recipe. If I’m using leftover coffee, I sometimes add an extra shot of instant espresso powder to boost the flavor. Just stir it into the hot milk until dissolved.
Variations & Adaptations
One of the best things about this recipe is how easy it is to change up. Here are some variations we’ve tried in our house.
Dairy-free version: Use oat milk instead of whole milk and coconut cream instead of heavy cream. Oat milk has a similar creaminess to dairy milk and doesn’t separate when heated. Almond milk works but gives a thinner texture. For the whipped cream, chill a can of full-fat coconut cream overnight, then whip the solid part with powdered sugar.
Extra chocolatey: Add 2 tablespoons of chocolate syrup along with the cocoa powder. This gives it that deep, almost fudgy flavor that Starbucks has. I do this when I’m really craving something indulgent — like on the first snow day of the year.
Mocha latte version: Use 1 cup of strong coffee instead of 1/2 cup. This makes it more coffee-forward and less chocolaty. My husband prefers this version because he says the original is “too dessert-like.” I think he’s wrong, but I make it for him anyway.
White chocolate peppermint mocha: Substitute the cocoa powder with 1/4 cup of melted white chocolate chips. Reduce the sugar to 1 tablespoon since white chocolate is already sweet. This is dangerously good — like drinking a melted candy cane.
Kid-friendly hot chocolate version: Omit the coffee entirely and add an extra 1/2 cup of milk. This is what I make for my youngest who’s not ready for caffeine yet. She calls it “special hot chocolate” and feels very grown up drinking it alongside us.
Serving & Storage Suggestions
This mocha is best served hot, right after you make it. But I’ve also enjoyed it cold on warmer days, and it’s surprisingly good either way.
Serving temperature: Serve it piping hot, but not boiling. Let it cool for about a minute after pouring so nobody burns their tongue. I’ve done that more times than I care to admit.
Presentation: Use clear glass mugs if you have them — the dark chocolate color against the white whipped cream and red candy cane pieces is gorgeous. For holiday gatherings, I serve it in my grandmother’s old teacups. The contrast between the fancy cups and the casual drink is charming.
What goes with it: This pairs beautifully with chocolate chip cookies for dipping. I also love it with cranberry orange scones for a holiday brunch spread. The tartness of the cranberries balances the sweetness of the mocha perfectly.
Storage: Leftover mocha (if you have any) can be stored in an airtight container in the fridge for up to 3 days. The flavors will meld together and actually improve. Reheat it gently on the stovetop or in 30-second bursts in the microwave, stirring between each.
Freezing: You can freeze the mocha base in ice cube trays and use them later for iced peppermint mochas. Just pop a few cubes into a glass, add cold milk, and stir. It’s a great hack for summer when you’re craving that holiday flavor.
How flavors develop: The peppermint flavor fades slightly as the mocha sits, so if you’re making it ahead, you might want to add an extra 1/8 teaspoon of extract right before serving. The chocolate flavor deepens over time, becoming richer and more complex.
Nutritional Information & Benefits
Let’s be real — this is a treat, not a health drink. But it’s not as bad as you might think.
Per serving (12 ounces with whipped cream): Approximately 280 calories, 12g fat, 38g carbohydrates, 8g protein, and 2g fiber. Without whipped cream, it’s about 200 calories.
Health benefits of key ingredients: Cocoa powder is rich in antioxidants called flavonoids, which can help reduce inflammation and improve heart health. Milk provides calcium and vitamin D. Peppermint has been shown to aid digestion and reduce stress. So there are some redeeming qualities here.
Dietary considerations: This recipe is naturally vegetarian. For a gluten-free version, make sure your candy canes are certified gluten-free (most are, but check the label). For a lower-sugar version, use a sugar substitute like monk fruit sweetener and skip the whipped cream.
Potential allergens: Contains dairy. The candy canes may contain traces of soy or corn. If you’re serving someone with allergies, check all labels carefully.
From a wellness perspective, I think it’s fine to enjoy treats like this in moderation. We’re not drinking peppermint mochas every day — they’re a seasonal indulgence that makes winter feel special. And honestly, making them at home means you control what goes in them. No artificial flavors, no preservatives, no weird additives. Just real ingredients that taste amazing.
Conclusion
This homemade peppermint mocha is proof that you don’t need a coffee shop to enjoy a truly special winter drink. It’s rich, chocolaty, perfectly minty, and comes together in less time than it takes to drive through the Starbucks line. Plus, it costs a fraction of what you’d pay for a single drink — which means more money for actual candy canes.
I love this recipe because it’s become a tradition in our house. My daughter still makes it her way — extra chocolate, extra peppermint, extra whipped cream — and I’ve stopped trying to “fix” it. She was right all along. Sometimes the best recipes come from letting go of the rules and just making what tastes good.
Try it this weekend. Make it with your kids, or make it for yourself on a quiet evening. Adjust the coffee strength, play with the chocolate ratio, and make it your own. And when you do, come back and tell me how it turned out. Drop a comment below, share your photos, or tag me on social media. I’d love to see your version of this cozy winter classic.
Here’s to warm mugs, happy families, and the joy of being wrong about something delicious.
Frequently Asked Questions
Can I make this without a stovetop?
Yes, absolutely. You can make this entirely in the microwave. Whisk the cocoa powder and sugar with a splash of milk in a microwave-safe mug. Microwave for 30 seconds, then add the remaining milk and coffee. Microwave in 30-second bursts until hot, then stir in the peppermint extract. It works perfectly and takes about 2 minutes.
How do I make it less sweet?
Reduce the sugar to 2 tablespoons or skip it entirely. The cocoa powder and peppermint extract provide plenty of flavor on their own. You can also use unsweetened cocoa powder and skip the sugar in the whipped cream. I’ve made it with just 1 tablespoon of sugar and it was still delicious.
Can I use chocolate syrup instead of cocoa powder?
You can, but the flavor will be different. Chocolate syrup is sweeter and less intense than cocoa powder. If you’re substituting, use 1/4 cup of chocolate syrup and reduce the sugar to 1 tablespoon. The texture will be slightly thinner, but it still tastes great.
How do I make it for a crowd?
Multiply the recipe by the number of people you’re serving. For a holiday party of 12, use 6 cups of milk, 3/4 cup of cocoa powder, 3/4 cup of sugar, 3 cups of coffee, and 1 1/2 teaspoons of peppermint extract. Make it in a large pot and keep it warm in a slow cooker on the “keep warm” setting. Set out bowls of whipped cream and crushed candy canes so guests can top their own.
Can I use peppermint syrup instead of extract?
Yes, but adjust the amounts. Peppermint syrup is much less concentrated than extract. Start with 2 tablespoons of syrup and taste, adding more if needed. You’ll also want to reduce the sugar in the recipe since the syrup is sweetened. I’ve done this when I was out of extract and it worked fine — just a slightly different flavor profile.
Pin This Recipe!
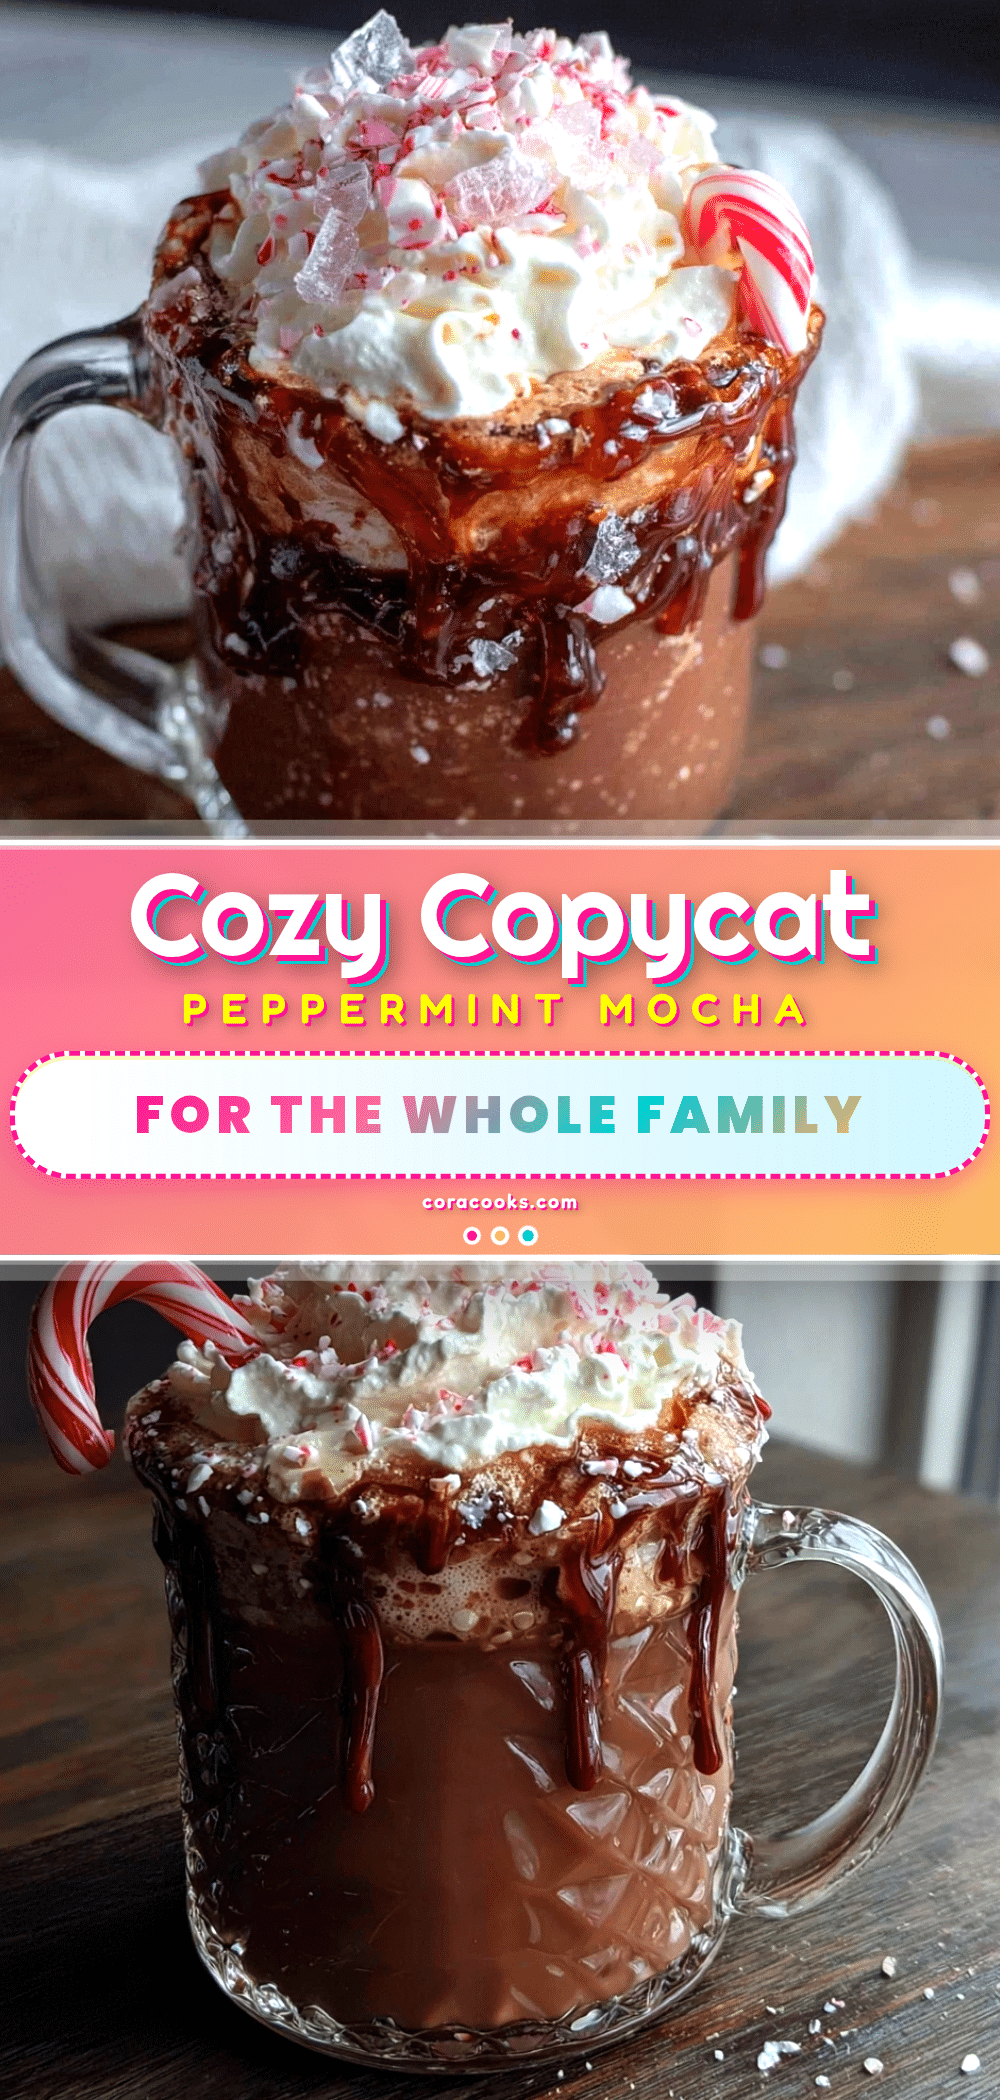
Best Homemade Peppermint Mocha: Easy Copycat Starbucks Recipe

This homemade peppermint mocha is richer, more chocolaty, and way more forgiving than any coffee shop recipe. It costs pennies per serving and comes together in 10 minutes using pantry staples.
- Prep Time: 5 minutes
- Cook Time: 5 minutes
- Total Time: 10 minutes
- Yield: 2 servings 1x
- Category: Beverage
- Cuisine: American
Ingredients
- 2 cups whole milk (or 2%)
- 1/4 cup unsweetened cocoa powder
- 1/4 cup granulated sugar
- 1/2 cup strong brewed coffee or espresso
- 1/2 teaspoon peppermint extract
- 1/4 cup heavy cream (for whipped cream)
- 1 tablespoon powdered sugar (for whipped cream)
- Crushed candy canes or peppermint candies (for garnish)
Instructions
- In a medium saucepan, whisk together the cocoa powder and sugar until no lumps remain. Add about 1/4 cup of the milk and whisk into a smooth paste.
- Pour in the remaining milk and whisk until combined. Place the saucepan over medium heat. Stir occasionally with a whisk.
- Heat until steaming, about 4-5 minutes. Small bubbles will form around the edges, but do not let it come to a full boil.
- Pour in the brewed coffee or espresso and stir to combine.
- Remove the saucepan from heat and stir in the peppermint extract. Taste and adjust if needed.
- While the mocha is heating, make the whipped cream: Pour heavy cream and powdered sugar into a mixing bowl. Use a hand mixer on medium speed for 2-3 minutes until soft peaks form.
- Crush 2-3 candy canes in a zip-top bag using a rolling pin or heavy pan into small pieces.
- Pour the hot mocha into mugs, leaving about an inch of space at the top. Add a generous dollop of whipped cream and sprinkle crushed candy canes on top. Serve immediately.
Notes
Don’t skip the paste step to avoid lumps. Keep heat at medium to prevent scalding. Start with less peppermint extract as it is potent. The mocha base can be made up to 2 days ahead and stored in the fridge. For a dairy-free version, use oat milk and coconut cream. For a kid-friendly version, omit the coffee and add extra milk.
Nutrition
- Serving Size: 12 ounces
- Calories: 280
- Sugar: 30
- Sodium: 120
- Fat: 12
- Saturated Fat: 7
- Carbohydrates: 38
- Fiber: 2
- Protein: 8
Keywords: peppermint mocha, copycat Starbucks, homemade mocha, winter drink, Christmas drink, hot chocolate coffee