Love this? Save it for later!
Share the inspiration with your friends
Thanksgiving was in twelve hours and I’d completely forgotten about the stuffing. Not the turkey—I had that brining in the garage like a responsible adult. Not the pies—those were cooling on the counter. But the stuffing? The one dish everyone fights over at my table? Completely slipped my mind. I stood in my kitchen at 10 PM, staring at a loaf of slightly stale sourdough, a stick of butter, and a handful of sage from the garden that looked like it was judging me.
I could have just made regular stuffing in a casserole dish. Honestly, that would have been the smart move. But I get weird under pressure. My brain went straight to “what if I made individual portions?” And then, because I clearly enjoy chaos, I thought “what if I browned the butter first?” Thirty minutes later, I had a dozen golden, crispy-edged muffin-shaped stuffing bombs cooling on my counter. My neighbor Carol texted me at midnight asking if I was “okay over there” because the smell of brown butter had apparently drifted through the walls.
The next day, I brought these crispy brown butter sage stuffing muffins to dinner, fully expecting them to be a quirky side note. Instead, my cousin Mike—who has declared himself the family stuffing critic—ate four of them before the turkey even hit the table. My aunt asked for the recipe before dessert. And me? I sat there quietly amused, because I’d made the best stuffing of my life on accident, under pressure, with ingredients I almost didn’t have.
Maybe you’ve had one of those kitchen moments where panic turns into brilliance. That’s this recipe. These stuffing muffins are everything you love about traditional Thanksgiving stuffing—the crispy edges, the herbaceous punch, the comforting breadiness—but they’re individually portioned, ridiculously easy to serve, and that brown butter situation? Let me tell you, it changes everything. I’ve made them every year since that panicked night, and honestly, they’re the first thing to disappear from the table.
Why You’ll Love This Recipe
Let me be real with you—I’ve tested this recipe about a dozen times since that fateful Thanksgiving Eve. I’ve made it with different breads, adjusted the liquid ratios, and even tried baking them in different pans. What I’m giving you here is the version that works every single time. Here’s why you’re going to love it:
- Individual Portions, Zero Fuss : No more scooping from a communal dish or fighting over the crispy corner pieces. Each muffin is its own perfect little package of crispy edges and tender center. They’re basically edible presents.
- Brown Butter Magic : That nutty, toasty flavor that takes exactly 5 minutes to create? It’s the secret weapon here. Regular butter stuffing is fine. Brown butter stuffing is the kind people text you about at midnight.
- Make-Ahead Friendly : You can prep these the day before and bake them fresh. Or bake them completely and reheat. They handle reheating like a champ, which is basically a Thanksgiving miracle.
- Crispy On All Sides : Because each muffin has more surface area exposed to heat, you get way more of those golden, crunchy bits that everyone fights over. It’s science, and it’s delicious.
- Simple Ingredients : Stale bread, butter, sage, onion, celery, broth, eggs. That’s it. No weird specialty items or grocery store scavenger hunts.
What makes this recipe different from every other stuffing out there? It’s the combination of technique and format. The brown butter adds a depth that regular melted butter just can’t match. The muffin format gives you that perfect crispy-to-soft ratio in every bite. And the sage? It’s not just sprinkled in as an afterthought—it gets bloomed in the brown butter, which makes its flavor go from “hey, that’s sage” to “whoa, what IS that amazing taste?”
This isn’t just stuffing—it’s the kind of dish that makes people close their eyes after the first bite. It’s comfort food reimagined: faster to serve, easier to portion, but with the same soul-soothing satisfaction that makes Thanksgiving dinner feel like a hug.
What Ingredients You Will Need
This recipe uses simple, honest ingredients to create something truly special. Most of these are probably already in your kitchen, especially if you’re a regular home cook. Let me walk you through each one and share a few things I’ve learned along the way.
- 1 loaf (about 16 ounces) day-old sourdough or French bread, cut into 1/2-inch cubes : Stale bread is your friend here—it absorbs the broth without turning into mush. If your bread is fresh, spread the cubes on a baking sheet and bake at 300°F for 10-15 minutes to dry them out. I prefer sourdough for its tangy flavor, but French bread or even a good country loaf works beautifully.
- 1/2 cup (1 stick) unsalted butter : This is the star of the show, so use good quality butter. I’m partial to Kerrygold or Plugrà for their higher fat content, which means more flavorful brown butter. Salted butter works too, just reduce the added salt by half.
- 2 tablespoons fresh sage leaves, finely chopped : Fresh sage is non-negotiable here. Dried sage won’t give you the same aromatic punch. Look for sage with bright green, velvety leaves—avoid any that look wilted or yellowed. If you’re growing your own, even better.
- 1 medium yellow onion, diced (about 1 1/2 cups) : Yellow onion gives the best savory foundation. Sweet onions work too, but you’ll lose a bit of that classic stuffing flavor. Dice them small so they cook evenly and blend into the bread.
- 3 celery stalks, diced (about 1 cup) : Celery adds that essential crunch and freshness. Make sure to rinse the stalks well and trim any tough strings from the outer ribs. Dice them about the same size as the onion for even cooking.
- 2 cloves garlic, minced : Fresh garlic only. The jarred stuff will taste flat next to that brown butter. Trust me on this one—I learned the hard way.
- 1 1/2 cups low-sodium chicken or vegetable broth : Low-sodium is key here because the bread absorbs the liquid, and you don’t want salty stuffing. Homemade broth is incredible if you have it, but store-bought works fine. I like Swanson or Kitchen Basics.
- 2 large eggs, lightly beaten : Eggs are the binder that holds your muffins together. Make sure they’re at room temperature so they incorporate smoothly into the warm broth mixture.
- 1 teaspoon kosher salt : I use Diamond Crystal. If you’re using Morton’s or fine table salt, reduce to 3/4 teaspoon.
- 1/2 teaspoon black pepper, freshly ground : Freshly ground pepper makes a noticeable difference here. Pre-ground pepper is fine in a pinch, but you’ll miss that bright, floral kick.
- 1/4 cup freshly chopped parsley (optional, for garnish) : This is purely for color, but it does add a nice fresh note that cuts through the richness.
Ingredient Selection Tips : When choosing your bread, look for a dense, sturdy loaf with a good crust. Avoid soft sandwich bread—it will turn into paste. For the sage, if you can find it at a farmer’s market, grab it. The flavor is noticeably more intense than grocery store sage. And please, please use real butter. Margarine or butter substitutes won’t brown properly and will leave you with sad, pale stuffing.
Equipment Needed
You don’t need a professional kitchen to make these stuffing muffins, but having the right tools makes the process smoother. Here’s what you’ll need:
- 12-cup standard muffin tin : This is non-negotiable. A mini muffin tin won’t give you the right bread-to-crust ratio. If you only have a 6-cup tin, you’ll need to bake in batches.
- Large skillet or sauté pan : For browning the butter and cooking the vegetables. A light-colored pan is actually helpful here because you can see the butter change color more easily.
- Large mixing bowl : Big enough to hold all your bread cubes with room to toss. I use my grandmother’s old ceramic bowl, but any large bowl works.
- Whisk : For combining the broth and eggs. A fork works in a pinch, but a whisk gives you a smoother mixture.
- Sharp chef’s knife and cutting board : You’ll be doing a fair amount of chopping, so make sure your knife is sharp. A dull knife makes everything harder and more dangerous.
- Measuring cups and spoons : For accuracy. I know some cooks eyeball everything, but for stuffing, precise ratios matter.
- Cooling rack : Letting the muffins cool in the pan for 5 minutes, then transferring them to a rack, keeps the bottoms from getting soggy.
Budget-Friendly Alternatives : If you don’t have a muffin tin, you can bake this stuffing in a standard 9×13 casserole dish—just spread it evenly and bake for about 35-40 minutes. You won’t get the individual portions, but the flavor will be the same. For the skillet, any heavy-bottomed pan works. I’ve used a cast iron skillet and a cheap nonstick pan with equal success. Just watch the butter closely in a dark pan since you can’t see the color change as easily.
Preparation Method
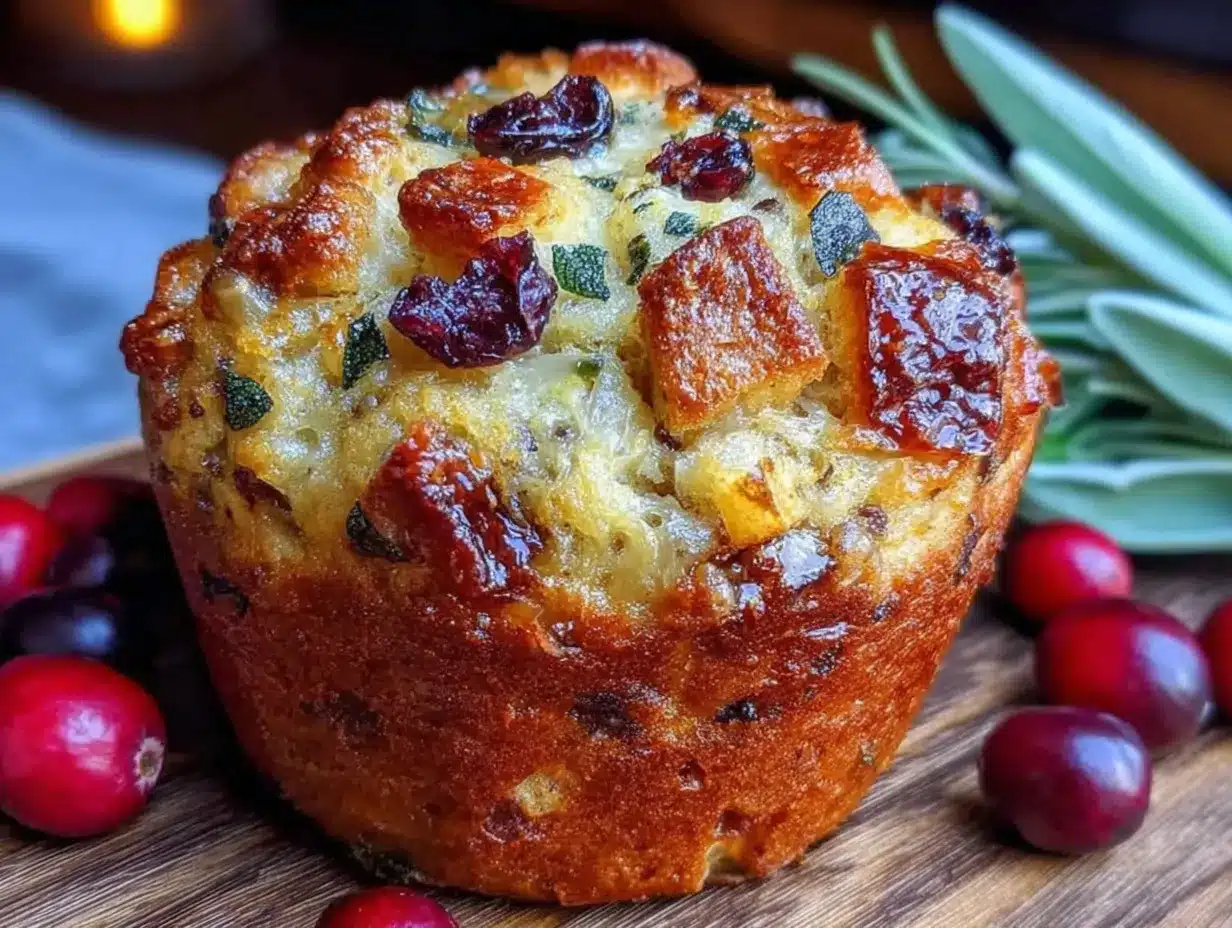
Alright, let’s make some stuffing muffins. I’ve broken this down into clear steps, and I’m including all the little details I wish someone had told me the first time I made these.
- Preheat your oven to 375°F (190°C). Grease a 12-cup muffin tin generously with butter or nonstick spray. Don’t skimp here—these muffins need to slide out easily. I use butter because it adds flavor to the edges, but spray works fine if you’re in a hurry.
- Dry your bread cubes if needed. If your bread isn’t stale, spread the cubes on a baking sheet and bake at 300°F for 10 minutes, tossing halfway through. They should feel dry to the touch but not toasted. Set aside in your large mixing bowl.
- Brown the butter. Melt the butter in your skillet over medium heat. Once melted, it will start to foam and bubble. Swirl the pan occasionally. After about 3-4 minutes, you’ll see golden brown specks forming at the bottom, and the butter will smell nutty and amazing. Watch it closely—brown butter goes from perfect to burnt in about 15 seconds. As soon as you see those brown specks and smell that nutty aroma, remove the pan from heat immediately.
- Bloom the sage. Immediately add the chopped sage to the hot brown butter. It will sizzle and release its fragrance. Stir for about 30 seconds, then pour the entire butter-sage mixture over the bread cubes. Toss gently to coat. Your kitchen should smell incredible right now.
- Cook the vegetables. Return the skillet to medium heat. Add the diced onion and celery, and cook for 5-6 minutes until softened and translucent. Add the minced garlic and cook for 1 more minute until fragrant. The vegetables should be soft but not browned—you want them tender, not caramelized.
- Add the vegetables to the bread. Scrape the cooked vegetables into the bowl with the bread cubes. Toss everything together gently with your hands or a spatula until evenly distributed.
- Make the liquid mixture. In a small bowl or measuring cup, whisk together the broth, beaten eggs, salt, and pepper until completely combined. The eggs should be fully incorporated into the broth—no streaks of white remaining.
- Combine everything. Pour the broth mixture over the bread mixture. Use a spatula to gently fold everything together until all the bread cubes are evenly moistened. Don’t overmix or you’ll break up the bread too much. Let the mixture sit for 5 minutes so the bread can absorb the liquid.
- Fill the muffin tin. Divide the stuffing mixture evenly among the 12 muffin cups. Press down gently with the back of a spoon to compact each muffin slightly. They should be mounded slightly above the rim—this gives you those gorgeous crispy tops.
- Bake. Place the muffin tin on the middle rack of your oven. Bake for 22-25 minutes, until the tops are golden brown and crispy, and the edges are pulling away from the sides of the pan slightly. Your kitchen will smell like Thanksgiving heaven.
- Cool and serve. Let the muffins cool in the pan for 5 minutes. Run a knife around the edges if needed, then carefully lift them out. Transfer to a cooling rack or serve immediately. The bottoms will be perfectly crispy, not soggy.
Pro Tip : If you want extra-crispy tops, brush each muffin with a little melted butter before baking. It’s not necessary, but it does make them look and taste even more indulgent.
Cooking Tips & Techniques
I’ve made this recipe enough times to know exactly where things can go wrong. Let me save you the trouble.
Don’t rush the brown butter. I know it’s tempting to crank up the heat and get it done faster, but medium heat is your friend. High heat will burn the butter before it has a chance to develop that nutty flavor. The first time I made this, I was in a hurry and ended up with burnt butter that tasted bitter. Learn from my mistake—patience pays off here.
Use day-old bread. Fresh bread will turn your stuffing into a soggy mess. The bread needs to be dry enough to absorb the broth without falling apart. If you’re planning ahead, cube your bread and leave it out on a baking sheet overnight. If you’re in a pinch, the low oven method works perfectly.
Don’t over-soak the bread. When you add the broth mixture, you want the bread to be moist but not drowning. If you see liquid pooling at the bottom of the bowl, you’ve added too much. The bread should look evenly damp, like a well-hydrated sponge.
Pack the muffins firmly. Loose stuffing won’t hold together when you try to remove it from the pan. Use the back of a spoon or your fingers to press each muffin down firmly. They should feel compact and solid.
Let them rest. Those 5 minutes of cooling in the pan aren’t optional—they’re essential. The muffins need that time to set so they hold their shape. If you try to remove them immediately, they’ll fall apart.
Timing strategy for Thanksgiving : Make the stuffing mixture the day before, fill the muffin tin, and refrigerate overnight. The next day, let them sit at room temperature for 20 minutes, then bake as directed. This actually improves the flavor because the bread has more time to absorb everything.
Variations & Adaptations
This recipe is wonderfully flexible. Here are some variations I’ve tried and loved:
Gluten-Free Version : Use a good quality gluten-free bread—I’ve had success with Schär or Canyon Bakehouse. The texture will be slightly different, but the flavor is still fantastic. Make sure to dry the bread cubes thoroughly, as gluten-free bread tends to be more delicate.
Vegetarian/Vegan Adaptation : Use vegetable broth and replace the eggs with flax eggs (1 tablespoon ground flaxseed mixed with 3 tablespoons water per egg, let sit for 5 minutes). Use vegan butter for browning—Miyoko’s or Country Crock Plant Butter work well. The texture will be a bit more fragile, but the flavor is still there.
Sausage & Apple Stuffing Muffins : Brown 1/2 pound of Italian sausage (casings removed) in the skillet before cooking the vegetables. Remove the sausage, then proceed with the vegetables. Add 1 diced apple (Honeycrisp or Granny Smith) along with the celery. This version is hearty enough to be a main dish.
Herb Variation : Not a fan of sage? Swap it for fresh thyme or rosemary. Or use a combination—I sometimes do half sage, half thyme for a more complex flavor profile. Fresh herbs really make a difference here.
Make it Spicy : Add 1/2 teaspoon of red pepper flakes along with the garlic, or use 1/4 cup of finely chopped jalapeño. The heat pairs surprisingly well with the nutty brown butter.
Personal Variation : Last year, I added 1/3 cup of dried cranberries and 1/4 cup of toasted pecans to the mixture. The sweetness and crunch were incredible. My sister-in-law now demands this version every year.
Serving & Storage Suggestions
These stuffing muffins are best served warm, straight from the oven, when the edges are still crispy and the centers are soft and fragrant. But they’re remarkably forgiving when it comes to serving and storage.
Serving Temperature : Serve them hot or at room temperature. They’re delicious either way. If serving at a buffet, they’ll stay warm for about 30 minutes covered loosely with foil.
What to Serve With Them : These are perfect alongside roast turkey, mashed potatoes, and gravy. But honestly, they’re also amazing with a simple roasted chicken or even a holiday salad. For a non-Thanksgiving meal, try them with pork chops or roasted vegetables.
Storage : Store leftover muffins in an airtight container in the refrigerator for up to 4 days. They actually get better after a day or two as the flavors meld together. I’ve eaten them cold straight from the fridge and they’re still delicious.
Reheating : The best way to reheat is in the oven at 350°F for 8-10 minutes. This restores the crispy edges. The microwave works in a pinch but will make them soft. If you’re in a hurry, split them in half and toast them—crispy stuffing croutons are a thing, and they’re amazing.
Freezing : These freeze beautifully. Place cooled muffins on a baking sheet and freeze until solid, then transfer to a freezer bag. They’ll keep for up to 3 months. Reheat directly from frozen at 350°F for 15-18 minutes.
Flavor Development : Like most stuffing, these muffins taste even better the next day. The flavors have time to settle and deepen. If you’re making them for a special occasion, consider making them a day ahead—your future self will thank you.
Nutritional Information & Benefits
Let’s be honest—stuffing isn’t health food. But knowing what’s in your food is always a good thing. Here’s the estimated nutritional breakdown per muffin (based on one serving):
Calories: 185 | Fat: 9g | Carbohydrates: 22g | Fiber: 1g | Protein: 5g | Sodium: 320mg
Health Benefits of Key Ingredients :
- Sage : This herb isn’t just for flavor—it’s been used for centuries for its anti-inflammatory properties and is rich in antioxidants. It also aids digestion, which is helpful after a heavy Thanksgiving meal.
- Celery : High in vitamin K and antioxidants, celery adds a fresh crunch and some hydration to the dish.
- Onions and Garlic : Both are packed with immune-boosting compounds and prebiotic fiber that supports gut health.
Dietary Considerations : This recipe is nut-free and can be made vegetarian by using vegetable broth. For a gluten-free version, see the variations section. It’s not dairy-free unless you use vegan butter, but the flavor really depends on that brown butter magic.
Personal Wellness Perspective : I’m a firm believer that food should nourish both body and soul. These stuffing muffins aren’t about being “healthy”—they’re about being satisfying and memorable. One muffin with your meal is plenty. They’re rich, they’re decadent, and they’re worth every bite.
Conclusion
These crispy brown butter sage stuffing muffins have become my signature Thanksgiving contribution, and I honestly never planned it that way. They started as a panicked experiment and turned into the dish everyone requests. That’s the thing about cooking—sometimes the best recipes come from the most chaotic moments.
I hope you’ll try these for your next holiday dinner, or honestly, for any random Tuesday when you’re craving comfort food. Don’t be afraid to make them your own—add your favorite herbs, throw in some sausage, or keep them classic. The beauty of this recipe is how forgiving and adaptable it is.
If you make these, I’d love to hear about it. Drop a comment below and tell me how they turned out, or share your own twist on the recipe. Did you add something unexpected? Did someone at your table eat four of them? I want to know! And if you’re looking for more holiday inspiration, check out my classic roast turkey recipe and easy homemade gravy to complete your feast.
Happy cooking, friends. May your brown butter be nutty, your edges be crispy, and your Thanksgiving be full of joy.
Frequently Asked Questions
Can I make these ahead of time?
Absolutely! You can assemble the muffins in the pan up to 24 hours ahead, cover and refrigerate, then bake just before serving. Or bake them completely and reheat in the oven at 350°F for 10 minutes.
Can I use dried sage instead of fresh?
You can, but the flavor won’t be as vibrant. Use 1 tablespoon of dried sage instead of 2 tablespoons fresh. Add it to the brown butter along with the fresh sage (if using any) or just sprinkle it over the bread cubes.
Why did my muffins fall apart?
This usually happens if the bread wasn’t dry enough, or if you didn’t pack the muffins firmly enough into the pan. Make sure your bread is thoroughly stale and press the mixture down firmly before baking. The eggs also help bind everything together, so don’t skip them.
Can I double this recipe?
Yes, but you’ll need two muffin tins. The recipe doubles beautifully—just make sure your skillet is large enough to brown the butter and cook the vegetables in batches if needed.
How do I get extra crispy tops?
Brush each muffin with a little melted butter before baking, and make sure they’re mounded slightly above the rim of the pan. You can also switch the oven to broil for the last 1-2 minutes, but watch them carefully so they don’t burn.
Pin This Recipe!
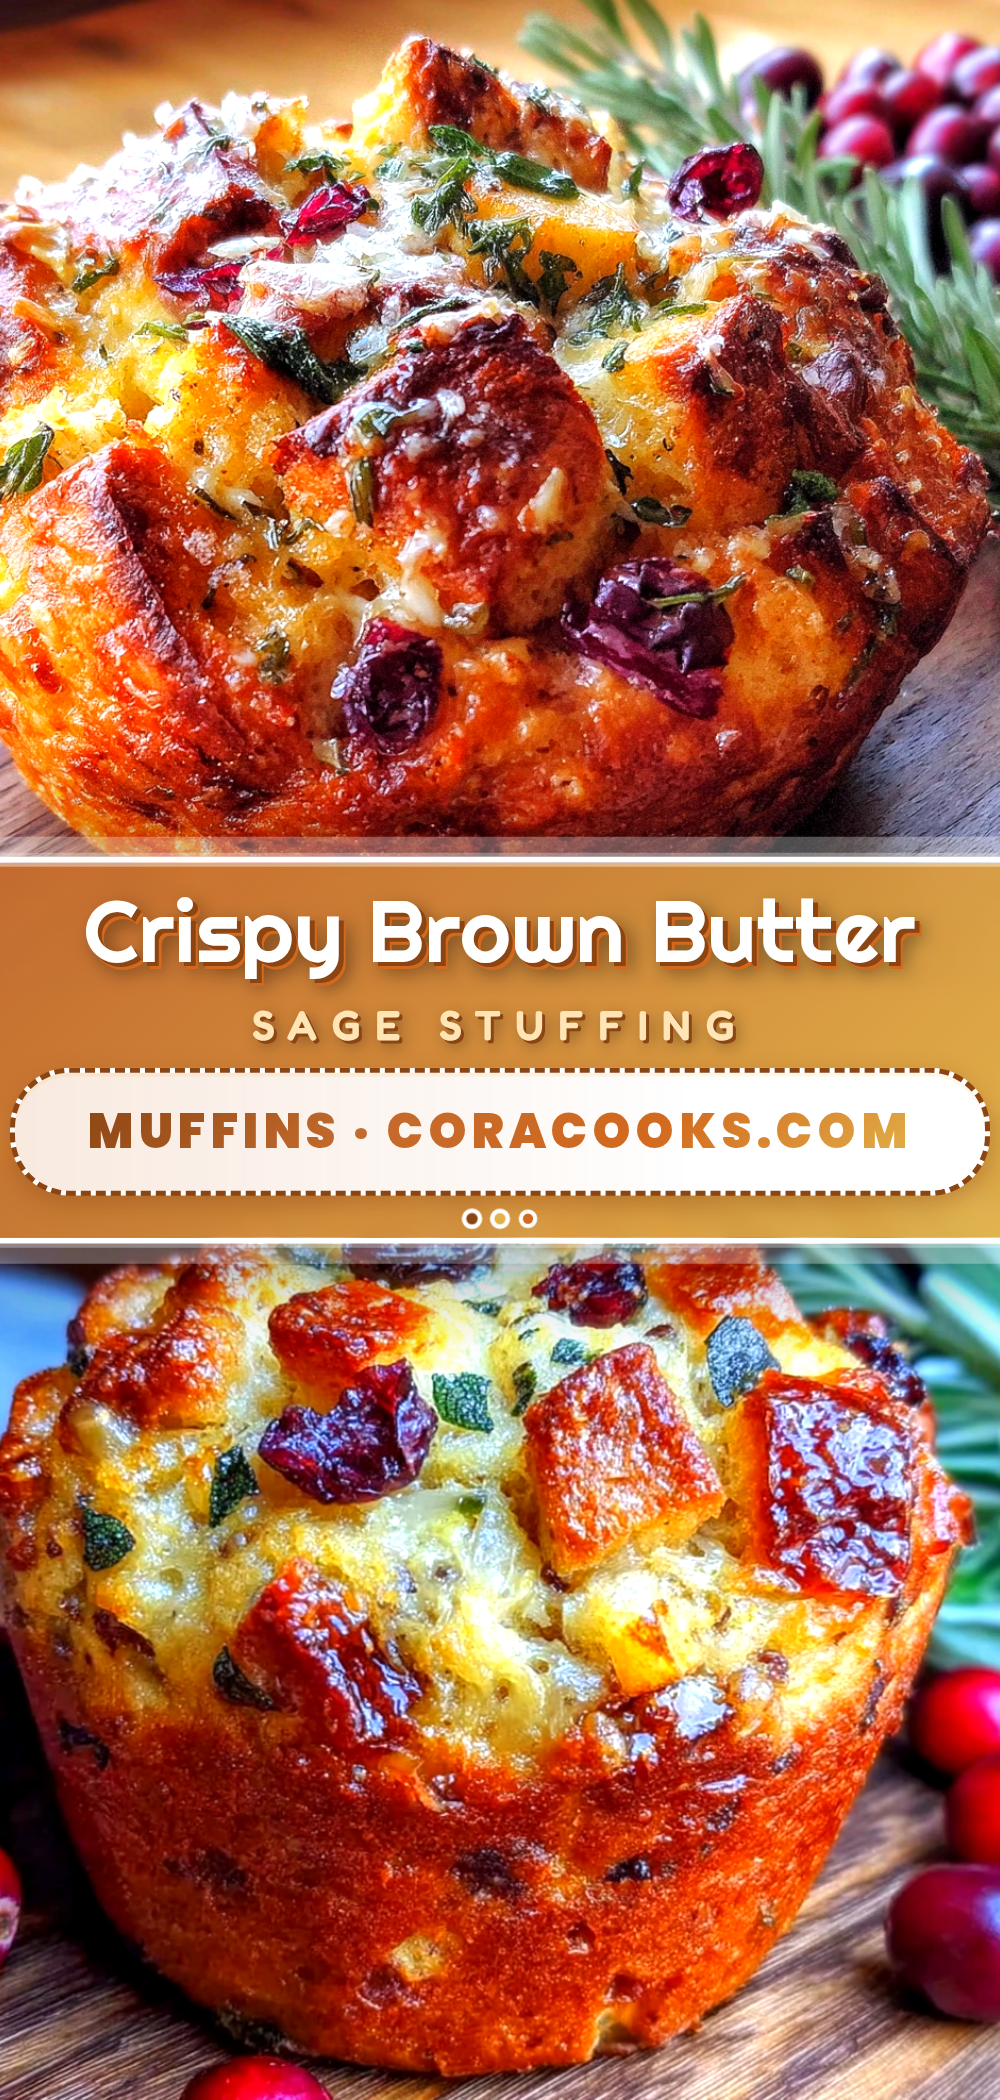
Best Homemade Brown Butter Sage Stuffing Muffins

These crispy, golden stuffing muffins are made with nutty brown butter, fresh sage, and simple ingredients. Individually portioned and packed with flavor, they’re the perfect make-ahead side dish for Thanksgiving or any holiday meal.
- Prep Time: 20 minutes
- Cook Time: 25 minutes
- Total Time: 45 minutes
- Yield: 12 servings 1x
- Category: Side Dish
- Cuisine: American
Ingredients
- 1 loaf (about 16 ounces) day-old sourdough or French bread, cut into 1/2-inch cubes
- 1/2 cup (1 stick) unsalted butter
- 2 tablespoons fresh sage leaves, finely chopped
- 1 medium yellow onion, diced (about 1 1/2 cups)
- 3 celery stalks, diced (about 1 cup)
- 2 cloves garlic, minced
- 1 1/2 cups low-sodium chicken or vegetable broth
- 2 large eggs, lightly beaten
- 1 teaspoon kosher salt
- 1/2 teaspoon black pepper, freshly ground
- 1/4 cup freshly chopped parsley (optional, for garnish)
Instructions
- Preheat your oven to 375°F (190°C). Grease a 12-cup muffin tin generously with butter or nonstick spray.
- If your bread isn’t stale, spread the cubes on a baking sheet and bake at 300°F for 10 minutes, tossing halfway through. Set aside in your large mixing bowl.
- Melt the butter in your skillet over medium heat. Once melted, it will start to foam and bubble. Swirl the pan occasionally. After about 3-4 minutes, you’ll see golden brown specks forming at the bottom, and the butter will smell nutty. Remove from heat immediately.
- Immediately add the chopped sage to the hot brown butter. Stir for about 30 seconds, then pour the entire butter-sage mixture over the bread cubes. Toss gently to coat.
- Return the skillet to medium heat. Add the diced onion and celery, and cook for 5-6 minutes until softened and translucent. Add the minced garlic and cook for 1 more minute until fragrant.
- Scrape the cooked vegetables into the bowl with the bread cubes. Toss everything together gently.
- In a small bowl or measuring cup, whisk together the broth, beaten eggs, salt, and pepper until completely combined.
- Pour the broth mixture over the bread mixture. Use a spatula to gently fold everything together until all the bread cubes are evenly moistened. Let the mixture sit for 5 minutes so the bread can absorb the liquid.
- Divide the stuffing mixture evenly among the 12 muffin cups. Press down gently with the back of a spoon to compact each muffin slightly. They should be mounded slightly above the rim.
- Place the muffin tin on the middle rack of your oven. Bake for 22-25 minutes, until the tops are golden brown and crispy, and the edges are pulling away from the sides of the pan slightly.
- Let the muffins cool in the pan for 5 minutes. Run a knife around the edges if needed, then carefully lift them out. Transfer to a cooling rack or serve immediately.
Notes
For extra-crispy tops, brush each muffin with a little melted butter before baking. Make ahead: assemble muffins in the pan up to 24 hours ahead, cover and refrigerate, then bake just before serving. Freeze baked muffins for up to 3 months.
Nutrition
- Serving Size: 1 muffin
- Calories: 185
- Sugar: 2
- Sodium: 320
- Fat: 9
- Saturated Fat: 5
- Carbohydrates: 22
- Fiber: 1
- Protein: 5
Keywords: stuffing muffins, brown butter sage stuffing, Thanksgiving stuffing, individual stuffing, crispy stuffing muffins, holiday side dish


