Love this? Save it for later!
Share the inspiration with your friends
My niece asked why I couldn’t just use a store-bought cookie cutter for the cat shape. I started to explain why that wouldn’t work—then stopped. She was eight, and she had a point. The truth is, I had been wrestling with a homemade cardboard template for an hour, and the results looked less like a cat and more like a lopsided potato with ears. I was so focused on doing it the “right” way—the complicated way—that I forgot the simplest solution was sitting right there on the craft store shelf. Honestly, it was a humbling moment. I mean, I’m supposed to be the adult with the baking experience, right?
That afternoon, with a cheap plastic cutter and a batch of dough that had been chilling in the fridge, we made the most adorable black cat cookies I’ve ever seen. My niece, who had never rolled out dough in her life, was the one who figured out the perfect eye placement (tiny silver dragées, if you’re curious). I was just there to handle the hot oven. It was a total role reversal, and let me tell you, it was the best kind of lesson. Sometimes the best ideas come from the person who isn’t overthinking everything.
These Adorable Black Cat Halloween Sugar Cookies are now my go-to for October. They’re not just cute—they have that perfect, slightly crisp edge and soft, buttery center that makes a classic sugar cookie so irresistible. I’ve tweaked the recipe over the years, adding a pinch of black cocoa powder for that deep, dark color and a subtle, almost Oreo-like flavor. It makes them taste as good as they look. Maybe you’ve been there, trying to make a themed treat that looks better in your head than on the baking sheet. These cookies are the fix for that. They’re easy enough for a weeknight baking session with kids, but polished enough to bring to a Halloween party. Let’s just say, I’ve learned my lesson: sometimes the shortcut is the secret to success.
Why You’ll Love This Recipe
I’ve tested this recipe more times than I care to admit, trying to get the perfect balance of flavor, texture, and ease. After a few batches that were either too flat, too cakey, or just plain stubborn to cut, I landed on this version. It’s the one I now use for every holiday, and it never lets me down. Here’s why I think you’ll feel the same way:
- Quick & Easy: From start to finish, you’re looking at about 30 minutes of active work. The dough comes together in one bowl, and there’s no chilling time required if you’re in a hurry (though a quick chill makes cutting easier).
- Simple Ingredients: You probably have 90% of these in your pantry right now. No weird extracts or specialty flours—just butter, sugar, eggs, and a little black cocoa magic.
- Perfect for Halloween: These little guys are the star of any spooky snack table. They’re great for classroom parties, trick-or-treat gatherings, or just a fun afternoon activity with the kids.
- Crowd-Pleaser: I’ve brought these to work and to family dinners, and they vanish. Kids love the design, and adults love that they actually taste like a real, high-quality sugar cookie.
- Unbelievably Delicious: The secret is the black cocoa powder. It gives the cookies a deep, dark color without a ton of artificial dye, and it adds a mellow, almost chocolatey flavor that’s totally addictive. It’s not just a gimmick—it genuinely makes the cookie better.
This isn’t just another sugar cookie recipe. It’s the one that uses a simple trick—black cocoa—to make a cookie that’s both visually striking and genuinely delicious. You get that classic, soft-baked texture with a rich, dark flavor that feels special. It’s comfort food with a spooky twist, and it’s the kind of cookie that makes you close your eyes after the first bite. Honestly, it’s the perfect way to impress your Halloween guests without spending all day in the kitchen.
What Ingredients You Will Need
This recipe relies on a handful of pantry staples, plus one special ingredient that makes all the difference. The ingredients work together to create a dough that’s easy to handle, bakes up with a soft center and slightly crisp edges, and takes on that perfect black cat color.
- Unsalted Butter, Softened: (1 cup, 2 sticks or 226g) Make sure it’s truly softened to room temperature. This is key for creaming it properly with the sugar, which gives the cookies their tender crumb. I always use unsalted so I can control the salt level.
- Granulated Sugar: (1 cup or 200g) Standard white sugar is perfect. It adds sweetness and helps with that slight spread and crisp edge.
- Large Egg: (1, room temperature) The egg binds everything together. A room-temperature egg incorporates into the butter mixture much more smoothly than a cold one.
- Vanilla Extract: (2 teaspoons) Use pure vanilla extract if you have it. It adds warmth and rounds out the flavor of the cocoa. Imitation works in a pinch, but pure is better.
- All-Purpose Flour: (2 ½ cups or 312g) I use unbleached all-purpose flour. For the best results, spoon the flour into your measuring cup and level it off with a knife. Scooping directly from the bag can pack in too much flour and make the cookies dry.
- Black Cocoa Powder: (¼ cup or 25g) This is the star of the show. It’s a Dutch-processed cocoa that’s been heavily alkalized, giving it a jet-black color and a smooth, mild chocolate flavor. You can find it at specialty baking stores or online. I recommend the King Arthur Flour brand for consistent results. A little goes a long way.
- Baking Powder: (1 teaspoon) This gives the cookies a little lift, keeping them from being too dense.
- Salt: (½ teaspoon) Salt is essential for balancing the sweetness and enhancing the chocolate flavor. Don’t skip it.
- Powdered Sugar: (for dusting, optional) A light dusting of powdered sugar over the baked cookies makes them look like they’ve been caught in a snowstorm—a cute contrast to the black cookie.
- Silver Dragées or White Frosting: (for eyes) For the eyes, you can use tiny silver dragées (the little ball sprinkles) or pipe on small dots with white frosting. Both work great, but the dragées give a nice, shiny “eye” effect.
Equipment Needed
You don’t need a ton of fancy gear for this recipe, which is part of its charm. A few basics, and you’re good to go.
- Cat-Shaped Cookie Cutter: This is the most important tool. You can find them at craft stores, online, or even in Halloween-themed baking sets. I have a simple metal one that works perfectly, but plastic ones are fine too.
- Mixing Bowls: One large bowl for the dough and a smaller one for the dry ingredients.
- Electric Mixer: A hand mixer or a stand mixer with the paddle attachment makes creaming the butter and sugar a breeze. You can do it by hand with a wooden spoon, but it takes some elbow grease.
- Baking Sheets: Standard half-sheet pans work perfectly. I recommend lining them with parchment paper or a silicone baking mat for easy cleanup and even baking.
- Rolling Pin: A standard rolling pin is fine. If you have a French rolling pin (without handles), I find it gives me more control over the thickness.
- Cooling Rack: A wire rack is essential for letting the cookies cool completely before you decorate them. It prevents the bottoms from getting soggy.
Preparation Method
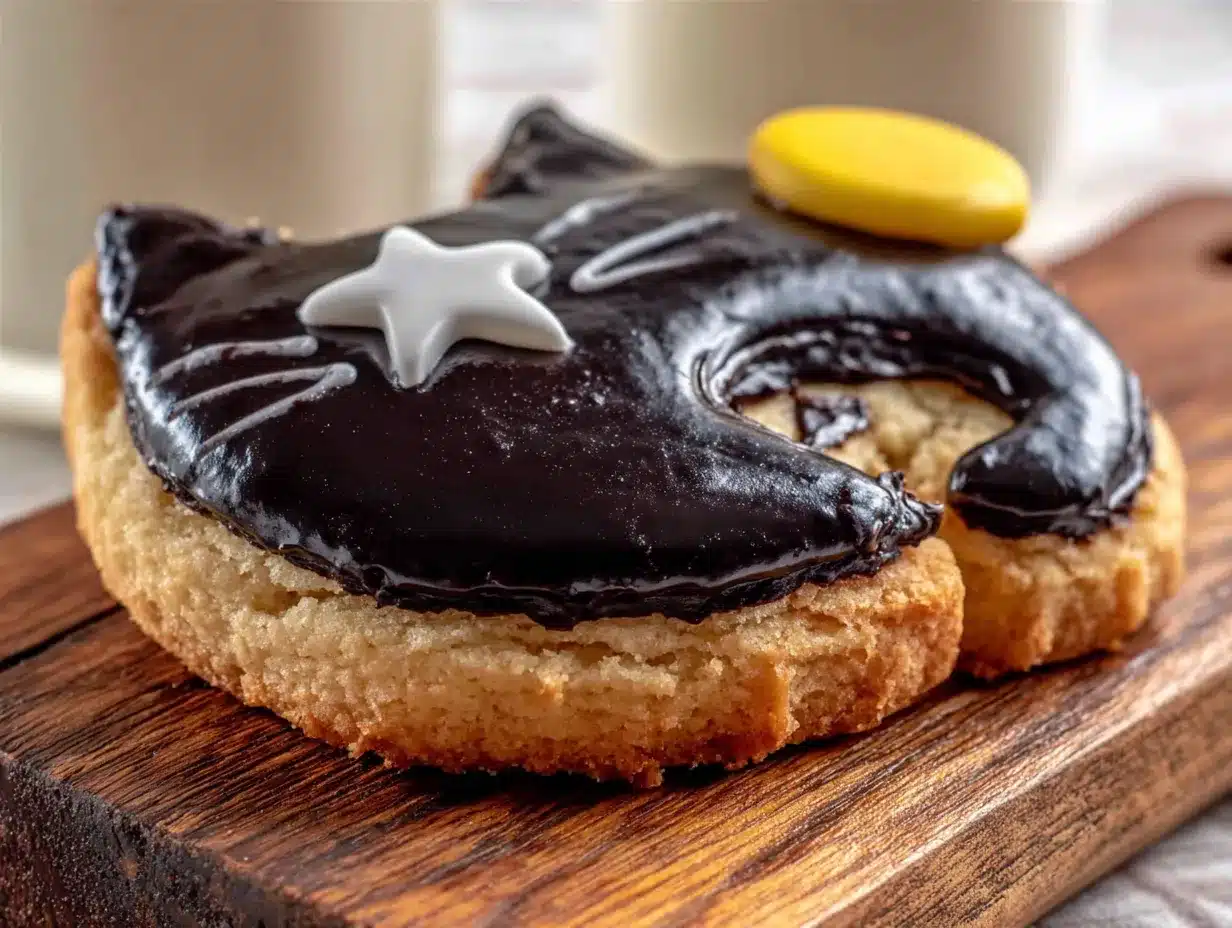
This process is straightforward, but I’ve added a few notes from my own trial and error to help you avoid the same mistakes I made. Follow these steps, and you’ll have a batch of perfect little black cat faces in no time.
- Cream the Butter and Sugar: In your large mixing bowl, beat the softened butter and granulated sugar together on medium speed until light, fluffy, and pale in color. This takes about 2-3 minutes. Scrape down the sides of the bowl once or twice. This step is crucial—it incorporates air into the dough, which helps the cookies bake up tender.
- Add the Egg and Vanilla: Add the room-temperature egg and the vanilla extract. Beat on low speed until just combined. Don’t overmix here, or the dough can get tough. It should look smooth and creamy.
- Combine the Dry Ingredients: In a separate, smaller bowl, whisk together the all-purpose flour, black cocoa powder, baking powder, and salt. Whisking ensures the cocoa and baking powder are evenly distributed, so you don’t get a bitter pocket of cocoa in one cookie.
- Mix the Dough: With the mixer on low speed, gradually add the dry ingredients to the wet ingredients. Mix until just combined. You’ll know it’s ready when the dough starts to clump together and pull away from the sides of the bowl. It will look very dark, almost like chocolate play-dough. Don’t overmix!
- Roll and Cut (The Easy Way): This is where my niece’s advice comes in. Lightly flour your work surface and your rolling pin. Place the dough on the floured surface and roll it out to about ¼-inch thickness. If the dough feels too sticky, dust it with a little more flour. Use your cat-shaped cookie cutter to press out the shapes. Re-roll the scraps and cut out more cookies until all the dough is used. You should get about 18-24 cookies, depending on the size of your cutter.
- Chill (Optional but Helpful): Place the cut-out cookies on a parchment-lined baking sheet. If you have time, pop the sheet in the refrigerator for 10-15 minutes. This helps the cookies hold their shape better in the oven and prevents them from spreading too much. I’ve skipped this step many times, and they still turn out fine, but the chilling does help keep those cat ears sharp.
- Bake: Preheat your oven to 350°F (175°C). Bake the cookies for 8-10 minutes. They are done when the edges are set and the bottoms are just lightly browned. The centers will still look a little soft—that’s okay. They will firm up as they cool. Let them cool on the baking sheet for 5 minutes before transferring them to a wire rack to cool completely.
- Add the Eyes: Once the cookies are completely cool, it’s time to bring them to life. For each cookie, place two silver dragées near the top center of the face for eyes. If you’re using frosting, pipe two small dots. You can also add a tiny pink or white frosting nose, but I like the simplicity of just the eyes. It keeps them looking cute and a little mysterious.
Cooking Tips & Techniques
Over the years, I’ve learned a few things that make these cookies even better. Here are my best tips, born from my own kitchen failures and successes.
- Don’t Overbake: This is the number one mistake I made early on. Sugar cookies go from perfectly soft to dry and hard in about 30 seconds. Pull them out when the edges are just set, even if the center looks a bit underdone. They will continue to bake on the hot pan as they cool.
- The Flour Spooning Trick: If your cookies turn out dry or crumbly, you’re probably using too much flour. The best way to measure it is to fluff the flour in the bag with a spoon, then spoon it into your measuring cup and level it off with a knife. This prevents packing.
- Work in Batches: Don’t try to roll out all the dough at once. It’s easier to work with a third of the dough at a time, keeping the rest covered in the fridge. This keeps the dough from getting too warm and sticky.
- Use a Thin Spatula: When moving the cut-out cookies to the baking sheet, use a thin, flat metal spatula. It makes it much easier to lift the delicate shapes without tearing them.
- My Biggest Failure: I once tried to dye the dough with black food coloring instead of using black cocoa. It was a disaster. The dough was sticky, the color was uneven, and the cookies tasted like chemicals. Trust the cocoa. It does the job perfectly and makes the cookies taste great.
Variations & Adaptations
This recipe is a great base, and you can easily tweak it to suit your taste or what you have on hand. Here are a few ideas I’ve tried and loved.
- White Cat Cookies: For a twist, replace the black cocoa powder with an equal amount of all-purpose flour. The cookies will be a classic pale vanilla color. You can then use dark chocolate chips or black frosting for the eyes and nose. It’s a fun, yin-and-yang look for Halloween.
- Spiced Pumpkin Cats: Add ½ teaspoon of pumpkin pie spice and ¼ cup of pumpkin puree to the dough along with the egg. You’ll need to add about 2-3 extra tablespoons of flour to compensate for the moisture. These bake up a little softer and have a lovely fall flavor.
- Gluten-Free Option: Substitute the all-purpose flour with a 1:1 gluten-free baking flour blend. I’ve had good luck with the Bob’s Red Mill brand. Make sure the blend contains xanthan gum. The dough might be a little more fragile, so handle it gently.
- Chocolate Dipped: Once the cookies are baked and cooled, dip half of each cookie in melted dark chocolate or white chocolate. It adds a beautiful, professional-looking finish and an extra layer of flavor. Let them set on a piece of parchment paper.
Serving & Storage Suggestions
These cookies are perfect for a Halloween party, but they also make a great treat for a cozy night in. Here’s how to serve and store them to keep them at their best.
- Serving: Serve the cookies at room temperature. They are perfect on their own, but they also pair wonderfully with a glass of cold milk, a warm cup of apple cider, or a hot chocolate. For a party, arrange them on a black or orange platter for a festive look.
- Storing: Store the baked and decorated cookies in an airtight container at room temperature. They will stay fresh and soft for up to 5 days. Place a piece of parchment paper between layers to prevent the dragées from scratching the cookies.
- Freezing: You can freeze the unbaked, cut-out cookies. Place them on a baking sheet in the freezer until solid, then transfer them to a freezer-safe bag. They can be baked directly from frozen, just add 1-2 minutes to the baking time. Baked cookies can also be frozen for up to 3 months. Thaw them at room temperature before serving.
- Flavor Development: Honestly, these cookies taste even better the next day. The flavors of the butter, vanilla, and black cocoa meld together overnight, creating a richer, more complex taste. So don’t be afraid to make them a day ahead.
Nutritional Information & Benefits
While these are a treat, it’s good to know what you’re eating. The black cocoa powder actually has some benefits over regular cocoa, but let’s be real—these are for fun.
- Estimated Nutrition (per cookie): Calories: 150, Fat: 8g, Carbs: 18g, Protein: 2g. These are estimates and will vary based on exact ingredients and cookie size.
- Health Benefits: The black cocoa powder is rich in antioxidants, just like regular cocoa. It also has a lower acidity, which can be easier on the stomach for some people. It’s a small silver lining in a delicious treat.
- Dietary Considerations: This recipe contains gluten, dairy, and eggs. For a gluten-free version, see the variations section. To make it dairy-free, you can substitute the butter with a high-quality vegan butter stick.
- Allergens: Contains wheat, milk, and eggs. The silver dragées may contain trace amounts of soy or corn. Always check your labels if you have allergies.
I believe in balance. These cookies are a celebration, not an everyday snack. They’re made with real ingredients, and they bring a lot of joy. That has its own kind of nutritional value, if you ask me.
Conclusion
These Adorable Black Cat Halloween Sugar Cookies have become a staple in my fall baking rotation, and I think they’ll become one in yours too. They’re proof that sometimes the best recipes come from a little bit of humility and a willingness to listen to an eight-year-old. They are simple enough for a beginner, but the black cocoa gives them a sophisticated flavor that even the pickiest eaters will love.
I encourage you to make them your own. Play with the decorations, try a different cutter shape, or add your favorite spice. The base recipe is forgiving and endlessly adaptable. For me, they’re a reminder that baking should be fun, not a battle. And honestly, seeing those little black cat faces on a plate never fails to make me smile.
I’d love to hear how yours turn out! Leave a comment below and tell me about your own kitchen adventures. Did you use a different decoration? Did your kids have any brilliant suggestions? Share your photos and tag me on Pinterest—I can’t wait to see your spooky creations. Happy baking!
Frequently Asked Questions
Can I make these cookies without a cat-shaped cutter?
Absolutely! You can use any Halloween-shaped cutter you have—pumpkins, ghosts, bats, or even a simple circle. You can also freehand a cat shape by cutting the dough with a knife around a cardboard template. It’s a little more work, but it’s totally doable.
Why did my cookies spread too much?
This usually happens if the dough was too warm when it went into the oven. Make sure to chill the cut-out cookies for at least 10 minutes before baking. Another culprit is using melted butter instead of softened butter. Stick to softened butter for the best shape retention.
Can I substitute the black cocoa powder with regular cocoa powder?
You can, but the cookies will be a dark brown instead of black. Regular cocoa powder is more acidic and has a stronger, more bitter chocolate flavor. If you use it, you might want to add an extra tablespoon of sugar to balance the bitterness.
How do I get the silver dragées to stick?
Press them gently into the dough right after you cut out the cookies, before baking. They will bake right into the surface. If you add them after baking, you’ll need a tiny dab of frosting or royal icing to act as glue.
Can I use this dough for cut-out cookies for other holidays?
Yes! This is a fantastic all-purpose sugar cookie dough. For non-Halloween cookies, simply omit the black cocoa powder and use an equal amount of all-purpose flour. You’ll have a classic, buttery vanilla cookie that’s perfect for any shape or occasion.
Pin This Recipe!

Adorable Black Cat Halloween Sugar Cookies: Easy Recipe
These Adorable Black Cat Halloween Sugar Cookies are the perfect spooky treat. With a soft, buttery center and a deep, dark color from black cocoa powder, they’re easy to make and guaranteed to be a crowd-pleaser at any Halloween gathering.
- Prep Time: 30 minutes
- Cook Time: 10 minutes
- Total Time: 40 minutes
- Yield: 18-24 cookies 1x
- Category: Dessert
- Cuisine: American
Ingredients
- 1 cup (2 sticks or 226g) unsalted butter, softened
- 1 cup (200g) granulated sugar
- 1 large egg, room temperature
- 2 teaspoons vanilla extract
- 2 ½ cups (312g) all-purpose flour
- ¼ cup (25g) black cocoa powder
- 1 teaspoon baking powder
- ½ teaspoon salt
- Powdered sugar for dusting (optional)
- Silver dragées or white frosting for eyes
Instructions
- Cream the butter and sugar: In a large mixing bowl, beat the softened butter and granulated sugar together on medium speed until light, fluffy, and pale in color, about 2-3 minutes. Scrape down the sides of the bowl once or twice.
- Add the egg and vanilla: Add the room-temperature egg and vanilla extract. Beat on low speed until just combined. It should look smooth and creamy.
- Combine the dry ingredients: In a separate bowl, whisk together the all-purpose flour, black cocoa powder, baking powder, and salt.
- Mix the dough: With the mixer on low speed, gradually add the dry ingredients to the wet ingredients. Mix until just combined. The dough will start to clump together and pull away from the sides of the bowl.
- Roll and cut: Lightly flour your work surface and rolling pin. Roll the dough out to about ¼-inch thickness. Use a cat-shaped cookie cutter to press out shapes. Re-roll scraps and cut out more cookies until all dough is used (about 18-24 cookies).
- Chill (optional but helpful): Place cut-out cookies on a parchment-lined baking sheet. Refrigerate for 10-15 minutes to help cookies hold their shape.
- Bake: Preheat oven to 350°F (175°C). Bake for 8-10 minutes, until edges are set and bottoms are lightly browned. Centers will still look soft. Cool on baking sheet for 5 minutes, then transfer to a wire rack to cool completely.
- Add the eyes: Once completely cool, place two silver dragées near the top center of each cookie for eyes, or pipe two small dots with white frosting.
Notes
For best results, chill the cut-out cookies for 10-15 minutes before baking to help them hold their shape. Don’t overbake; pull them out when edges are just set. The cookies taste even better the next day as flavors meld. Store in an airtight container at room temperature for up to 5 days.
Nutrition
- Serving Size: 1 cookie
- Calories: 150
- Sugar: 8
- Sodium: 95
- Fat: 8
- Saturated Fat: 5
- Carbohydrates: 18
- Fiber: 1
- Protein: 2
Keywords: Halloween cookies, black cat cookies, sugar cookies, easy Halloween recipe, black cocoa cookies, spooky treats, cut-out cookies


