Love this? Save it for later!
Share the inspiration with your friends
My nephew Leo asked why I couldn’t just stir everything together in one pot instead of using separate bowls for melting and mixing. I started to explain why that wouldn’t work — then stopped. Honestly, I had no good reason. I’d been making no-bake cookies for years, always dirtying two bowls like a good little rule-follower. But Leo, all of eight years old, was looking at me like I was overcomplicating things. He was right.
So I tried it his way. One pot, everything in at once. And you know what? The avalanche cookies turned out perfect — maybe even better than my usual batch. The peanut butter and chocolate melted together more evenly, the stirring was easier, and cleanup took about thirty seconds. I stood there in my kitchen on a random Tuesday afternoon, holding a single dirty pot, feeling like the student instead of the teacher. It was humbling, honestly. And delicious.
These no-bake avalanche cookies have become our go-to budget-friendly treat. They are the kind of recipe you make when you need something sweet but don’t want to turn on the oven or spend real money at the store. With just four ingredients — most of which you probably already have — you can whip up a batch in under fifteen minutes. That first bite, with the creamy chocolate, crunchy peanut butter, and those little marshmallows, is pure comfort. Maybe you’ve been there too, standing in your kitchen wondering what to make with a bare pantry and a craving. These cookies are the answer.
I keep making them because they remind me that sometimes the simplest methods are the best. Leo taught me that day that rules are meant to be questioned, especially in the kitchen. These avalanche cookies are proof that you don’t need fancy techniques or expensive ingredients to make something everyone will love.
Why You’ll Love This Recipe
I have tested this recipe more times than I can count, and it never fails. My sister-in-law (Leo’s mom) has made it for school bake sales, my neighbor Sarah brought a batch to her book club, and even my picky-eater friend admitted these cookies “disappeared too fast.” That is real-world testing, folks.
- Quick & Easy: Ready in just 10 minutes of hands-on time. No oven, no baking soda, no fuss.
- Simple Ingredients: You need four things — peanut butter, chocolate chips, butterscotch chips, and mini marshmallows. That is it.
- Perfect for Family Treats: Great for after-school snacks, birthday parties, or just a Tuesday night craving.
- Crowd-Pleaser: Kids love the marshmallows, adults love the nostalgic flavor. Everyone wins.
- Unbelievably Delicious: The combination of creamy peanut butter, rich chocolate, and sweet butterscotch is next-level comfort food. The texture is soft, chewy, and slightly crunchy all at once.
What makes these avalanche cookies different from other no-bake recipes? It is the balance. I use a specific ratio of chocolate to butterscotch chips that gives the cookies a deep, almost caramel-like sweetness without being overpowering. And the method — one pot, no double boiler — keeps everything smooth and easy.
These cookies are the kind that make you close your eyes after the first bite. They are comfort food reimagined — faster, cheaper, but with the same soul-soothing satisfaction. Perfect for impressing your kids without stress, or turning a simple afternoon into something memorable.
What Ingredients You Will Need
This recipe uses simple, budget-friendly ingredients to deliver bold flavor and satisfying texture without the fuss. Most of these are pantry staples you probably already have on hand.
- Creamy Peanut Butter (1 cup) — Use a standard brand like Jif or Skippy for best texture. Natural peanut butter that separates can make the cookies greasy. I personally prefer creamy over crunchy here because it blends more smoothly into the mixture.
- Semi-Sweet Chocolate Chips (1 cup) — I recommend Ghirardelli or Nestlé Toll House for consistent melting. The semi-sweet balances the sweetness of the butterscotch and marshmallows perfectly.
- Butterscotch Chips (1 cup) — These add a unique caramel-like flavor that makes avalanche cookies special. If you cannot find them, you can substitute white chocolate chips, but the flavor will be different.
- Mini Marshmallows (2 cups) — Regular-sized marshmallows work too, but mini ones distribute more evenly. Use fresh marshmallows for the best texture — stale ones get tough.
Optional Add-Ins:
- Chopped peanuts (1/2 cup) — Adds crunch if you want extra texture.
- Sea salt flakes — A sprinkle on top before setting enhances the sweet-salty contrast.
- Shredded coconut (1/4 cup) — For a tropical twist, toast it first for deeper flavor.
Substitution Guidance:
- Nut-Free Option: Use sunflower seed butter (like SunButter) instead of peanut butter. The flavor will be slightly different but still delicious.
- Dairy-Free: Use dairy-free chocolate chips and butterscotch chips. Many brands offer vegan versions.
- Lower Sugar: Use sugar-free chocolate chips and reduce the butterscotch chips to 1/2 cup, adding extra marshmallows to compensate.
I always keep these ingredients in my pantry for emergency cookie cravings. They are cheap, non-perishable, and ready when you need them.
Equipment Needed
You do not need fancy equipment for these avalanche cookies. That is part of their charm.
- Medium Saucepan — A 2-3 quart saucepan works perfectly. I use my old Farberware pot that has seen better days but still melts chocolate like a dream.
- Wooden Spoon or Silicone Spatula — For stirring. A silicone spatula is easier for scraping every last bit of chocolate mixture out of the pot.
- Baking Sheet — A standard half-sheet pan works. Line it with parchment paper or wax paper for easy cleanup.
- Parchment Paper or Wax Paper — Essential for preventing sticking. I prefer parchment because it is sturdier.
- Measuring Cups — You need 1 cup and 1/2 cup measures. Dry measuring cups are fine since we are measuring chips and marshmallows.
- Cooling Rack — Optional but helpful for speeding up the setting process.
If you do not have a saucepan, you can melt everything in a microwave-safe bowl in 30-second bursts, stirring between each. I have done that in a pinch, and it works fine — just watch carefully so the chocolate does not burn.
Preparation Method
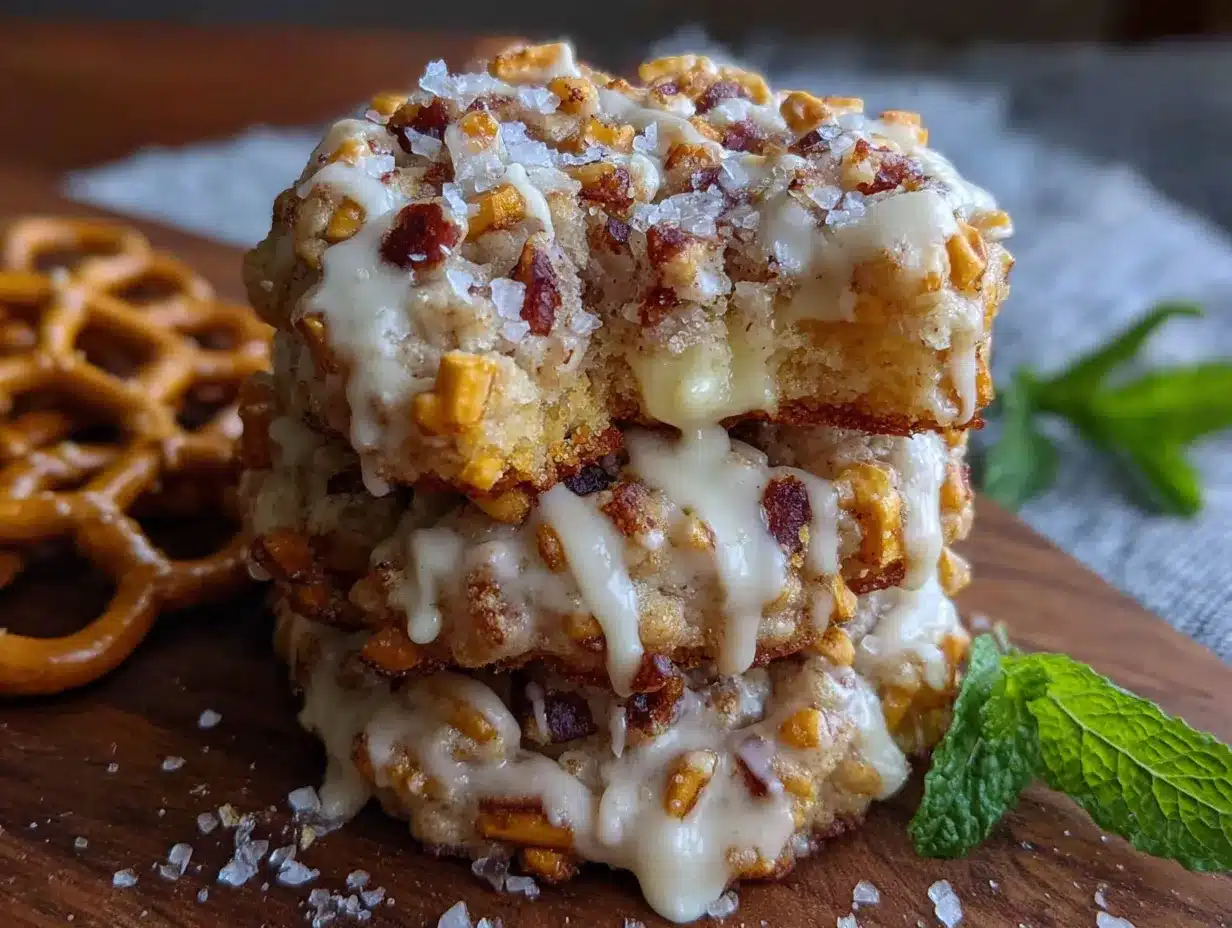
- Line a baking sheet with parchment paper or wax paper. This is important — do not skip it or your cookies will stick. Set the sheet aside.
- Combine peanut butter, chocolate chips, and butterscotch chips in a medium saucepan. Use 1 cup of each. Place the saucepan over low heat. I mean really low heat — the lowest setting your stove has. Chocolate burns easily, and burnt chocolate ruins the whole batch.
- Stir constantly with your wooden spoon or silicone spatula. This takes about 3-4 minutes. The chips will start to melt and look shiny. Keep stirring until the mixture is completely smooth and there are no lumps of unmelted chips. Do not walk away — I learned this the hard way when I answered the phone and came back to a scorched mess.
- Remove the saucepan from heat immediately once the mixture is smooth. Let it cool for about 2 minutes. This is important because if you add the marshmallows while the mixture is too hot, they will melt into a sticky puddle instead of staying as soft, chewy bits.
- Fold in the mini marshmallows gently. Add 2 cups of mini marshmallows and stir until they are evenly coated with the chocolate mixture. Do not overmix — you want distinct marshmallow pieces, not a uniform paste. The mixture will look lumpy and uneven, which is exactly what you want.
- Drop spoonfuls onto the prepared baking sheet using a cookie scoop or two spoons. I use a 1.5-tablespoon cookie scoop for uniform cookies. If you are using spoons, aim for golf-ball-sized mounds. Leave about an inch between each cookie — they do not spread much, but a little space helps them set evenly.
- Let the cookies set at room temperature for about 30 minutes. They will firm up as the chocolate cools. If you are in a hurry, you can pop the baking sheet in the refrigerator for 15 minutes. I usually let them sit on the counter while I clean up the kitchen — multitasking at its finest.
- Optional: Sprinkle with sea salt right after dropping the cookies. The salt flakes add a wonderful contrast to the sweetness. I started doing this after a friend suggested it, and now I never skip this step.
Sensory Cues: The mixture should look glossy and smooth before you add the marshmallows. When you fold in the marshmallows, you will see white bits scattered through the chocolate. The finished cookies should be firm to the touch but still slightly soft inside when you bite into them.
Cooking Tips & Techniques
I have made these avalanche cookies dozens of times, and I have messed up plenty. Here is what I learned.
Low heat is your friend. Chocolate and butterscotch chips are sensitive. High heat makes them seize up into a grainy mess. I once cranked the heat because I was impatient, and I ended up with a lumpy, unusable mixture. Start low, stir often, and be patient.
Do not skip the cooling step. That 2-minute rest after melting is crucial. If you add marshmallows to piping-hot chocolate, they melt into gooey puddles. Your cookies will still taste good, but they will look flat and messy. I learned this when my niece helped me make a batch and we added marshmallows too quickly — the cookies looked like sad chocolate blobs.
Use fresh marshmallows. Stale marshmallows get hard and chewy. If your bag has been open for weeks, the cookies will have tough, unpleasant bits. A fresh bag makes all the difference.
Work quickly once the marshmallows are added. The mixture starts to set as it cools, so drop your cookies promptly. If the mixture becomes too stiff to scoop, you can microwave it for 10-15 seconds to soften it.
For consistently sized cookies, use a cookie scoop. I use a 1.5-tablespoon scoop, and it makes exactly 24 cookies. If you are making these for a party or bake sale, uniform cookies look more professional.
Variations & Adaptations
These avalanche cookies are endlessly adaptable. Here are some variations I have tried and loved.
- Chocolate Peanut Butter Avalanche Cookies: Use all chocolate chips (2 cups) and skip the butterscotch. Add 1/2 cup of chopped peanuts for crunch. This version is richer and more intense.
- White Chocolate Cranberry Avalanche Cookies: Substitute white chocolate chips for both the semi-sweet and butterscotch chips. Add 1/2 cup of dried cranberries along with the marshmallows. The tartness of the cranberries cuts through the sweetness beautifully.
- Mint Avalanche Cookies: Use 1 cup of semi-sweet chocolate chips and 1 cup of mint chocolate chips (like Andes creme de menthe chips). The mint flavor is refreshing and unexpected.
- Gluten-Free Version: These cookies are naturally gluten-free as written, since none of the four main ingredients contain gluten. Just double-check your chocolate chip labels to be safe.
- Vegan Version: Use vegan chocolate chips and butterscotch chips (many are accidentally vegan). Substitute the peanut butter with a nut-free alternative if needed. Mini marshmallows are usually not vegan, but you can find vegan marshmallows at most health food stores.
My personal favorite variation is adding 1/4 cup of toasted coconut flakes along with the marshmallows. The coconut adds a subtle tropical flavor and a pleasant chewiness. I made this version for a summer barbecue, and it was gone in ten minutes.
Serving & Storage Suggestions
These avalanche cookies are best served at room temperature. The texture is perfect — firm enough to hold their shape but soft and chewy when you bite into them.
Serving Ideas:
- Arrange on a platter for parties or potlucks. They look beautiful with a light dusting of powdered sugar or a drizzle of melted chocolate.
- Pair with a glass of cold milk for the ultimate after-school treat. My nephew Leo insists this is the only way to eat them.
- Crush them over ice cream for an easy sundae topping. The chocolate-marshmallow combo is incredible with vanilla ice cream.
- Package in cellophane bags tied with ribbon for homemade gifts. These cookies travel well and stay fresh for days.
Storage Instructions:
- Room Temperature: Store in an airtight container at room temperature for up to 1 week. Layer them between sheets of wax paper to prevent sticking.
- Refrigerator: They will keep for 2-3 weeks in the fridge. The texture becomes slightly firmer, which some people prefer.
- Freezer: These cookies freeze beautifully. Place them in a single layer on a baking sheet and freeze until solid, then transfer to a freezer-safe bag or container. They will keep for up to 3 months. Thaw at room temperature for 15-20 minutes before serving.
Reheating Tips: These cookies are meant to be eaten cold or at room temperature, but if you want a warm, gooey experience, microwave one cookie for 10 seconds. Be careful — the marshmallows get very hot.
The flavors actually develop over time. I find these cookies taste even better the day after they are made, once the chocolate and marshmallows have had time to meld together.
Nutritional Information & Benefits
These avalanche cookies are a treat, so they are not exactly health food. But they do offer some surprising benefits.
Estimated Nutritional Values (per cookie, based on 24 cookies):
| Nutrient | Amount |
|---|---|
| Calories | 175 |
| Total Fat | 10g |
| Saturated Fat | 4g |
| Carbohydrates | 21g |
| Sugar | 16g |
| Protein | 4g |
| Fiber | 1g |
Health Benefits:
- Peanut butter provides protein and healthy fats that help keep you full longer. It also contains vitamin E and magnesium.
- Dark chocolate (if you use semi-sweet chips) contains antioxidants called flavonoids that support heart health.
- Marshmallows are basically just sugar and air, but hey — sometimes you need a little joy.
Dietary Considerations: These cookies are naturally gluten-free. They are not low-carb or keto-friendly due to the sugar content. If you have peanut allergies, use sunflower seed butter instead.
I believe in balance. These cookies are a treat, not a daily staple. But when you need something sweet, homemade is always better than store-bought — you control the ingredients, and you know exactly what is in them.
Conclusion
These kid-approved no-bake avalanche cookies are proof that you do not need fancy ingredients or complicated techniques to make something truly delicious. With just four simple ingredients and ten minutes of work, you can create a treat that will have everyone coming back for seconds.
I love this recipe because it is forgiving, adaptable, and always delivers. Whether you are making them for a school bake sale, a holiday cookie exchange, or just a quiet afternoon at home, these cookies never disappoint. And the best part? You probably already have everything you need in your pantry.
I would love to hear how your avalanche cookies turn out. Did you try any variations? Did your kids help you make them? Leave a comment below and share your experience. And if you have a favorite no-bake recipe, tell me about it — I am always looking for new ideas.
Go ahead, make a batch today. Your family will thank you. And remember — sometimes the best recipes come from questioning the rules. Happy cooking!
Frequently Asked Questions
Can I use natural peanut butter for these avalanche cookies?
I do not recommend it. Natural peanut butter that separates can make the cookies greasy and affect the texture. Stick with a standard creamy peanut butter like Jif or Skippy for best results.
Why did my avalanche cookies turn out crumbly?
This usually happens if the chocolate mixture was too hot when you added the marshmallows, causing them to melt completely. Let the mixture cool for 2 minutes before folding in the marshmallows. Also, make sure you are using enough peanut butter — it acts as a binder.
Can I make these avalanche cookies ahead of time?
Absolutely. They store well at room temperature for up to a week, in the fridge for 2-3 weeks, or in the freezer for up to 3 months. They actually taste even better the next day.
How do I prevent the cookies from sticking to the pan?
Always line your baking sheet with parchment paper or wax paper. Do not skip this step — the chocolate mixture is sticky and will be difficult to remove otherwise.
Can I double this recipe?
Yes, but use a larger pot. If you double the ingredients, make sure your saucepan is big enough to hold everything comfortably. You may need to increase the melting time slightly, but keep the heat low and stir constantly.
Pin This Recipe!
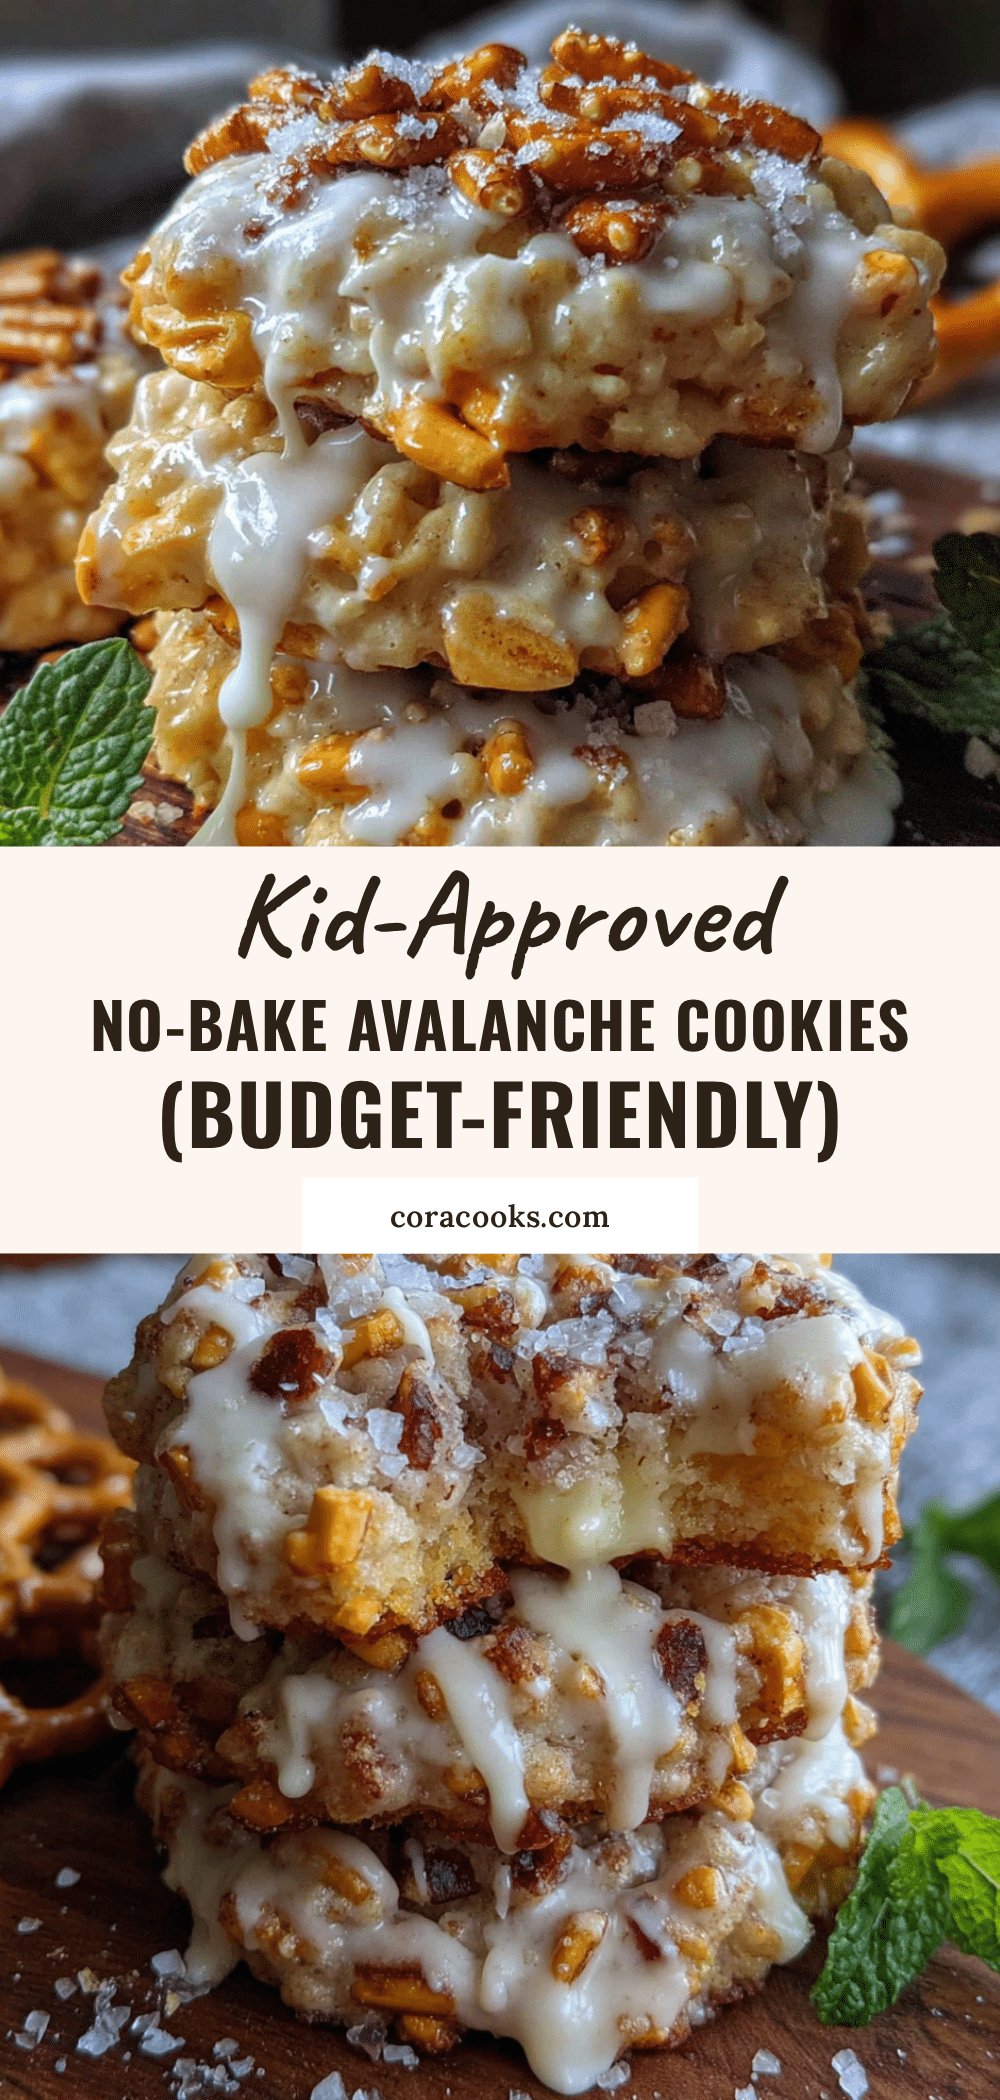
Kid-Approved No-Bake Avalanche Cookies: 4-Ingredient Easy Recipe

These no-bake avalanche cookies are a quick and easy treat made with just four ingredients: peanut butter, chocolate chips, butterscotch chips, and mini marshmallows. Ready in under 15 minutes, they are perfect for satisfying a sweet craving without turning on the oven.
- Prep Time: 10 minutes
- Cook Time: 5 minutes
- Total Time: 45 minutes (including setting time)
- Yield: 24 cookies 1x
- Category: Dessert
- Cuisine: American
Ingredients
- 1 cup creamy peanut butter (e.g., Jif or Skippy)
- 1 cup semi-sweet chocolate chips (e.g., Ghirardelli or Nestlé Toll House)
- 1 cup butterscotch chips
- 2 cups mini marshmallows
- Optional: 1/2 cup chopped peanuts
- Optional: sea salt flakes for sprinkling
- Optional: 1/4 cup shredded coconut (toasted)
Instructions
- Line a baking sheet with parchment paper or wax paper. Set aside.
- In a medium saucepan over low heat, combine peanut butter, chocolate chips, and butterscotch chips. Stir constantly until completely smooth and melted, about 3-4 minutes.
- Remove from heat and let cool for 2 minutes.
- Gently fold in the mini marshmallows until evenly coated. Do not overmix.
- Drop spoonfuls (about 1.5 tablespoons each) onto the prepared baking sheet, leaving about 1 inch between cookies.
- Optional: Sprinkle with sea salt immediately after dropping.
- Let cookies set at room temperature for about 30 minutes, or refrigerate for 15 minutes until firm.
Notes
Use low heat to prevent chocolate from burning. Let mixture cool for 2 minutes before adding marshmallows to prevent them from melting. Use fresh marshmallows for best texture. Cookies can be stored at room temperature for up to 1 week, refrigerated for 2-3 weeks, or frozen for up to 3 months. For uniform cookies, use a cookie scoop.
Nutrition
- Serving Size: 1 cookie
- Calories: 175
- Sugar: 16
- Fat: 10
- Saturated Fat: 4
- Carbohydrates: 21
- Fiber: 1
- Protein: 4
Keywords: no-bake cookies, avalanche cookies, peanut butter cookies, chocolate marshmallow cookies, easy dessert, 4-ingredient recipe, kid-friendly, budget-friendly