Love this? Save it for later!
Share the inspiration with your friends
I wasn’t expecting eggnog advice from my plumber, but there I was, standing in my kitchen with a dripping pipe, listening to him describe exactly how to make the perfect custard base. His name was Dave, and he’d been fixing my garbage disposal for about twenty minutes when he noticed the carton of store-bought eggnog on my counter. “You know,” he said, wiping his hands on a rag, “my grandma used to make the real stuff. The kind that doesn’t come from a carton.” I laughed, thinking it was just small talk, but Dave was serious. He spent the next ten minutes—while water was still shut off under my sink—walking me through his grandmother’s method for a cooked custard eggnog. No raw eggs, no weird thickeners, just patience and a good whisk. Honestly, I was skeptical. A plumber giving me a holiday recipe? But let me tell you, that first batch changed everything.
That was three winters ago, and I haven’t bought store-bought eggnog since. There’s something about the process—standing over a warm stove, watching the milk and cream thicken into something velvety—that feels like a cozy ritual. It’s not just about the drink itself, though that’s pretty incredible. It’s about the slow, deliberate act of making it. Maybe you’ve been there, standing in a warm kitchen while snow falls outside, stirring something that smells like cinnamon and nutmeg. That’s the feeling this recipe captures.
I’ve tweaked Dave’s grandmother’s method over the years, swapping in a few of my own tricks to make it foolproof. No curdled eggs, no grainy texture—just a silky, rich eggnog that tastes like Christmas in a mug. And the best part? It’s surprisingly simple. You don’t need to be a pastry chef to pull this off. You just need a little time, a few basic ingredients, and a willingness to stir. Trust me, it’s worth every minute. This cozy homemade eggnog has become my go-to for holiday gatherings, quiet nights by the fire, and even as a gift for neighbors (poured into cute jars with a ribbon). It’s the kind of recipe that makes people close their eyes after the first sip.
Why You’ll Love This Recipe
Let’s be honest—there are a lot of eggnog recipes out there, but this one stands out for a reason. It’s not just about avoiding raw eggs (though that’s a huge plus). It’s about the texture, the flavor, and the way it makes you feel. Here’s why this cozy homemade eggnog will become your new holiday tradition:
- No Raw Eggs: The custard base is cooked, so you don’t have to worry about food safety. It’s perfect for serving to kids, pregnant friends, or anyone who’s cautious about raw eggs.
- Rich and Velvety Texture: Because we’re making a proper custard, you get that thick, luxurious mouthfeel that store-bought versions just can’t replicate. It’s like drinking liquid silk.
- Simple Ingredients: You probably already have most of these in your pantry—milk, cream, eggs, sugar, and spices. No weird additives or preservatives.
- Perfect for the Holidays: Whether you’re hosting a Christmas party, having a cozy night in, or giving gifts, this eggnog fits the bill. It’s festive without being fussy.
- Customizable: You can spike it with bourbon, rum, or brandy—or leave it alcohol-free for a family-friendly version. It’s totally up to you.
- Crowd-Pleaser: I’ve served this at multiple holiday gatherings, and it always gets rave reviews. Even people who say they don’t like eggnog change their minds after one sip.
What makes this recipe different from the rest? It’s the technique. By slowly cooking the custard over low heat, you get a perfectly smooth base without any eggy bits or graininess. I’ve tested this method dozens of times, tweaking the ratios and timing until it was just right. The result is an eggnog that’s not too thick, not too thin, and perfectly balanced in sweetness. It’s comfort food in a glass—the kind that makes you want to curl up under a blanket and watch old holiday movies.
What Ingredients You Will Need
This recipe uses simple, wholesome ingredients to deliver bold flavor and satisfying texture without the fuss. Most of these are pantry staples, but I’ll share a few tips on what to look for to get the best results.
- Whole Milk (2 cups / 480 ml): Whole milk gives the eggnog its creamy base. You can use 2% if that’s what you have, but the texture won’t be as rich. I recommend using organic whole milk if possible—it just tastes cleaner. (Avoid skim milk; it’s too watery.)
- Heavy Cream (1 cup / 240 ml): This adds that luxurious, velvety richness. Don’t skip it! If you’re dairy-free, you can substitute full-fat coconut cream, but the flavor will be slightly different. (I’ve tried it, and it’s still delicious, just not as traditional.)
- Large Egg Yolks (6): The yolks are what thicken the custard and give it that silky texture. Save the whites for another recipe (like meringue cookies or an omelet). Make sure your eggs are fresh and at room temperature for the best results.
- Granulated Sugar (1/2 cup / 100 g): Just regular white sugar works beautifully. You can reduce it to 1/3 cup if you prefer a less sweet eggnog, but I find 1/2 cup strikes the perfect balance. (I’ve tried brown sugar before, and it adds a slight molasses flavor that’s interesting but not traditional.)
- Vanilla Extract (1 teaspoon): Use pure vanilla extract, not imitation. It makes a difference in the depth of flavor. I like Nielsen-Massey brand, but any pure vanilla works.
- Ground Nutmeg (1/2 teaspoon, plus more for garnish): Freshly grated nutmeg is ideal—it has a much stronger, more aromatic flavor. But pre-ground works in a pinch. (If you’re using fresh, grate about 1/4 of a whole nutmeg.)
- Ground Cinnamon (1/4 teaspoon): Adds warmth without overpowering. You can skip it if you’re not a cinnamon fan, but I love the subtle layer it adds.
- Pinch of Salt: Just a tiny pinch—it balances the sweetness and enhances all the other flavors. Don’t skip it!
- Optional: Bourbon, Rum, or Brandy (1/2 to 1 cup / 120-240 ml): If you want to make it boozy, add your spirit of choice after the custard has cooled. I prefer bourbon for its warm, vanilla notes, but dark rum is also fantastic. (Start with 1/2 cup and add more to taste.)
Ingredient Tips: For the best texture, use fresh eggs and dairy. If your milk or cream is close to expiring, it might curdle when heated, so check the dates. For a dairy-free version, use oat milk and coconut cream—I’ve tested it, and it works surprisingly well. Just note that the texture will be slightly thinner.
Equipment Needed
You don’t need fancy equipment to make this cozy homemade eggnog, but a few key tools will make the process smoother. Here’s what you’ll need:
- Medium Heavy-Bottomed Saucepan: A heavy-bottomed pan distributes heat evenly, preventing the custard from scorching. I use a 3-quart stainless steel saucepan. (Avoid thin pans—they’ll give you hot spots and burnt milk.)
- Whisk: A good balloon whisk is essential for stirring the custard smoothly. I prefer a silicone-coated whisk to avoid scratching my pans, but a stainless steel one works fine.
- Fine-Mesh Strainer: This is optional but highly recommended. Straining the custard removes any tiny bits of cooked egg that might have formed, giving you a perfectly smooth eggnog. I use a small mesh strainer that fits over my mixing bowl.
- Mixing Bowls: You’ll need one medium bowl for the egg yolks and sugar, and a larger bowl for the ice bath (if you want to cool it quickly).
- Measuring Cups and Spoons: Accurate measurements are key for a consistent result. I recommend using liquid measuring cups for the milk and cream.
- Instant-Read Thermometer: This is a game-changer. It takes the guesswork out of custard-making. The ideal temperature is 160°F (71°C)—hot enough to thicken the eggs but not so hot that they scramble. (I use a Thermapen, but any reliable thermometer works.)
- Glass Pitcher or Bottle for Storage: Once your eggnog is done, you’ll need something to store it in. A glass pitcher with a lid works perfectly. (I reuse old milk bottles for a rustic look.)
Budget-Friendly Tips: If you don’t have a thermometer, you can test the custard by dipping a spoon in and running your finger across the back. If the line holds, it’s thick enough. Also, a regular saucepan works fine if you stir constantly—just keep the heat low.
Preparation Method
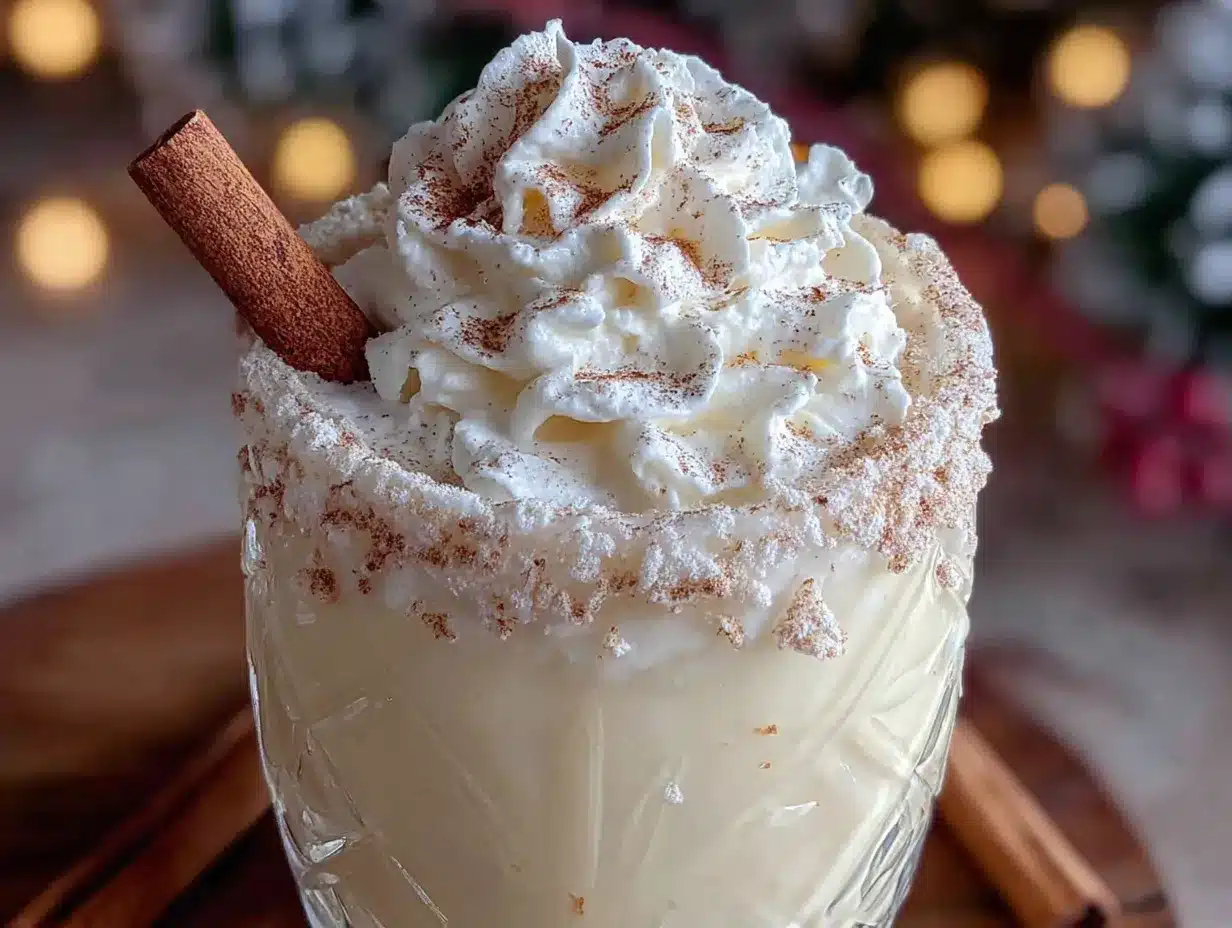
Making this cozy homemade eggnog is easier than you think. The key is patience and low heat. Follow these steps, and you’ll have a silky, delicious custard base in no time.
- Prepare Your Ingredients: Separate the egg yolks from the whites. Place the yolks in a medium mixing bowl and save the whites for another use. Measure out your milk, cream, sugar, and spices. Having everything ready before you start makes the process much smoother.
- Heat the Milk and Cream: In a medium heavy-bottomed saucepan, combine the whole milk and heavy cream. Place it over medium heat and warm it until it’s steaming but not boiling—about 150°F (65°C). You should see small bubbles around the edges, but no rolling boil. Stir occasionally to prevent a skin from forming. This takes about 5-7 minutes.
- Whisk the Egg Yolks and Sugar: While the milk heats, whisk the egg yolks and granulated sugar together in your mixing bowl until the mixture is pale yellow and slightly thickened—about 2 minutes. This step is important because it dissolves the sugar and aerates the yolks, giving you a smoother custard. (Pro tip: If you stop whisking and the mixture falls in ribbons, you’re done.)
- Temper the Egg Yolks: This is the crucial step to avoid scrambled eggs. Slowly drizzle about 1 cup of the hot milk mixture into the egg yolk mixture while whisking constantly. Don’t dump it all in at once—add it in a thin, steady stream. This gradually raises the temperature of the yolks without cooking them. (I’ve learned this the hard way—rushing this step will give you lumpy eggnog.)
- Combine and Cook: Pour the tempered egg mixture back into the saucepan with the remaining milk. Place it over low heat and stir constantly with a whisk or wooden spoon. You want to cook it gently, reaching 160°F (71°C) on your thermometer. This should take about 8-10 minutes. The mixture will thicken enough to coat the back of a spoon. Don’t let it boil—if you see bubbles, remove it from the heat immediately.
- Strain the Custard: Once the custard has thickened, remove it from the heat and pour it through a fine-mesh strainer into a clean bowl or pitcher. This catches any tiny bits of cooked egg that might have formed. (Honestly, this step is optional, but it guarantees a perfectly smooth texture. I never skip it.)
- Add Vanilla and Spices: Stir in the vanilla extract, ground nutmeg, ground cinnamon, and a pinch of salt. Mix well until everything is combined. Taste it and adjust the spices if needed—I sometimes add an extra pinch of nutmeg for a stronger flavor.
- Cool the Eggnog: Let the eggnog cool to room temperature, then cover and refrigerate for at least 2 hours, or overnight. It will thicken further as it chills. If you’re in a hurry, you can set the bowl in an ice bath and stir occasionally to speed up the process. (I usually make it the night before—the flavors meld beautifully overnight.)
- Add Alcohol (Optional): If you’re making a boozy version, stir in your bourbon, rum, or brandy after the eggnog has cooled. Start with 1/2 cup and add more to taste. I usually go with 3/4 cup of bourbon for a nice kick without overpowering the custard.
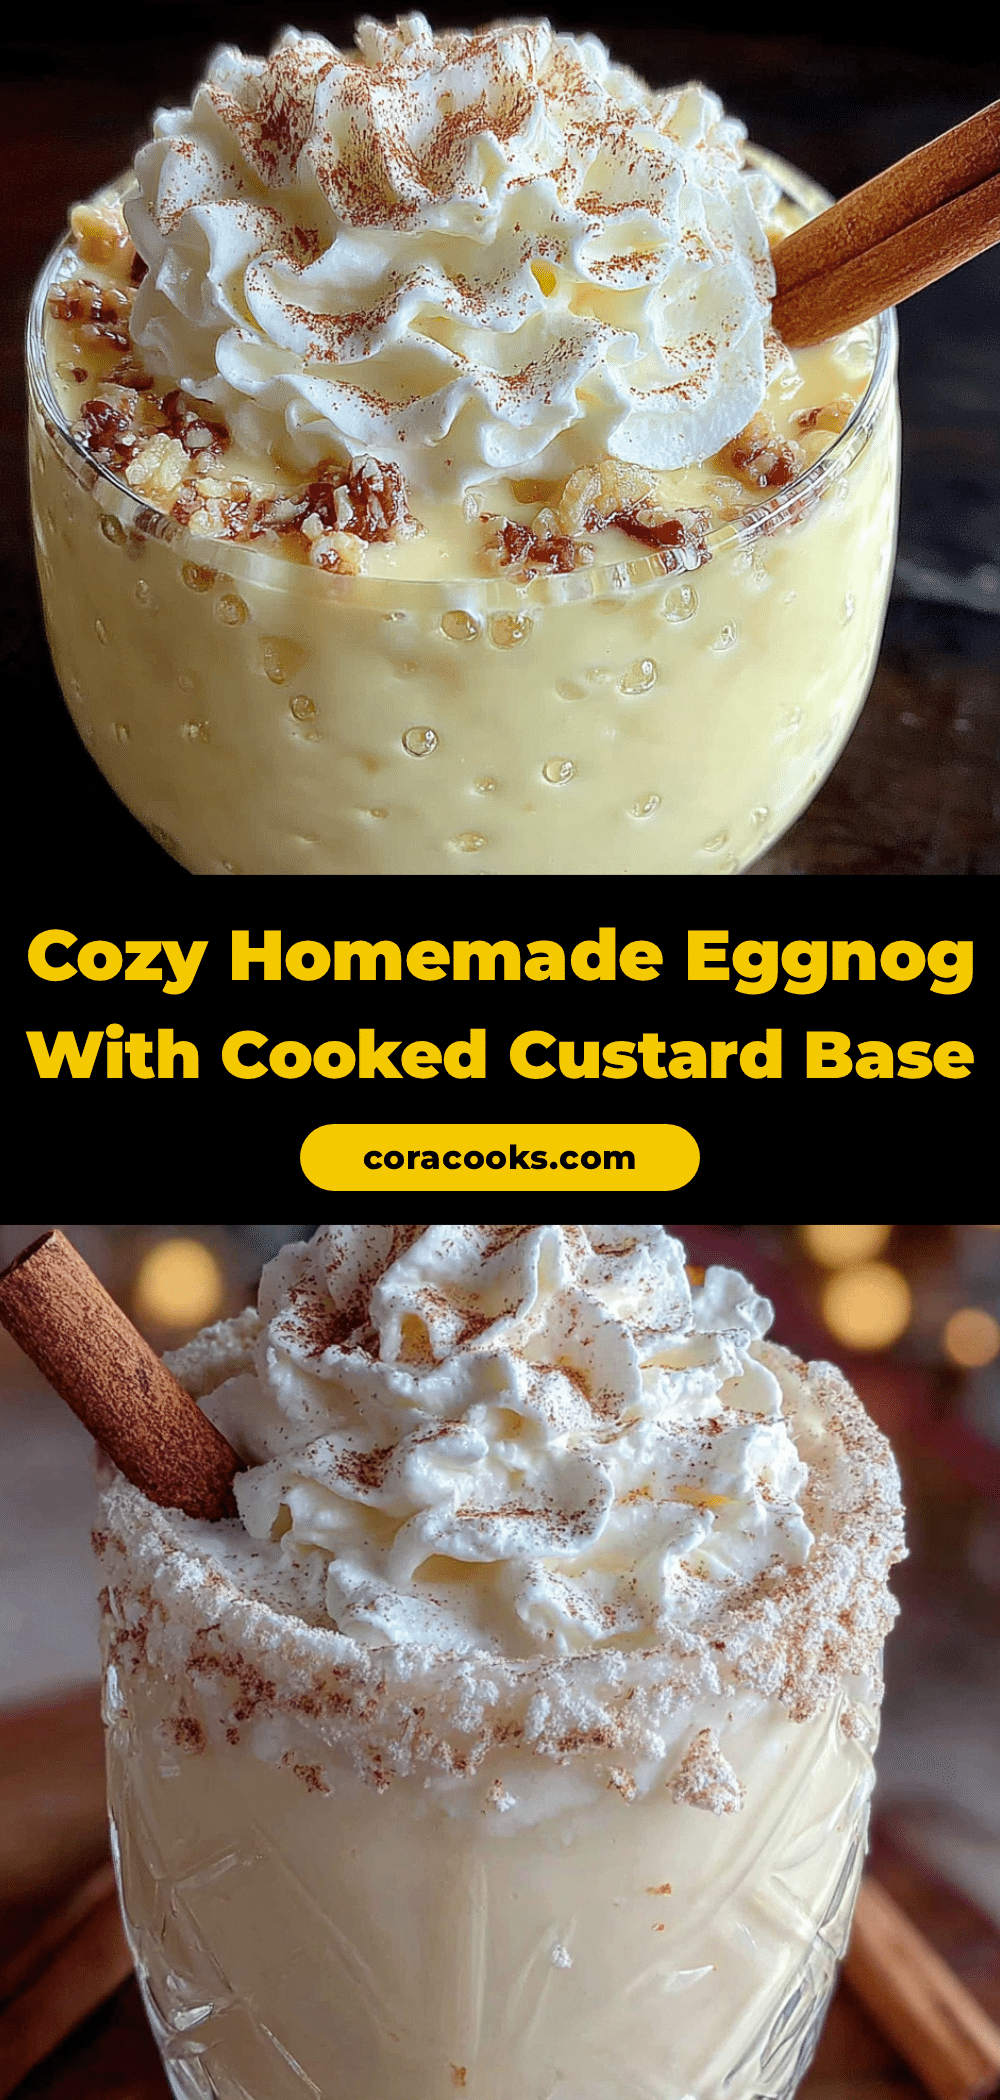
- Serve and Enjoy: Pour the chilled eggnog into mugs and garnish with a sprinkle of fresh nutmeg or a cinnamon stick. For an extra touch, add a dollop of whipped cream. Serve immediately and watch it disappear!
Cooking Tips & Techniques
After making this recipe dozens of times, I’ve picked up a few tricks that make the process foolproof. Here are my top tips for perfect eggnog every time:
- Keep the Heat Low: This is the most important rule. Custard is delicate—if you cook it over high heat, you’ll end up with sweet scrambled eggs. Always use low heat and stir constantly. If you see steam rising aggressively, turn the heat down. (I once got distracted and walked away for 30 seconds—big mistake. The bottom scorched, and I had to start over.)
- Use a Thermometer: An instant-read thermometer takes the guesswork out of custard-making. The sweet spot is 160°F (71°C). At this temperature, the eggs are cooked enough to be safe but not so hot that they curdle. If you don’t have one, look for the mixture to coat the back of a spoon—when you run your finger through it, the line should hold.
- Don’t Skip the Tempering: I know it’s tempting to just dump the hot milk into the eggs, but tempering is what prevents lumps. Adding the hot liquid slowly while whisking gives the eggs time to adjust to the temperature. It’s a little extra work, but it’s worth it.
- Strain for Smoothness: Even if you’re careful, tiny bits of cooked egg can sneak in. Straining the custard through a fine-mesh sieve catches those bits and gives you a silky-smooth eggnog. It also removes any clumps of spice that didn’t dissolve.
- Chill Overnight: Eggnog tastes better the next day. The flavors have time to meld and mellow, and the texture becomes even creamier. If you can, make it a day ahead. (I always do—it’s one less thing to worry about on party day.)
- Adjust Sweetness to Taste: Some people like their eggnog sweeter than others. Start with 1/2 cup of sugar and taste the custard after it cools. You can always stir in a little more sugar if needed. Just dissolve it in a splash of warm milk first.
Common Mistakes to Avoid: Don’t let the mixture boil—it will curdle the eggs and ruin the texture. Also, don’t over-whisk the egg yolks with sugar too far ahead of time; they can develop a crust if left sitting. And for goodness’ sake, don’t add the alcohol while the custard is still hot—it will evaporate the booze and leave you with a flat flavor.
Variations & Adaptations
One of the best things about this cozy homemade eggnog is how adaptable it is. Here are a few variations I’ve tried and loved:
- Dairy-Free Eggnog: Substitute the whole milk with oat milk and the heavy cream with full-fat coconut cream. The texture will be slightly thinner, but the flavor is still rich and creamy. I’ve made this for my lactose-intolerant friends, and they rave about it. (Just make sure to use a full-fat coconut cream, not the light version.)
- Vegan Eggnog: Use a combination of canned coconut milk and cashew milk for the base. For the “custard,” use cornstarch or arrowroot powder to thicken instead of egg yolks. Whisk 2 tablespoons of cornstarch with the sugar before adding the milk, then cook until thickened. It’s not exactly the same, but it’s surprisingly good.
- Spiced Eggnog: Add a pinch of ground cloves, allspice, or cardamom along with the nutmeg and cinnamon. I love adding a tiny pinch of cloves—it gives the eggnog a warm, holiday-spice flavor that’s perfect for Christmas.
- Chocolate Eggnog: Melt 2 ounces of dark chocolate (70% cocoa) into the milk before adding the eggs. Stir until smooth, then proceed with the recipe. The result is a rich, chocolatey eggnog that tastes like a liquid dessert. (I tried this for a holiday party, and it was a huge hit.)
- Boozy Variations: Instead of bourbon, try dark rum, spiced rum, or cognac. Each spirit adds a different character—rum is sweeter, while cognac is more sophisticated. You can also make a non-alcoholic version by adding a splash of vanilla extract and a drop of rum extract for flavor.
- Low-Sugar Eggnog: Substitute the granulated sugar with a monk fruit sweetener or erythritol. Use 1/3 cup instead of 1/2 cup, as these sweeteners tend to be sweeter. The texture will be the same, but the sweetness will be dialed back. (I’ve tested this for my diabetic aunt, and she loved it.)
Personal Variation: My favorite twist is to add a teaspoon of orange zest along with the spices. The citrus brightens up the richness and adds a subtle, unexpected note. I discovered this by accident when I ran out of nutmeg and used orange zest instead—it was a happy mistake!
Serving & Storage Suggestions
Serving this cozy homemade eggnog is almost as fun as making it. Here’s how to get the most out of your batch:
- Serving Temperature: Serve it cold, straight from the fridge. The texture is best when it’s well-chilled. You can also serve it warm if you prefer—just reheat it gently over low heat, stirring constantly, and don’t let it boil. (Warm eggnog is especially cozy on a cold winter night.)
- Presentation Ideas: Pour the eggnog into clear glass mugs or small glasses to show off its creamy color. Garnish with a sprinkle of fresh nutmeg, a cinnamon stick, or a star anise pod. For a festive touch, rim the glass with cinnamon sugar (mix equal parts sugar and cinnamon, then dip a dampened rim into the mixture).
- Complementary Dishes: Eggnog pairs beautifully with gingerbread cookies, shortbread, or a slice of pound cake. It also goes well with savory appetizers like cheese straws or spiced nuts—the sweetness balances out salty snacks. For a full holiday spread, serve it alongside a cheese board with sharp cheddar and dried fruits.
- Beverage Pairings: If you’re serving a boozy version, consider offering a choice of bourbon, rum, or brandy on the side so guests can customize their drinks. For a non-alcoholic option, offer sparkling water with a splash of cranberry juice as a palate cleanser.
- Storage Instructions: Store leftover eggnog in an airtight container in the refrigerator for up to 5 days. The flavors will continue to develop, so it might even taste better on day 3. (I’ve never had it last longer than 3 days in my house, but it should be fine for up to 5.)
- Freezing Instructions: You can freeze eggnog for up to 3 months. Pour it into a freezer-safe container, leaving about an inch of headspace for expansion. Thaw it in the refrigerator overnight, then whisk it well before serving. The texture might be slightly thinner after freezing, but it’s still delicious. (I’ve frozen it in ice cube trays for adding to coffee—amazing!)
- Reheating Tips: If you want to serve it warm, reheat it gently on the stovetop over low heat, stirring constantly. Do not let it boil, or it might curdle. You can also reheat it in the microwave in 30-second bursts, stirring between each. (I prefer the stovetop for more control.)
Nutritional Information & Benefits
While eggnog is definitely a treat, it does have some redeeming qualities. Here’s a rough estimate of the nutritional content per serving (about 1 cup, without alcohol):
| Nutrient | Amount per Serving |
|---|---|
| Calories | 280 |
| Total Fat | 18g |
| Saturated Fat | 11g |
| Cholesterol | 210mg |
| Sodium | 95mg |
| Total Carbohydrates | 24g |
| Sugars | 22g |
| Protein | 7g |
| Calcium | 200mg |
| Vitamin D | 2.5mcg |
Health Benefits: Eggnog is a good source of calcium, thanks to the milk and cream, which supports bone health. The egg yolks provide vitamin D, which is essential for immune function and mood regulation (especially important during the darker winter months). The nutmeg and cinnamon also have anti-inflammatory properties, though the amounts are small.
Dietary Considerations: This recipe is vegetarian and can be made gluten-free (all ingredients are naturally gluten-free). For a dairy-free version, use oat milk and coconut cream as mentioned above. For a lower-sugar option, use a monk fruit sweetener. Note that this recipe contains eggs and dairy, which are common allergens. If you’re serving a crowd, consider making a separate batch with alternative ingredients for those with dietary restrictions.
Personal Perspective: I don’t pretend that eggnog is health food, but I do believe in enjoying seasonal treats in moderation. This recipe uses real ingredients—no artificial flavors or preservatives—so you can feel good about what you’re drinking. And honestly, the joy it brings is its own kind of nourishment.
Conclusion
This cozy homemade eggnog with its cooked custard base is more than just a holiday drink—it’s a tradition waiting to happen. From the unexpected moment I learned it from my plumber, Dave, to the countless batches I’ve made since, this recipe has become a staple in my winter kitchen. It’s the kind of thing that makes you slow down, appreciate the process, and enjoy the simple pleasure of a well-made beverage.
I hope you’ll give it a try. Don’t be afraid to tweak the spices, adjust the sweetness, or experiment with different spirits. That’s the beauty of homemade eggnog—it’s yours to customize. Whether you’re serving it at a holiday party, sipping it by the fire, or giving it as a gift, this eggnog is sure to bring warmth and comfort to your season.
If you make this recipe, I’d love to hear about it! Leave a comment below and let me know how it turned out. Did you add bourbon or keep it alcohol-free? Did you try the chocolate version? Share your variations—I’m always looking for new ideas. And if you’re feeling generous, share this recipe with a friend who needs a little holiday cheer. Happy sipping, and here’s to cozy moments!
Frequently Asked Questions
Can I make this eggnog without a thermometer?
Absolutely. If you don’t have a thermometer, look for the custard to coat the back of a spoon. When you run your finger through the coating, the line should hold without running. That’s your cue that it’s thick enough. Just be careful not to let it boil—keep the heat low and stir constantly.
How long does homemade eggnog last in the fridge?
Homemade eggnog will keep in the refrigerator for up to 5 days when stored in an airtight container. The flavors actually improve after a day or two as they meld together. Just give it a good stir before serving, as some separation may occur.
Can I use low-fat milk or cream?
You can, but the texture won’t be as rich and creamy. If you’re watching calories, try using 2% milk instead of whole milk, but keep the heavy cream—it’s what gives eggnog its signature velvety texture. Using skim milk will result in a thinner, less satisfying drink.
Is it safe to serve this eggnog to pregnant women and children?
Yes! Because the custard base is cooked to 160°F (71°C), the eggs are fully pasteurized, making it safe for pregnant women, children, and anyone with a compromised immune system. Just skip the alcohol if serving to kids or non-drinkers.
Can I double this recipe for a party?
Definitely. This recipe doubles beautifully. Just use a larger saucepan and increase the cooking time slightly—it might take an extra 5-7 minutes to reach the right temperature. Make sure to stir constantly to prevent scorching. You can also make it a day ahead to save time on party day.
Pin This Recipe!
Cozy Homemade Eggnog – Best Cooked Custard Recipe
This cozy homemade eggnog features a cooked custard base for a rich, velvety texture without raw eggs. It’s a simple, foolproof holiday drink that’s perfect for gatherings, quiet nights, or gifting.
- Prep Time: 15 minutes
- Cook Time: 20 minutes
- Total Time: 2 hours 35 minutes (includes chilling)
- Yield: 4 servings 1x
- Category: Beverage
- Cuisine: American
Ingredients
- 2 cups (480 ml) whole milk
- 1 cup (240 ml) heavy cream
- 6 large egg yolks
- 1/2 cup (100 g) granulated sugar
- 1 teaspoon pure vanilla extract
- 1/2 teaspoon ground nutmeg, plus more for garnish
- 1/4 teaspoon ground cinnamon
- Pinch of salt
- Optional: 1/2 to 1 cup (120-240 ml) bourbon, rum, or brandy
Instructions
- Separate the egg yolks from the whites. Place the yolks in a medium mixing bowl and save the whites for another use. Measure out the milk, cream, sugar, and spices.
- In a medium heavy-bottomed saucepan, combine the whole milk and heavy cream. Warm over medium heat until steaming but not boiling (about 150°F/65°C), stirring occasionally, about 5-7 minutes.
- While the milk heats, whisk the egg yolks and granulated sugar together until pale yellow and slightly thickened, about 2 minutes.
- Slowly drizzle about 1 cup of the hot milk mixture into the egg yolk mixture while whisking constantly to temper the yolks.
- Pour the tempered egg mixture back into the saucepan with the remaining milk. Cook over low heat, stirring constantly, until the mixture reaches 160°F (71°C) and thickens enough to coat the back of a spoon, about 8-10 minutes. Do not let it boil.
- Remove from heat and pour the custard through a fine-mesh strainer into a clean bowl or pitcher to remove any cooked egg bits.
- Stir in the vanilla extract, ground nutmeg, ground cinnamon, and a pinch of salt. Mix well.
- Let the eggnog cool to room temperature, then cover and refrigerate for at least 2 hours or overnight. It will thicken further as it chills.
- If making a boozy version, stir in the bourbon, rum, or brandy after the eggnog has cooled. Start with 1/2 cup and add more to taste.
- Pour the chilled eggnog into mugs, garnish with fresh nutmeg or a cinnamon stick, and serve.
Notes
For best results, use fresh eggs and dairy. Keep heat low to avoid curdling. Straining ensures a smooth texture. Chill overnight for best flavor. Adjust sweetness to taste.
Nutrition
- Serving Size: 1 cup
- Calories: 280
- Sugar: 22
- Sodium: 95
- Fat: 18
- Saturated Fat: 11
- Carbohydrates: 24
- Protein: 7
Keywords: eggnog, homemade eggnog, cooked eggnog, custard eggnog, holiday drink, Christmas drink, eggnog recipe