Love this? Save it for later!
Share the inspiration with your friends
“I never thought gluten-free sugar cookies could taste this good,” my friend Jenna admitted one sunny Saturday afternoon, just as she bit into one of these soft, perfect gluten-free flag sugar cookies. The funny thing is, I wasn’t even planning to make these cookies that day. It started with a last-minute invitation to a neighborhood barbecue where I wanted to bring something festive but had zero time to fuss. I rummaged through my pantry, spotted my trusty gluten-free flour blend, and decided to whip up a batch of sugar cookies shaped like flags—because, well, it was just a few days before a big holiday. Honestly, I was skeptical. Gluten-free baking can be tricky, and I’d had my fair share of crumbly, dry treats before.
But as I mixed, rolled, and baked, I noticed the dough was surprisingly pliable and smooth, not the usual crumbly mess I’d anticipated. The aroma that filled my kitchen was nostalgic—sweet vanilla with a hint of buttery richness. When the cookies came out of the oven, they were soft, tender, and just the right level of chewy. And decorating them with vibrant red, white, and blue icing added that festive touch that made them stand out on the picnic table.
Maybe you’ve been there before—wanting to create something special but worried gluten-free will mean sacrificing texture or flavor. Well, this recipe changed the game for me. It’s not just about being gluten-free; it’s about making sugar cookies that are reliably soft and delicious every single time. Let me tell you, these cookies have become my go-to for celebrations, especially when friends with gluten sensitivities are around. The best part? Nobody can tell they’re gluten-free unless you spill the secret.
Why You’ll Love This Recipe
Having tested this perfect gluten-free flag sugar cookies recipe dozens of times, I can confidently say it hits all the right notes. Here’s why you’ll want to keep it in your baking arsenal:
- Quick & Easy: Comes together in under 30 minutes, perfect for those last-minute celebrations or spontaneous baking urges.
- Simple Ingredients: No need for fancy or hard-to-find items; most are pantry staples you already have on hand.
- Perfect for Patriotic Events: Ideal for Independence Day, Memorial Day, or any gathering where a festive flag cookie will impress.
- Crowd-Pleaser: Loved by kids, adults, and gluten-free eaters alike—everyone asks for seconds!
- Unbelievably Soft Texture: The secret gluten-free blend ensures cookies are tender with just the right chewiness, avoiding that dreaded dryness.
This isn’t your typical gluten-free sugar cookie. The magic lies in the flour blend and a touch of cornstarch that work together to mimic the softness of traditional cookies. I also add a little extra vanilla and a hint of lemon zest to brighten the flavor. It’s the kind of recipe that makes you close your eyes after the first bite and say, “Wow, that’s really good.” Whether you’re baking for a crowd or just treating yourself, these cookies deliver comfort and joy in every bite.
What Ingredients You Will Need
This recipe uses a handful of straightforward, wholesome ingredients that come together beautifully to create soft, flavorful gluten-free sugar cookies. You won’t need to hunt for anything exotic, and substitutions are easy if needed.
- Gluten-Free Flour Blend (2 ½ cups / 300g): I recommend a blend with rice flour, tapioca starch, and potato starch for the best texture. Bob’s Red Mill 1-to-1 Gluten-Free Baking Flour works well here.
- Cornstarch (2 tablespoons): This helps add tenderness and softness to the cookies.
- Baking Powder (1 teaspoon): For a gentle lift and lightness.
- Salt (½ teaspoon): Balances the sweetness and enhances flavor.
- Unsalted Butter (1 cup / 227g), softened: Use real butter for the best flavor and texture. If dairy-free is needed, swap with a plant-based butter alternative.
- Granulated Sugar (¾ cup / 150g): For sweetness and that classic sugar cookie taste.
- Large Egg (1), room temperature: Helps bind everything together.
- Pure Vanilla Extract (1 ½ teaspoons): Adds warmth and depth of flavor.
- Lemon Zest (1 teaspoon, optional): A little brightness that really lifts the cookie flavor.
- Milk (2 tablespoons): Use dairy or almond milk to bring the dough together smoothly.
If you want to make these dairy-free, simply swap the butter with a vegan alternative and the milk with your favorite plant milk. For a nut-free version, avoid almond milk and use oat or rice milk instead. I’ve also tried adding a pinch of cream of tartar for extra tenderness, but it’s totally optional.
Equipment Needed
- Mixing Bowls: One large bowl for dry ingredients and one for wet ingredients.
- Electric Mixer or Stand Mixer: Makes creaming the butter and sugar much easier, but a sturdy whisk and elbow grease work too.
- Measuring Cups and Spoons: For accurate measuring – especially crucial in gluten-free baking.
- Rolling Pin: Essential for rolling the dough evenly to about ¼ inch thickness.
- Flag-shaped Cookie Cutters: Or any patriotic shapes you like. If you don’t have flag cutters, rectangles with a small star or triangle cutter work beautifully.
- Baking Sheets: Lined with parchment paper or silicone mats to prevent sticking and ensure even baking.
- Cooling Rack: For letting the cookies cool completely before decorating.
For those on a budget, silicone baking mats can be replaced with parchment paper, and if you don’t have a stand mixer, a hand mixer or even a wooden spoon works fine. Just be prepared for a little extra arm work! Keeping your rolling pin lightly floured with gluten-free flour helps prevent sticky dough mishaps.
Preparation Method
- Preheat your oven to 350°F (175°C). Line two baking sheets with parchment paper or silicone mats. This prevents sticking and promotes even baking.
- Mix Dry Ingredients: In a large bowl, whisk together 2 ½ cups (300g) gluten-free flour blend, 2 tablespoons cornstarch, 1 teaspoon baking powder, and ½ teaspoon salt. Set aside.
- Cream Butter and Sugar: In another bowl, use an electric mixer to beat 1 cup (227g) softened unsalted butter with ¾ cup (150g) granulated sugar until fluffy and pale, about 3-4 minutes. This step is key for a tender texture.
- Add Egg, Vanilla, and Lemon Zest: Beat in 1 large room temperature egg, 1 ½ teaspoons vanilla extract, and 1 teaspoon lemon zest until combined. The lemon zest adds a subtle, fresh note that brightens the flavor.
- Incorporate Dry Ingredients: Gradually add the dry flour mixture to the wet ingredients, alternating with 2 tablespoons milk. Mix on low speed until the dough comes together but don’t overmix—it should be soft but not sticky.
- Chill the Dough: Wrap the dough in plastic wrap and refrigerate for at least 30 minutes. This step helps the dough firm up, making it easier to roll and cut shapes without sticking or tearing.
- Roll and Cut: Lightly flour your work surface with gluten-free flour. Roll the dough to about ¼ inch (6mm) thickness. Use your flag-shaped cookie cutters to cut out shapes, transferring them gently to the prepared baking sheets. If the dough is too sticky, chill it a bit longer.
- Bake: Bake the cookies for 10-12 minutes, or until the edges just start to turn golden. The centers should remain soft. Overbaking leads to dryness, so keep an eye on them—you’ll learn the perfect timing with practice.
- Cool Completely: Transfer cookies to a cooling rack and let them cool fully before decorating. This prevents icing from melting or sliding off.
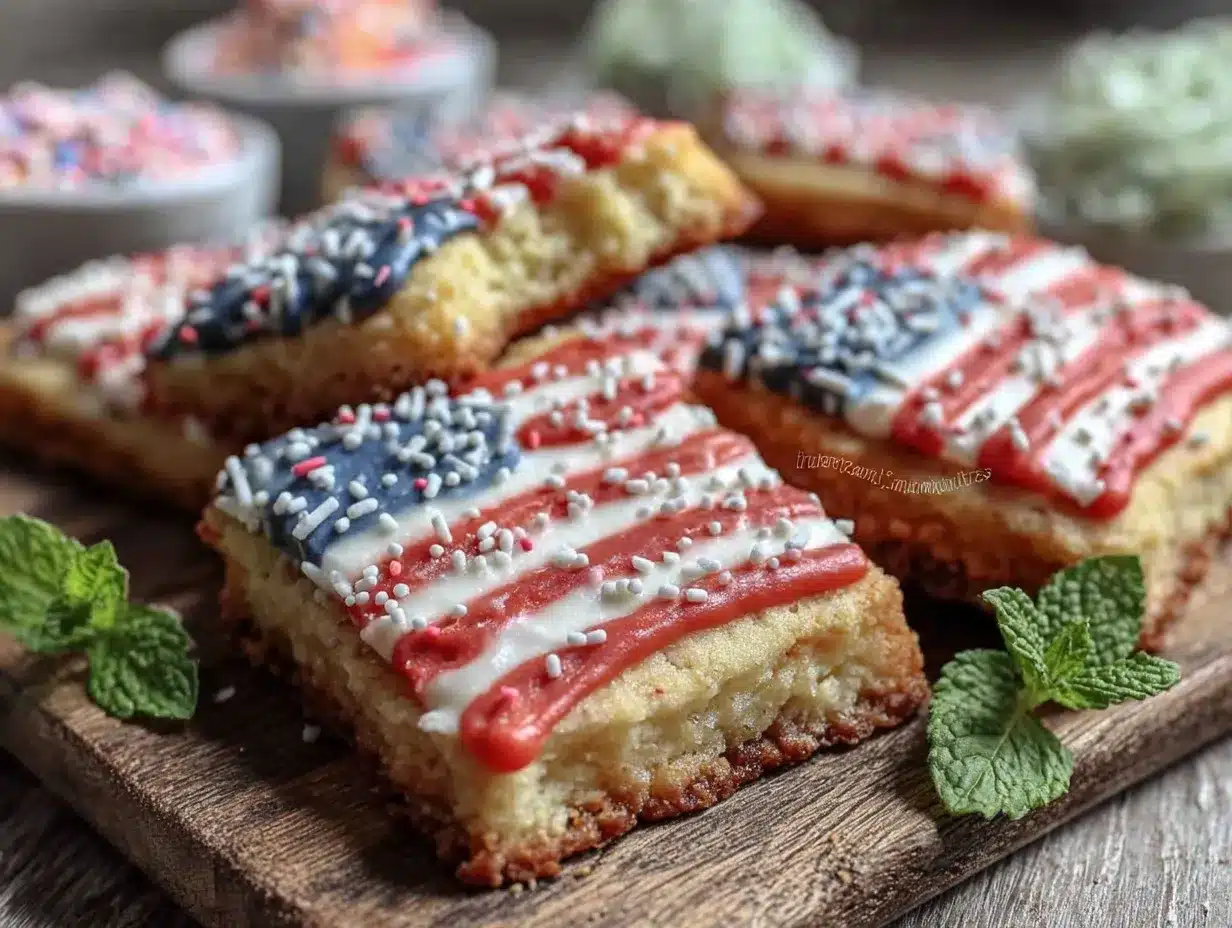
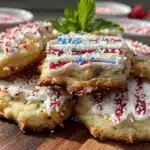
- Decorate: Once cooled, you can pipe royal icing or spread colored glaze in red, white, and blue to create your flag designs. I like to keep it simple with stripes and stars, but feel free to get creative!
A quick tip: If you forgot to chill the dough, don’t panic. Just pop the rolled dough in the freezer for 10 minutes before cutting, and it will firm up nicely. And remember, every oven heats a bit differently, so check on your cookies a minute or two before the timer goes off to avoid overbaking.
Cooking Tips & Techniques
Gluten-free baking can be a little intimidating, but these tips have saved me from many cookie disasters:
- Measure Flour Correctly: Always spoon your gluten-free flour into the measuring cup and level it off. Scooping directly can lead to too much flour and dry cookies.
- Don’t Skip the Cornstarch: It’s a game-changer for softness and tenderness in this recipe.
- Chill the Dough: This helps prevent spreading during baking and keeps the cookie shape crisp.
- Watch Baking Time Closely: Gluten-free cookies can quickly go from soft to hard. Take them out just as the edges start to golden.
- Use Room Temperature Ingredients: Butter and eggs blend better, resulting in a smoother dough and even texture.
- Mixing Speed: Cream butter and sugar thoroughly but fold in flour gently. Overmixing can make cookies tough.
One time, I accidentally used cold eggs straight from the fridge and ended up with a dough that looked curdled. Lesson learned: always bring eggs to room temperature first! Also, when decorating, if your royal icing is too runny, add powdered sugar bit by bit until it holds shape better for piping stars or stripes.
Variations & Adaptations
This perfect gluten-free flag sugar cookie recipe is super versatile, so you can tweak it based on your needs or mood:
- Dairy-Free Version: Swap butter for vegan margarine and use almond or oat milk instead of dairy milk for a plant-based treat.
- Low-Sugar Option: Reduce the sugar to ½ cup (100g) and try a sugar substitute like coconut sugar for a deeper flavor.
- Flavor Twists: Add a teaspoon of almond extract for a nutty note, or replace lemon zest with orange zest for a different citrus flair.
- Alternative Shapes: Not feeling flag shapes? Use stars, hearts, or classic circles for any occasion.
- Seasonal Adaptation: Swap the flag colors with autumnal orange and brown icing for fall celebrations.
Personally, I once made a batch using maple extract and topped them with chopped pecans for a cozy autumn vibe—it was a hit at my friends’ brunch! The recipe’s forgiving nature means you can experiment without fear.
Serving & Storage Suggestions
These gluten-free sugar cookies are best served at room temperature. That soft, tender texture really shines when they aren’t too cold or overly warm. I like to plate them on a colorful platter with fresh berries for a fun patriotic look at summer parties.
They pair wonderfully with cold milk, iced tea, or even a light sparkling lemonade to balance the sweetness. For a cozy twist, try them with a cup of herbal tea or hot cocoa.
To store, keep the cookies in an airtight container at room temperature for up to 4 days. If you want to save them longer, they freeze beautifully—just layer parchment paper between cookies and seal tightly in a freezer-safe bag for up to 3 months.
When reheating frozen cookies, let them thaw fully at room temperature. You can pop them in a warm oven (about 300°F / 150°C) for 3-5 minutes to regain that fresh-baked softness. Over time, the flavors meld nicely, making the lemon zest and vanilla notes even more pronounced.
Nutritional Information & Benefits
Each cookie (based on 24 cookies per batch) contains approximately:
| Calories | 110 |
|---|---|
| Fat | 6g |
| Carbohydrates | 14g |
| Sugar | 8g |
| Protein | 1g |
The use of gluten-free flour blends makes these cookies suitable for those with gluten intolerance or celiac disease. The addition of cornstarch and proper fats help provide a satisfying texture without relying on traditional wheat flour. Plus, the lemon zest adds a small boost of vitamin C.
For those mindful of allergens, this recipe contains dairy and eggs but can be easily adapted to be dairy-free and vegan by swapping butter and egg with plant-based alternatives. It’s a treat that fits well into many dietary lifestyles without feeling like a compromise.
Conclusion
If you’ve been searching for a perfect gluten-free sugar cookie recipe that’s soft, flavorful, and festive, this one’s for you. It’s a recipe that has stood the test of time in my kitchen and has made many celebrations extra special—without the usual gluten-free baking headaches.
Feel free to play around with the flavors, shapes, and decorations to make it your own. Honestly, baking these cookies is as fun as eating them, and I love how they bring people together, especially when dietary needs are involved.
Give these a try, and don’t forget to share your own twists or decorating tips in the comments below—I’m always excited to see your creations! Happy baking and may your kitchen smell like vanilla and celebration.
FAQs
Can I make these cookies ahead of time?
Yes! The dough can be made and chilled up to 2 days in advance. Baked cookies store well for several days or can be frozen for longer storage.
What gluten-free flour blend works best?
A 1-to-1 gluten-free baking flour blend that includes rice flour, tapioca starch, and potato starch is ideal. Avoid single flours alone for best texture.
How do I keep the cookies soft?
Don’t overbake—remove the cookies as soon as the edges start to turn golden. Also, chilling the dough helps maintain softness after baking.
Can I use this recipe for other cookie shapes?
Absolutely! This dough is sturdy and rolls well, so feel free to use any cookie cutters for different occasions.
Is it possible to make these dairy-free?
Yes! Substitute butter with a plant-based margarine and use almond or oat milk instead of dairy milk. The texture remains soft and delicious.
Pin This Recipe!
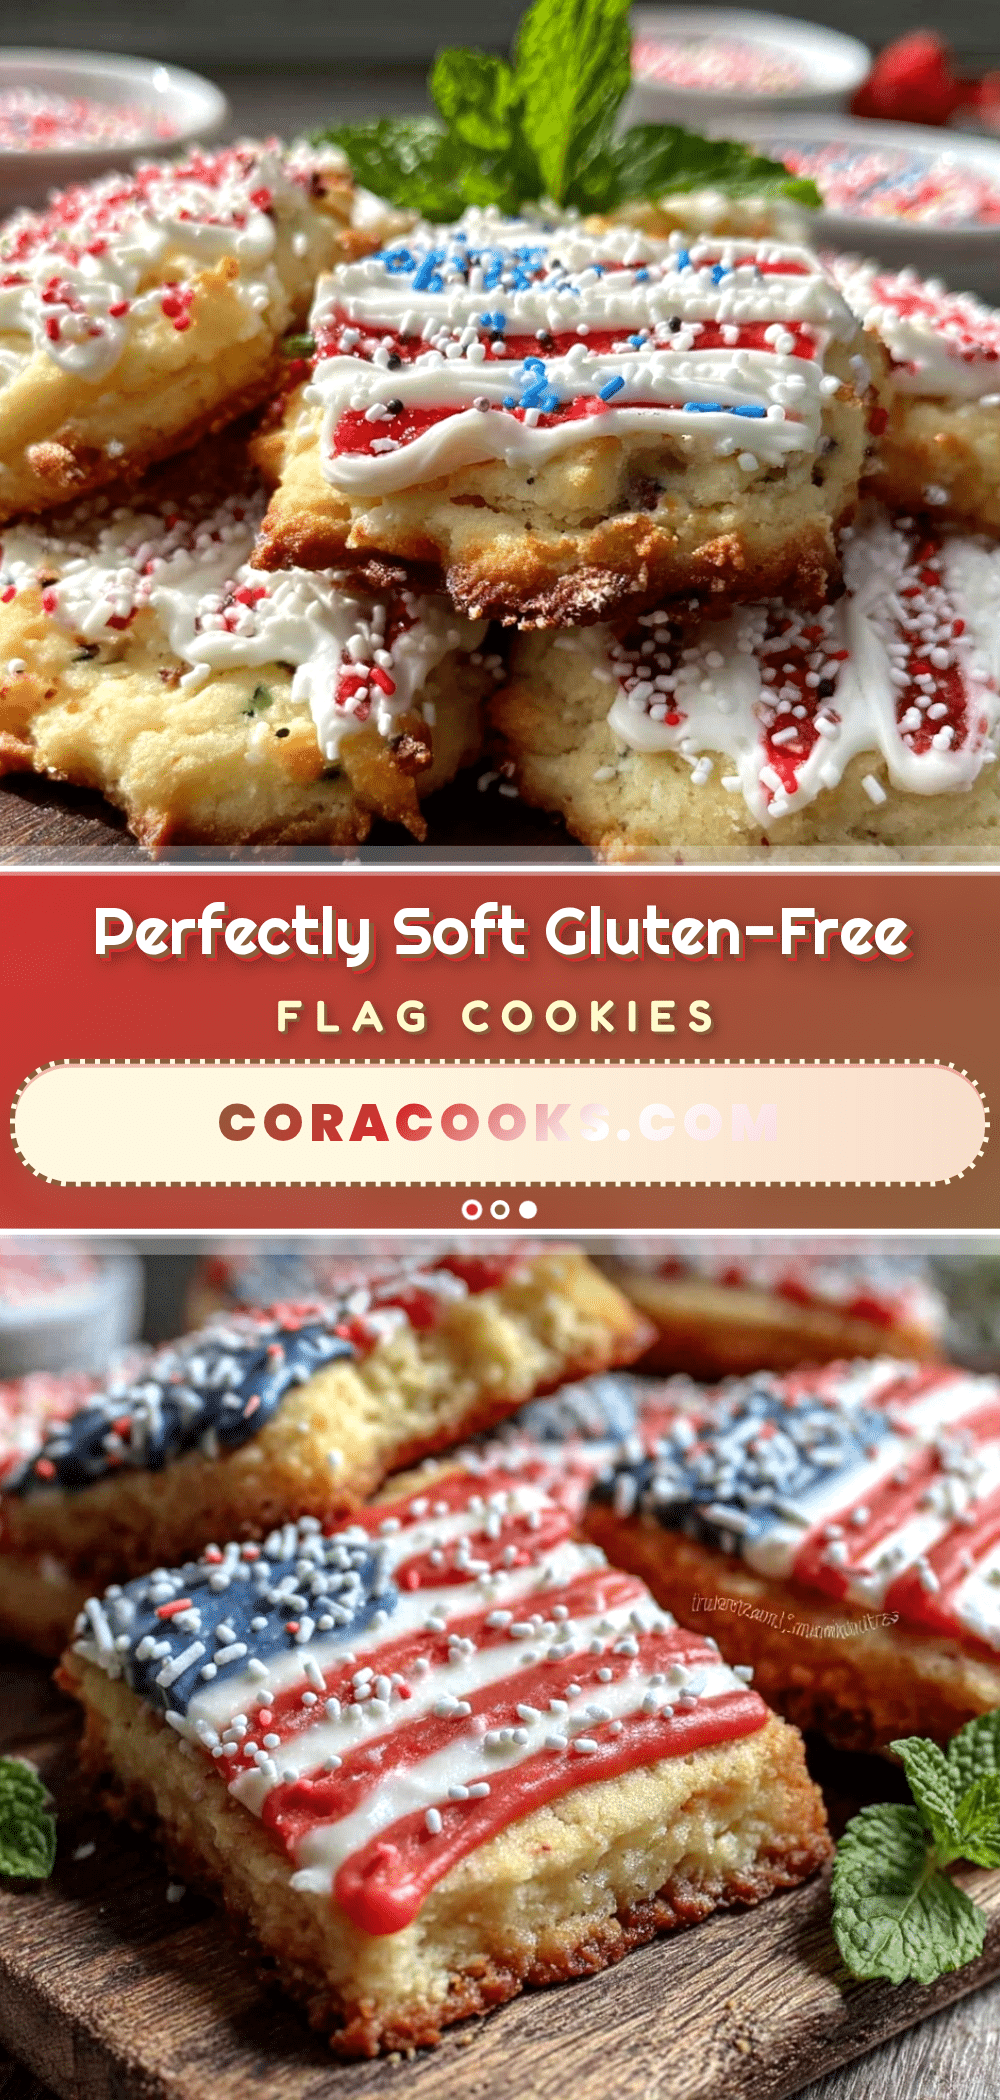
Perfect Gluten-Free Flag Sugar Cookies Easy Soft Texture Recipe
Soft, tender, and chewy gluten-free sugar cookies perfect for patriotic celebrations, made with a special gluten-free flour blend and cornstarch for ideal texture.
- Prep Time: 15 minutes
- Cook Time: 12 minutes
- Total Time: 42 minutes
- Yield: 24 cookies 1x
- Category: Dessert
- Cuisine: American
Ingredients
- 2 ½ cups (300g) gluten-free flour blend (rice flour, tapioca starch, potato starch)
- 2 tablespoons cornstarch
- 1 teaspoon baking powder
- ½ teaspoon salt
- 1 cup (227g) unsalted butter, softened
- ¾ cup (150g) granulated sugar
- 1 large egg, room temperature
- 1 ½ teaspoons pure vanilla extract
- 1 teaspoon lemon zest (optional)
- 2 tablespoons milk (dairy or almond milk)
Instructions
- Preheat your oven to 350°F (175°C). Line two baking sheets with parchment paper or silicone mats.
- In a large bowl, whisk together gluten-free flour blend, cornstarch, baking powder, and salt. Set aside.
- In another bowl, beat softened unsalted butter with granulated sugar using an electric mixer until fluffy and pale, about 3-4 minutes.
- Beat in the egg, vanilla extract, and lemon zest until combined.
- Gradually add the dry flour mixture to the wet ingredients, alternating with milk. Mix on low speed until dough comes together but is not sticky.
- Wrap the dough in plastic wrap and refrigerate for at least 30 minutes.
- Lightly flour your work surface with gluten-free flour. Roll the dough to about ¼ inch (6mm) thickness.
- Use flag-shaped cookie cutters to cut out shapes and transfer them to prepared baking sheets. Chill dough longer if too sticky.
- Bake for 10-12 minutes, or until edges just start to turn golden and centers remain soft.
- Transfer cookies to a cooling rack and let cool completely before decorating.
- Decorate with royal icing or colored glaze in red, white, and blue to create flag designs.
Notes
Chill dough for at least 30 minutes to prevent spreading and maintain shape. Use room temperature ingredients for best texture. Avoid overbaking to keep cookies soft. For dairy-free, substitute butter with vegan margarine and milk with plant-based milk. If dough is sticky, chill longer or freeze rolled dough for 10 minutes before cutting.
Nutrition
- Serving Size: 1 cookie
- Calories: 110
- Sugar: 8
- Fat: 6
- Carbohydrates: 14
- Protein: 1
Keywords: gluten-free sugar cookies, flag cookies, patriotic cookies, soft sugar cookies, gluten-free baking, easy sugar cookies, dairy-free option