Love this? Save it for later!
Share the inspiration with your friends
I was standing in the frozen foods aisle last Tuesday, staring at a bag of pre-seasoned chicken thighs, when the smell hit me. Not from the freezer case, but from somewhere deep in my memory—garlic hitting hot butter, that sharp, sweet sizzle that means something good is about to happen. And suddenly I was nine years old, standing on a step stool in my aunt Rita’s tiny kitchen, watching her drop chicken thighs into a cast iron skillet. She’d never write a recipe down, of course. She just knew—a pat of butter here, a handful of garlic cloves smashed with the side of her knife, a splash of something acidic from a bottle she never labeled. The smell was so specific, so tied to that yellow linoleum floor and the crack in the window above the sink, that I almost dropped my shopping basket. I mean, honestly, I stood there for a full minute, holding a bag of frozen broccoli, completely transported.
I haven’t seen my aunt Rita in almost eight years. She moved to Arizona for her health, and we talk on birthdays and holidays, but that kitchen—the one with the perpetually sticky counter and the drawer that always stuck—is just a memory now. I’ve tried to recreate those chicken thighs a dozen times, and I’ve never quite gotten there. But this version? This lighter one-pan garlic butter chicken thighs recipe? It’s the closest I’ve come. It’s not a copy. It’s more like a conversation with that memory, you know? A way of saying, “I remember.”
Maybe you’ve been there—chasing a taste from your past, trying to pin down something that’s half flavor and half feeling. That’s what this recipe is for me. It’s quick enough for a Tuesday night when you’re tired and hungry, but it carries just enough of that old warmth to make it feel like more than dinner. Let me show you how to make it.
Why You’ll Love This Recipe
Let’s be real for a second. I’ve tested this lighter one-pan garlic butter chicken thighs recipe at least seven times. Seven times! My family is probably tired of chicken at this point, but honestly, every version taught me something new. The first time, I used too much butter and ended up with a greasy mess. The second time, I skimped on the garlic and my husband asked, “Is this supposed to taste like… nothing?” So by version seven, I had it dialed in. This is the one.
- Quick & Easy: From fridge to table in under 30 minutes. No marinating, no complicated steps, no sink full of dishes. Just one pan and a little patience.
- Simple Ingredients: You probably have most of this already. Chicken thighs, garlic, butter, lemon, a few pantry spices. No trips to specialty stores or weird ingredients you’ll use once and forget about.
- Perfect for Busy Weeknights: This is the dinner you make when you want something that feels indulgent but doesn’t take all evening. It’s fancy enough for company, simple enough for a Tuesday.
- Lighter Without Sacrifice: I cut the butter in half and added a splash of olive oil. I used less salt and let the garlic and lemon do the heavy lifting. You won’t miss a thing.
- Crowd-Pleaser: My kids, who usually pick at their food, asked for seconds. My neighbor, who stopped by to borrow an egg, ended up staying for dinner. That’s the kind of recipe this is.
What makes this different from every other garlic butter chicken recipe out there? It’s the balance. Most versions drown the chicken in butter and call it a day. This one lets the chicken be the star—crispy skin, juicy meat, and a sauce that’s rich but not heavy. It’s comfort food that doesn’t leave you feeling like you need a nap. And honestly, that’s the sweet spot.
What Ingredients You Will Need
This recipe uses simple, wholesome ingredients to deliver bold flavor and satisfying texture without the fuss. Most of these are pantry staples, which is exactly what I look for on a busy night.
- Chicken Thighs (6 pieces, bone-in, skin-on, about 2 pounds total) — Bone-in, skin-on thighs give you the best flavor and that crispy skin we’re after. If you only have boneless, skinless thighs, the cooking time will be shorter (about 12-15 minutes), and you’ll miss the crispy skin, but it’ll still taste great.
- Unsalted Butter (2 tablespoons, divided) — I use unsalted so I can control the salt level. If you only have salted butter, just reduce the added salt by a pinch. I personally prefer Kerrygold for the richness, but any good-quality butter works.
- Olive Oil (1 tablespoon) — This helps the butter not burn and adds a little fruity flavor. Use a good extra virgin if you have it, but regular olive oil is fine.
- Garlic (6 cloves, smashed) — Don’t mince it! Smashed cloves release flavor without burning. You want them soft and golden, not black and bitter. Fresh garlic is non-negotiable here—skip the jarred stuff.
- Lemon (1 large lemon) — You’ll use both the zest and the juice. Zest it before you cut it open—trust me, it’s easier that way. The lemon brightens everything up and cuts through the richness.
- Chicken Broth (1/2 cup, low-sodium) — This deglazes the pan and becomes the base of your sauce. Low-sodium gives you control over the salt. If you only have full-sodium, cut the added salt in half.
- Fresh Thyme (4-5 sprigs) — Thyme and chicken are a classic pair. If you don’t have fresh, use 1/2 teaspoon dried, but add it earlier so it has time to rehydrate.
- Paprika (1 teaspoon) — I use sweet paprika for color and a mild warmth. Smoked paprika works too, but it’ll change the flavor profile—still delicious, just different.
- Salt (1 teaspoon, plus more for seasoning) — I use fine sea salt. If you’re using kosher salt, you might need a bit more.
- Black Pepper (1/2 teaspoon, freshly ground) — Freshly ground makes a difference. Pre-ground pepper is dusty and flat.
- Fresh Parsley (2 tablespoons, chopped) — For garnish. It adds color and a fresh finish. If you don’t have parsley, chives or even a few basil leaves work.
Ingredient Selection Tip: When buying chicken thighs, look for ones that are roughly the same size so they cook evenly. If some are huge and some are tiny, the small ones will dry out before the big ones are done. I’ve made that mistake, and it’s frustrating.
Equipment Needed
You don’t need much for this one. That’s the beauty of it.
- Large Oven-Safe Skillet (12-inch, preferably cast iron or stainless steel) — Cast iron holds heat beautifully and gives you that perfect sear. Stainless steel works too, just make sure it’s heavy-bottomed. Non-stick will work, but you won’t get as much browning. I use my trusty Lodge cast iron that my mom gave me—it’s seasoned to perfection.
- Tongs — For flipping the chicken without piercing the skin. Piercing the skin lets the juices run out, and nobody wants dry chicken.
- Microplane or Fine Grater — For zesting the lemon. A box grater works too, just be careful not to get the white pith.
- Chef’s Knife and Cutting Board — For smashing garlic and chopping parsley. Nothing fancy needed.
- Measuring Spoons — For the paprika, salt, and pepper. Eyeballing is fine for some things, but for seasoning, a little precision helps.
- Meat Thermometer (optional but recommended) — Chicken thighs are done at 165°F, but I pull them at 160°F because they’ll keep cooking as they rest. If you don’t have one, cut into the thickest part and check that the juices run clear.
Budget-Friendly Tip: Don’t have a cast iron skillet? A regular non-stick pan will work—just be careful not to overheat it. You can also finish the chicken in the oven on a baking sheet if your skillet isn’t oven-safe. Just transfer the chicken and sauce to a baking dish and pop it in the oven for 5-7 minutes.
Preparation Method
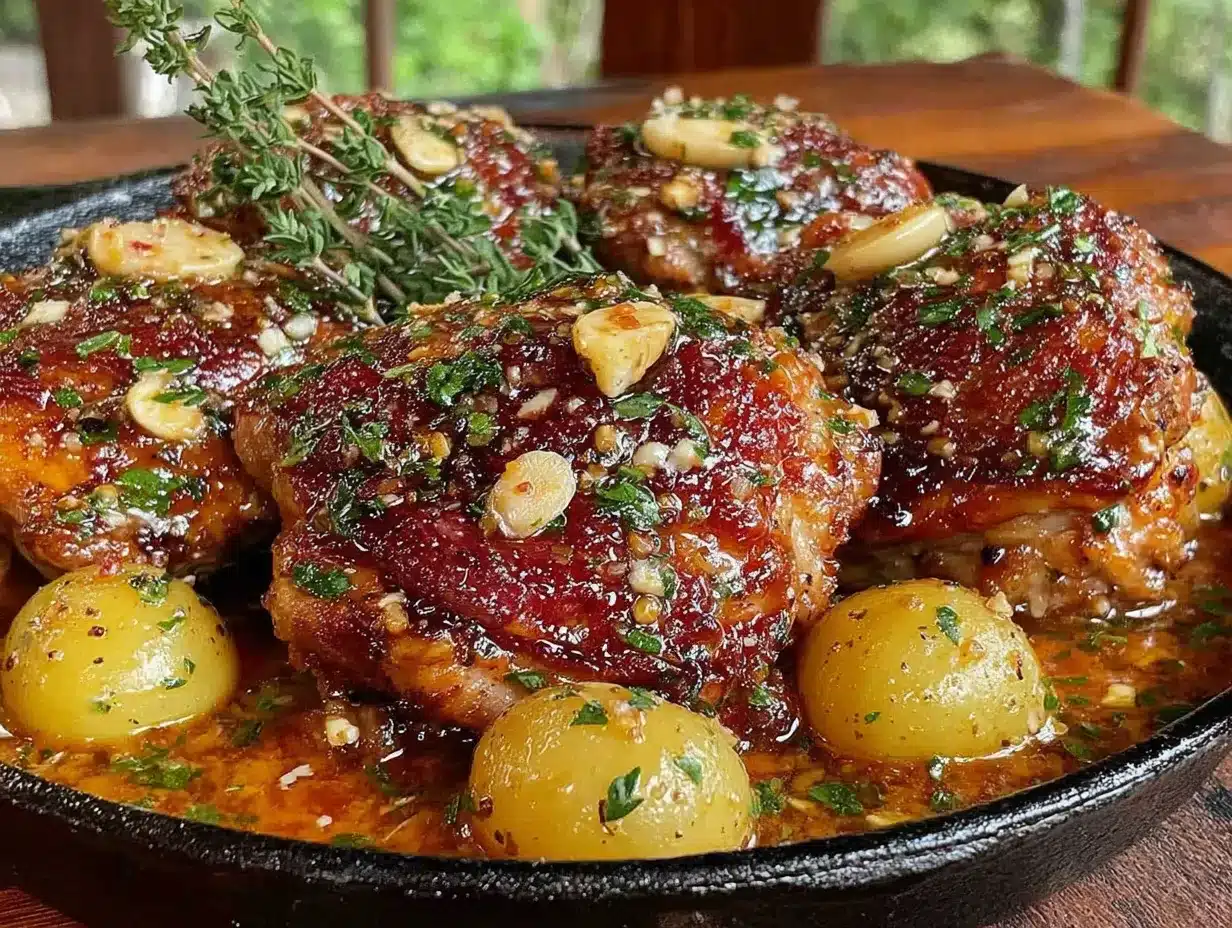
- Prep your ingredients. Take the chicken out of the fridge 15 minutes before you start—this helps it cook more evenly. Pat the thighs dry with paper towels (this is crucial for crispy skin). Smash the garlic cloves with the flat side of your knife. Zest and juice the lemon. Chop the parsley. Measure out your spices. Getting everything ready before you start cooking makes the whole process smoother. I learned this the hard way after burning garlic while frantically searching for the paprika.
- Season the chicken. In a small bowl, mix together 1 teaspoon salt, 1/2 teaspoon black pepper, and 1 teaspoon paprika. Sprinkle this mixture evenly over both sides of the chicken thighs. Don’t be shy—get it into all the nooks and crannies. Let the chicken sit for 5 minutes while your pan heats up. This gives the seasoning time to stick.
- Heat your skillet. Place your skillet over medium-high heat and add 1 tablespoon of olive oil and 1 tablespoon of butter. Swirl the pan to combine. Wait until the butter stops foaming and starts to brown just slightly—that’s your signal that the pan is hot enough. If the butter burns, wipe the pan clean and start over. Burnt butter tastes bitter and sad.
- Sear the chicken. Place the chicken thighs skin-side down in the hot skillet. Don’t crowd the pan—if your skillet is smaller, do this in batches. Let them cook undisturbed for 5-6 minutes. I know it’s tempting to peek, but resist! The skin needs that uninterrupted contact to get golden and crispy. You’ll know it’s ready when the skin releases easily from the pan. If it sticks, give it another minute.
- Flip and sear the other side. Using tongs, flip each thigh over. Cook for another 3-4 minutes. The second side won’t get as brown, and that’s fine. Remove the chicken to a plate and set aside. Don’t wipe the pan—all those browned bits are flavor gold.
- Cook the garlic. Reduce the heat to medium. Add the remaining 1 tablespoon of butter to the pan. Once it melts, add the smashed garlic cloves. Cook for 1-2 minutes, stirring frequently, until the garlic is fragrant and golden. Be careful—garlic goes from golden to burnt very quickly. If it starts to smell acrid, you’ve gone too far.
- Deglaze the pan. Pour in the 1/2 cup of chicken broth and immediately scrape up all those browned bits from the bottom of the pan with a wooden spoon or spatula. This is called deglazing, and it’s where all the flavor lives. Let the broth simmer for 2 minutes, reducing slightly. Add the lemon juice, lemon zest, and fresh thyme sprigs. Stir to combine.
- Finish cooking. Return the chicken thighs to the pan, skin-side up. Spoon some of the sauce over the top. Reduce the heat to medium-low, cover the pan, and let everything simmer together for 8-10 minutes. The chicken should reach an internal temperature of 165°F. The sauce will thicken slightly as it cooks.
- Rest and serve. Remove the pan from the heat. Let the chicken rest in the pan for 5 minutes—this lets the juices redistribute. Sprinkle with fresh parsley and serve immediately. The smell at this point is absolutely ridiculous, in the best way.
Cooking Tips & Techniques
I’ve made this lighter one-pan garlic butter chicken thighs recipe more times than I care to count, and I’ve messed it up in almost every way possible. Here’s what I learned.
Don’t skip drying the chicken. This is the number one mistake people make. Wet skin won’t crisp up—it’ll steam and turn rubbery. Take the extra 30 seconds to pat each thigh dry with paper towels. Your future self will thank you.
Let the pan get hot enough. I used to rush this step because I was hungry and impatient. The result? Pale, sad chicken that stuck to the pan. Wait until the butter is sizzling and just starting to brown. That’s the sweet spot. If you’re using a non-stick pan, medium heat is usually enough—non-stick can get damaged by high heat.
Smash, don’t mince. I know minced garlic is the default in most recipes, but for this one, smashed cloves are better. They release flavor slowly without burning, and they soften into these sweet, buttery nuggets that are honestly my favorite part of the dish. Plus, it’s faster—no fiddly mincing required.
Beware the splatter. Chicken with skin-on will splatter oil everywhere when it hits the pan. I speak from experience when I say that wearing a white shirt while making this is a bad idea. Use a splatter screen if you have one, or just accept that you’ll be wiping down your stovetop afterward.
Multitask smartly. While the chicken is searing, zest your lemon and chop your parsley. While the sauce is simmering, set the table or make a quick side dish. This recipe comes together fast, so having everything ready before you start makes it feel effortless.
One more thing. If your sauce seems too thin at the end, don’t panic. Remove the chicken to a plate and let the sauce simmer uncovered for 2-3 minutes. It’ll reduce and thicken. If it’s too thick, add a splash more broth or water. You’re in control here.
Variations & Adaptations
This recipe is flexible, and I love that about it. Here are a few ways to make it your own.
- Dairy-Free Version: Swap the butter for a high-quality vegan butter or use all olive oil. The flavor will be slightly different—less rich, more fruity—but still delicious. I’ve used Miyoko’s European-style cultured vegan butter, and it worked beautifully.
- Spicy Kick: Add 1/2 teaspoon of red pepper flakes when you add the garlic. Or, for a different kind of heat, use smoked paprika instead of sweet. My husband loves this version—he says it wakes up the dish.
- Herb Swap: No thyme? Use rosemary or oregano. Both work great. Rosemary is stronger, so use 2 sprigs instead of 4. Oregano is more delicate, so add it at the end to preserve the flavor.
- Vegetable Add-In: Throw in a handful of green beans or asparagus during the last 5 minutes of cooking. They’ll cook in the sauce and absorb all that garlic butter goodness. I did this with asparagus last spring, and it was a game-changer—one pan, complete meal.
- Lighter Lemon: If you’re not a lemon fan (are you sure?), use 1 tablespoon of white wine vinegar instead. It gives you the acidity without the citrus flavor. I tried this once when I was out of lemons, and it was surprisingly good.
- Oven-Finished Option: After searing the chicken and making the sauce, transfer the skillet to a 400°F oven for 10-12 minutes instead of simmering on the stovetop. This gives you a slightly different texture—the skin stays crisper. I do this when I’m making the recipe for company because it looks more impressive.
Serving & Storage Suggestions
This lighter one-pan garlic butter chicken thighs recipe is incredibly versatile when it comes to serving. Here’s how I like to enjoy it.
Serving Temperature: Serve the chicken hot, straight from the pan. The sauce should be warm and slightly thickened. If it’s cooled down too much, just reheat it gently on the stovetop for a minute or two.
What to Serve With It: I love this chicken with something that soaks up the sauce. Mashed potatoes are my go-to—the creamy texture against the crispy skin is perfect. Rice works great too, especially jasmine or basmati. For a lighter option, try cauliflower rice or a simple green salad. Roasted vegetables, like broccoli or zucchini, are also excellent. The sauce is the star here, so don’t waste a drop.
Storage: Store leftovers in an airtight container in the refrigerator for up to 3 days. The flavors actually get better overnight as the chicken sits in the sauce. I’ve been known to make extra just for leftovers the next day.
Reheating: The best way to reheat this chicken is in a skillet over medium-low heat. Add a splash of broth or water to loosen the sauce, cover, and warm for 5-7 minutes. The microwave works in a pinch, but it’ll make the skin soft. If you have an air fryer, you can reheat the chicken there for 3-4 minutes at 375°F to crisp the skin back up.
Freezing: This recipe freezes well. Let the chicken cool completely, then transfer to a freezer-safe container. It’ll keep for up to 3 months. Thaw overnight in the refrigerator and reheat as directed above. I’ve done this on busy weeks, and it’s a lifesaver.
Flavor Development: One thing I’ve noticed is that the garlic flavor mellows and deepens after a day in the fridge. The lemon brightens up again when you reheat it. So if you’re meal-prepping, this recipe is a solid choice—it actually gets better with time.
Nutritional Information & Benefits
I’m not a nutritionist, but I do pay attention to what goes into my body. Here’s the breakdown for one serving (one chicken thigh with sauce):
| Nutrient | Amount per Serving |
|---|---|
| Calories | ~320 |
| Protein | 28g |
| Fat | 22g |
| Saturated Fat | 8g |
| Carbohydrates | 3g |
| Fiber | 0g |
| Sugar | 1g |
| Sodium | 480mg |
Health Benefits: Chicken thighs are a great source of protein and contain important nutrients like iron, zinc, and B vitamins. Garlic is known for its anti-inflammatory properties and may support immune health. Lemon provides vitamin C and antioxidants. By using less butter and more olive oil, we’ve reduced the saturated fat while keeping the flavor. This recipe is also naturally low in carbohydrates, making it suitable for low-carb and keto-friendly diets (just skip the potatoes on the side).
Dietary Considerations: This recipe is gluten-free, nut-free, and egg-free. For dairy-free, use the substitution mentioned above. Always check your specific ingredients for hidden allergens, especially broths and spice blends.
My Take: I love that this recipe feels indulgent without actually being heavy. It’s the kind of meal that makes you feel good—not just because it tastes amazing, but because you know you’re eating something that’s balanced and nourishing. That’s a win in my book.
FAQs
Can I use chicken breasts instead of thighs?
Yes, but you’ll need to adjust the cooking time. Chicken breasts cook faster and can dry out easily. Sear them for 3-4 minutes per side, then simmer for 6-8 minutes until they reach 165°F. I recommend pounding them to an even thickness first so they cook evenly.
How do I prevent the garlic from burning?
Keep the heat at medium, not high, and stir the garlic constantly. Smashed cloves are more forgiving than minced garlic, but they can still burn if you walk away. If the garlic starts to smell acrid or turns dark brown, remove it immediately and start over with fresh cloves.
Can I make this recipe ahead of time?
Absolutely. You can sear the chicken and make the sauce up to a day in advance. Store everything in the refrigerator, then reheat gently on the stovetop when you’re ready to serve. The flavors will be even better the next day.
What’s the best pan to use for this recipe?
Cast iron is my favorite because it holds heat well and gives you a beautiful sear. Stainless steel works great too. Avoid non-stick if possible—it won’t give you the same browning, and high heat can damage the coating.
How do I get the skin extra crispy?
Pat the chicken completely dry before seasoning. Don’t move it while it’s searing—let it cook undisturbed for 5-6 minutes. And make sure your pan is hot enough before adding the chicken. If the skin still isn’t crispy enough, you can finish the chicken under the broiler for 1-2 minutes, watching closely so it doesn’t burn.
Conclusion
This lighter one-pan garlic butter chicken thighs recipe is more than just a quick dinner—it’s a little piece of comfort that fits into a busy life. It reminds me that you don’t need complicated techniques or fancy ingredients to make something truly satisfying. Sometimes, all you need is good chicken, a hot pan, and a little patience.
I hope you give this recipe a try. Maybe you’ll make it exactly as written, or maybe you’ll add your own twist—a different herb, a splash of wine, a handful of vegetables. That’s the beauty of cooking, isn’t it? You take the bones of a recipe and make it your own. If you do try it, I’d love to hear how it turned out. Leave a comment below, tag me in your photos, or just send me a note. Happy cooking, friends!
Pin This Recipe!
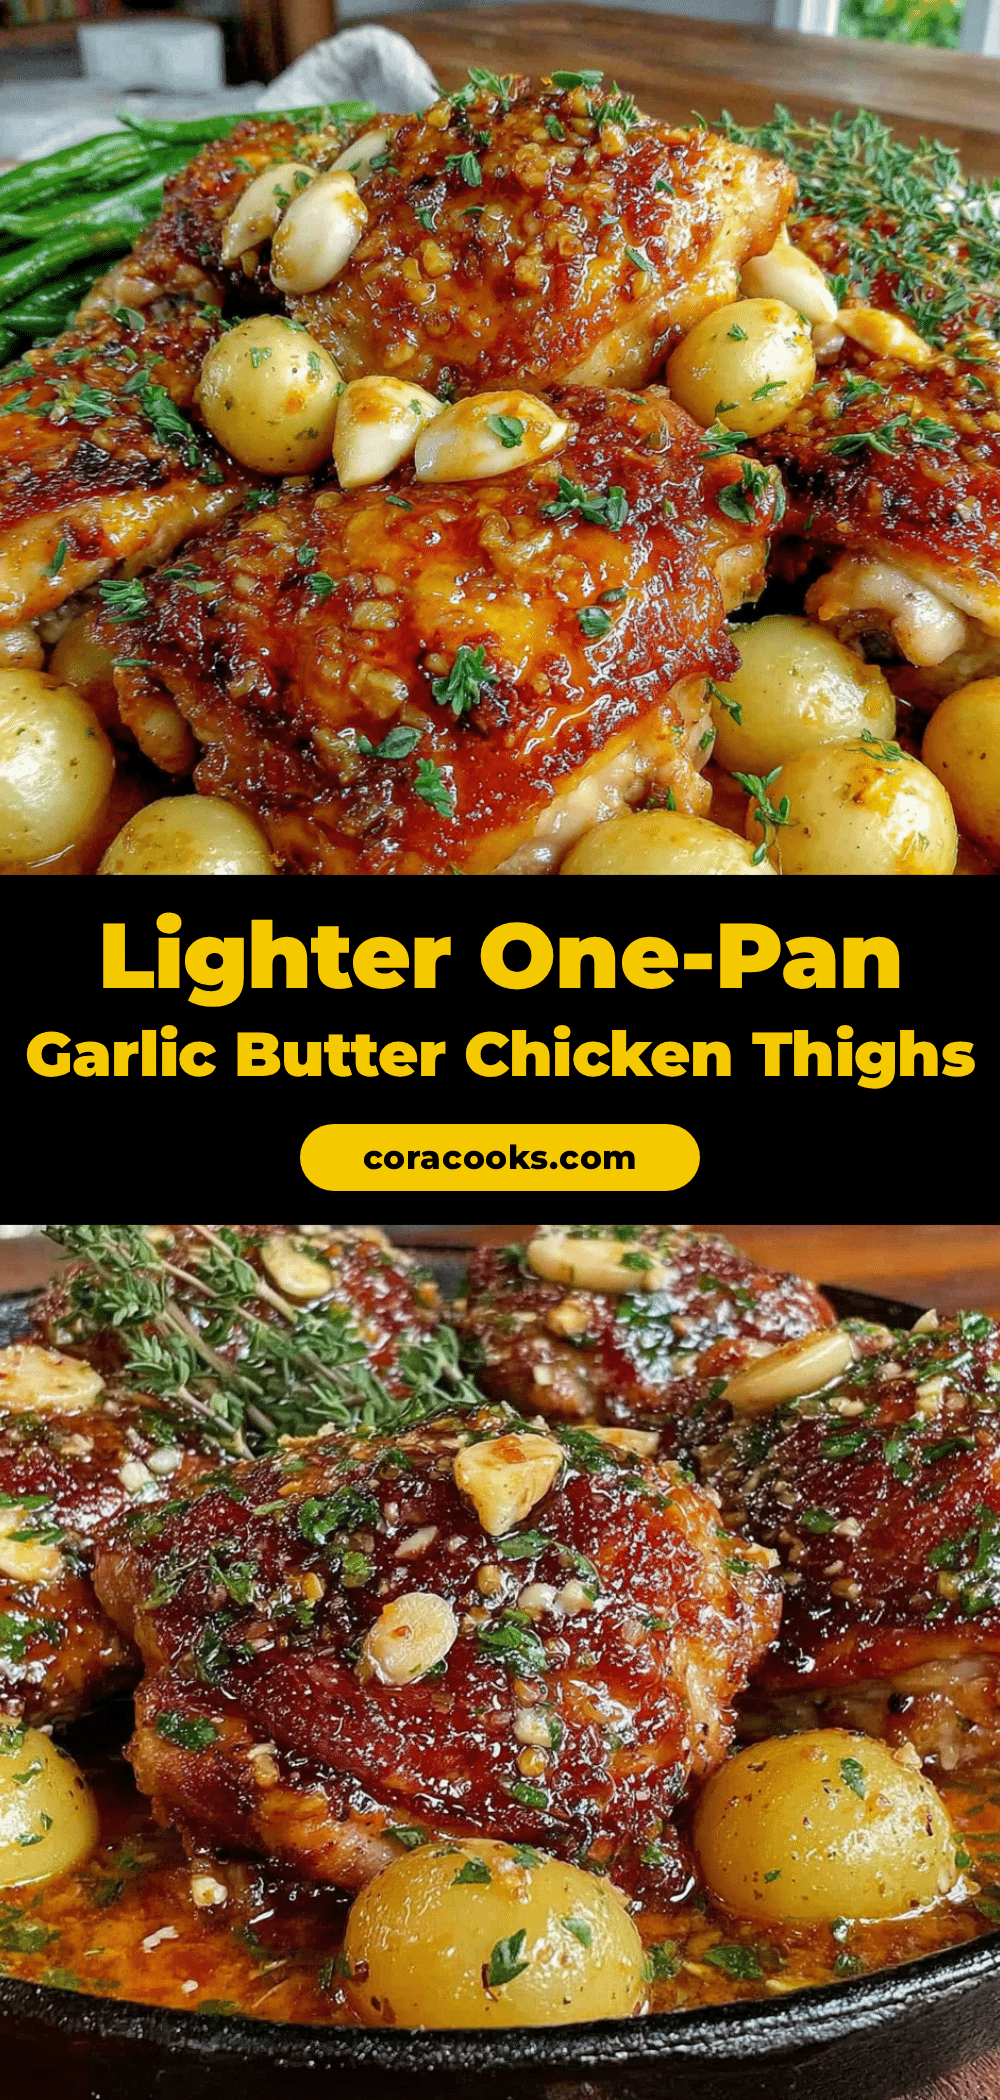
Lighter One-Pan Garlic Butter Chicken Thighs: Easy 30-Minute Dinner

A quick and easy one-pan dinner featuring crispy-skinned chicken thighs in a rich garlic butter sauce with lemon and thyme. This lighter version uses less butter and more olive oil for a balanced, comforting meal that’s ready in under 30 minutes.
- Prep Time: 10 minutes
- Cook Time: 20 minutes
- Total Time: 30 minutes
- Yield: 6 servings 1x
- Category: Main Course
- Cuisine: American
Ingredients
- 6 bone-in, skin-on chicken thighs (about 2 pounds total)
- 2 tablespoons unsalted butter, divided
- 1 tablespoon olive oil
- 6 cloves garlic, smashed
- 1 large lemon (zested and juiced)
- 1/2 cup low-sodium chicken broth
- 4–5 sprigs fresh thyme
- 1 teaspoon sweet paprika
- 1 teaspoon fine sea salt, plus more for seasoning
- 1/2 teaspoon freshly ground black pepper
- 2 tablespoons fresh parsley, chopped
Instructions
- Prep your ingredients. Take the chicken out of the fridge 15 minutes before starting. Pat the thighs dry with paper towels. Smash the garlic cloves with the flat side of a knife. Zest and juice the lemon. Chop the parsley. Measure out the spices.
- Season the chicken. In a small bowl, mix together 1 teaspoon salt, 1/2 teaspoon black pepper, and 1 teaspoon paprika. Sprinkle evenly over both sides of the chicken thighs. Let sit for 5 minutes.
- Heat your skillet. Place a large oven-safe skillet (12-inch, preferably cast iron or stainless steel) over medium-high heat. Add 1 tablespoon olive oil and 1 tablespoon butter. Swirl to combine. Wait until the butter stops foaming and starts to brown slightly.
- Sear the chicken. Place the chicken thighs skin-side down in the hot skillet. Cook undisturbed for 5-6 minutes until the skin is golden and crispy and releases easily from the pan.
- Flip and sear the other side. Using tongs, flip each thigh over. Cook for another 3-4 minutes. Remove the chicken to a plate and set aside. Do not wipe the pan.
- Cook the garlic. Reduce heat to medium. Add the remaining 1 tablespoon butter to the pan. Once melted, add the smashed garlic cloves. Cook for 1-2 minutes, stirring frequently, until fragrant and golden.
- Deglaze the pan. Pour in 1/2 cup chicken broth and scrape up the browned bits from the bottom of the pan. Let simmer for 2 minutes. Add the lemon juice, lemon zest, and fresh thyme sprigs. Stir to combine.
- Finish cooking. Return the chicken thighs to the pan, skin-side up. Spoon some sauce over the top. Reduce heat to medium-low, cover, and simmer for 8-10 minutes until the chicken reaches an internal temperature of 165°F.
- Rest and serve. Remove from heat. Let the chicken rest in the pan for 5 minutes. Sprinkle with fresh parsley and serve immediately.
Notes
Pat the chicken completely dry for crispy skin. Don’t crowd the pan when searing. Smashed garlic cloves release flavor without burning. If sauce is too thin, simmer uncovered for 2-3 minutes. For dairy-free, use vegan butter or all olive oil. Leftovers keep in the refrigerator for up to 3 days and freeze for up to 3 months.
Nutrition
- Serving Size: 1 chicken thigh with
- Calories: 320
- Sugar: 1
- Sodium: 480
- Fat: 22
- Saturated Fat: 8
- Carbohydrates: 3
- Protein: 28
Keywords: garlic butter chicken, one-pan chicken, chicken thighs, easy dinner, 30-minute meal, weeknight dinner, lighter chicken recipe