Love this? Save it for later!
Share the inspiration with your friends
It was 11:47 PM on a random Wednesday in early December, and I had a desperate need for a chocolate peppermint cookie. Not just any cookie, but the kind that snaps when you bite into it and leaves that cool tingle on your tongue. I didn’t have the usual stick-and-a-half of butter a normal recipe would demand, but I had a half-empty tub of Greek yogurt, some dark cocoa powder that was about to expire, and the crazy idea that maybe—just maybe—I could make this work without the full fat.
Honestly, I was tired. The Christmas lights were up but unlit, the tree was leaning slightly to the left, and I was wearing sweatpants that had seen better days. But that craving? It was non-negotiable. I started pulling ingredients out of the pantry, muttering to myself about ratios and wondering if this was going to be a triumph or a total disaster. I mean, I’ve been known to make some questionable decisions after 10 PM, but swapping butter for yogurt in a thumbprint cookie felt like a gamble.
The dough came together surprisingly well—soft, a little sticky, and deeply chocolatey. I pressed my thumb into each little ball, feeling that weirdly satisfying indent form, and spooned a tiny dollop of peppermint jam (leftover from a summer project) into each one. When they came out of the oven, the kitchen smelled like a candy cane had married a brownie. That first bite? The edges were crisp, the center was tender, and the peppermint cut through the richness like a cold breeze. I stood there at the counter, eating one after another, thinking, “I might actually be onto something here.”
Maybe you’ve been there—wanting something indulgent but not wanting to undo a week of decent eating. Or maybe you just love chocolate and peppermint together (who doesn’t?). Either way, these lightened-up chocolate peppermint thumbprint cookies became my go-to holiday treat that year, and I haven’t made the heavy version since. They’re proof that a late-night kitchen experiment can turn into something you actually want to share.
Why You’ll Love This Recipe
Let me tell you why these cookies are worth every single calorie—and why you won’t miss the extra butter and sugar. I’ve tested this recipe about seven times (my coworkers were very happy taste-testers), and each batch got better. Here’s what makes them special:
- Quick & Easy: From start to finish, these cookies take about 30 minutes. Perfect for those last-minute holiday parties or when you need a dessert in a hurry.
- Simple Ingredients: You probably have most of these in your kitchen right now. No weird specialty flours or obscure extracts—just real food.
- Perfect for Holiday Gatherings: They look fancy with that little thumbprint and jam center, but they’re secretly simple. Great for cookie swaps, potlucks, or gifting.
- Crowd-Pleaser: I’ve served these to kids, adults, and even my picky aunt who “doesn’t like healthy desserts.” She asked for the recipe.
- Unbelievably Delicious: The texture is spot-on—crispy edges, soft centers, and that burst of peppermint in every bite. You honestly won’t believe they’re lightened up.
What makes these different from every other chocolate peppermint cookie out there? It’s the yogurt. Using Greek yogurt instead of a full stick of butter cuts the fat significantly while keeping the dough tender and moist. Plus, I use a touch of coconut oil for that necessary richness, so you get the best of both worlds. This isn’t just another version—it’s the version I make every single Christmas now.
These cookies are the kind that make you close your eyes after the first bite. They’re comfort food reimagined—healthier, faster, but with the same soul-soothing satisfaction. Perfect for impressing guests without stress, or turning a simple Tuesday night into something memorable.
What Ingredients You Will Need
This recipe uses simple, wholesome ingredients to deliver bold chocolate flavor and a refreshing peppermint kick without the heavy butter and sugar load. Most of these are pantry staples, which makes these cookies perfect for spontaneous baking sessions.
- Whole wheat pastry flour, 1 ¼ cups (150g) – (adds fiber and tenderness; all-purpose flour works too)
- Unsweetened cocoa powder, ½ cup (40g) – I prefer Ghirardelli for its deep, rich flavor
- Baking soda, ½ teaspoon
- Salt, ¼ teaspoon
- Coconut oil, ¼ cup (60ml), melted and cooled – (adds richness without dairy; use refined for neutral flavor)
- Greek yogurt, ¼ cup (60g), plain or vanilla – (replaces butter; use full-fat for best texture)
- Granulated sugar, ½ cup (100g) – (or coconut sugar for a less refined option)
- Large egg, 1, room temperature
- Vanilla extract, 1 teaspoon
- Peppermint extract, ½ teaspoon – (look for pure extract, not artificial flavoring)
- Dark chocolate chips, ¼ cup (45g), melted – (for the filling; use 60% cacao or higher)
- Crushed peppermint candies, 2 tablespoons – (for garnish; crush them yourself for best texture)
For the filling, you can also use seedless raspberry jam or peppermint-flavored dark chocolate melting wafers if you want a different twist. I’ve tried both, and they’re equally delicious. Just make sure your jam isn’t too runny, or it’ll spread out during baking.
One sourcing tip: Look for cocoa powder that’s labeled “Dutch-processed” for a smoother, less acidic chocolate flavor. If you only have natural cocoa powder, that’s fine—just don’t substitute baking powder for baking soda, as the acidity levels differ.
Equipment Needed
You don’t need a fancy bakery setup for these cookies. Here’s what I use:
- Mixing bowls – One large, one medium. I use glass bowls because they don’t hold onto odors.
- Whisk – For combining dry ingredients evenly.
- Electric hand mixer – Or a sturdy wooden spoon if you want an arm workout. The mixer makes creaming easier.
- Baking sheet – A light-colored, rimmed sheet works best to prevent over-browning.
- Parchment paper – Non-negotiable for easy cleanup and even baking.
- Small cookie scoop – A 1-tablespoon scoop ensures uniform cookies. I’ve used a teaspoon in a pinch.
- Thumbprint tool – Your actual thumb works fine, but a ½ teaspoon measure makes perfectly even indents.
- Cooling rack – Lets air circulate so cookies don’t get soggy bottoms.
If you don’t have parchment paper, a silicone baking mat is a great alternative. I’ve also used aluminum foil in a pinch, but the cookies tend to brown faster on the bottom, so watch them closely.
Preparation Method
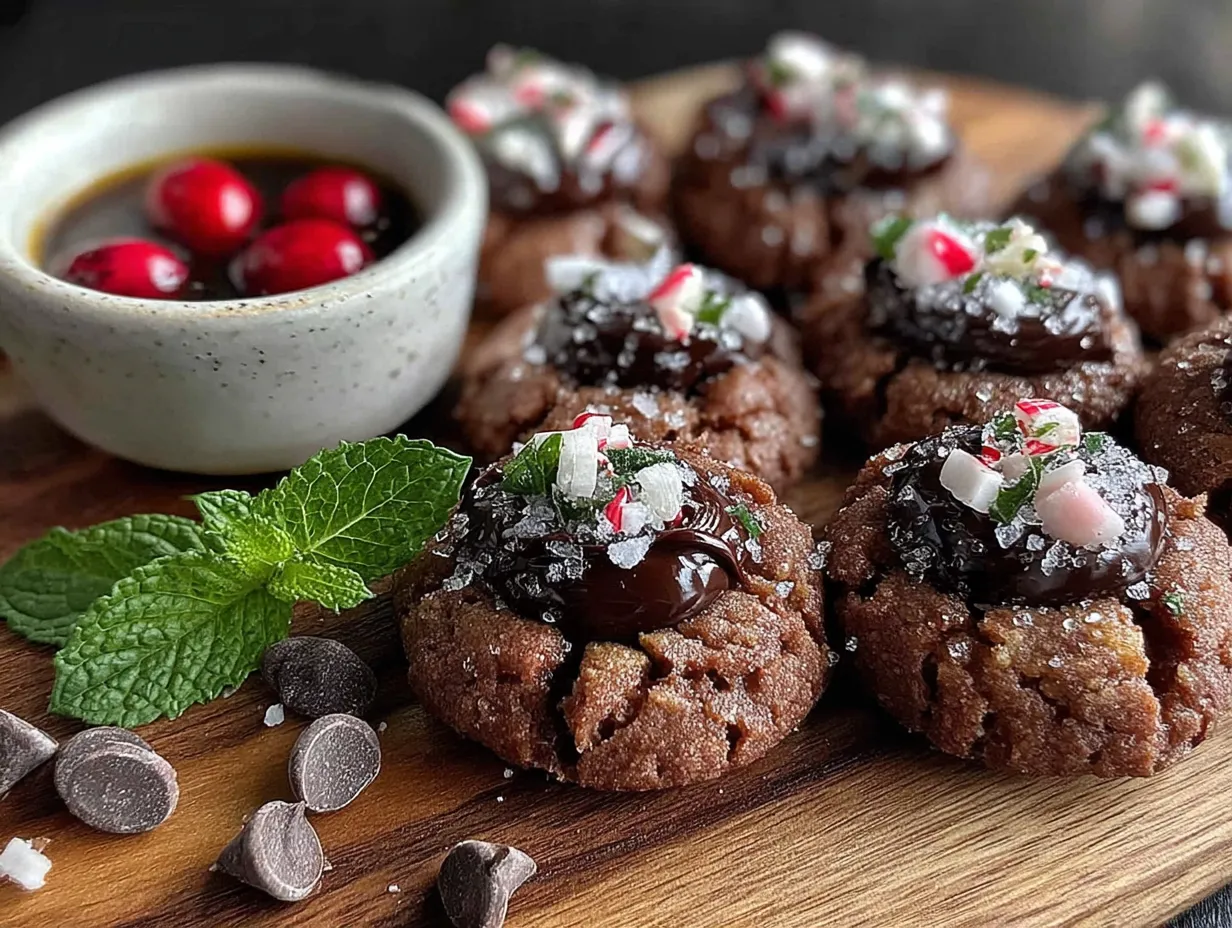
- Preheat and prep: Preheat your oven to 350°F (175°C). Line your baking sheet with parchment paper. This step is crucial—don’t skip it, or the cookies will stick.
- Mix dry ingredients: In a medium bowl, whisk together the whole wheat pastry flour, cocoa powder, baking soda, and salt. Make sure there are no lumps of cocoa—I use a fork to break them up. Set aside.
- Cream wet ingredients: In a large bowl, beat the melted coconut oil, Greek yogurt, and granulated sugar together until smooth. This should take about 2 minutes with an electric mixer on medium speed. The mixture will look a bit grainy from the sugar, but that’s okay.
- Add egg and extracts: Beat in the egg, vanilla extract, and peppermint extract until fully combined. The batter will smell amazing at this point—like a peppermint mocha. Scrape down the sides of the bowl with a spatula.
- Combine wet and dry: Gradually add the dry ingredients to the wet mixture, mixing on low speed until just combined. Do not overmix! Stop as soon as you no longer see streaks of flour. The dough will be soft and slightly sticky—that’s the yogurt working its magic.
- Chill the dough: Cover the bowl with plastic wrap and refrigerate for 15-20 minutes. This step is important because it firms up the coconut oil, making the dough easier to handle. I’ve skipped this before, and the cookies spread into flat, sad discs. Learn from my mistake.
- Shape the cookies: Scoop out tablespoon-sized portions of dough (about 15g each) and roll them into balls. Place them on the prepared baking sheet, spacing them about 2 inches apart. You should get about 18-20 cookies.
- Make the thumbprints: Using your thumb or the back of a ½ teaspoon measure, gently press an indent into the center of each dough ball. Don’t press all the way through—you want a little well, not a hole. If the dough cracks around the edges, just smooth it gently with your fingers.
- Bake: Bake for 9-11 minutes, or until the edges are set and the tops look slightly cracked. The centers will still look soft—that’s fine. They’ll continue to set as they cool. Pro tip: Rotate the baking sheet halfway through for even baking.
- Cool: Let the cookies cool on the baking sheet for 5 minutes, then transfer them to a cooling rack. This resting time is crucial—if you move them too soon, they’ll fall apart.
- Fill and garnish: While the cookies are still slightly warm, spoon about ½ teaspoon of melted dark chocolate into each thumbprint. Sprinkle a pinch of crushed peppermint candies on top while the chocolate is still wet. Let the chocolate set completely before serving, about 20 minutes.
Cooking Tips & Techniques
I’ve made these lightened-up chocolate peppermint thumbprint cookies enough times to know where things can go wrong. Here’s what I’ve learned:
Don’t skip the chill time: I know it’s tempting to rush, but cold dough is non-negotiable here. Coconut oil has a lower melting point than butter, so if the dough is warm, the cookies will spread into thin, crispy disks instead of staying puffy. I once tried to save time by skipping the fridge, and my cookies looked like chocolate pancakes. Not cute.
Measure your flour correctly: Scooping flour directly with the measuring cup packs it down, leading to dry, crumbly dough. Instead, spoon the flour into the cup and level it off with a knife. This simple trick makes a huge difference in texture.
Watch the baking time: Ovens vary wildly. My old oven would bake these perfectly at 10 minutes, but my new one runs hot, so I check at 8 minutes. Look for set edges and slightly cracked tops—the centers should still look soft. Overbaked cookies lose that tender texture and become dry.
Make the indents deep enough: The indent will puff up slightly during baking, so press a little deeper than you think you need. If you fill them while they’re warm, the chocolate will melt slightly and create a beautiful, glossy pool.
Crush peppermint candies in a bag: Place the candies in a zip-top bag and bash them with a rolling pin. It’s faster than chopping, and you get a nice mix of fine powder and small chunks. Plus, it’s oddly satisfying.
Variations & Adaptations
One of the best things about this recipe is how flexible it is. Here are some variations I’ve tried and loved:
- Gluten-Free Version: Swap the whole wheat pastry flour for a 1:1 gluten-free baking flour blend. I’ve used King Arthur Measure for Measure with great results. Add 1 tablespoon of milk if the dough seems too dry.
- Vegan Adaptation: Use a flax egg (1 tablespoon ground flaxseed + 3 tablespoons water) and dairy-free yogurt (coconut or soy-based). The texture will be slightly less tender, but still delicious.
- Different Fillings: Instead of dark chocolate, try seedless raspberry jam, apricot preserves, or even a dollop of Nutella. For a peppermint twist, use white chocolate mixed with a drop of peppermint extract.
- Double Chocolate: Add ¼ cup of mini chocolate chips to the dough before baking. It turns these into a double-chocolate peppermint dream.
- Spiced Version: Add ½ teaspoon of cinnamon and a pinch of cayenne pepper to the dry ingredients. The warmth of the spices pairs beautifully with the cool peppermint.
My personal favorite variation? I once made these with a dollop of cranberry orange chutney in the center instead of chocolate. The tartness cut through the richness perfectly, and it felt extra festive. Don’t be afraid to experiment—that’s half the fun of baking.
Serving & Storage Suggestions
These cookies are best served at room temperature, but I’ve been known to eat them straight from the fridge (they get a nice, firm snap). For presentation, arrange them on a festive plate and dust with a little powdered sugar—it makes them look like they came from a bakery.
They pair beautifully with a cup of hot cocoa, a peppermint mocha, or even a glass of cold milk. If you’re serving them at a holiday party, place them next to a plate of classic sugar cookies for a nice contrast.
Storage: Store the cookies in an airtight container at room temperature for up to 5 days. Layer them between sheets of parchment paper to prevent the chocolate from smudging. I’ve also frozen them successfully—place the baked, unfilled cookies in a freezer-safe bag for up to 3 months. Thaw at room temperature, then add the chocolate filling and peppermint garnish fresh.
Reheating: If you want that just-baked warmth, pop a cookie in the microwave for 8-10 seconds. The chocolate will get slightly melty, and the peppermint aroma will fill the air. Honestly, it’s dangerous how good they are warm.
One note: The flavors actually develop over time. Day-old cookies taste more deeply chocolatey and the peppermint mellows out. So if you can resist eating them all immediately, they’ll be even better tomorrow.
Nutritional Information & Benefits
Here’s the estimated nutrition per cookie (based on 20 cookies):
- Calories: 95
- Fat: 4.5g
- Saturated Fat: 3g
- Carbohydrates: 13g
- Fiber: 2g
- Sugar: 7g
- Protein: 2.5g
Compared to a traditional chocolate thumbprint cookie (which can clock in at 150-180 calories each), these are a significant improvement. The Greek yogurt adds protein and calcium while reducing saturated fat, and the whole wheat pastry flour provides more fiber than all-purpose flour.
Dark chocolate is rich in antioxidants, and peppermint has been shown to aid digestion—so these cookies are practically health food, right? (Okay, maybe not, but they’re definitely a smarter choice for holiday indulgence.)
These cookies are vegetarian and can be made gluten-free and vegan with the substitutions mentioned earlier. They contain dairy (yogurt) and eggs, so keep that in mind for allergies.
Conclusion
These lightened-up chocolate peppermint thumbprint cookies have become my holiday signature, and I think they deserve a spot in your recipe box too. They’re proof that you don’t need a pound of butter to make a cookie that feels indulgent. Whether you’re baking for a crowd, a cookie swap, or just yourself on a quiet Wednesday night, these deliver on every level.
I love how customizable they are—swap the filling, play with the spices, make them your own. That’s the beauty of a simple recipe done right. And honestly? The fact that they’re lighter means you can eat three without guilt. I mean, you could. I’m not judging.
So go ahead, preheat that oven, and give these a try. I’d love to hear how they turn out—leave a comment below and tell me your favorite variation, or tag me in your photos if you share them. Happy baking, friend. You’ve got this.
Frequently Asked Questions
Can I use all-purpose flour instead of whole wheat pastry flour?
Absolutely. Use the same amount (1 ¼ cups or 150g). The cookies will be slightly less tender and have a bit less fiber, but they’ll still taste great. If you want to keep it lighter, you can use half all-purpose and half whole wheat pastry flour.
Why did my cookies spread too much?
This usually happens if the dough wasn’t chilled long enough, or if your coconut oil was too warm when you mixed it. Make sure to chill the dough for the full 15-20 minutes. If your kitchen is warm, pop it in the fridge for 30 minutes instead.
Can I use butter instead of coconut oil?
Yes, but it won’t be as lightened up. Use ¼ cup (½ stick) of unsalted butter, softened. The cookies will be richer and spread a bit more, so you might need to chill the dough longer. I’ve tested it both ways, and the coconut oil version is my favorite for texture.
How do I crush peppermint candies without making a mess?
Place the candies in a sturdy zip-top bag and seal it. Wrap the bag in a kitchen towel (to muffle the sound), then bash them with a rolling pin or the bottom of a heavy pan. You’ll get a mix of fine powder and small chunks—perfect for sprinkling.
Can I freeze the dough instead of baking all at once?
Definitely. Scoop the dough into balls and place them on a parchment-lined baking sheet. Freeze until solid, then transfer to a freezer-safe bag. When you’re ready to bake, place the frozen dough balls on a baking sheet, let them sit for 5 minutes, then press the indents and bake as directed, adding 2-3 minutes to the baking time.
Pin This Recipe!
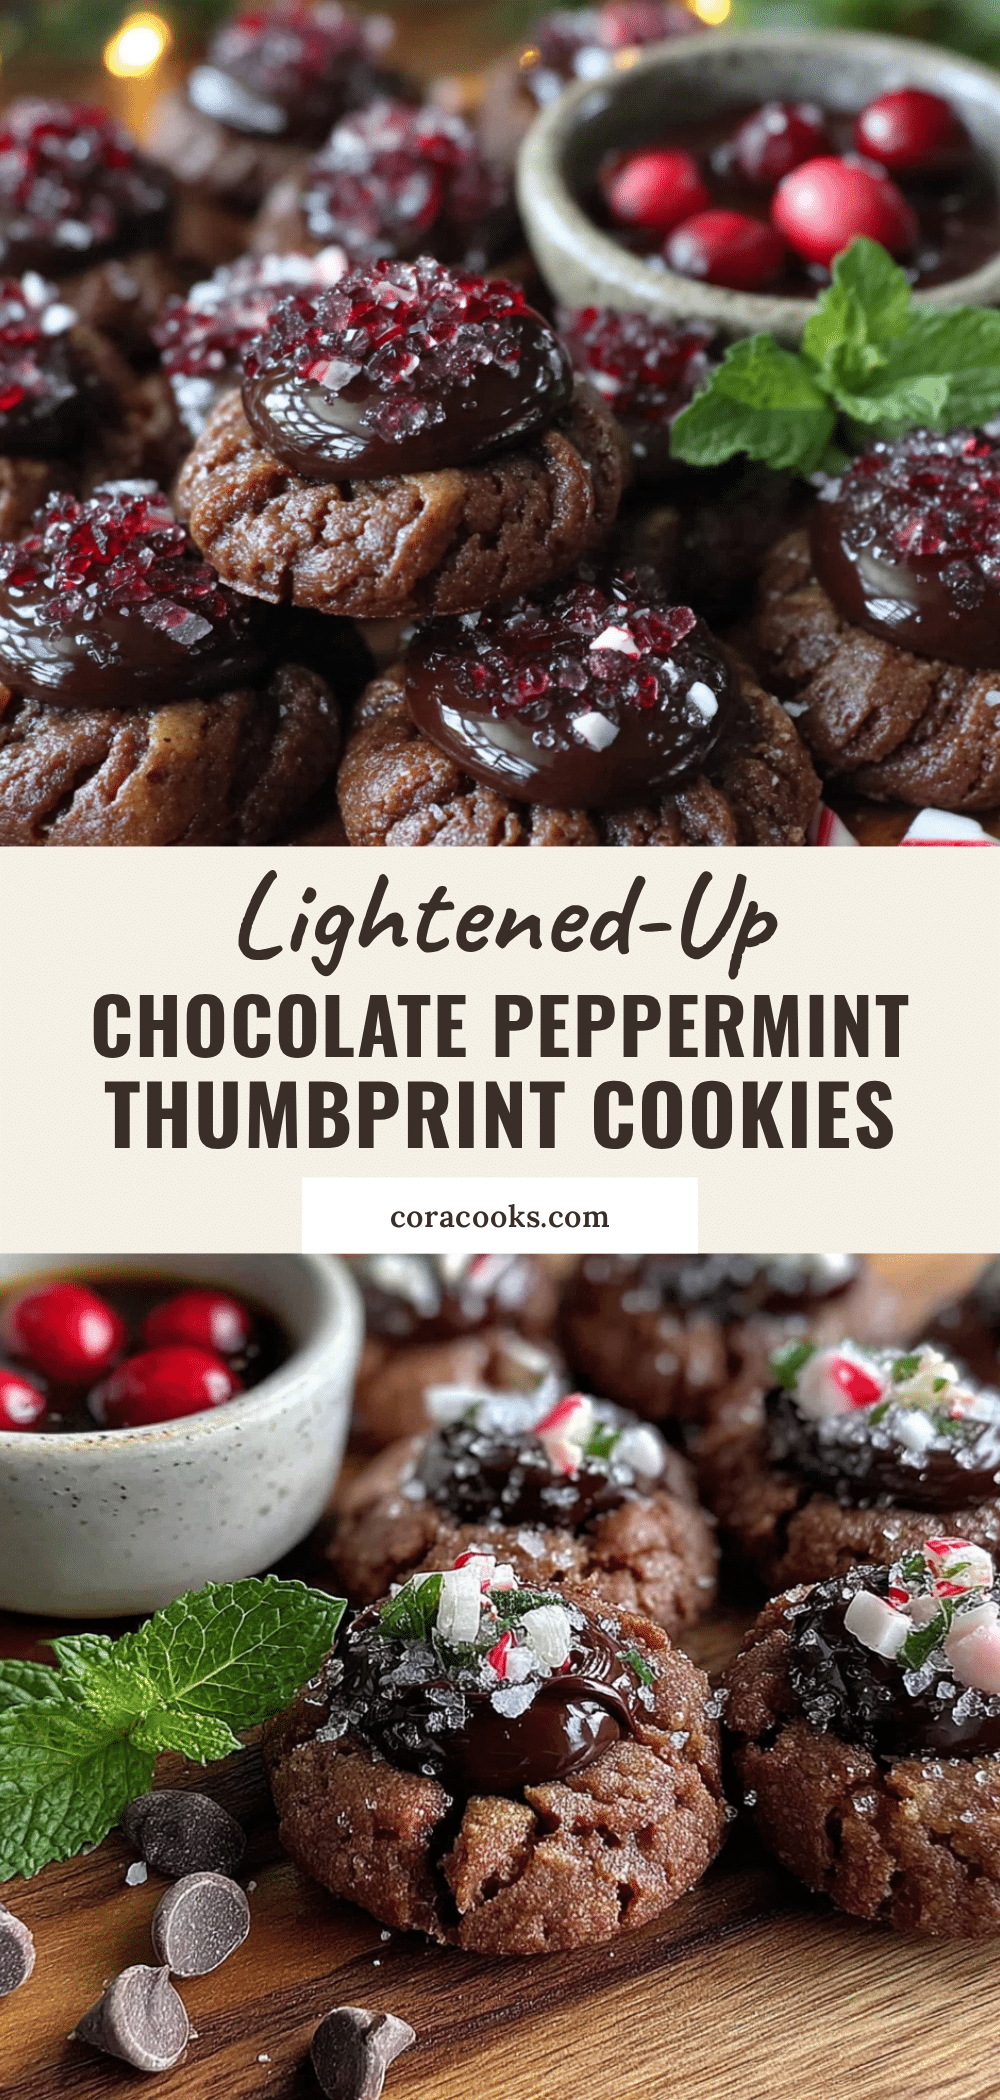
Lightened-Up Chocolate Peppermint Thumbprint Cookies

These lightened-up chocolate peppermint thumbprint cookies are a healthier holiday treat made with Greek yogurt and coconut oil instead of butter. They feature a rich chocolate cookie base with a dark chocolate filling and crushed peppermint garnish, perfect for cookie swaps or festive gatherings.
- Prep Time: 15 minutes
- Cook Time: 10 minutes
- Total Time: 30 minutes
- Yield: 20 cookies 1x
- Category: Dessert
- Cuisine: American
Ingredients
- 1 ¼ cups (150g) whole wheat pastry flour
- ½ cup (40g) unsweetened cocoa powder
- ½ teaspoon baking soda
- ¼ teaspoon salt
- ¼ cup (60ml) coconut oil, melted and cooled
- ¼ cup (60g) Greek yogurt, plain or vanilla
- ½ cup (100g) granulated sugar
- 1 large egg, room temperature
- 1 teaspoon vanilla extract
- ½ teaspoon peppermint extract
- ¼ cup (45g) dark chocolate chips, melted
- 2 tablespoons crushed peppermint candies
Instructions
- Preheat oven to 350°F (175°C). Line a baking sheet with parchment paper.
- In a medium bowl, whisk together whole wheat pastry flour, cocoa powder, baking soda, and salt.
- In a large bowl, beat melted coconut oil, Greek yogurt, and granulated sugar until smooth, about 2 minutes.
- Beat in egg, vanilla extract, and peppermint extract until fully combined.
- Gradually add dry ingredients to wet mixture, mixing on low speed until just combined. Do not overmix.
- Cover bowl with plastic wrap and refrigerate dough for 15-20 minutes.
- Scoop tablespoon-sized portions of dough (about 15g each) and roll into balls. Place on prepared baking sheet, spacing 2 inches apart.
- Using thumb or ½ teaspoon measure, press an indent into the center of each dough ball.
- Bake for 9-11 minutes, until edges are set and tops look slightly cracked. Rotate baking sheet halfway through.
- Let cookies cool on baking sheet for 5 minutes, then transfer to a cooling rack.
- While cookies are still slightly warm, spoon about ½ teaspoon melted dark chocolate into each thumbprint. Sprinkle crushed peppermint candies on top. Let chocolate set completely before serving, about 20 minutes.
Notes
Don’t skip chilling the dough; it prevents spreading. Measure flour correctly by spooning into cup and leveling off. Make indents deep enough as they puff up during baking. Crush peppermint candies in a zip-top bag with a rolling pin. Cookies can be stored in an airtight container at room temperature for up to 5 days or frozen for up to 3 months.
Nutrition
- Serving Size: 1 cookie
- Calories: 95
- Sugar: 7
- Sodium: 75
- Fat: 4.5
- Saturated Fat: 3
- Carbohydrates: 13
- Fiber: 2
- Protein: 2.5
Keywords: chocolate peppermint cookies, thumbprint cookies, lightened-up cookies, healthy holiday cookies, Greek yogurt cookies