Love this? Save it for later!
Share the inspiration with your friends
I was digging through the back of my pantry last Tuesday, looking for a bag of chocolate chips I knew I had stashed somewhere, when a dusty bottle of peppermint extract rolled out from behind a can of beans. I picked it up, twisted off the cap, and that sharp, cool smell hit me — and suddenly I was seven years old, standing on a step stool in my Aunt Carla’s tiny kitchen, watching her stir a pot of something that made the whole house smell like Christmas morning. She was making her famous hot cocoa mix, but she’d always add a drop of that extract to her coffee, winking at me like she was getting away with something. I can still see the chipped blue mug she used, the one with the little snowflake that was half worn off. I tried to recreate that coffee creamer she made once, years after she moved to Arizona, and honestly? The first batch was a disaster. Too minty, too sweet, and it curdled in my mug. But I kept at it, because that memory of her standing there in her fuzzy slippers, humming along to the radio, was worth the mess. And now, after a lot of trial and error — and a few very patient taste-testers in my own kitchen — I’ve got a homemade peppermint mocha coffee creamer that’s kid-approved, budget-friendly, and tastes like a hug in a mug. Maybe you’ve been there, chasing a flavor from your past that you can’t quite put your finger on. Well, let me tell you, this is it.
Why You’ll Love This Recipe
Let’s be real for a second. Store-bought coffee creamers are expensive, and half the time they’re filled with stuff I can’t even pronounce. This homemade peppermint mocha creamer is the opposite of all that. It’s made with simple, real ingredients you probably already have in your fridge and pantry, and it comes together in about ten minutes. No fancy trips to the grocery store, no spending six bucks on a bottle that’s gone in a week.
- Quick & Easy: From start to finish, you’re looking at under ten minutes. Seriously. Stir, simmer, and you’re done.
- Simple Ingredients: Whole milk, sweetened condensed milk, cocoa powder, and peppermint extract. That’s it. No weird gums or preservatives.
- Perfect for Family Mornings: This creamer turns a regular cup of coffee into a special treat that even the kids will beg for (in their hot cocoa, of course).
- Crowd-Pleaser: I’ve brought this to holiday brunches and book club meetings, and it always gets the same reaction — “Wait, you made this yourself?”
- Unbelievably Delicious: The balance of rich chocolate and cool peppermint is spot-on. It’s not too sweet, not too minty — it’s just right.
What makes this recipe different from every other copycat version out there? It’s the technique. Instead of just dumping everything in a jar and shaking it, you gently heat the milk and cocoa powder together, which blooms the chocolate flavor and makes the creamer silky smooth. No gritty texture, no chalky aftertaste. It’s a small step, but it makes a world of difference. And honestly, it’s the kind of recipe that makes you feel like a kitchen wizard, even on a Tuesday morning when you’re still half asleep.
What Ingredients You Will Need
This recipe uses simple, wholesome ingredients to deliver that bold, festive flavor without any of the fuss. Most of these are pantry staples, so you can whip up a batch whenever the craving hits.
- 2 cups whole milk — (adds richness and a creamy texture; you can use 2% or oat milk in a pinch, but whole milk really makes it luxurious)
- 1 can (14 ounces) sweetened condensed milk — (this is your sweetener and your creaminess booster; don’t skip it or try to sub it with regular milk and sugar — it won’t be the same)
- 3 tablespoons unsweetened cocoa powder — (I prefer Ghirardelli or Hershey’s Special Dark for a deeper chocolate flavor; regular works fine too)
- 1 teaspoon peppermint extract — (start with this amount and adjust to taste; some brands are stronger than others)
- 1/2 teaspoon vanilla extract — (optional, but it rounds out the flavors beautifully)
- Pinch of salt — (trust me on this — it balances the sweetness and makes the chocolate pop)
For the cocoa powder, look for one that’s Dutch-processed if you can find it. It has a smoother, less bitter flavor that works perfectly here. If you only have natural cocoa powder, that’s fine too — just make sure you’re using a good quality brand. I’ve tried this with store-brand cocoa, and while it works, the flavor isn’t as rich.
As for the peppermint extract, be careful. Not all extracts are created equal. Some are very strong, and a little goes a long way. I recommend starting with 3/4 teaspoon, tasting it, and adding more if you want a stronger mint kick. You can always add more, but you can’t take it out.
If you’re looking for a dairy-free option, you can swap the whole milk for full-fat oat milk or canned coconut milk. The sweetened condensed milk is harder to replace, but there are dairy-free versions available at most grocery stores now. Just be aware that the texture will be slightly thinner.
Equipment Needed
You don’t need any fancy gadgets for this recipe, which is part of why I love it so much. Here’s what you’ll need:
- Medium saucepan — Any pot will do, but a heavy-bottomed one helps prevent scorching the milk. I use my old stainless steel one that’s seen better days, and it works just fine.
- Whisk — A good whisk is your best friend here. It helps incorporate the cocoa powder without leaving lumps. A silicone whisk is great because it won’t scratch your pot.
- Measuring cups and spoons — For accuracy, especially with the peppermint extract. Eyeballing it can lead to a toothpaste-flavored disaster.
- Glass jar or bottle — For storing the finished creamer. A mason jar works perfectly, or you can reuse an old store-bought creamer bottle (just wash it really well first).
- Funnel — Optional, but it makes pouring the hot creamer into a jar much less messy. I learned this the hard way after spilling half a batch down the side of my counter.
That’s it. No blender, no food processor, no fancy immersion circulator. Just basic kitchen tools that you probably already own. If you don’t have a funnel, you can use a measuring cup with a spout to pour carefully. Or, you know, just be very, very steady.
Preparation Method
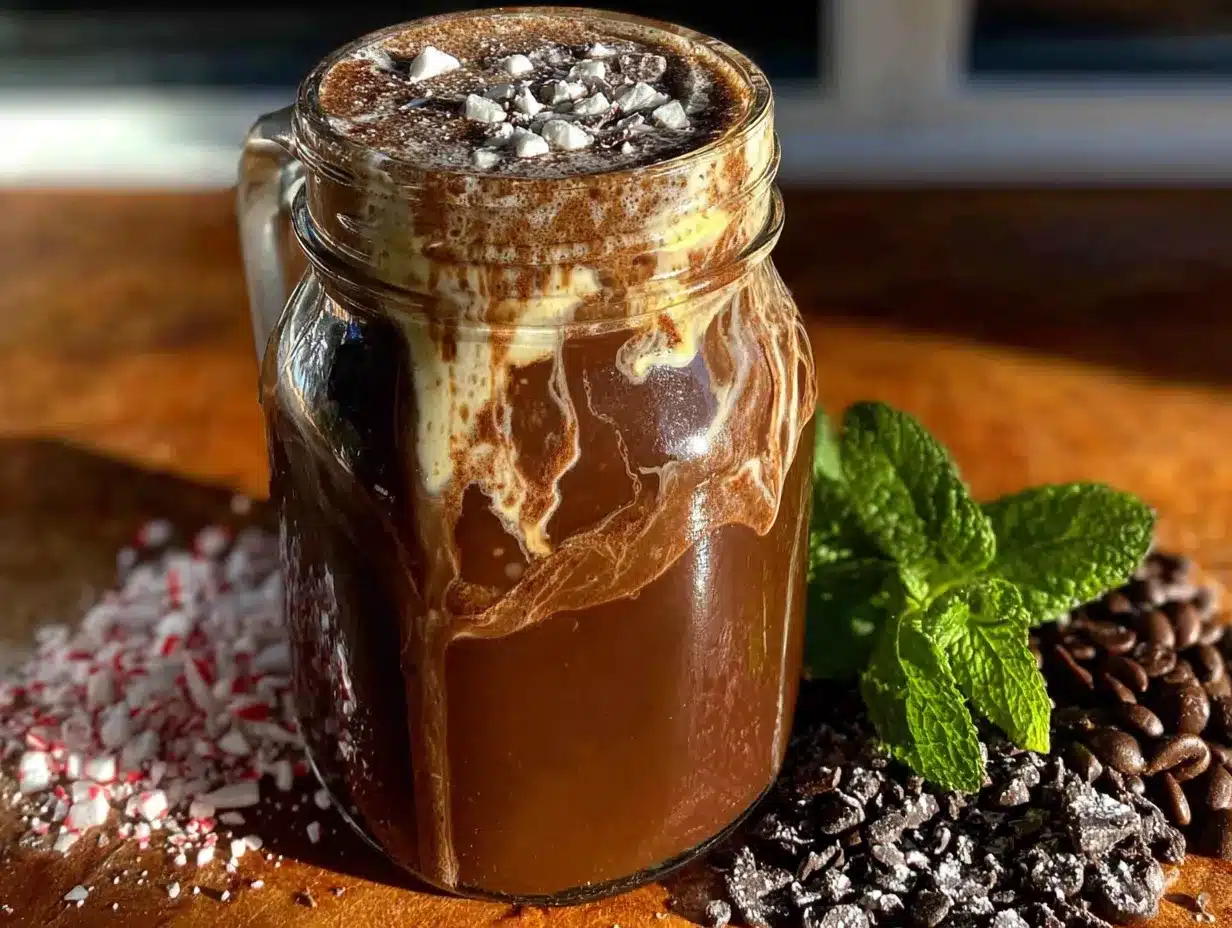
Alright, let’s get to the good part. Here’s how you make this homemade peppermint mocha creamer, step by step.
- Combine the milk and cocoa powder. In your medium saucepan, whisk together the 2 cups of whole milk and 3 tablespoons of unsweetened cocoa powder. Make sure you whisk it really well — you want to break up any clumps of cocoa powder before you turn on the heat. I usually whisk for about 30 seconds, scraping the bottom and sides of the pan.
- Heat gently over medium-low heat. Place the saucepan on the stove and turn the heat to medium-low. You don’t want to boil the milk — just warm it gently. Stir occasionally with your whisk, scraping the bottom to prevent the milk from scorching. This should take about 3 to 4 minutes. You’ll know it’s ready when you see tiny bubbles forming around the edges of the pan, but the milk isn’t bubbling in the center.
- Add the sweetened condensed milk. Once the milk is warm, pour in the entire can of sweetened condensed milk. Whisk continuously until it’s fully incorporated and the mixture is smooth and glossy. This should take about a minute. The creamer will look a little thin at this point, but don’t worry — it will thicken as it cools.
- Remove from heat and add the extracts. Take the saucepan off the stove. Add 1 teaspoon of peppermint extract, 1/2 teaspoon of vanilla extract (if using), and a pinch of salt. Whisk everything together until it’s well combined. Give it a quick taste. Is it minty enough? If you want a stronger peppermint kick, add another 1/4 teaspoon. Just be careful — it’s easier to add more than to fix an overpowering mint flavor.
- Cool and store. Let the creamer cool in the saucepan for about 10 to 15 minutes. It will thicken slightly as it cools. Once it’s warm but not hot, pour it into your glass jar or bottle using a funnel. Seal it with a lid and let it come to room temperature completely before refrigerating. This usually takes about an hour.
- Refrigerate for at least 2 hours before using. I know, I know — you want to try it right now. But trust me, the flavors need time to meld together. The creamer will taste much better after it’s had a chance to chill. It will also thicken up nicely in the fridge, giving you that rich, creamy texture you’re after.
One thing I learned the hard way: don’t crank up the heat to speed things along. High heat can scorch the milk, giving your creamer a burnt, unpleasant flavor. Low and slow is the way to go. Also, if you notice any little bits of cocoa powder floating on top after you’ve whisked everything together, don’t panic. Just strain the creamer through a fine-mesh sieve as you pour it into your jar. Problem solved.
Cooking Tips & Techniques
After making this creamer about a dozen times (and messing it up at least three of those times), I’ve picked up a few tricks that make the process smoother and the results better.
Bloom the cocoa powder. This is the single most important tip I can give you. When you first whisk the cocoa powder into the cold milk, let it sit for about a minute before you turn on the heat. This allows the cocoa to hydrate and “bloom,” which releases its full chocolate flavor. It’s the same technique you’d use for baking a chocolate cake, and it works just as well here. The difference in flavor is subtle but noticeable — your creamer will taste richer and more complex.
Use a thermometer if you have one. Milk should never be heated above 180°F (82°C) for this recipe. Anything higher can cause it to curdle or develop a skin on top. If you don’t have a thermometer, just watch for those tiny bubbles around the edge of the pan. That’s your cue to move on to the next step.
Taste as you go. I know it’s tempting to just dump everything in and hope for the best, but tasting at each stage is crucial. The sweetness level, the mint intensity, the chocolate depth — you want to adjust these things while the creamer is still in the pot, not after it’s bottled and chilled. I always taste it right after adding the extracts, and I’ve learned to trust my palate. If something feels off, I adjust it right then.
Don’t skip the salt. I mentioned this in the ingredients section, but it bears repeating. A tiny pinch of salt doesn’t make the creamer salty — it enhances the chocolate flavor and balances the sweetness. Without it, the creamer can taste flat and one-dimensional. It’s a small addition that makes a big difference.
Multitask wisely. This recipe comes together so quickly that you don’t really need to multitask. But if you’re making it as part of a bigger meal prep session, you can measure out your ingredients while the milk is warming. Just don’t walk away from the stove — milk can go from perfectly warm to scorched in about 30 seconds.
Variations & Adaptations
One of the best things about this creamer is how easy it is to customize. Here are a few variations I’ve tried and loved.
Dark Chocolate Peppermint Mocha Creamer: Swap the regular cocoa powder for Dutch-processed or dark cocoa powder. The flavor is deeper, slightly less sweet, and absolutely divine. I use this version when I’m feeling fancy or when I want a more grown-up coffee experience.
White Chocolate Peppermint Creamer: Replace the cocoa powder with 1/2 cup of white chocolate chips. Add them along with the sweetened condensed milk and whisk until melted and smooth. This version is sweeter and creamier, and it’s a huge hit with the kids. Just be careful not to overheat the white chocolate, or it can seize up and get grainy.
Dairy-Free Peppermint Mocha Creamer: Use full-fat oat milk or canned coconut milk instead of whole milk, and look for a dairy-free sweetened condensed milk. The texture will be slightly thinner, but the flavor is still fantastic. I’ve made this for a friend who’s lactose intolerant, and she said it was better than the store-bought version.
Extra Minty Version: If you’re a peppermint fanatic like my sister-in-law, you can increase the peppermint extract to 1 1/2 teaspoons. Just be aware that this can overpower the chocolate flavor, so you might want to increase the cocoa powder to 4 tablespoons to keep things balanced.
Mocha Coconut Creamer: Add 1/2 teaspoon of coconut extract along with the vanilla and peppermint. It gives the creamer a subtle tropical twist that’s surprisingly good. I stumbled on this combination by accident when I grabbed the wrong bottle from my spice cabinet, and it turned out to be a happy mistake.
Serving & Storage Suggestions
This creamer is best served chilled, straight from the fridge. Shake or stir it well before each use, because the cocoa powder can settle at the bottom over time. I like to add about 2 to 3 tablespoons to a standard 8-ounce cup of hot coffee, but you can adjust the amount based on how sweet and creamy you like your coffee.
For a real treat, use this creamer in a peppermint mocha latte. Just brew a double shot of espresso (or a very strong cup of coffee), heat up some milk, and add a generous pour of this creamer. Top with whipped cream and a crushed candy cane for the full coffee shop experience — at a fraction of the price.
Storage: Keep the creamer in a sealed glass jar or bottle in the refrigerator. It will stay fresh for up to 10 days. I usually write the date on the lid with a permanent marker so I don’t forget when I made it. After about a week, the peppermint flavor starts to fade slightly, so it’s best to use it within the first 7 days.
Freezing: You can freeze this creamer in ice cube trays for up to 3 months. Once frozen, pop the cubes out and store them in a freezer-safe bag. When you’re ready to use one, just drop a cube into your hot coffee and stir until melted. It’s a great way to have a stash ready for busy mornings or unexpected guests.
Reheating: If you prefer your creamer warm, you can gently reheat it in a small saucepan over low heat, stirring constantly. Don’t microwave it — the high heat can cause the milk to separate and the texture to become grainy.
One thing I love about this creamer is that the flavors actually get better after a day or two in the fridge. The chocolate and peppermint meld together into something that tastes more cohesive and well-rounded. So don’t be discouraged if it doesn’t taste perfect on day one — give it a little time.
Nutritional Information & Benefits
This homemade peppermint mocha creamer is definitely a treat, but it’s made with real ingredients and no artificial anything. Here’s the approximate nutritional breakdown for a 2-tablespoon serving:
- Calories: 85
- Fat: 2g
- Carbohydrates: 15g
- Sugar: 14g
- Protein: 2g
Compared to store-bought peppermint mocha creamers, which can have up to 120 calories and 20 grams of sugar per serving, this version is actually a bit lighter. Plus, you’re getting real milk, which provides calcium and vitamin D, and cocoa powder, which is rich in antioxidants.
If you’re watching your sugar intake, you can reduce the amount of sweetened condensed milk by half and add a splash of heavy cream to make up for the lost richness. The flavor won’t be as sweet, but it will still be delicious.
This recipe is naturally vegetarian and can be made gluten-free by checking that your extracts and cocoa powder are certified gluten-free (most are, but it’s always worth a look). It’s also nut-free as written, making it a safe choice for school lunches or parties.
I’m not a nutritionist, and I don’t pretend to be one. But I do believe that food should be enjoyed without guilt, and this creamer fits that philosophy perfectly. It’s a small indulgence that makes everyday moments feel a little more special.
Conclusion
So there you have it — a homemade peppermint mocha coffee creamer that’s easy, affordable, and absolutely delicious. It’s the kind of recipe that turns a regular Tuesday morning into something to look forward to, and it costs a fraction of what you’d pay at the coffee shop or grocery store.
I love this recipe because it’s forgiving. You can tweak it, adjust it, and make it your own without worrying about ruining it. It’s also a great way to use up that bottle of peppermint extract that’s been sitting in your pantry since last December. And honestly, there’s something deeply satisfying about pouring a splash of something you made yourself into your morning coffee.
I’d love to hear how this creamer turns out for you. Did you add extra peppermint? Try the white chocolate version? Let me know in the comments below — and if you have a favorite variation, please share it. We’re all in this together, chasing those flavors that remind us of the people and places we love.
Now go make yourself a cup of coffee. You’ve earned it.
Frequently Asked Questions
Can I use skim milk or 2% milk instead of whole milk?
Yes, you can. The creamer will be slightly thinner and less rich, but it will still taste great. If you use skim milk, you might want to add an extra tablespoon of sweetened condensed milk to boost the creaminess.
How long does this creamer last in the fridge?
It will stay fresh for up to 10 days when stored in a sealed container in the refrigerator. I recommend using it within the first week for the best flavor.
Can I make this creamer without a stove?
Absolutely. You can heat the milk and cocoa powder in a microwave-safe bowl in 30-second intervals, stirring between each, until warm. Then whisk in the remaining ingredients. Just be careful not to overheat the milk, as it can curdle in the microwave.
My creamer tastes too minty. Can I fix it?
If you’ve already made the full batch and it’s too minty, try adding a splash of plain milk or a little extra sweetened condensed milk to dilute the peppermint flavor. You can also mix it with a plain creamer to balance it out. Next time, start with less extract and add more to taste.
Can I use this creamer in iced coffee?
Yes, it works beautifully in iced coffee. Just pour it over ice along with your cold brew or chilled coffee. The creamer might separate slightly if the coffee is very cold, so give it a good stir before drinking.
Pin This Recipe!
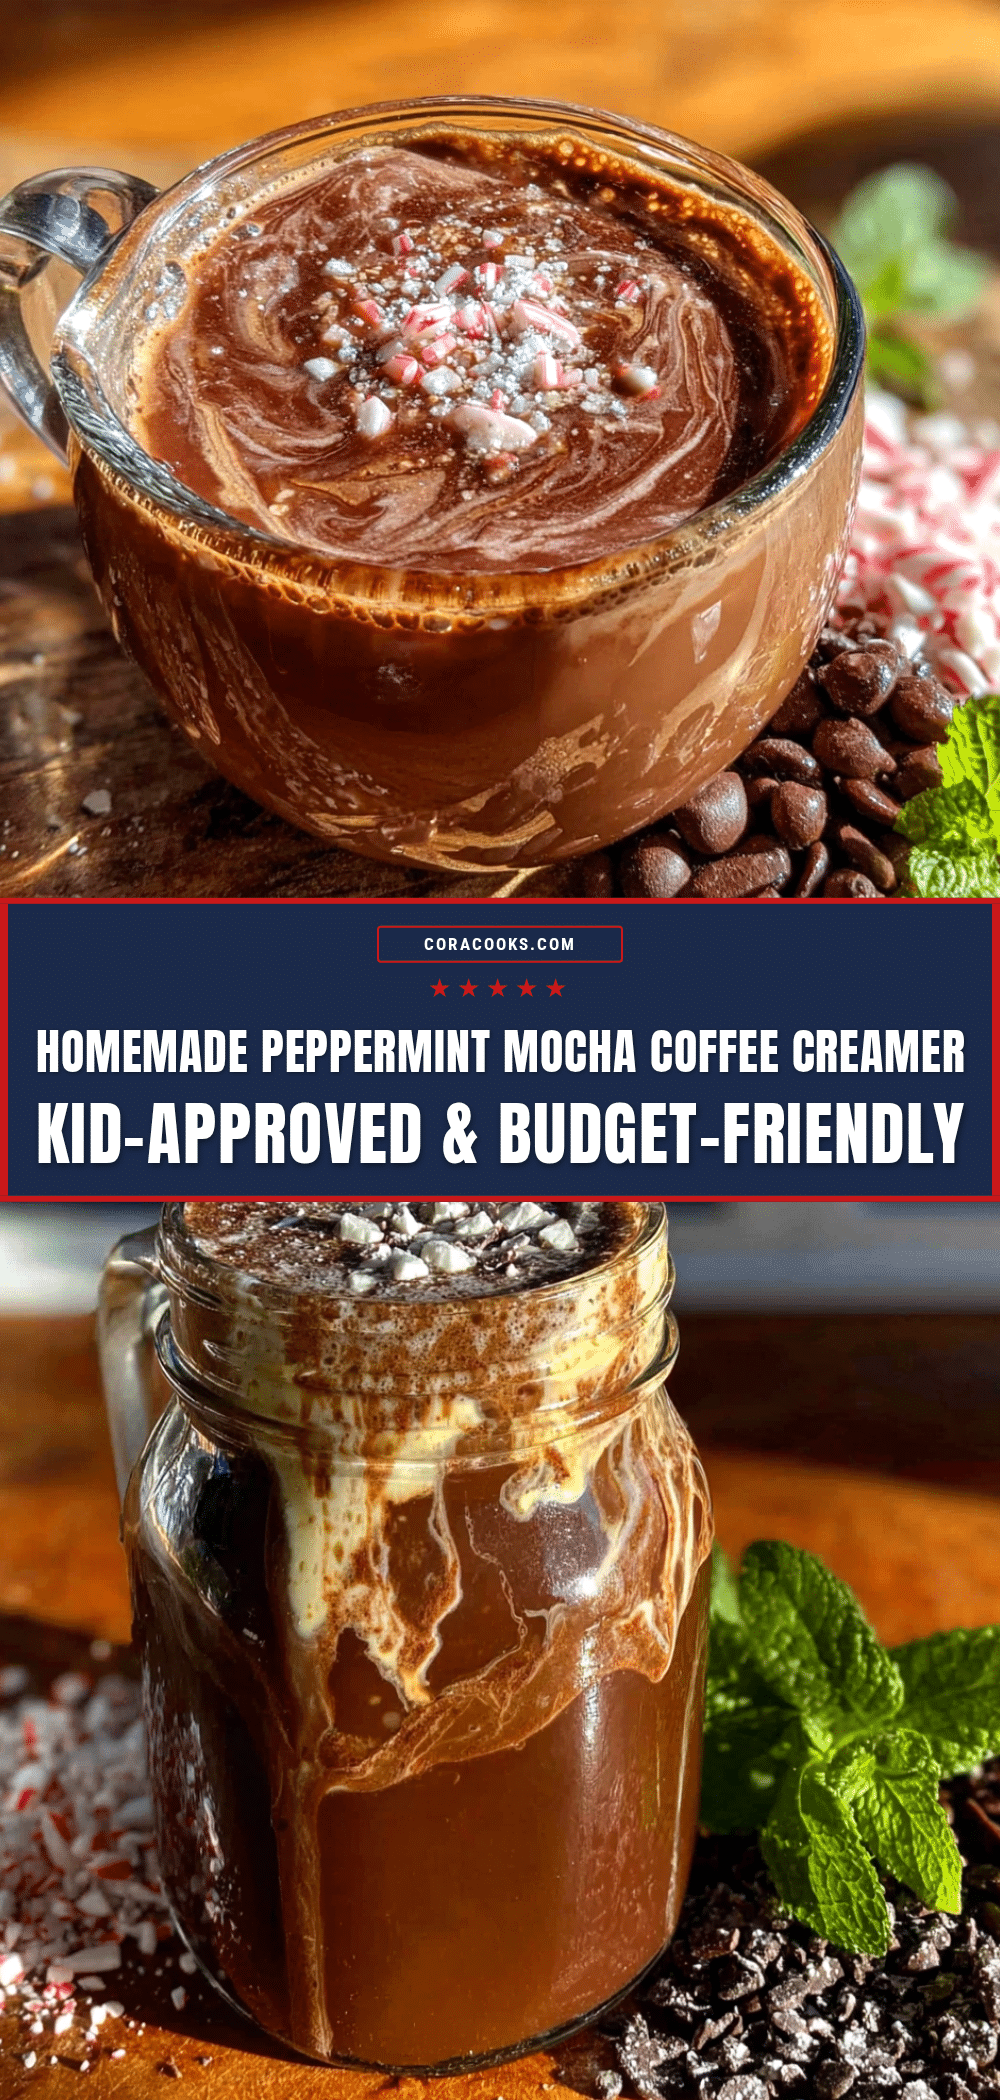
Homemade Peppermint Mocha Creamer: Easy Budget-Friendly Recipe
This homemade peppermint mocha coffee creamer is easy, affordable, and absolutely delicious. Made with simple, real ingredients, it turns a regular cup of coffee into a special treat that tastes like a hug in a mug.
- Prep Time: 5 minutes
- Cook Time: 5 minutes
- Total Time: 10 minutes
- Yield: 16 servings 1x
- Category: Condiment
- Cuisine: American
Ingredients
- 2 cups whole milk
- 1 can (14 ounces) sweetened condensed milk
- 3 tablespoons unsweetened cocoa powder
- 1 teaspoon peppermint extract
- 1/2 teaspoon vanilla extract (optional)
- Pinch of salt
Instructions
- In a medium saucepan, whisk together the whole milk and unsweetened cocoa powder until no clumps remain.
- Heat gently over medium-low heat, stirring occasionally, until tiny bubbles form around the edges (about 3-4 minutes). Do not boil.
- Pour in the sweetened condensed milk and whisk continuously until fully incorporated and smooth (about 1 minute).
- Remove from heat. Add peppermint extract, vanilla extract (if using), and a pinch of salt. Whisk to combine. Taste and adjust peppermint if desired.
- Let the creamer cool in the saucepan for 10-15 minutes. It will thicken slightly.
- Pour into a glass jar or bottle using a funnel. Seal and let come to room temperature completely before refrigerating (about 1 hour).
- Refrigerate for at least 2 hours before using to allow flavors to meld.
Notes
For best results, bloom the cocoa powder by letting it sit in the cold milk for 1 minute before heating. Use a thermometer to keep milk below 180°F (82°C) to prevent curdling. The creamer will keep in the refrigerator for up to 10 days. Shake or stir before each use as cocoa powder may settle.
Nutrition
- Serving Size: 2 tablespoons
- Calories: 85
- Sugar: 14
- Sodium: 35
- Fat: 2
- Saturated Fat: 1
- Carbohydrates: 15
- Protein: 2
Keywords: peppermint mocha creamer, homemade coffee creamer, peppermint mocha, easy creamer recipe, budget-friendly creamer, Christmas coffee creamer