Love this? Save it for later!
Share the inspiration with your friends
I had refused to make cake pops for years. Four years, actually. Ever since my sister-in-law brought a bakery box of them to a family gathering and I watched my then-three-year-old nephew try to eat one whole and end up with more frosting on his shirt than in his mouth. They seemed fussy, finicky, and frankly, a little bit of a pain. Then last December, my neighbor Carla texted me a photo of her kitchen counter, covered in what looked like a tiny army of snowmen on sticks, with the caption, “I made these with my kids in under an hour. You’d be proud.” I stared at that photo for a solid minute. She had a two-year-old and a four-year-old. If she could pull it off without losing her mind, maybe I had been wrong. The next day, I found myself in my own kitchen, butter and sugar out, determined to prove a point to myself. And honestly? I ended up making three batches that week.
These Easy White Chocolate Christmas Cake Pops are the result of that snowy afternoon conversion. They are everything I thought they could not be: simple, forgiving, and genuinely fun to make with little helpers. The cake is tender, the white chocolate coating is sweet and creamy, and the sprinkles make them look like they came from a fancy bakery. But the real magic is how easy they are to pull together. You don’t need a special pan or a pastry degree. You just need a box of cake mix, some frosting, and a little patience for the dipping part. I mean, let me tell you, the first time I dipped a cake ball into melted white chocolate, it fell right off the stick into the bowl. My daughter laughed so hard she snorted. It was a mess. But we fished it out, ate it, and started over. And that second one? Perfect.
Maybe you have been there, staring at a Pinterest board full of perfectly decorated cake pops and thinking, “There is no way I can make those.” I get it. But this recipe is different. It is the one that changed my mind, and I think it might change yours too. These are the kind of treats that make you feel like a holiday hero without spending all day in the kitchen. And honestly, watching a kid’s face light up when they bite into one of these little snowballs is worth every second of dipping.
Why You’ll Love This Recipe
Let me tell you why this recipe has become my go-to for holiday baking. I have tested it with my own kids, with my niece and nephew, and even with a group of skeptical moms at a playdate. It passed every single test.
- Kid-Approved & Parent-Friendly: These cake pops are sweet, fun, and easy for little hands to hold. No forks, no plates, no mess. Parents love them because they keep kids happy and occupied.
- Simple Ingredients: You need a box of white or vanilla cake mix, a can of frosting, white chocolate melting wafers, and some sprinkles. That is it. No fancy grocery trips needed.
- Quick & Easy: From start to finish, you can have these ready in about an hour and a half, including chilling time. Perfect for a busy December afternoon when you need a quick holiday treat.
- Perfect for Holiday Gatherings: These are great for classroom parties, cookie exchanges, or just a cozy night decorating with the kids. They travel well and look impressive on a platter.
- Budget-Friendly: A box of cake mix costs a couple of dollars, and a bag of white chocolate wafers is under five bucks. You can make a whole batch for less than the price of a bakery dozen.
- Endlessly Customizable: You can change the sprinkles, the cake flavor, or even the chocolate coating. Red velvet cake with white chocolate? Peppermint cake with dark chocolate? The possibilities are endless.
What makes this recipe different from all the others? It is the texture. The cake is not dry and crumbly like some cake pops I have tried. It is moist and tender, almost like a little cake truffle. The secret is using just the right amount of frosting to bind the crumbs together. Too little, and they fall apart. Too much, and they are too sweet. I have found the perfect balance, and I am sharing it with you. This is not just another version of a cake pop. This is the one that works every single time.
What Ingredients You Will Need
This recipe uses simple, wholesome ingredients that you can find at any grocery store. The beauty of these cake pops is that they rely on pantry staples and a few festive extras to create something truly special.
- 1 box (15.25 oz) white or vanilla cake mix (I prefer Betty Crocker or Duncan Hines for consistent results. You can also use a yellow cake mix if that is what you have.)
- Ingredients listed on the cake mix box (usually eggs, oil, and water)
- 1/2 cup (120 ml) prepared white or vanilla frosting (store-bought is fine, but homemade works too. I like Pillsbury Creamy Supreme Vanilla Frosting for its smooth texture.)
- 12 oz (340 g) white chocolate melting wafers or candy melts (I recommend Wilton or Ghirardelli white melting wafers. They melt smoothly and set up nicely. Do not use white chocolate chips, as they do not melt as well and can seize up.)
- 1 tablespoon (15 ml) coconut oil or vegetable shortening (optional, but helps thin the white chocolate for easier dipping)
- Christmas sprinkles (red, green, and white jimmies, nonpareils, or sanding sugar. I like to use a mix of shapes and sizes for variety.)
- Lollipop sticks (about 4-5 inches long. You can find them at craft stores or online.)
- Styrofoam block or cardboard box (to hold the cake pops upright while they set)
Ingredient Selection Tips: When choosing your cake mix, look for one that says “moist” on the box. That extra moisture helps the cake pops hold together better. For the frosting, a classic buttercream or cream cheese frosting works beautifully. If you want to cut down on sweetness, you can use a cream cheese frosting instead of a traditional buttercream. For the white chocolate, I have found that Ghirardelli white melting wafers give the smoothest, creamiest coating. They melt evenly and do not get that weird, grainy texture that some cheaper brands have.
Substitution Guidance: If you are gluten-free, use a gluten-free cake mix and check that your frosting is gluten-free as well. For a dairy-free version, use a dairy-free cake mix, dairy-free frosting, and dairy-free white chocolate (like Enjoy Life brand). You can also swap the white chocolate for dark or milk chocolate if you prefer a less sweet coating. Just keep in mind that the color will change, so you might want to adjust your sprinkles accordingly.
Equipment Needed
You do not need a lot of fancy equipment to make these cake pops. Here is what you will need to get started.
- Large mixing bowl (for crumbling the cake and mixing in the frosting)
- 9×13 inch baking pan (or two 8-inch round pans, whichever you prefer)
- Electric hand mixer or stand mixer (for mixing the cake batter, though you can do it by hand if you are strong enough)
- Cookie scoop or small ice cream scoop (for portioning the cake balls evenly. A 1-inch scoop works perfectly.)
- Baking sheet lined with parchment paper (for chilling the cake balls)
- Microwave-safe bowl (for melting the white chocolate)
- Lollipop sticks (about 4-5 inches long)
- Styrofoam block or cardboard box (to hold the cake pops upright while they set. I use a shoebox with holes poked in the top.)
- Small spoon or fork (for dipping the cake balls into the chocolate)
I have tried making cake pops with a fancy cake pop maker, and honestly, I prefer the traditional method. The cake pop maker bakes the cake into little balls, but I find they come out a bit dry. Baking a full sheet cake and then crumbling it gives you a much moister, more tender cake pop. Plus, you do not need a special appliance taking up space in your cabinet. A simple baking sheet and a bowl will do the job just fine.
If you do not have lollipop sticks, you can use pretzel sticks instead. They add a salty crunch that pairs beautifully with the sweet white chocolate. Just be aware that pretzel sticks are a bit thicker, so you might need to make your cake balls slightly larger to accommodate them.
Preparation Method
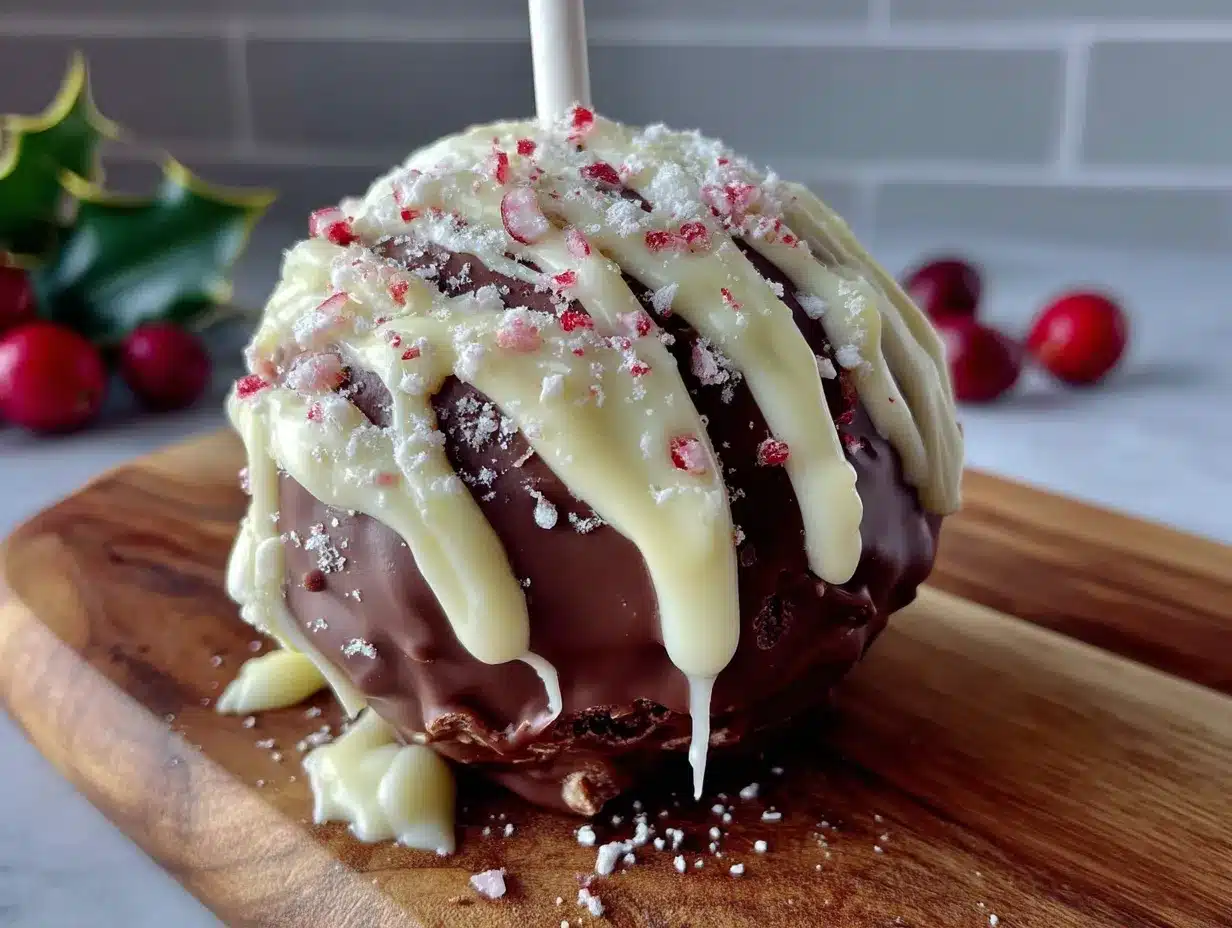
Let me walk you through the process step by step. I have made these cake pops more times than I can count, and I have learned a few tricks along the way that will save you from my early mistakes.
- Bake the cake. Preheat your oven to 350°F (175°C). Grease a 9×13 inch baking pan. Prepare the cake mix according to the package directions. Pour the batter into the prepared pan and bake for 25-30 minutes, or until a toothpick inserted into the center comes out clean. Let the cake cool completely in the pan on a wire rack. This is important. If the cake is even slightly warm, the frosting will melt and you will end up with a sticky mess instead of a workable dough.
- Crumble the cake. Once the cake is completely cool, use your hands to crumble it into fine crumbs in a large mixing bowl. You want to break up any large chunks. There should be no pieces larger than a pea. This takes a few minutes, but it is worth doing thoroughly. I like to put on some Christmas music and let my mind wander while I crumble.
- Add the frosting. Spoon the 1/2 cup of frosting into the bowl with the cake crumbs. Use a spatula or your hands to mix it together until the mixture holds together when pressed. You want it to feel like damp sand or play dough. If it is too dry, add a tablespoon more of frosting. If it is too wet, add a little more cake crumbs. The texture should be moldable but not sticky.
- Shape the cake balls. Using a cookie scoop or your hands, roll the mixture into 1-inch balls. You should get about 24-30 balls, depending on how big you make them. Place them on a parchment-lined baking sheet. I like to roll them between my palms to get them perfectly round. It is a little messy, but that is part of the fun. My kids love this part because they get to get their hands dirty.
- Chill the cake balls. Place the baking sheet in the refrigerator for at least 30 minutes, or up to 2 hours. This step is crucial. The cake balls need to be firm so they do not fall apart when you dip them in the white chocolate. If you are in a hurry, you can pop them in the freezer for 15 minutes, but do not leave them in there too long or they will get too hard.
- Melt the white chocolate. Place the white chocolate melting wafers in a microwave-safe bowl. Microwave in 30-second intervals, stirring after each, until the chocolate is smooth and fully melted. Add the coconut oil or shortening, if using, and stir until combined. The oil helps thin the chocolate, making it easier to dip. Be careful not to overheat the chocolate, or it will seize up and become grainy. If that happens, you can try adding a little more oil and stirring vigorously, but it is usually best to start over.
- Dip the cake balls. Remove the cake balls from the refrigerator. Dip the tip of a lollipop stick into the melted white chocolate, then insert it about halfway into a cake ball. This helps secure the stick. Dip the cake ball into the melted chocolate, turning to coat it completely. Gently tap the stick on the edge of the bowl to let the excess chocolate drip off. You want a thin, even coating. If the chocolate starts to thicken as you work, pop it back in the microwave for 10-15 seconds to thin it out again.
- Add sprinkles. While the white chocolate is still wet, sprinkle the Christmas sprinkles over the cake pop. You can do this over a small bowl to catch any sprinkles that fall off. I like to use a mix of red and green jimmies and some white nonpareils for a festive look. If you wait too long, the chocolate will set and the sprinkles will not stick.
- Let them set. Stick the lollipop stick into the Styrofoam block or cardboard box to hold the cake pop upright. Repeat with the remaining cake balls. Let them set at room temperature for about 30 minutes, or until the white chocolate is firm to the touch. If you are in a hurry, you can put them in the refrigerator for 15 minutes, but be careful not to let them get too cold, or condensation will form on the surface.
That first time I made these, I forgot to chill the cake balls long enough. The first one I dipped fell right off the stick into the bowl of white chocolate. I fished it out, rolled it into a ball again, and put it back in the fridge for another 20 minutes. The second time worked perfectly. So if your first one fails, do not give up. Just chill them a little longer and try again.
Cooking Tips & Techniques
I have made every mistake in the book when it comes to cake pops, so let me save you some trouble. Here are my best tips for perfect results every time.
Keep the cake balls cold. This is the most important tip I can give you. Cold cake balls hold their shape when dipped. Warm cake balls fall apart. I chill mine for at least 30 minutes, and if I am making a big batch, I keep a few in the fridge while I dip the others. It takes a little longer, but it is worth it.
Thin the white chocolate. White chocolate is thicker than dark or milk chocolate, which makes dipping a little tricky. Adding a tablespoon of coconut oil or vegetable shortening helps thin it out so you get a smooth, even coating. I learned this after my first batch looked like lumpy snowmen. Now they come out perfectly smooth.
Tap off the excess. After you dip the cake ball, gently tap the stick on the edge of the bowl to let the excess chocolate drip off. This prevents a thick, clumpy coating and helps the sprinkles stick evenly. If you have a little pool of chocolate at the bottom, you can gently scrape it off on the edge of the bowl before sticking it in the Styrofoam block.
Work in small batches. Do not try to dip all the cake balls at once. Take out only 4-5 from the fridge at a time. This keeps the rest cold and firm. I learned this the hard way when I took all 30 cake balls out at once and by the time I got to number 10, they were too soft to dip.
Use a deep bowl for melting. A deep, narrow bowl is better than a wide, shallow one for dipping. It allows you to submerge the cake ball completely without wasting a lot of chocolate. I use a 2-cup glass measuring cup, and it works perfectly.
Do not overmix the cake and frosting. Mix just until the crumbs hold together. Overmixing can make the texture gummy and dense. You want the cake pops to be light and tender, not heavy and chewy.
Let the white chocolate set completely. Do not rush this step. If you try to move the cake pops before the chocolate is fully set, you will end up with fingerprints and smudges. I let mine sit for at least 30 minutes at room temperature, and I try not to touch them until I am ready to serve them.
Variations & Adaptations
One of the best things about this recipe is how easy it is to change it up. Here are some of my favorite variations.
Red Velvet Christmas Cake Pops: Swap the white cake mix for a red velvet cake mix. Use cream cheese frosting instead of vanilla frosting. Coat the cake pops in white chocolate and top with red and green sprinkles. The red cake peeking through the white coating is so festive. I made these for a Christmas party last year, and they disappeared in minutes.
Peppermint Chocolate Cake Pops: Use a chocolate cake mix and chocolate frosting. Coat the cake pops in white chocolate and sprinkle crushed candy canes on top. The peppermint adds a cool, refreshing crunch that balances the sweet chocolate. Just make sure to crush the candy canes into small pieces so they stick to the chocolate.
Gingerbread Cake Pops: Use a spice cake mix or a gingerbread cake mix. Add 1 teaspoon of ground ginger and 1/2 teaspoon of ground cloves to the cake batter before baking. Use cream cheese frosting to bind the crumbs. Coat the cake pops in white chocolate and top with a tiny gingerbread man cookie or a sprinkle of cinnamon sugar. These taste like Christmas in a bite.
Gluten-Free Version: Use a gluten-free cake mix and gluten-free frosting. Most white chocolate melting wafers are gluten-free, but check the label to be sure. I have made these for a gluten-free friend, and she said they were the best cake pops she had ever had. The texture was just as tender and moist as the regular version.
Dairy-Free Version: Use a dairy-free cake mix, dairy-free frosting, and dairy-free white chocolate. Coconut oil works well as a substitute for butter in the cake mix. I have made these for a dairy-free family, and they were a hit. The coconut oil adds a subtle coconut flavor that pairs nicely with the white chocolate.
Mini Cake Pop Bites: Instead of rolling the cake mixture into 1-inch balls, roll them into 1/2-inch balls. Skip the lollipop sticks and dip them in the white chocolate like truffles. These are great for snacking or for a party where you want smaller portions. My kids love these because they can eat three or four without feeling guilty.
Serving & Storage Suggestions
These cake pops are best served at room temperature. The white chocolate coating is firm but not hard, and the cake inside is tender and moist. I like to arrange them on a festive platter or a cake stand for a holiday party. They look beautiful grouped together, like a little forest of snow-covered trees.
Complementary Dishes: These cake pops pair wonderfully with a cup of hot cocoa or a mug of eggnog. They also go well with other holiday treats like gingerbread cookies, peppermint bark, or sugar cookies. If you are serving them at a party, set them out alongside a bowl of fresh fruit or a cheese platter for a nice balance of sweet and savory.
Storage Instructions: Store the cake pops in an airtight container in the refrigerator for up to 5 days. Place them in a single layer, or separate layers with parchment paper so they do not stick together. I like to use a container with a lid that seals tightly to keep them fresh. If you are stacking them, be gentle. The white chocolate coating can crack if you press too hard.
Freezer Instructions: You can freeze the cake pops for up to 2 months. Place them in a single layer on a baking sheet and freeze until solid, about 1 hour. Then transfer them to a freezer-safe bag or container. To thaw, place them in the refrigerator overnight or leave them at room temperature for about 30 minutes. Do not microwave them to thaw, or the white chocolate will melt and become sticky.
Reheating Tips: These cake pops are best served cold or at room temperature. I do not recommend reheating them, as the white chocolate will melt. If you want a warm treat, you can microwave one for about 10 seconds, but be aware that the white chocolate will become soft and gooey. Some people like that, but I prefer them as they are.
How Flavors Develop: The flavors of these cake pops actually improve after a day in the refrigerator. The cake absorbs a little moisture from the white chocolate coating, making it even more tender and flavorful. I have made them a day ahead for parties, and they were even better than the day I made them. So do not be afraid to make them in advance.
Nutritional Information & Benefits
Let me be honest with you. These cake pops are a treat, not a health food. But that does not mean they cannot be part of a balanced holiday diet. Here is the estimated nutritional information for one cake pop (based on a 1-inch ball with white chocolate coating and sprinkles).
| Nutrient | Amount per Serving (1 cake pop) |
|---|---|
| Calories | 180 |
| Total Fat | 8g |
| Saturated Fat | 5g |
| Cholesterol | 15mg |
| Sodium | 150mg |
| Total Carbohydrates | 26g |
| Dietary Fiber | 0g |
| Sugars | 18g |
| Protein | 2g |
Health Benefits of Key Ingredients: While these cake pops are not exactly a superfood, they do have a few redeeming qualities. The white chocolate contains calcium and a small amount of protein. The cake provides carbohydrates for energy, which is perfect for active kids. And the sprinkles? Well, they make you smile, and that counts for something, right?
Dietary Considerations: These cake pops are not gluten-free, dairy-free, or nut-free unless you make the substitutions I mentioned earlier. They do contain eggs, wheat, and milk. If you have allergies, be sure to check the labels on your cake mix, frosting, and white chocolate. Some brands may contain traces of nuts or other allergens.
Potential Allergens: The main allergens in this recipe are wheat (in the cake mix), milk (in the white chocolate and frosting), and eggs (in the cake mix). If you are serving these at a party, it is a good idea to label them so guests with allergies know what they are eating. I always put a little sign next to mine that says “Contains: Wheat, Milk, Eggs.”
Personal Wellness Perspective: I believe in balance. These cake pops are a special holiday treat, not an everyday snack. I make them for parties, for school events, and for those cozy December evenings when we are watching Christmas movies and sipping hot cocoa. They are a celebration, and that is okay. Life is too short to skip the sprinkles.
Conclusion
These Easy White Chocolate Christmas Cake Pops have become a December tradition in my house. They are the recipe that proved me wrong, the one that showed me that cake pops do not have to be fussy or frustrating. They can be simple, joyful, and absolutely delicious. I love that I can make them with my kids, that they use ingredients I already have in my pantry, and that they always get rave reviews from everyone who tries them.
I hope you give them a try. Whether you are making them for a classroom party, a cookie exchange, or just a quiet night at home with your family, I think you will find that they are as fun to make as they are to eat. And if your first cake pop falls off the stick into the bowl of white chocolate, do not worry. Just fish it out, eat it, and start over. That is what I did. And honestly? That imperfect first bite is often the sweetest one of all.
I would love to hear how your cake pops turn out. Leave a comment below and let me know what sprinkles you used, what variations you tried, or how many you ate before they made it to the party. (No judgment here. I have been there.) Share a photo on social media and tag me, too. I love seeing your creations. Happy holidays, and happy baking!
Frequently Asked Questions
Can I use a different flavor of cake mix?
Absolutely. You can use any flavor of cake mix you like. Chocolate, red velvet, lemon, or even funfetti would work beautifully. Just keep in mind that the color of the cake will show through the white chocolate coating, so choose a flavor that complements the white chocolate.
Why did my cake pops fall off the sticks?
This usually happens for one of two reasons. Either the cake balls were not chilled long enough, or you did not dip the stick in melted chocolate before inserting it into the cake ball. The chocolate acts like glue, holding the stick in place. If your cake balls are too warm, the chocolate will not set properly, and the stick will slide out.
Can I use white chocolate chips instead of melting wafers?
I do not recommend it. White chocolate chips contain stabilizers that prevent them from melting smoothly. They can become thick and grainy when melted, which makes dipping difficult. Melting wafers or candy melts are formulated to melt smoothly and set up with a nice, shiny finish.
How far in advance can I make these cake pops?
You can make them up to 5 days in advance if you store them in an airtight container in the refrigerator. You can also freeze them for up to 2 months. I often make a batch a week before Christmas and pull them out for parties. They taste just as fresh as the day I made them.
Can I use homemade frosting instead of store-bought?
Yes, you can use homemade frosting. Just make sure it is thick enough to hold the cake crumbs together. A classic buttercream or cream cheese frosting works well. If your homemade frosting is too thin, the cake balls will be too soft to dip. You can thicken it by adding a little powdered sugar.
Pin This Recipe!
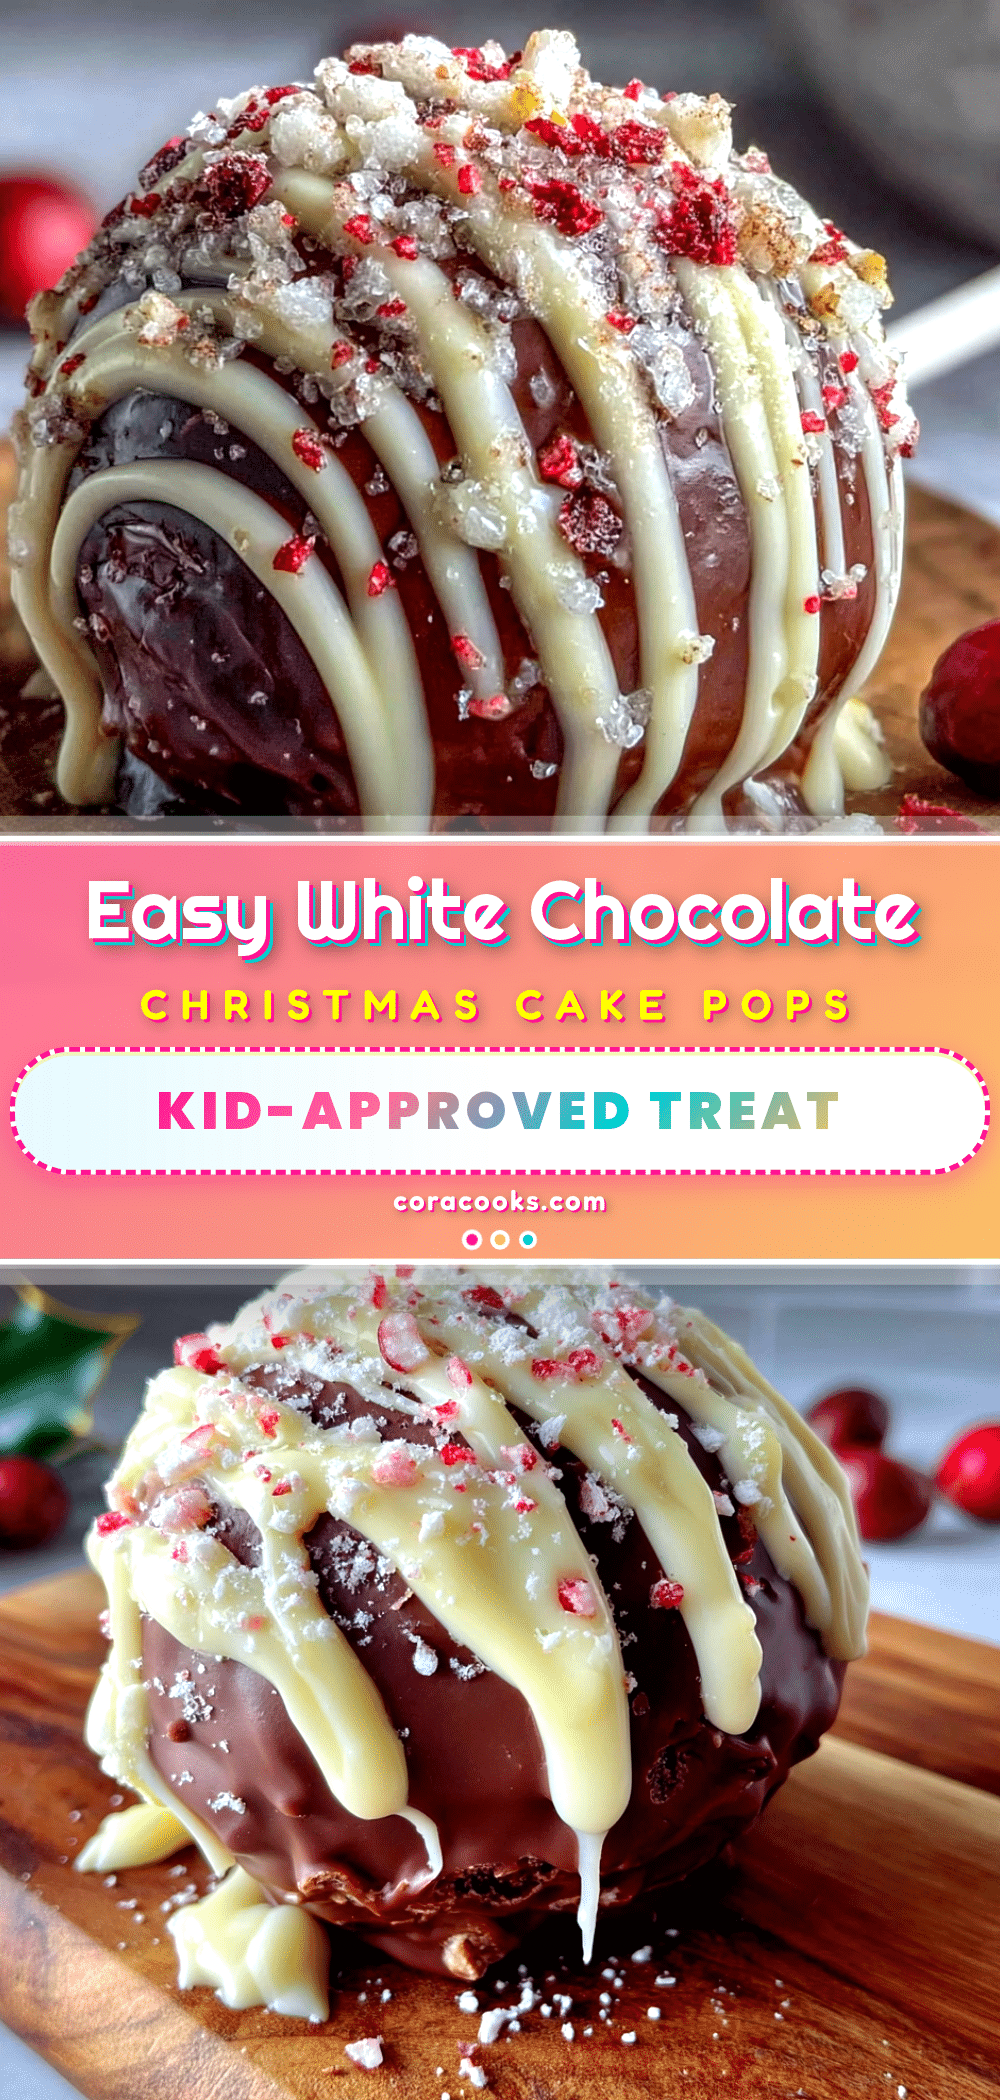
Easy White Chocolate Christmas Cake Pops: Best Kid-Approved Holiday Treat
These Easy White Chocolate Christmas Cake Pops are simple, forgiving, and genuinely fun to make with little helpers. The cake is tender, the white chocolate coating is sweet and creamy, and the sprinkles make them look like they came from a fancy bakery.
- Prep Time: 30 minutes
- Cook Time: 30 minutes
- Total Time: 1 hour 30 minutes (including chilling time)
- Yield: 24-30 servings 1x
- Category: Dessert
- Cuisine: American
Ingredients
- 1 box (15.25 oz) white or vanilla cake mix
- Ingredients listed on the cake mix box (usually eggs, oil, and water)
- 1/2 cup (120 ml) prepared white or vanilla frosting
- 12 oz (340 g) white chocolate melting wafers or candy melts
- 1 tablespoon (15 ml) coconut oil or vegetable shortening (optional)
- Christmas sprinkles (red, green, and white jimmies, nonpareils, or sanding sugar)
- Lollipop sticks (about 4-5 inches long)
- Styrofoam block or cardboard box (to hold the cake pops upright while they set)
Instructions
- Preheat your oven to 350°F (175°C). Grease a 9×13 inch baking pan. Prepare the cake mix according to the package directions. Pour the batter into the prepared pan and bake for 25-30 minutes, or until a toothpick inserted into the center comes out clean. Let the cake cool completely in the pan on a wire rack.
- Once the cake is completely cool, use your hands to crumble it into fine crumbs in a large mixing bowl. There should be no pieces larger than a pea.
- Spoon the 1/2 cup of frosting into the bowl with the cake crumbs. Use a spatula or your hands to mix it together until the mixture holds together when pressed. It should feel like damp sand or play dough.
- Using a cookie scoop or your hands, roll the mixture into 1-inch balls. You should get about 24-30 balls. Place them on a parchment-lined baking sheet.
- Place the baking sheet in the refrigerator for at least 30 minutes, or up to 2 hours, to chill the cake balls until firm.
- Place the white chocolate melting wafers in a microwave-safe bowl. Microwave in 30-second intervals, stirring after each, until the chocolate is smooth and fully melted. Add the coconut oil or shortening, if using, and stir until combined.
- Remove the cake balls from the refrigerator. Dip the tip of a lollipop stick into the melted white chocolate, then insert it about halfway into a cake ball. Dip the cake ball into the melted chocolate, turning to coat it completely. Gently tap the stick on the edge of the bowl to let the excess chocolate drip off.
- While the white chocolate is still wet, sprinkle the Christmas sprinkles over the cake pop.
- Stick the lollipop stick into the Styrofoam block or cardboard box to hold the cake pop upright. Repeat with the remaining cake balls. Let them set at room temperature for about 30 minutes, or until the white chocolate is firm to the touch.
Notes
Keep the cake balls cold for best results when dipping. Thin the white chocolate with coconut oil or shortening for a smoother coating. Work in small batches, taking only 4-5 cake balls from the fridge at a time. If your first cake pop falls off the stick, chill the cake balls longer and try again.
Nutrition
- Serving Size: 1 cake pop
- Calories: 180
- Sugar: 18
- Sodium: 150
- Fat: 8
- Saturated Fat: 5
- Carbohydrates: 26
- Protein: 2
Keywords: Christmas cake pops, white chocolate cake pops, holiday treats, kid-friendly desserts, easy cake pops, Christmas baking


