Love this? Save it for later!
Share the inspiration with your friends
This was supposed to be a classic batch of peanut butter blossom cookies—you know, the ones with the Hershey’s Kiss pressed right in the middle. I had the dough chilling, the kisses unwrapped, and my four-year-old perched on a stool, ready to help. Then I realized I was completely out of regular granulated sugar for rolling. All I had was this bag of coarse turbinado sugar I’d bought on a whim for a fancy crumble topping. I figured, well, this is going to be a disaster, but we’re already committed. So we rolled those sticky peanut butter balls in the crunchy sugar, baked them off, and while they were cooling, I spotted a jar of salted caramel sauce in the fridge that was about to expire. On a total whim, I drizzled some over the top of the cookies before pressing the chocolate kiss in. Honestly, I thought I’d ruined them. The sugar was too crunchy, the caramel would make a mess—it felt like a kitchen fail in the making.
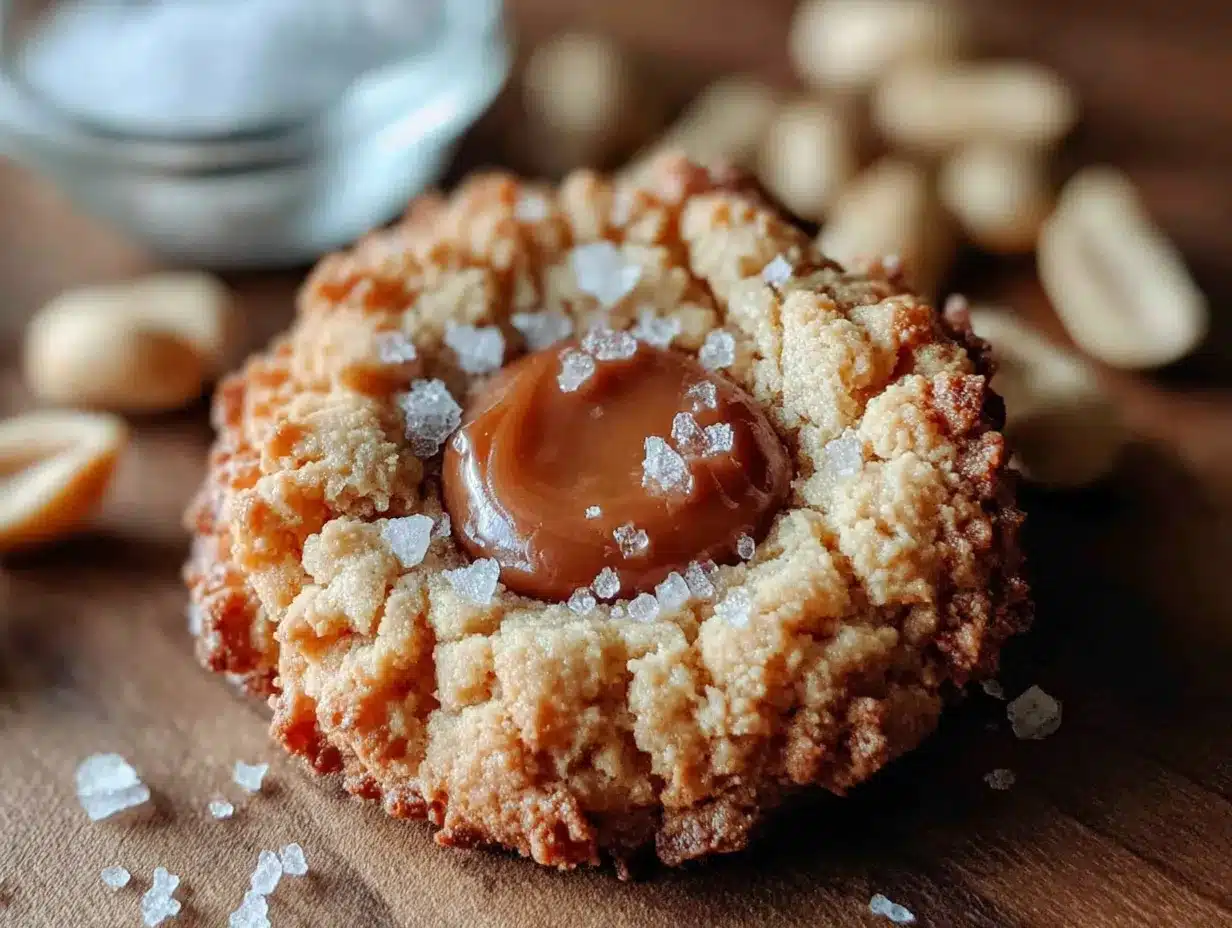
But then I took a bite. The turbinado sugar gave the outside this incredible, crackly crunch that contrasted perfectly with the soft, chewy peanut butter center. And the salted caramel? It melted into the chocolate kiss, creating this gooey, salty-sweet ribbon that tied everything together. My kid, who usually picks the chocolate off first, ate three in a row without saying a word. My husband walked in, grabbed one, and just stared at me. “What did you do?” he asked. I shrugged and said, “Made a mistake, I guess.” Maybe you’ve been there—staring at a half-finished recipe, convinced you’ve messed it up, only to discover that the detour was actually the destination. These Easy Salted Caramel Peanut Butter Blossom Cookies are proof that sometimes the best recipes come from happy accidents.
Why You’ll Love This Recipe
Let me tell you why these cookies have become the most-requested treat in my house. First off, they’re incredibly forgiving—even if you overbake them by a minute or two, the caramel keeps them moist and irresistible. That’s a win for busy parents who get distracted mid-batch.
- Kid-Approved & Parent-Friendly: My kids help me make these all the time. The dough doesn’t stick too much, the rolling is fun, and they love drizzling the caramel. Plus, I’ve tested this recipe with three different picky eaters, and every single one asked for seconds.
- Simple Ingredients, No Fuss: You likely have most of these in your pantry right now. Peanut butter, butter, sugar, flour, eggs—nothing fancy. The salted caramel sauce is a simple addition that makes them taste bakery-quality.
- Perfect for Busy Weeknights: From start to finish, these come together in about 30 minutes. The dough doesn’t need to chill (though it helps if you have time), so you can whip up a batch after school or during a commercial break.
- Always a Crowd-Pleaser: I’ve brought these to potlucks, school bake sales, and holiday parties. They disappear fast. The combination of peanut butter, chocolate, and salted caramel is basically a flavor trifecta that nobody can resist.
What makes this recipe different from all the other blossom cookies out there? It’s the texture. The turbinado sugar creates this audible crunch when you bite into them, and the caramel adds a layer of richness that makes the chocolate taste even deeper. I’ve had friends tell me they’ve never liked peanut butter blossoms until they tried this version. That’s the kind of feedback that makes a home cook feel like a rockstar.
This isn’t just another cookie recipe—it’s the one that makes you close your eyes after the first bite and forget about the laundry, the dishes, and the math homework waiting on the counter. It’s comfort food, reimagined with a little bit of caramel magic.
What Ingredients You Will Need
This recipe uses simple, wholesome ingredients to deliver bold flavor and satisfying texture without the fuss. Most of these are pantry staples, so you probably won’t need a special trip to the store.
- 1 cup (2 sticks) unsalted butter, softened — I use Land O’Lakes for consistent results. Make sure it’s truly softened, not melted, or your cookies will spread too thin.
- 1 cup creamy peanut butter — Skippy or Jif work great here. Natural peanut butter that separates can make the cookies greasy, so stick with the processed stuff for best texture.
- 1 cup granulated sugar — For the dough itself. Regular white sugar is perfect.
- 1 cup packed light brown sugar — Adds moisture and a hint of molasses depth that pairs beautifully with the caramel.
- 2 large eggs, room temperature — Cold eggs can shock the butter and make the dough lumpy. Leave them on the counter for 30 minutes before starting.
- 2 teaspoons vanilla extract — Pure vanilla, not imitation, if you can swing it. It makes a difference.
- 2 ½ cups all-purpose flour — Spoon and level it; don’t scoop directly from the bag or you’ll pack in too much flour.
- 1 teaspoon baking soda — Helps the cookies puff up just enough.
- ½ teaspoon salt — Balances the sweetness. I use fine sea salt.
- ½ cup turbinado sugar (for rolling) — This is the crunchy, coarse sugar that gives the cookies their signature crackle. You can find it near the regular sugar at most grocery stores. If you don’t have it, regular granulated sugar works, but you’ll miss that crunch.
- 24-30 Hershey’s Kisses, unwrapped — Milk chocolate is classic, but dark chocolate kisses are amazing here too.
- ½ cup salted caramel sauce — Store-bought is fine (I like the one from Stonewall Kitchen), but if you have a favorite homemade version, go for it. You’ll need about 1 teaspoon per cookie.
- Flaky sea salt (optional, for garnish) — A tiny sprinkle on top before serving takes these over the edge.
For the salted caramel sauce, I’ve found that the consistency matters. You want it thick enough to drizzle but not so thick that it won’t settle into the chocolate. If your caramel is too runny, it’ll pool around the cookie base. If it’s too thick, microwave it for 10 seconds to loosen it up.
Equipment Needed
Nothing too fancy here—just the basics that most home kitchens already have. Here’s what you’ll need:
- Electric stand mixer or hand mixer — A stand mixer makes creaming the butter and sugars effortless, but a hand mixer works just fine. I’ve made these with both, and honestly, the results are identical.
- Large mixing bowls — One for the wet ingredients, one for the dry.
- Baking sheets — I recommend light-colored, non-stick sheets. Dark sheets can cause the bottoms to brown too quickly.
- Parchment paper or silicone baking mats — Silpat mats are my go-to because they’re reusable and prevent sticking perfectly. Parchment paper works great too.
- Cooling rack — Essential for letting the cookies set properly before adding the caramel and kisses.
- Small offset spatula — Not required, but it makes transferring the cookies from the baking sheet to the rack much easier.
- Small spoon or piping bag — For drizzling the caramel. A piping bag gives you more control, but a small spoon works in a pinch.
- Cookie scoop (1.5-tablespoon size) — Helps keep the cookies uniform in size, which means even baking. I got mine at a kitchen supply store for under $10.
If you don’t have turbinado sugar, you can pulse regular granulated sugar in a food processor for a few seconds to make it slightly coarser. Not the same, but close enough in a pinch.
Preparation Method
Ready to bake? Let’s walk through this step by step. I’ve made these cookies more times than I can count, so I’ll share all the little tricks I’ve picked up along the way.
- Preheat your oven to 375°F (190°C). Line two baking sheets with parchment paper or silicone mats. This is non-negotiable—the caramel can stick to unlined sheets, and nobody wants to scrape cookies off a pan.
- Cream the butter and sugars. In a large mixing bowl, beat the softened butter, granulated sugar, and brown sugar together on medium speed until light and fluffy—about 3-4 minutes. Scrape down the sides of the bowl halfway through. The mixture should look pale and slightly aerated. Don’t rush this step; proper creaming is what gives the cookies their tender texture.
- Add the peanut butter, eggs, and vanilla. Beat in the peanut butter until fully incorporated, then add the eggs one at a time, beating well after each addition. Stir in the vanilla extract. The mixture will look smooth and glossy at this point, almost like a thick frosting.
- Mix the dry ingredients separately. In a medium bowl, whisk together the flour, baking soda, and salt. This ensures the leavening agent is evenly distributed—you don’t want one cookie to puff up while another stays flat.
- Combine wet and dry. Gradually add the dry ingredients to the wet mixture, mixing on low speed just until the flour disappears. Overmixing at this stage can make the cookies tough. The dough will be soft and slightly sticky, which is exactly what you want.
- Prepare the rolling station. Pour the turbinado sugar into a shallow bowl. Using a cookie scoop or your hands, portion the dough into 1.5-tablespoon balls (about the size of a walnut). Roll each ball between your palms until smooth, then roll it in the turbinado sugar to coat evenly. Place the coated dough balls on the prepared baking sheets, spacing them about 2 inches apart—they’ll spread a bit.
- Bake for 10-12 minutes. The cookies are done when the edges are set and lightly golden, but the centers still look slightly soft and puffed. They’ll continue to set as they cool. I usually pull them out at the 11-minute mark for that perfect chewy texture. If you like crispier cookies, go to 12 minutes.
- Cool briefly on the baking sheet. Let the cookies rest on the hot baking sheet for exactly 2 minutes. This is important—if you try to move them too soon, they’ll fall apart. After 2 minutes, transfer them to a wire cooling rack to cool completely.
- Add the caramel and chocolate. Once the cookies are completely cool (about 15-20 minutes), drizzle about 1 teaspoon of salted caramel sauce over the center of each cookie. While the caramel is still wet, gently press a Hershey’s Kiss into the center, pushing down just until the chocolate is nestled into the caramel. The caramel will act like glue, holding the kiss in place.
- Finish with flaky salt (optional). If you’re feeling fancy, sprinkle a tiny pinch of flaky sea salt over the top of each cookie. This step is optional but highly recommended—it really makes the caramel pop.
Let the cookies sit for another 10 minutes to allow the caramel to set slightly. Then, grab one and try not to eat the whole batch. Good luck with that.
Cooking Tips & Techniques
Over the years, I’ve learned a few things the hard way so you don’t have to. Here are my top tips for perfect Easy Salted Caramel Peanut Butter Blossom Cookies every single time.
Don’t skip the turbinado sugar. I know it seems like a small detail, but that crunchy coating is what makes these cookies stand out. Regular sugar just dissolves into the dough, but turbinado stays intact, giving you that satisfying crackle. If you can’t find it, demerara sugar works too.
Watch your oven temperature. Ovens run hot or cold more often than you’d think. I burned my first batch because my oven runs 25 degrees hotter than the dial says. An inexpensive oven thermometer is a game-changer—trust me on this one.
Chill the dough if you have time. While this recipe works fine without chilling, 30 minutes in the fridge makes the dough easier to handle and prevents excessive spreading. If your kitchen is warm or humid, definitely chill the dough for at least 15 minutes before rolling.
Don’t overbake. The biggest mistake people make with blossom cookies is baking them until they look fully done. They should look slightly underdone in the center when you pull them out. They’ll continue baking on the hot pan and set up perfectly as they cool. Overbaked blossoms get dry and crumbly, and nobody wants that.
Let the caramel cool slightly before drizzling. If your caramel sauce is straight out of the fridge, it’ll be too thick to drizzle. Microwave it for 10-15 seconds to loosen it up, but don’t let it get hot—warm caramel can melt the chocolate kiss and make a mess. You want it at room temperature, just thin enough to flow.
Press the kisses in gently. I’ve crushed more than a few kisses by pressing too hard. Just a gentle push is all you need. The caramel will hold it in place as it sets.
One time, I accidentally used crunchy peanut butter instead of creamy because I grabbed the wrong jar from the pantry. The cookies turned out surprisingly good—the little peanut bits added extra texture. So if you’re in a pinch, crunchy works. Just don’t tell my kids I said that.
Variations & Adaptations
One of the best things about this recipe is how easy it is to tweak. Here are some variations I’ve tried and loved.
Dark Chocolate Lovers: Swap the milk chocolate Hershey’s Kisses for dark chocolate ones. The bitterness of the dark chocolate balances the sweet caramel and peanut butter beautifully. I did this for a friend who claims to hate milk chocolate, and she ate six.
Gluten-Free Version: Substitute the all-purpose flour with a 1:1 gluten-free baking flour blend. I’ve tested this with Bob’s Red Mill Gluten-Free 1-to-1 Baking Flour, and the texture was nearly identical. Just make sure your oats (if you add any) are certified gluten-free.
Double Caramel Delight: For the ultimate indulgence, press a soft caramel candy (like a Werther’s Original) into the center of the dough ball before baking, then top with the salted caramel sauce and chocolate kiss after. It’s a lot of caramel, but honestly, nobody has ever complained.
Holiday Twist: Use seasonal Hershey’s Kisses flavors—candy cane kisses around Christmas, pumpkin spice kisses in the fall, or Hugs (the white chocolate ones) for a pretty striped look. The caramel goes with all of them.
Lower Sugar Option: Reduce the granulated sugar in the dough to ¾ cup and use sugar-free caramel sauce. The turbinado sugar coating is still needed for texture, but you can use a light dusting instead of a full roll. The cookies will be less sweet but still delicious.
My personal favorite variation? I made these with a drizzle of peanut butter powder mixed with water (like PB2) thinned out to a drizzling consistency, in addition to the caramel. It added an extra peanut butter punch that made my husband declare them “the best cookies I’ve ever made.” High praise from a guy who usually just nods and says “they’re good.”
Serving & Storage Suggestions
These cookies are best served at room temperature, about 20 minutes after you’ve added the caramel and kisses. The caramel should be set but still soft, and the chocolate kiss will be firm but not rock-hard. If you serve them too soon, the caramel will run; too late, and the chocolate might bloom (get that white powdery look) if stored improperly.
For presentation, I like to arrange them on a white platter in concentric circles, with the kisses facing up. A light dusting of flaky sea salt on top makes them look bakery-worthy. They’re perfect for holiday cookie swaps, school bake sales, or just a Tuesday afternoon treat.
These cookies pair beautifully with a cold glass of milk (obviously), a hot cup of coffee, or even a glass of red wine for the adults. The saltiness of the caramel cuts through the sweetness, making them surprisingly wine-friendly.
Storage: Store the cookies in an airtight container at room temperature for up to 5 days. Separate layers with parchment paper to prevent the caramel from sticking. Do not refrigerate them—the fridge will dry out the cookies and make the chocolate bloom. If your kitchen is very warm, you can store them in a cool, dark cupboard.
Freezing: These freeze beautifully. Freeze the baked cookies (without the caramel and kisses) in a single layer on a baking sheet, then transfer to a freezer-safe bag for up to 3 months. When you’re ready to serve, thaw them at room temperature, then add the caramel and kisses fresh. I’ve done this for holiday baking, and nobody could tell they weren’t fresh-baked.
One thing I’ve noticed: the flavors actually get better after a day or two. The caramel soaks into the cookie slightly, making it even more tender, and the peanut butter flavor deepens. So if you can resist eating them all on day one, you’re in for a treat on day two.
Nutritional Information & Benefits
Let’s be real—these are cookies, not health food. But if you’re going to indulge, here’s what you’re working with. Per cookie (based on 30 cookies), the approximate nutritional breakdown is:
Calories: 210 | Fat: 12g | Saturated Fat: 5g | Carbohydrates: 24g | Sugar: 16g | Protein: 4g | Sodium: 150mg
On the plus side, peanut butter provides a decent amount of protein and healthy monounsaturated fats. It also contains vitamin E, magnesium, and potassium. The salted caramel, while sugary, does have a small amount of calcium from the cream and butter. And the dark chocolate kisses (if you use them) are rich in antioxidants.
For a lighter option, you can reduce the sugar in the dough by ¼ cup without affecting the texture too much. Or use a sugar-free caramel sauce to cut the sugar content in half. I’ve tried both, and while the cookies aren’t quite as decadent, they’re still pretty darn good.
These cookies are not suitable for anyone with peanut allergies, obviously. But if you need a nut-free version, you can substitute sunflower seed butter (like SunButter) for the peanut butter. The flavor will be different—more earthy—but the texture holds up well. Just be aware that sunflower seed butter can turn green when baked due to a reaction with baking soda. It’s safe to eat, just not as pretty.
Conclusion
So there you have it—my accidental masterpiece. These Easy Salted Caramel Peanut Butter Blossom Cookies started as a failed attempt at a classic recipe and ended up as the cookie that everyone in my family begs for. They’re proof that sometimes the best things in life come from mistakes, from grabbing the wrong sugar or drizzling on a sauce that was about to expire.
I hope you give these a try, and I hope you make them your own. Add extra salt if you’re a salty-sweet fanatic. Use dark chocolate if that’s your thing. Double the caramel because, why not? The beauty of this recipe is that it’s forgiving enough to handle your tweaks and still come out amazing.
When you make them—and I know you will—come back and tell me how they turned out. Did your kids love them? Did your husband eat six in one sitting? Did you burn the first batch like I did? I want to hear it all. Drop a comment below, share a photo on Pinterest, or tag me on social media. Let’s keep this happy accident going.
Happy baking, friends. And remember: sometimes the best recipes are the ones you never meant to make.
Frequently Asked Questions
Can I use natural peanut butter for this recipe?
I don’t recommend it. Natural peanut butter (the kind that separates) has a higher oil content that can make the cookies greasy and cause them to spread too much. Stick with processed peanut butter like Skippy or Jif for the best texture. If you only have natural, stir it really well and reduce the butter by 2 tablespoons to compensate for the extra oil.
Why did my cookies spread too much?
This usually happens for one of three reasons: your butter was too soft or melted, your dough wasn’t chilled, or your oven wasn’t hot enough. Make sure your butter is softened but still cool to the touch, chill the dough for 15-20 minutes if your kitchen is warm, and always preheat your oven fully. An oven thermometer can help you verify the temperature.
Can I make the dough ahead of time?
Absolutely. You can refrigerate the dough for up to 3 days or freeze it for up to 3 months. If freezing, scoop the dough into balls first, freeze them on a baking sheet, then transfer to a freezer bag. Bake from frozen, adding 1-2 minutes to the baking time. Just don’t roll them in the turbinado sugar until right before baking, or the sugar will dissolve into the dough.
How do I keep the caramel from making a sticky mess?
Let the cookies cool completely before adding the caramel. If the cookies are still warm, the caramel will melt and run off. Also, make sure your caramel sauce is at room temperature—not too thick, not too warm. A piping bag with a small tip gives you the most control, but a spoon works if you drizzle slowly. And always store them in a single layer with parchment paper between layers.
Can I use a different chocolate instead of Hershey’s Kisses?
Sure! Chocolate chips work in a pinch, but they don’t have the same iconic look. You can use chocolate chunks, caramel-filled chocolates, or even mini peanut butter cups (pressed in upside down). Just make sure whatever you use is sturdy enough to hold its shape when pressed into the caramel. Soft fillings like truffles might squish out.
Pin This Recipe!

Easy Salted Caramel Peanut Butter Blossom Cookies
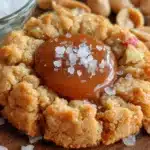
These Easy Salted Caramel Peanut Butter Blossom Cookies are a happy accident that turned into a family favorite. With a crunchy turbinado sugar coating, a soft peanut butter center, and a gooey salted caramel and chocolate kiss topping, they’re the perfect salty-sweet treat.
- Prep Time: 15 minutes
- Cook Time: 11 minutes
- Total Time: 26 minutes
- Yield: 24-30 cookies 1x
- Category: Dessert
- Cuisine: American
Ingredients
- 1 cup (2 sticks) unsalted butter, softened
- 1 cup creamy peanut butter
- 1 cup granulated sugar
- 1 cup packed light brown sugar
- 2 large eggs, room temperature
- 2 teaspoons vanilla extract
- 2 ½ cups all-purpose flour
- 1 teaspoon baking soda
- ½ teaspoon salt
- ½ cup turbinado sugar (for rolling)
- 24–30 Hershey’s Kisses, unwrapped
- ½ cup salted caramel sauce
- Flaky sea salt (optional, for garnish)
Instructions
- Preheat your oven to 375°F (190°C). Line two baking sheets with parchment paper or silicone mats.
- In a large mixing bowl, beat the softened butter, granulated sugar, and brown sugar together on medium speed until light and fluffy—about 3-4 minutes. Scrape down the sides of the bowl halfway through.
- Beat in the peanut butter until fully incorporated, then add the eggs one at a time, beating well after each addition. Stir in the vanilla extract.
- In a medium bowl, whisk together the flour, baking soda, and salt.
- Gradually add the dry ingredients to the wet mixture, mixing on low speed just until the flour disappears. The dough will be soft and slightly sticky.
- Pour the turbinado sugar into a shallow bowl. Using a cookie scoop or your hands, portion the dough into 1.5-tablespoon balls (about the size of a walnut). Roll each ball between your palms until smooth, then roll it in the turbinado sugar to coat evenly. Place the coated dough balls on the prepared baking sheets, spacing them about 2 inches apart.
- Bake for 10-12 minutes. The cookies are done when the edges are set and lightly golden, but the centers still look slightly soft and puffed.
- Let the cookies rest on the hot baking sheet for exactly 2 minutes. After 2 minutes, transfer them to a wire cooling rack to cool completely.
- Once the cookies are completely cool (about 15-20 minutes), drizzle about 1 teaspoon of salted caramel sauce over the center of each cookie. While the caramel is still wet, gently press a Hershey’s Kiss into the center, pushing down just until the chocolate is nestled into the caramel.
- If desired, sprinkle a tiny pinch of flaky sea salt over the top of each cookie. Let the cookies sit for another 10 minutes to allow the caramel to set slightly.
Notes
For best results, use processed peanut butter (like Skippy or Jif) rather than natural peanut butter. If your kitchen is warm, chill the dough for 15-30 minutes before rolling to prevent spreading. Let the caramel sauce come to room temperature before drizzling—if it’s too thick, microwave for 10-15 seconds. Store cookies in an airtight container at room temperature for up to 5 days, with parchment paper between layers. Freeze baked cookies (without caramel and kisses) for up to 3 months.
Nutrition
- Serving Size: 1 cookie
- Calories: 210
- Sugar: 16
- Sodium: 150
- Fat: 12
- Saturated Fat: 5
- Carbohydrates: 24
- Fiber: 1
- Protein: 4
Keywords: peanut butter blossom cookies, salted caramel cookies, easy cookie recipe, peanut butter and chocolate, holiday cookies, kid-friendly cookies