Love this? Save it for later!
Share the inspiration with your friends
I wasn’t expecting cooking advice from the plumber. But there I was, standing in my own kitchen with a wrench in one hand and a bag of fresh green beans in the other, while Frank—yes, the guy who fixes my pipes—explained his secret for the best green bean casserole I’d ever heard of. He’d come to fix a leaky faucet, spotted the green beans on my counter, and just started talking. “You’re overcomplicating it,” he said, wiping his hands on his coveralls. “My grandma taught me this trick back in ’82, and I’ve never gone back to that canned stuff.”
Honestly, I almost laughed him off. A plumber giving me a green bean casserole recipe? But something about the way he described it—the slow-cooked mushrooms, the homemade cream sauce, the crispy onions made from scratch—made me grab a notepad. I mean, when a man who fixes toilets for a living gets that passionate about green beans, you listen. So I tried it that very weekend, and let me tell you, it was nothing short of a revelation. This easy make-ahead green bean casserole from scratch changed my entire holiday cooking game.
Maybe you’ve been there, standing in the grocery aisle, staring at a can of cream of mushroom soup and feeling a little guilty. Maybe you’ve wanted something fresher, something that actually tastes like the vegetables it’s supposed to celebrate. That’s exactly where I was when Frank walked in. And now, years later, this recipe has become my go-to for every Thanksgiving, every potluck, every Tuesday night when I need a little comfort. It’s the kind of dish that makes people close their eyes after the first bite—and then ask for the recipe before they’ve even swallowed. So let’s get into it, because this is the only green bean casserole recipe you’ll ever need.
Why You’ll Love This Recipe
Let’s be real for a second. Green bean casserole has a bit of a reputation. It’s that dish from the ’50s that shows up at every family gathering, usually from a can, and honestly, it’s fine. But “fine” isn’t what we’re going for here. We’re going for memorable. Here’s why this version is different—and why you’ll keep coming back to it.
- Make-Ahead Magic: This is the ultimate time-saver. You can assemble the entire casserole up to two days in advance. Just pop it in the oven when you’re ready. No last-minute scrambling, no stressed-out host vibes. Just a perfect dish, right on time.
- From Scratch, But Easy: I know “from scratch” sounds fancy, but trust me—it’s not. We’re talking fresh green beans, a creamy mushroom sauce made with real ingredients, and crispy onions you can actually pronounce. No cans, no preservatives, no weird additives. Just real food that tastes incredible.
- Simple Ingredients: You likely already have most of what you need in your kitchen. Butter, flour, milk, mushrooms, onions, and of course, green beans. No exotic trips to a specialty store required. This is pantry cooking at its finest.
- Perfect for Weeknights and Holidays: Look, this recipe is versatile. It’s special enough for Thanksgiving dinner, but simple enough for a random Wednesday. The make-ahead factor means you can prep it on a Sunday and have a side dish ready to go whenever you need it.
- Crowd-Pleaser: I’ve served this to everyone—from picky kids to foodie adults—and it always gets rave reviews. The creamy texture, the fresh snap of the beans, the crunchy topping… it’s comfort food that actually makes you feel good.
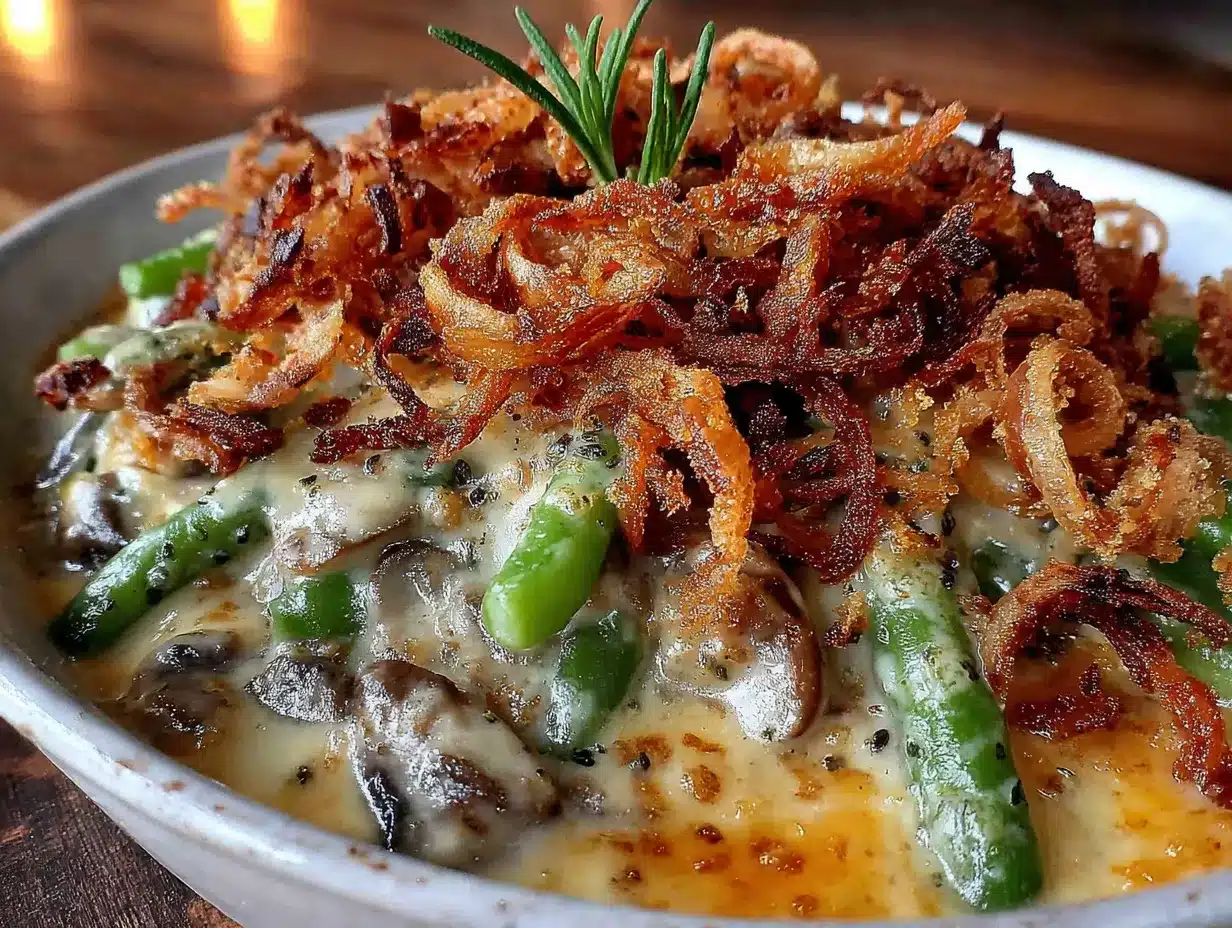
What really sets this recipe apart is the technique. Instead of a gluey canned soup, we’re building a silky, savory sauce from scratch using sautéed mushrooms, garlic, and a touch of nutmeg. The fresh green beans are blanched just enough to keep their vibrant color and satisfying crunch. And the crispy onions? They’re baked, not fried, so they stay crunchy without being greasy. It’s not just another version—it’s the best version. The one that makes you wonder why you ever settled for less.
What Ingredients You Will Need
This recipe uses simple, wholesome ingredients to deliver bold flavor and satisfying texture without the fuss. Most of these are probably already in your pantry or fridge, which is exactly how weeknight cooking should be. Here’s what you’ll need and why each ingredient matters.
For the Green Beans
- Fresh green beans, 1.5 pounds (680g) — Look for bright, firm beans with no brown spots. I prefer haricots verts (thin French green beans) for their tenderness, but regular green beans work beautifully too. Trim the ends, and you’re good to go.
- Kosher salt, 1 tablespoon (for blanching water) — This helps the beans stay bright green and seasoned from the inside out.
- Ice water, for the ice bath — This stops the cooking process immediately, locking in that vibrant color and perfect crunch.
For the Homemade Cream of Mushroom Sauce
- Unsalted butter, 4 tablespoons (56g) — I use unsalted so I can control the salt level. If you only have salted, just reduce the added salt later. I recommend Kerrygold for its rich flavor, but any good-quality butter works.
- Cremini mushrooms, 12 ounces (340g), sliced — These have more flavor than white button mushrooms. You can also use a mix of wild mushrooms like shiitake or oyster for a deeper, earthier taste.
- Yellow onion, 1 medium (about 150g), finely diced — This forms the aromatic base of the sauce. Sweet onions like Vidalia work great here too.
- Garlic, 3 cloves, minced — Fresh garlic is non-negotiable here. The jarred stuff just won’t give you the same punch.
- All-purpose flour, 3 tablespoons (24g) — This thickens the sauce. For a gluten-free option, use a 1:1 gluten-free flour blend or cornstarch (see notes below).
- Whole milk, 1.5 cups (360ml) — Whole milk gives the creamiest result. You can use 2% or even half-and-half for extra richness. For a dairy-free version, unsweetened oat milk or full-fat coconut milk works surprisingly well.
- Low-sodium chicken or vegetable broth, 1/2 cup (120ml) — This adds savory depth without making the sauce too salty. I prefer homemade vegetable broth for the best flavor, but store-bought is fine.
- Fresh thyme, 1 teaspoon, chopped (or 1/2 teaspoon dried) — Thyme and mushrooms are a classic pairing. Don’t skip it—it adds a subtle earthiness that ties everything together.
- Nutmeg, 1/4 teaspoon, freshly grated — This is my secret ingredient. A tiny pinch of nutmeg brightens the creamy sauce and makes it taste more complex. Trust me on this one.
- Kosher salt and freshly ground black pepper, to taste
For the Crispy Onion Topping
- Yellow onions, 2 large (about 400g), thinly sliced into rings — You want them thin and even so they crisp up uniformly. A mandoline slicer makes this job a breeze.
- Buttermilk, 1 cup (240ml) — This tenderizes the onions and gives them a slight tang. No buttermilk? Add 1 tablespoon of lemon juice or white vinegar to regular milk and let it sit for 5 minutes.
- All-purpose flour, 1 cup (120g) — For coating the onions. You can use a gluten-free flour blend here.
- Panko breadcrumbs, 1/2 cup (30g) — These add extra crunch. Regular breadcrumbs work, but panko gives a lighter, crispier texture.
- Kosher salt, 1 teaspoon
- Garlic powder, 1/2 teaspoon
- Paprika, 1/2 teaspoon — Smoked paprika adds a lovely depth, but sweet paprika works too.
- Olive oil or melted butter, 3 tablespoons (45ml) — For tossing with the onions before baking.
Equipment Needed
You don’t need a fancy kitchen to make this recipe. Here’s what you’ll need, along with a few tips from my own trial and error.
- Large pot (for blanching) — A 6-quart pot works perfectly. You need enough water to fully submerge the green beans.
- Large bowl of ice water — For the ice bath. This stops the beans from overcooking.
- Large skillet or sauté pan — A 12-inch skillet is ideal for making the mushroom sauce. A wider pan means more surface area for the mushrooms to brown, which equals more flavor.
- 9×13-inch baking dish — This is the standard size for a family-sized casserole. An 8×8 dish works for a smaller batch, but you’ll need to adjust the baking time.
- Baking sheet (for the onions) — A rimmed baking sheet lined with parchment paper makes cleanup a breeze.
- Whisk — For making the sauce smooth and lump-free. A silicone whisk is gentle on nonstick pans.
- Sharp knife and cutting board — A good chef’s knife makes slicing onions and trimming beans so much easier.
- Mandoline slicer (optional but helpful) — For getting paper-thin onion rings. I bought a cheap one at a garage sale, and honestly, it’s one of my most-used tools. Just watch your fingers!
Budget-Friendly Tip: If you don’t have a mandoline, just use a sharp knife. It takes a few extra minutes, but the results are still fantastic. And if you don’t have a 9×13 dish, a 10-inch cast iron skillet works beautifully—it even looks nice on the table.
Preparation Method
Alright, let’s get cooking. This recipe breaks down into three main components: the green beans, the sauce, and the crispy onions. You can make them all at once, or spread the work over two days. Here’s how.
Step 1: Blanch the Green Beans (10 minutes)
Bring a large pot of water to a rolling boil. Add 1 tablespoon of kosher salt—this seasons the beans and helps them stay bright green. Drop in the trimmed green beans and cook for exactly 2 to 3 minutes. You want them tender-crisp, not mushy. While they cook, prepare a large bowl of ice water. Using a slotted spoon or tongs, transfer the beans directly into the ice bath. This stops the cooking immediately. Let them sit for 2 minutes, then drain well and pat dry with a clean kitchen towel. Set aside.
Personal Tip: I once forgot the ice bath and ended up with sad, olive-green beans. Don’t be like me. The ice bath is non-negotiable if you want that vibrant color and perfect snap.
Step 2: Make the Crispy Onion Topping (25 minutes)
Preheat your oven to 375°F (190°C). Line a baking sheet with parchment paper.
In a medium bowl, soak the thinly sliced onions in the buttermilk for 10 minutes. This tenderizes them and adds a subtle tang. Meanwhile, in a shallow dish, whisk together the flour, panko, salt, garlic powder, and paprika.
Drain the onions, but don’t pat them dry. Toss them directly in the flour mixture, making sure each ring is well coated. Spread them in a single layer on the prepared baking sheet. Drizzle with olive oil or melted butter, and toss gently to coat. Bake for 15 to 18 minutes, stirring halfway through, until golden brown and crispy. Keep an eye on them—they can go from golden to burnt in a flash. Let them cool on the sheet; they’ll continue to crisp up.
Step 3: Make the Creamy Mushroom Sauce (20 minutes)
In a large skillet, melt the butter over medium heat. Add the sliced mushrooms and cook, stirring occasionally, for 5 to 7 minutes, until they release their liquid and start to brown. Add the diced onion and cook for another 3 minutes, until softened. Stir in the minced garlic and cook for 30 seconds, until fragrant.
Sprinkle the flour over the mushroom mixture and stir constantly for 1 minute. This cooks out the raw flour taste. Slowly pour in the milk and broth, whisking continuously to prevent lumps. Bring the sauce to a gentle simmer—it should thicken in about 2 to 3 minutes. Stir in the fresh thyme, nutmeg, and season with salt and pepper to taste. Remove from heat.
Sensory Cue: The sauce should be thick enough to coat the back of a spoon. If it looks too thin, let it simmer another minute. If it’s too thick, add a splash more milk.
Step 4: Assemble the Casserole (5 minutes)
Preheat your oven to 350°F (175°C). Grease your 9×13-inch baking dish lightly with butter or cooking spray.
Spread the blanched green beans evenly in the dish. Pour the mushroom sauce over the top, using a spatula to make sure every bean is coated. Sprinkle the crispy onions evenly over the sauce.
Make-Ahead Note: At this point, you can cover the dish with foil and refrigerate for up to 2 days. If baking straight away, proceed to the next step.
Step 5: Bake (20 to 25 minutes)
Bake the casserole uncovered for 20 to 25 minutes, until the sauce is bubbly around the edges and the topping is deep golden brown. If the topping starts to get too dark, tent loosely with foil for the last 5 minutes.
Let the casserole rest for 5 minutes before serving. This allows the sauce to set slightly, making it easier to serve.
If Baking from Refrigerated: Add 5 to 10 minutes to the baking time, and cover with foil for the first 15 minutes to ensure the center heats through without burning the topping.
Cooking Tips & Techniques
Over the years, I’ve made this casserole more times than I can count. And let me tell you, I’ve learned a thing or two the hard way. Here are my best tips to make sure yours turns out perfect every single time.
- Don’t skip the ice bath. I know it’s an extra step, but it’s the difference between bright, crisp beans and sad, limp ones. The shock of the cold water locks in the color and stops the cooking instantly. Trust the process.
- Brown your mushrooms properly. This is where the flavor lives. Don’t crowd the pan—if you have too many mushrooms, they’ll steam instead of brown. Cook them in batches if needed. You want them golden and slightly caramelized, not gray and watery.
- Season in layers. Add salt at every stage—when blanching the beans, sautéing the mushrooms, and finishing the sauce. This builds deep, balanced flavor that you can’t get from just seasoning at the end.
- Watch your onions like a hawk. Homemade crispy onions are incredible, but they go from perfect to burnt in about 30 seconds. Check them at the 12-minute mark and stir. If they’re browning unevenly, rotate the baking sheet.
- Let the sauce simmer. Don’t rush this step. The flour needs a full minute to cook, and the sauce needs to bubble gently to reach the right consistency. Patience here pays off with a silky, lump-free sauce.
- Use freshly grated nutmeg. I know it seems fussy, but pre-ground nutmeg loses its punch quickly. A few swipes on a microplane grater make a world of difference. It’s one of those small details that makes this recipe feel special.
My Biggest Failure: The first time I made this, I tried to skip the blanching step. I figured, “It’s going in the oven anyway, right?” Wrong. The beans turned out tough and unevenly cooked. Some were underdone, others were mushy. It was a mess. Now I never skip the blanch, and my casserole has been perfect ever since.
Variations & Adaptations
One of the best things about this recipe is how flexible it is. Here are a few ways to make it your own, depending on your mood, your diet, or what’s in your fridge.
- Dairy-Free Version: Swap the butter for vegan butter or olive oil, use unsweetened oat milk or full-fat coconut milk in the sauce, and skip the buttermilk soak for the onions (just toss them in the flour mixture directly). The coconut milk adds a subtle sweetness that’s surprisingly lovely.
- Gluten-Free Version: Use a 1:1 gluten-free flour blend in the sauce and for the onion coating. Cornstarch also works for the sauce—use 1.5 tablespoons mixed with 2 tablespoons of cold water, then stir it in at the end. The texture will be slightly different, but still delicious.
- Add Protein: Make it a main dish by adding shredded rotisserie chicken, cooked bacon bits, or sautéed Italian sausage. Stir it into the sauce before assembling the casserole. It’s a great way to use up leftovers.
- Seasonal Twist: In the summer, swap the green beans for fresh asparagus or a mix of summer squash. In the fall, add a handful of roasted butternut squash cubes. The creamy mushroom sauce works beautifully with almost any vegetable.
- Extra Crunchy Topping: Mix in some crushed potato chips or crispy fried shallots with the homemade onions. It’s a bit indulgent, but hey—sometimes you need that extra crunch.
I once made a version with sautéed leeks instead of onions in the sauce, and it was incredible. Leeks have a milder, sweeter flavor that pairs beautifully with the mushrooms. Just make sure to wash them thoroughly—leeks are notorious for hiding dirt.
Serving & Storage Suggestions
This casserole is best served warm, fresh from the oven. Let it rest for 5 minutes before bringing it to the table—this helps the sauce set and makes serving cleaner. I love to garnish with a sprinkle of fresh thyme leaves or chopped parsley for a pop of color.
What to Serve With It: This green bean casserole is a natural side for roasted turkey, baked ham, or even a simple roast chicken. For a vegetarian meal, pair it with creamy mashed potatoes and a crisp green salad. It also goes beautifully with cornbread or dinner rolls to soak up any extra sauce.
Storage: Leftovers can be stored in an airtight container in the refrigerator for up to 4 days. The crispy topping will soften over time, but the flavor will still be fantastic. To reheat, place the casserole in a 350°F (175°C) oven for 10 to 15 minutes, or until heated through. You can also microwave individual portions, though the texture won’t be as good.
Freezing: This casserole freezes beautifully. Assemble the casserole completely, but don’t add the crispy onions. Cover tightly with foil and freeze for up to 3 months. When ready to bake, thaw overnight in the refrigerator, add the onions, and bake as directed. If baking from frozen, add 15 to 20 minutes to the baking time and cover with foil for the first half.
Flavor Development: Honestly, this casserole tastes even better the next day. The flavors meld together overnight, and the sauce gets even creamier. If you can resist eating it all the first night, you’re in for a treat.
Nutritional Information & Benefits
While this is comfort food at its finest, it also packs some surprising nutritional benefits. Here’s a rough estimate per serving (based on 8 servings):
| Nutrient | Amount per Serving |
|---|---|
| Calories | 245 |
| Total Fat | 12g |
| Saturated Fat | 6g |
| Cholesterol | 25mg |
| Sodium | 480mg |
| Total Carbohydrates | 28g |
| Dietary Fiber | 4g |
| Sugars | 8g |
| Protein | 6g |
| Vitamin A | 15% DV |
| Vitamin C | 20% DV |
| Calcium | 10% DV |
| Iron | 8% DV |
Green beans are a fantastic source of vitamin K, vitamin C, and fiber, which supports digestion and heart health. Mushrooms provide B vitamins and selenium, an important antioxidant. And while the sauce has some butter and milk, using whole food ingredients means you’re getting real nutrition, not processed additives. If you’re watching your sodium, use low-sodium broth and go easy on the added salt in the sauce.
Dietary Note: This recipe is vegetarian as written. For a vegan version, see the variations section above. It contains dairy and gluten, but both can be easily substituted.
Conclusion
So there you have it—the green bean casserole that changed my mind about green bean casserole. It’s creamy, crunchy, and packed with real flavor from ingredients you can actually pronounce. Whether you’re making it for a holiday feast, a weeknight dinner, or just because you want something comforting, this recipe delivers every single time.
What I love most about this dish is how it brings people together. That first bite always sparks a conversation—someone saying “wait, this is from scratch?” or “I never knew green beans could taste like this.” It’s the kind of recipe that becomes a tradition, the one your family requests year after year. And honestly, that’s the best compliment a cook can get.
Now I want to hear from you. Did you try this recipe? Did you add your own twist? Drop a comment below and tell me about it. I read every single one, and I love seeing how you make these recipes your own. And if you loved it, share it with a friend—because great recipes deserve to be passed along.
Happy cooking, friends. Your perfect green bean casserole is just one oven cycle away.
Frequently Asked Questions
Can I use frozen green beans instead of fresh?
Yes, you can! Just skip the blanching step. Thaw the frozen beans completely and pat them dry before using. Keep in mind that frozen beans will be slightly softer than fresh, so adjust your baking time by a few minutes if needed.
How far in advance can I make this casserole?
You can assemble the entire casserole (without the crispy onions) up to 2 days ahead. Store it covered in the refrigerator. Add the onions just before baking. If you want to prep even further ahead, you can blanch the beans and make the sauce up to 3 days in advance, then assemble when ready.
Why are my crispy onions not getting crunchy?
A few things could be going wrong. First, make sure your onions are sliced thinly and evenly. Second, don’t overcrowd the baking sheet—they need space to crisp up. Third, make sure your oven is fully preheated. And finally, let them cool completely on the baking sheet before adding to the casserole; they continue to crisp as they cool.
Can I double this recipe?
Absolutely! This recipe doubles beautifully. Just use a larger baking dish (or two 9×13 dishes) and increase the baking time by 5 to 10 minutes. Make sure the sauce is bubbly in the center before pulling it out of the oven.
What can I use instead of buttermilk for the onions?
No buttermilk? No problem. Add 1 tablespoon of lemon juice or white vinegar to 1 cup of regular milk and let it sit for 5 minutes. It will curdle slightly, but that’s exactly what you want. You can also use plain yogurt thinned with a little water.
Pin This Recipe!

Easy Make-Ahead Green Bean Casserole: Best Homemade Recipe

This creamy, crunchy green bean casserole is made completely from scratch with fresh green beans, a silky homemade mushroom sauce, and baked crispy onions. It can be assembled up to two days ahead, making it perfect for holidays or weeknight dinners.
- Prep Time: 30 minutes
- Cook Time: 25 minutes
- Total Time: 55 minutes
- Yield: 8 servings 1x
- Category: Side Dish
- Cuisine: American
Ingredients
- 1.5 pounds (680g) fresh green beans, trimmed
- 1 tablespoon kosher salt (for blanching water)
- Ice water (for ice bath)
- 4 tablespoons (56g) unsalted butter
- 12 ounces (340g) cremini mushrooms, sliced
- 1 medium yellow onion (about 150g), finely diced
- 3 cloves garlic, minced
- 3 tablespoons (24g) all-purpose flour
- 1.5 cups (360ml) whole milk
- 1/2 cup (120ml) low-sodium chicken or vegetable broth
- 1 teaspoon fresh thyme, chopped (or 1/2 teaspoon dried)
- 1/4 teaspoon freshly grated nutmeg
- Kosher salt and freshly ground black pepper, to taste
- 2 large yellow onions (about 400g), thinly sliced into rings
- 1 cup (240ml) buttermilk
- 1 cup (120g) all-purpose flour
- 1/2 cup (30g) panko breadcrumbs
- 1 teaspoon kosher salt
- 1/2 teaspoon garlic powder
- 1/2 teaspoon paprika (smoked or sweet)
- 3 tablespoons (45ml) olive oil or melted butter
Instructions
- Blanch the green beans: Bring a large pot of water to a rolling boil. Add 1 tablespoon kosher salt. Drop in the trimmed green beans and cook for 2 to 3 minutes until tender-crisp. Prepare a large bowl of ice water. Transfer the beans to the ice bath using a slotted spoon or tongs. Let sit for 2 minutes, then drain well and pat dry. Set aside.
- Make the crispy onion topping: Preheat oven to 375°F (190°C). Line a baking sheet with parchment paper. In a medium bowl, soak the thinly sliced onions in buttermilk for 10 minutes. In a shallow dish, whisk together 1 cup flour, panko, 1 teaspoon salt, garlic powder, and paprika. Drain the onions (do not pat dry) and toss in the flour mixture until well coated. Spread in a single layer on the prepared baking sheet. Drizzle with olive oil or melted butter and toss gently. Bake for 15 to 18 minute…
- Make the creamy mushroom sauce: In a large skillet, melt butter over medium heat. Add sliced mushrooms and cook for 5 to 7 minutes, stirring occasionally, until browned. Add diced onion and cook for 3 minutes until softened. Stir in minced garlic and cook for 30 seconds until fragrant. Sprinkle 3 tablespoons flour over the mixture and stir constantly for 1 minute. Slowly pour in milk and broth, whisking continuously to prevent lumps. Bring to a gentle simmer and cook for 2 to 3 minutes until thi…
- Assemble the casserole: Preheat oven to 350°F (175°C). Grease a 9×13-inch baking dish. Spread blanched green beans evenly in the dish. Pour mushroom sauce over the top, using a spatula to coat all beans. Sprinkle crispy onions evenly over the sauce. (At this point, you can cover and refrigerate for up to 2 days.)
- Bake: Bake uncovered for 20 to 25 minutes, until sauce is bubbly around the edges and topping is deep golden brown. If topping browns too quickly, tent loosely with foil for the last 5 minutes. Let rest for 5 minutes before serving. If baking from refrigerated, add 5 to 10 minutes and cover with foil for the first 15 minutes.
Notes
For the best texture, do not skip the ice bath after blanching the green beans—it locks in color and crunch. Brown the mushrooms properly by not crowding the pan; cook in batches if needed. Watch the crispy onions closely as they can burn quickly. The sauce should coat the back of a spoon; adjust thickness with extra milk if needed. This casserole can be assembled up to 2 days ahead and refrigerated. Leftovers keep for 4 days in the refrigerator and taste even better the next day. For freezing, assemble without the crispy onions, cover tightly, and freeze for up to 3 months.
Nutrition
- Serving Size: 1 serving (about 1 c
- Calories: 245
- Sugar: 8
- Sodium: 480
- Fat: 12
- Saturated Fat: 6
- Carbohydrates: 28
- Fiber: 4
- Protein: 6
Keywords: green bean casserole, homemade, make-ahead, Thanksgiving side dish, from scratch, creamy mushroom sauce, crispy onions