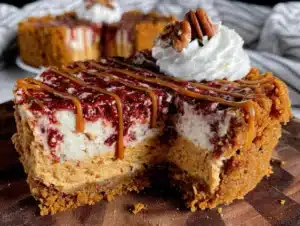
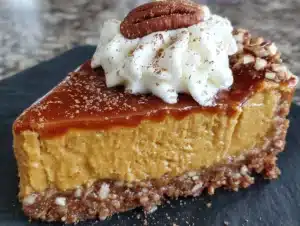
Love this? Save it for later!
Share the inspiration with your friends
This was supposed to be a classic pumpkin pie. I had my grandmother’s recipe memorized, the one with the flaky butter crust that took me years to perfect. But last Thanksgiving, I was already two glasses of wine in when I realized the cream cheese I’d softened was meant for the appetizer platter, not the dessert station. My oven was preheating, guests were arriving in an hour, and I had a brick of cream cheese staring at me like it knew I’d messed up. I grabbed the wrong block from the fridge, my gingersnap cookies were already crushed for a crust I hadn’t planned, and I was already sweating through my apron. What came out of that oven was nothing like the plan—and better.
Honestly, I almost threw the whole thing in the trash. The filling looked too thick, the crust was darker than I liked, and I was convinced I’d ruined dessert for fifteen people. But my neighbor Maria walked in, took one look at the pie cooling on the rack, and said, “That smells like Christmas.” So I let it cool, crossed my fingers, and served it with a dollop of whipped cream. The first bite was quiet. Then my sister-in-law asked for the recipe. Then everyone asked for the recipe. I mean, I stood there holding a spatula, completely confused about what I’d just created.
This Maple Pumpkin Cheesecake Pie with Gingersnap Crust is now the only dessert I bring to gatherings. It’s got that rich, tangy cream cheese layer that cuts through the sweet pumpkin, and the maple syrup gives it this warm, cozy flavor that makes people close their eyes when they eat it. The gingersnap crust is honestly the star—crunchy, spicy, and way easier than a traditional pie dough. Maybe you’ve been there, staring at a mistake in the kitchen wondering if you should start over. Don’t. Sometimes the best recipes come from grabbing the wrong thing and pretending you meant to do it all along.
Why You’ll Love This Recipe
I’ve tested this pie at three different dinner parties, two potlucks, and one very chaotic family reunion. It works every single time. Here’s why this version stands out from every other pumpkin dessert you’ve tried:
- Perfect for Hosting: This pie feeds a crowd with zero last-minute stress. You can make it a full day ahead, and honestly, it tastes better after sitting overnight in the fridge. The flavors meld together, and the crust stays perfectly crunchy.
- Simple Ingredients: No fancy grocery store trips required. Canned pumpkin, cream cheese, maple syrup, and gingersnap cookies—you probably have most of this in your pantry right now.
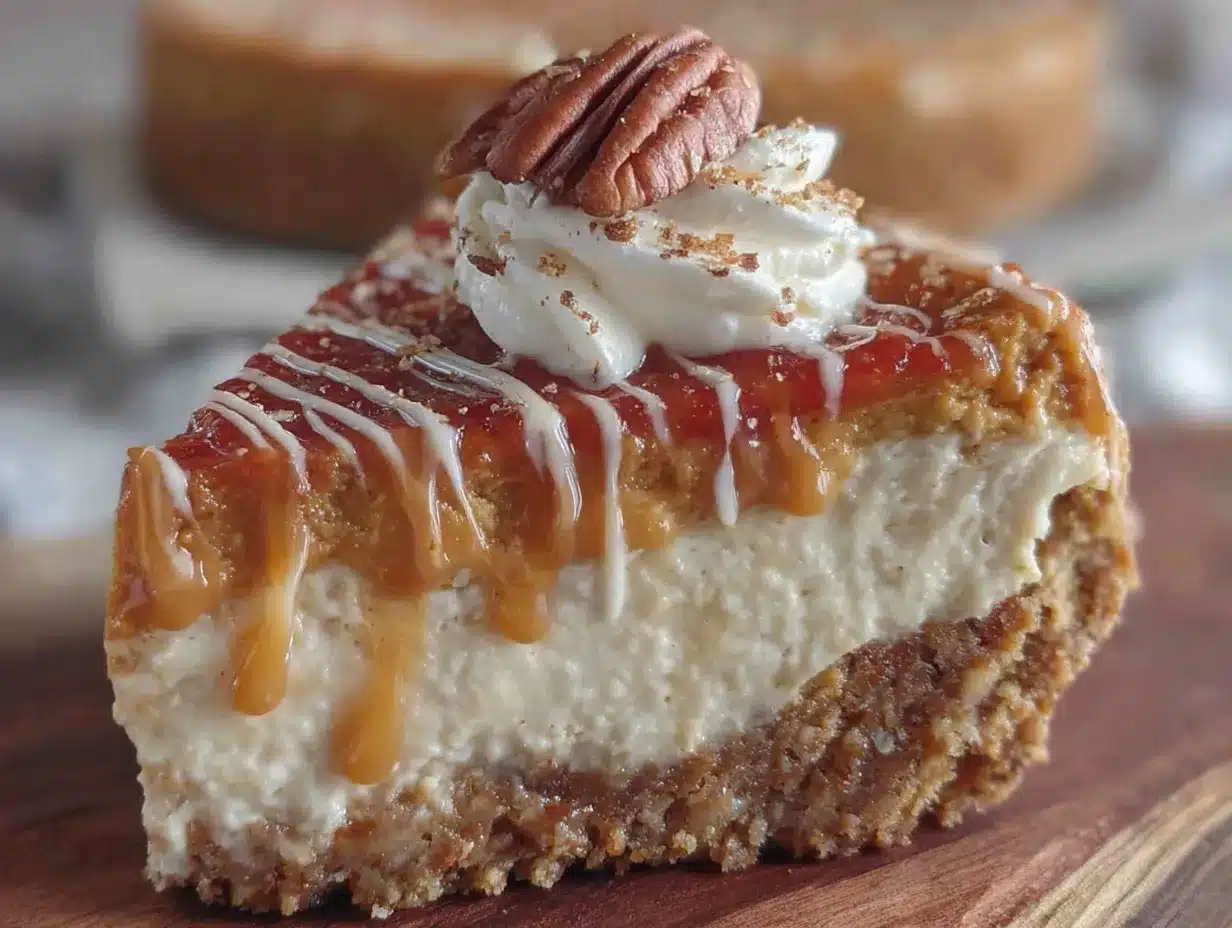
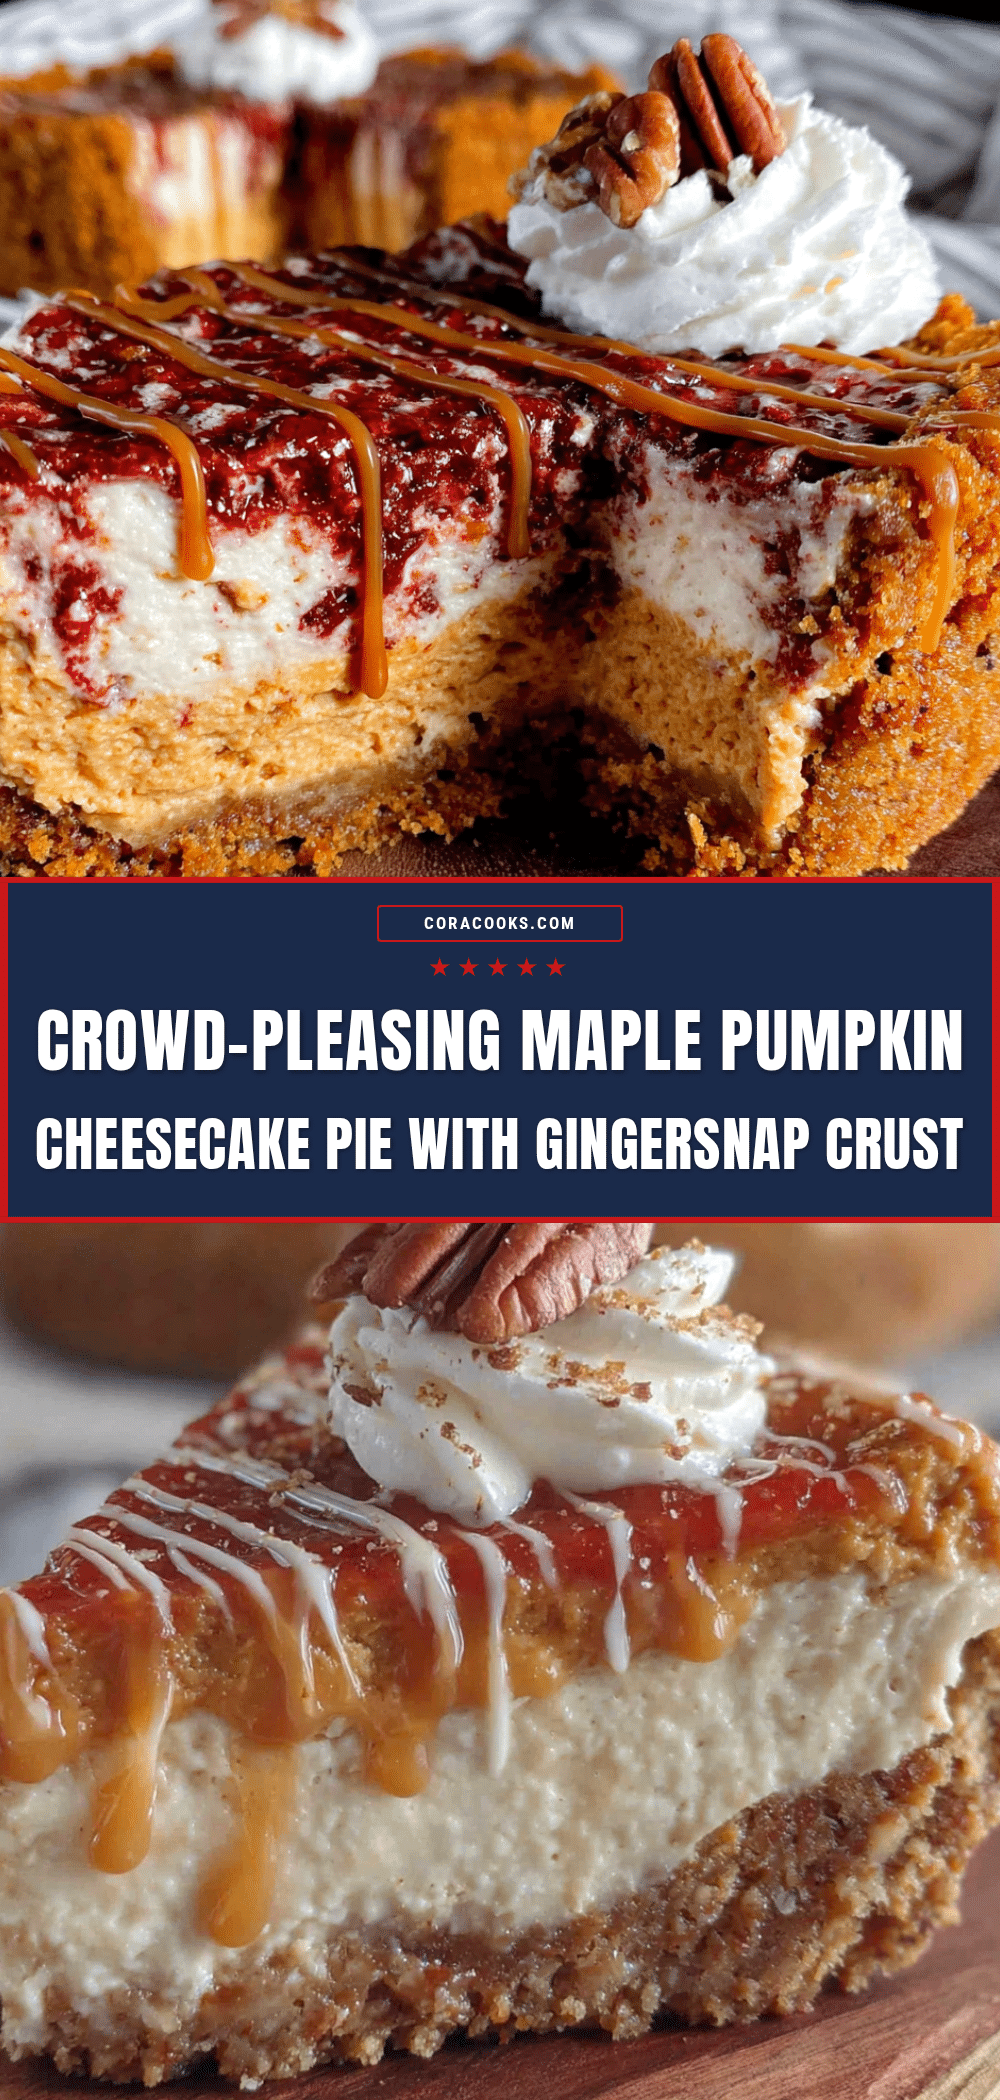
- Impressive Presentation: The layered look with the creamy cheesecake on top of the pumpkin filling is gorgeous. Your guests will think you spent hours on it. Let them wonder.
- Crowd-Pleaser: I’ve served this to pumpkin pie purists and cheesecake lovers alike. Both groups fight over the last slice. It’s that good.
- Unbelievably Delicious: The combination of tangy cream cheese, sweet maple, and spicy gingersnap is next-level comfort food. It’s the kind of dessert that makes people ask for the recipe before they finish their first slice.
What makes this recipe different from the rest is the texture. The cream cheese layer stays silky and smooth, while the pumpkin layer has that classic custard-like feel. The gingersnap crust adds a crunchy contrast that regular pie crust just can’t match. It’s comfort food reimagined—richer, faster, and with the same soul-soothing satisfaction that makes you want a second slice.
What Ingredients You Will Need
This recipe uses simple, wholesome ingredients to deliver bold flavor and satisfying texture without the fuss. Most of these are pantry staples, especially during fall baking season. Let me walk you through each one and why it matters.
For the Gingersnap Crust
- 2 cups (about 8 ounces) gingersnap cookies, crushed (I recommend Nabisco or a bakery brand for the best spicy kick)
- 5 tablespoons unsalted butter, melted (adds richness and helps the crust hold together)
- 2 tablespoons granulated sugar (just a touch to balance the spice)
- Pinch of salt (trust me on this—it makes the crust taste more like a cookie)
For the Pumpkin Layer
- 1 can (15 ounces) pumpkin puree (not pumpkin pie filling—make sure it’s 100% pure pumpkin)
- 3/4 cup granulated sugar
- 2 large eggs, room temperature (cold eggs can make the filling lumpy)
- 1 teaspoon ground cinnamon
- 1/2 teaspoon ground ginger
- 1/4 teaspoon ground nutmeg
- 1/4 teaspoon ground cloves
- 1/2 cup heavy cream (adds richness and a silky texture)
For the Cheesecake Layer
- 8 ounces cream cheese, softened (full-fat works best for that creamy texture)
- 1/3 cup pure maple syrup (use the real stuff, not pancake syrup—it makes a difference)
- 1 large egg, room temperature
- 1 teaspoon vanilla extract
- 1 tablespoon all-purpose flour (helps stabilize the cheesecake layer)
For the Topping (Optional but Recommended)
- 1 cup heavy whipping cream
- 2 tablespoons powdered sugar
- 1/2 teaspoon vanilla extract
- Extra crushed gingersnaps for garnish
If you’re dairy-free, you can substitute the cream cheese with a plant-based version, but I’ve found that the texture is slightly less firm. For a gluten-free option, use gluten-free gingersnap cookies—they work perfectly in the crust. And if you don’t have maple syrup on hand, honey makes a decent substitute, though the flavor will be a bit different.
Equipment Needed
You don’t need a professional bakery setup for this pie. Here’s what you’ll need:
- 9-inch pie dish (glass or ceramic works best for even baking)
- Food processor or zip-top bag and rolling pin (for crushing the gingersnaps)
- Medium mixing bowls (at least two)
- Electric hand mixer or stand mixer (for the cheesecake layer)
- Measuring cups and spoons
- Rubber spatula
- Cooling rack
If you don’t have a food processor, don’t worry. I’ve made this crust plenty of times by putting the cookies in a zip-top bag and going to town with a rolling pin. It’s a great way to work out any frustration, honestly. Just make sure the crumbs are fairly fine—you don’t want big chunks in your crust.
For the pie dish, I prefer a deep-dish glass pie plate because it lets you see when the crust is golden brown on the bottom. Ceramic works great too, but it takes a few minutes longer to bake. And if you’re using a metal pie pan, keep an eye on the crust—it can brown faster.
Preparation Method
Let me walk you through this step by step. The key to this pie is patience—let each layer set before adding the next one. Trust me, it’s worth the wait.
- Preheat your oven to 350°F (175°C). Position the rack in the center of the oven. While it’s heating up, start on the crust.
- Make the gingersnap crust. Crush the gingersnap cookies until you have fine crumbs. You should have about 2 cups. In a medium bowl, mix the crumbs with the melted butter, sugar, and salt until everything looks like wet sand. Press this mixture firmly into your pie dish, making sure to go up the sides. I use the bottom of a measuring cup to press it down evenly. Bake for 10 minutes, then set aside to cool slightly. The crust should be fragrant and slightly darker around the edges.
- Prepare the pumpkin layer. In a medium bowl, whisk together the pumpkin puree and sugar until smooth. Add the eggs one at a time, whisking well after each addition. Stir in the cinnamon, ginger, nutmeg, and cloves. Slowly pour in the heavy cream while whisking gently. The mixture should be smooth and slightly thick. Set aside.
- Make the cheesecake layer. In a separate bowl, beat the softened cream cheese with an electric mixer until it’s smooth and fluffy—about 2 minutes. Add the maple syrup and beat until combined. Add the egg and vanilla extract, mixing on low speed just until incorporated. Fold in the flour with a rubber spatula. Don’t overmix, or the cheesecake can get too dense.
- Layer the filling. Pour the pumpkin mixture into the pre-baked crust. Spread it evenly with a spatula. Then, gently spoon the cheesecake mixture on top of the pumpkin layer. Use the spatula to spread it carefully—you want distinct layers, not a swirl. Don’t worry if the cheesecake layer looks thin; it will puff up slightly as it bakes.
- Bake the pie. Place the pie dish on a baking sheet to catch any drips. Bake for 45 to 50 minutes, or until the edges are set and the center is just slightly jiggly—like a cheesecake. The top should be lightly golden. If the crust starts browning too quickly, tent the edges with foil after 30 minutes.
- Cool completely. Let the pie cool on a wire rack for at least 1 hour at room temperature. Then transfer it to the refrigerator and chill for at least 4 hours, preferably overnight. This is crucial—the pie needs time to set properly. I know it’s hard to wait, but your patience will be rewarded.
- Make the whipped cream topping. Just before serving, whip the heavy cream, powdered sugar, and vanilla extract together until soft peaks form. Spread or pipe it over the chilled pie. Sprinkle with extra crushed gingersnaps for that crunchy finish.
One thing I learned the hard way—don’t rush the cooling process. I once tried to speed things up by putting the pie in the freezer for an hour. The texture was off, and the crust got soggy. Let it chill slowly in the fridge. Your guests will thank you.
Cooking Tips & Techniques
After making this pie more times than I can count, I’ve picked up a few tricks that make a real difference.
Room temperature ingredients are non-negotiable. I know it’s tempting to use cold cream cheese straight from the fridge, but you’ll end up with lumps in your cheesecake layer. Take everything out of the fridge about 30 minutes before you start. If you forget (and I definitely have), you can microwave the cream cheese in 10-second bursts until it’s soft but not melted.
Press the crust firmly. This is the most common mistake I see. If the crust isn’t packed tightly, it will crumble when you cut the pie. Use the bottom of a measuring cup or a flat glass to really press it into the dish. I spend a good 3 minutes on this step alone.
Don’t overbake. The pie is done when the edges are set and the center has a slight wobble—like Jell-O that’s just about set. If you wait until the center is completely firm, the cheesecake layer will be dry and cracked. I’ve made that mistake exactly once. The pie was still good, but it wasn’t as creamy as it should have been.
Use a water bath if you want extra insurance. I don’t always do this, but if you’re worried about cracks, wrap the bottom of your pie dish in foil and place it in a larger baking pan filled with about an inch of hot water. This creates a gentle, even heat that prevents the cheesecake from cracking. It’s an extra step, but it works.
Let it rest before cutting. After chilling, let the pie sit at room temperature for about 15 minutes before slicing. This makes the layers soft enough to cut cleanly without falling apart. A hot knife also helps—run it under hot water, wipe it dry, then slice.
Variations & Adaptations
This pie is forgiving, and I’ve played around with it more than I’d like to admit. Here are a few variations I’ve tried and loved:
Gluten-Free Version: Swap the gingersnap cookies for gluten-free gingersnaps. I’ve used several brands, and they all work well. Just check that your vanilla extract and other ingredients are certified gluten-free if that’s a concern.
Dairy-Free Adaptation: Use dairy-free cream cheese and coconut cream instead of heavy cream in the pumpkin layer. The texture will be slightly different—a bit softer—but the flavor is still amazing. I’ve made this for a friend with lactose intolerance, and she didn’t miss the dairy at all.
Spiced Maple Variation: Add 1/4 teaspoon of cardamom and a pinch of black pepper to the pumpkin layer. The cardamom adds this floral note that pairs beautifully with the maple, and the black pepper gives a subtle warmth that most people can’t identify but definitely notice. It’s my personal favorite twist.
Chocolate Gingersnap Crust: Swap half the gingersnaps for chocolate wafer cookies. The chocolate adds a rich depth that complements the pumpkin and maple. I did this on a whim one Christmas, and it was gone before the turkey leftovers.
Individual Mini Pies: Use a muffin tin instead of a pie dish. Press the crust into each cup, fill with the pumpkin and cheesecake layers, and bake for about 20 minutes. These are perfect for parties where everyone wants their own little dessert.
Serving & Storage Suggestions
This pie shines at room temperature or slightly chilled. I prefer to serve it cold with a generous dollop of whipped cream and a sprinkle of crushed gingersnaps. The contrast between the cold, creamy filling and the crunchy topping is everything.
What to serve alongside: This pie is rich, so keep the sides simple. A cup of black coffee or spiced chai tea is perfect. If you’re serving it as part of a dessert spread, pair it with something light like fresh fruit or a simple sugar cookie. Avoid serving it with another heavy dessert—it’s a showstopper on its own.
Storage: Cover the pie loosely with plastic wrap or foil and store it in the refrigerator for up to 5 days. The flavors actually get better after the first day, so don’t be afraid to make it ahead. I’ve found that day two is the sweet spot—the maple flavor really comes through.
Freezing: You can freeze this pie for up to 2 months. Wrap it tightly in plastic wrap, then a layer of foil. Thaw it overnight in the refrigerator before serving. Add the whipped cream topping after thawing, not before. I’ve frozen several pies for holiday prepping, and they’ve always turned out perfectly.
Reheating: I don’t recommend reheating this pie. It’s meant to be served cold or at room temperature. If you absolutely want it warm, microwave individual slices for about 10 seconds. Just know that the texture will be softer, and the crust might lose some crunch.
Nutritional Information & Benefits
This pie is a treat, and I’m not going to pretend otherwise. But it does have some redeeming qualities. Here’s a rough estimate per slice (based on 12 servings):
- Calories: Approximately 380
- Fat: 22g
- Carbohydrates: 42g
- Protein: 6g
- Fiber: 2g
- Sugar: 28g
Pumpkin is packed with vitamin A, which is great for your eyes and immune system. It also has fiber, which helps with digestion. The cream cheese adds calcium and protein, so you’re not just eating empty calories. And the ginger in the crust has anti-inflammatory properties—at least that’s what I tell myself when I go back for seconds.
For dietary considerations, this recipe contains gluten, dairy, and eggs. It can be adapted for gluten-free and dairy-free diets as mentioned in the variations section. If you’re watching your sugar intake, you can reduce the sugar in the pumpkin layer by a quarter cup, but the texture might be slightly less firm.
Conclusion
This Maple Pumpkin Cheesecake Pie with Gingersnap Crust started as a mistake, but it’s become my most-requested dessert. Every time I bring it to a gathering, someone asks for the recipe. And every time, I smile and think about that chaotic Thanksgiving when I grabbed the wrong ingredient and ended up with something better than I planned.
I hope you make this pie and make it your own. Add extra ginger if you like things spicy. Use honey instead of maple if that’s what you have. Serve it with ice cream or whipped cream or nothing at all. The best recipes are the ones that adapt to your kitchen and your crowd.
If you try this recipe, I’d love to hear about it. Leave a comment below and tell me how it turned out. Did your guests ask for the recipe? Did you make any changes? Share your photos and tag me on social media—I love seeing your creations. And if you’re looking for more crowd-pleasing desserts, check out my classic pumpkin pie recipe or my no-bake cheesecake for another easy option.
Happy baking, friends. And remember—sometimes the best things in life come from grabbing the wrong ingredient and pretending you meant to do it all along.
Frequently Asked Questions
Can I use fresh pumpkin instead of canned?
Yes, you can. Roast a small sugar pumpkin until tender, then puree it in a food processor. Just make sure to drain any excess liquid—fresh pumpkin tends to be more watery than canned. You’ll need about 1 3/4 cups of puree for this recipe.
Why did my cheesecake layer crack?
Cracks usually happen from overbaking or sudden temperature changes. Make sure you take the pie out while the center is still slightly jiggly. Let it cool slowly at room temperature before refrigerating. If you’re worried, use a water bath as described in the tips section.
Can I make this pie a day ahead?
Absolutely. In fact, I recommend it. The pie needs at least 4 hours to chill, but overnight is even better. The flavors meld together, and the texture becomes perfectly creamy. Just wait to add the whipped cream topping until right before serving.
What if I don’t have gingersnap cookies?
You can use graham crackers with a teaspoon of ground ginger and a pinch of cinnamon mixed in. It won’t be exactly the same, but it’ll still be delicious. Shortbread cookies also work in a pinch.
How do I get clean slices?
Use a sharp knife and wipe it clean between each cut. Running the knife under hot water and drying it before slicing helps too. And make sure the pie is fully chilled—a warm pie will fall apart when you cut it.
Pin This Recipe!
Crowd-Pleasing Maple Pumpkin Cheesecake Pie Easy Recipe
A rich and creamy maple pumpkin cheesecake pie with a crunchy gingersnap crust. This easy, make-ahead dessert is perfect for holiday gatherings and is sure to be a crowd-pleaser.
- Prep Time: 30 minutes
- Cook Time: 50 minutes
- Total Time: 5 hours (includes chilling time)
- Yield: 12 servings 1x
- Category: Dessert
- Cuisine: American
Ingredients
- 2 cups (about 8 ounces) gingersnap cookies, crushed
- 5 tablespoons unsalted butter, melted
- 2 tablespoons granulated sugar
- Pinch of salt
- 1 can (15 ounces) pumpkin puree
- 3/4 cup granulated sugar
- 2 large eggs, room temperature
- 1 teaspoon ground cinnamon
- 1/2 teaspoon ground ginger
- 1/4 teaspoon ground nutmeg
- 1/4 teaspoon ground cloves
- 1/2 cup heavy cream
- 8 ounces cream cheese, softened
- 1/3 cup pure maple syrup
- 1 large egg, room temperature
- 1 teaspoon vanilla extract
- 1 tablespoon all-purpose flour
- 1 cup heavy whipping cream
- 2 tablespoons powdered sugar
- 1/2 teaspoon vanilla extract
- Extra crushed gingersnaps for garnish
Instructions
- Preheat your oven to 350°F (175°C). Position the rack in the center of the oven.
- Make the gingersnap crust: Crush the gingersnap cookies until you have fine crumbs. In a medium bowl, mix the crumbs with the melted butter, sugar, and salt until everything looks like wet sand. Press this mixture firmly into your pie dish, making sure to go up the sides. Bake for 10 minutes, then set aside to cool slightly.
- Prepare the pumpkin layer: In a medium bowl, whisk together the pumpkin puree and sugar until smooth. Add the eggs one at a time, whisking well after each addition. Stir in the cinnamon, ginger, nutmeg, and cloves. Slowly pour in the heavy cream while whisking gently. Set aside.
- Make the cheesecake layer: In a separate bowl, beat the softened cream cheese with an electric mixer until smooth and fluffy—about 2 minutes. Add the maple syrup and beat until combined. Add the egg and vanilla extract, mixing on low speed just until incorporated. Fold in the flour with a rubber spatula.
- Layer the filling: Pour the pumpkin mixture into the pre-baked crust. Spread it evenly. Then, gently spoon the cheesecake mixture on top of the pumpkin layer. Use a spatula to spread it carefully, keeping distinct layers.
- Bake the pie: Place the pie dish on a baking sheet. Bake for 45 to 50 minutes, or until the edges are set and the center is just slightly jiggly. If the crust browns too quickly, tent the edges with foil after 30 minutes.
- Cool completely: Let the pie cool on a wire rack for at least 1 hour at room temperature. Then refrigerate for at least 4 hours, preferably overnight.
- Make the whipped cream topping: Just before serving, whip the heavy cream, powdered sugar, and vanilla extract together until soft peaks form. Spread or pipe it over the chilled pie. Sprinkle with extra crushed gingersnaps.
Notes
Room temperature ingredients are key for a smooth texture. Don’t overbake; the center should still jiggle slightly. For best results, chill overnight. Use a water bath to prevent cracks. Let the pie sit at room temperature for 15 minutes before slicing for clean cuts.
Nutrition
- Serving Size: 1 slice
- Calories: 380
- Sugar: 28
- Sodium: 280
- Fat: 22
- Saturated Fat: 12
- Carbohydrates: 42
- Fiber: 2
- Protein: 6
Keywords: pumpkin cheesecake pie, maple pumpkin pie, gingersnap crust, Thanksgiving dessert, fall dessert, easy pie recipe