Love this? Save it for later!
Share the inspiration with your friends
My husband asked why I couldn’t just toss the chicken thighs directly into the air fryer without all the breading steps. I started to explain why that wouldn’t work—then stopped. I honestly had no good answer. I’d been following this complicated, multi-bowl method for years, convinced that the only way to get that shatteringly crispy skin was through a labor-intensive process involving buttermilk soaks and a three-step breading station. He just shrugged and said, “Seems like the air fryer does the work anyway.”
Let me tell you, I was humbled that Tuesday night. The chicken came out so ridiculously crispy that I actually got annoyed. I mean, all those years of extra dishes and counter mess? For nothing? The garlic Parmesan crust had adhered perfectly, the skin was crackling, and the meat was impossibly juicy. I’d been overcomplicating something that wanted to be simple. Maybe you’ve been there—sticking to a method just because that’s how you’ve always done it, even when a better way is staring you right in the face.
This recipe for Crispy Garlic Parmesan Chicken Thighs (Air Fryer) is the result of that humbling moment. It uses a streamlined, almost lazy approach that delivers the best results I’ve ever gotten from chicken thighs. Honestly, the air fryer does all the heavy lifting. I keep making this because it proves that sometimes the best cooking advice comes from the person who doesn’t overthink dinner.
Why You’ll Love This Recipe
I’ve tested this recipe more times than I care to admit, tweaking the garlic-to-Parmesan ratio and fiddling with cooking times. What I landed on is the version I make at least once a week. It’s not just another chicken recipe—it’s the one that made me stop ordering takeout fried chicken.
- Quick & Easy: From start to table in under 30 minutes. Perfect for those nights when you’re staring into the fridge wondering what’s for dinner.
- Simple Ingredients: You probably have everything in your kitchen right now. No weird specialty items or trips to three different stores.
- Perfect for Weeknights: It’s fancy enough for company but easy enough for a Tuesday. I’ve served it to guests who thought I spent hours in the kitchen.
- Crowd-Pleaser: My picky-eater nephew asked for seconds. That never happens. The garlic Parmesan coating is universally loved.
- Unbelievably Crispy: The air fryer creates a crust that rivals deep-fried chicken. It’s crunchy, golden, and stays crispy even after sitting for a few minutes.
What makes this different from every other air fryer chicken recipe is the technique. Instead of a wet batter that gets messy, we use a dry rub with a secret ingredient—mayonnaise. It sounds weird, I know, but it creates the perfect surface for the Parmesan mixture to stick while keeping the meat incredibly moist. It’s comfort food reimagined: faster, easier, but with the same soul-soothing satisfaction that makes you close your eyes after the first bite.
What Ingredients You Will Need
This recipe uses simple, everyday ingredients that work together to create something truly special. The magic is in how they combine, not in fancy or hard-to-find items.
- Boneless, skinless chicken thighs (about 1.5 lbs or 680g) — I prefer thighs over breasts here because they stay juicier and have more flavor. Look for thighs that are similar in size so they cook evenly. If you only have bone-in thighs, just increase the cooking time by 5-7 minutes.
- Mayonnaise (3 tablespoons) — This is my secret weapon. It acts as a binder for the coating and keeps the chicken incredibly moist during cooking. Use full-fat mayo for best results. I recommend Duke’s or Hellmann’s for their thicker consistency.
- Grated Parmesan cheese (1/2 cup, about 50g) — Buy the good stuff in a wedge and grate it yourself. The pre-shredded stuff has anti-caking agents that prevent it from melting properly. Freshly grated Parmesan melts into the coating and creates that incredible crispy crust.
- Panko breadcrumbs (1/2 cup, about 30g) — These are larger and flakier than regular breadcrumbs, which gives you that extra-crunchy texture. Regular breadcrumbs will work in a pinch, but panko is worth seeking out for the texture difference.
- Garlic powder (1 tablespoon) — Not garlic salt! We want pure garlic flavor without extra sodium. I’ve tried fresh minced garlic, but it burns in the air fryer. Garlic powder gives you that punch without the bitterness.
- Dried parsley (1 teaspoon) — For color and a subtle herbaceous note. Fresh parsley works too; just use 1 tablespoon finely chopped.
- Salt (1 teaspoon) — I use kosher salt. If using table salt, reduce to 3/4 teaspoon.
- Black pepper (1/2 teaspoon) — Freshly ground is always better, but pre-ground works fine.
- Paprika (1/2 teaspoon) — This adds a beautiful golden color and a subtle smokiness. Smoked paprika is amazing here if you have it.
- Olive oil spray — A light spritz helps the coating brown evenly. Avocado oil spray works great too.
Equipment Needed
You don’t need a professional kitchen to make these. Here’s what you’ll need:
- Air fryer — Any model works. I use a 6-quart Cosori, but I’ve tested this in a smaller 3-quart Ninja and it worked perfectly. Just don’t overcrowd the basket; work in batches if needed.
- Mixing bowls — Two medium bowls. One for the mayo mixture, one for the coating.
- Tongs — For turning the chicken without disrupting the coating. Silicone-tipped tongs are gentler on the coating.
- Measuring spoons — For accurate seasoning. I’ve learned the hard way that eyeballing garlic powder leads to disaster.
- Cutting board and knife — For trimming any excess fat from the thighs.
- Paper towels — Essential for patting the chicken dry. This step is non-negotiable for crispy results.
- Instant-read thermometer — Optional but highly recommended. Chicken thighs are done at 165°F (74°C), but I pull them at 160°F because they continue cooking while resting.
Budget tip: If you don’t have an air fryer yet, check Facebook Marketplace. I found mine for $20 and it’s changed my cooking life. Alternatively, you can bake these in a 425°F oven on a wire rack set over a baking sheet for 25-30 minutes.
Preparation Method
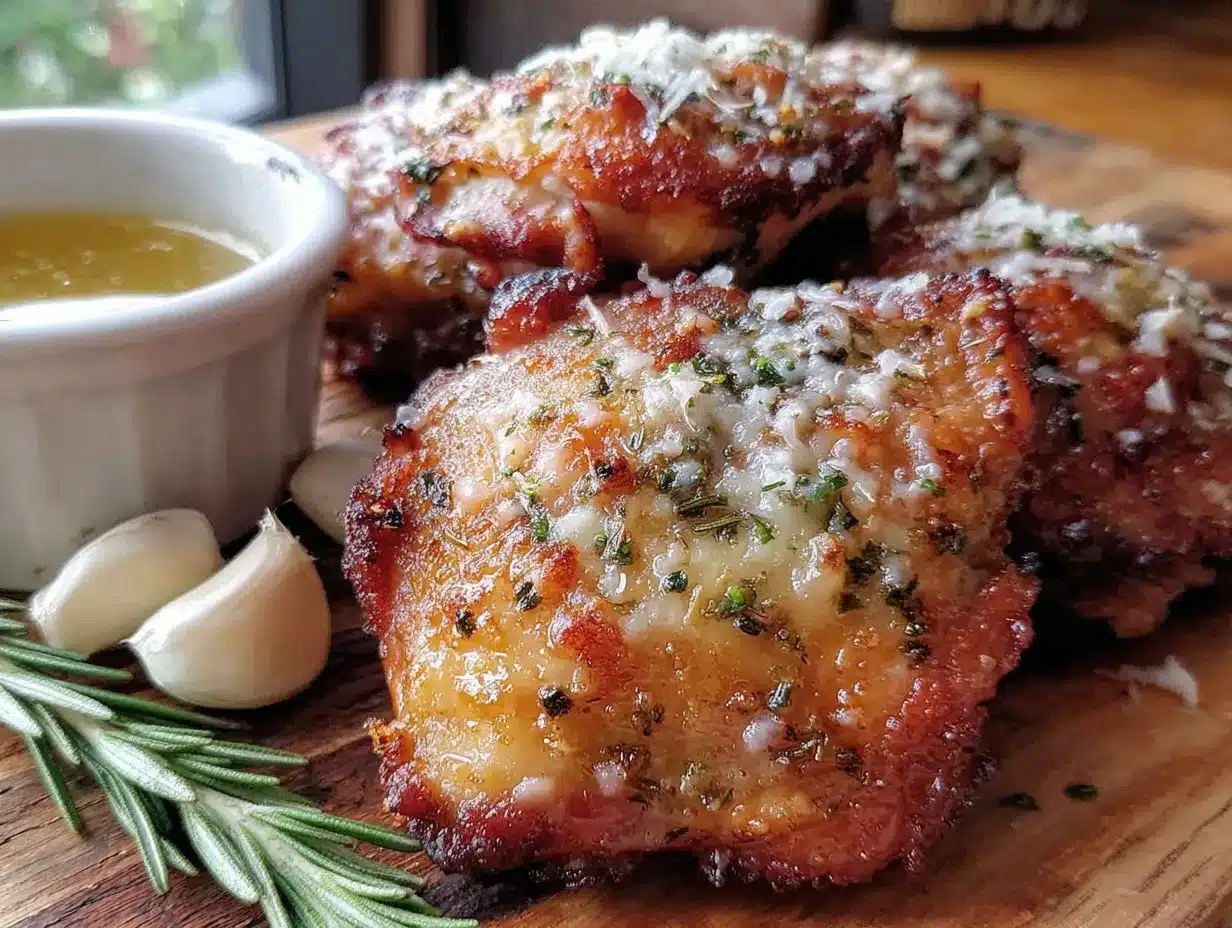
- Prep the chicken (5 minutes): Pat the chicken thighs dry with paper towels. This is crucial—moisture is the enemy of crispiness. Trim any excess fat or skin. Place the thighs in a medium bowl and season lightly with a pinch of salt and pepper. Let them sit while you prepare the coating.
- Make the coating mixture (5 minutes): In a shallow bowl, combine the grated Parmesan, panko breadcrumbs, garlic powder, dried parsley, salt, black pepper, and paprika. Whisk with a fork until everything is evenly distributed. The Parmesan and panko should look like a cohesive, golden mixture. Taste a tiny pinch—it should be savory and garlicky, not overwhelmingly salty.
- Apply the mayo binder (2 minutes): Add the mayonnaise to the bowl with the chicken thighs. Use your hands (yes, get in there!) to coat each thigh evenly. The mayo should cover every surface but not be gloppy. Think of it as a thin, even layer. Wash your hands immediately after.
- Coat the chicken (5 minutes): Working one thigh at a time, press the chicken into the Parmesan mixture. Flip and press again, making sure every nook and cranny is covered. Don’t be gentle—really press the coating into the mayo. Place the coated thighs on a plate. Let them rest for 5 minutes. This helps the coating set and adhere better during cooking.
- Preheat the air fryer (3 minutes): Set your air fryer to 400°F (200°C) and let it preheat for 3 minutes. A hot start ensures immediate crisping.
- Arrange in the basket (2 minutes): Lightly spray the air fryer basket with olive oil spray. Place the chicken thighs in a single layer, leaving at least 1/2 inch of space between each piece. Don’t overcrowd—air needs to circulate. Depending on your air fryer size, you may need to cook in two batches.
- Cook the first side (10 minutes): Air fry at 400°F for 10 minutes. Don’t open the basket during this time. You’ll see the coating start to turn golden and bubble.
- Flip and finish (6-8 minutes): Carefully flip each thigh using tongs. The coating should be firmly attached and golden. Spray the tops lightly with olive oil. Cook for another 6-8 minutes, until the internal temperature reaches 165°F (74°C) and the coating is deep golden brown and crispy. The last 2 minutes are crucial—watch carefully to prevent burning.
- Rest (5 minutes): Remove the chicken from the air fryer and let it rest on a wire rack for 5 minutes. This allows the juices to redistribute and the coating to set. Don’t skip this step! Cutting into them immediately will release all those precious juices.
Cooking Tips & Techniques
I’ve made every mistake possible with this recipe so you don’t have to. Here’s what I’ve learned:
Don’t skip the drying step. I once rushed through and left the chicken slightly damp. The coating slid right off in the air fryer, leaving me with sad, naked chicken. Pat those thighs like you mean it.
Temperature matters. I used to crank the air fryer to 425°F thinking it would make things crispier. It just burned the garlic powder and left the inside undercooked. 400°F is the sweet spot—hot enough to crisp, gentle enough to cook through evenly.
Watch the last few minutes. Air fryers vary wildly. My friend’s air fryer cooks this in 14 minutes total; mine takes 18. Start checking at the 14-minute mark. The coating should be deep golden, not dark brown. If it’s browning too fast, reduce the temperature to 375°F for the last 5 minutes.
Let the coating rest. That 5-minute rest after coating isn’t optional. It gives the mayo time to absorb into the panko and Parmesan, creating a cohesive crust that won’t fall off during cooking. I learned this after a particularly frustrating batch where half the coating ended up at the bottom of the air fryer basket.
Batch cooking strategy: If you’re making a double batch, keep the cooked chicken warm in a 200°F oven on a wire rack while you cook the rest. Don’t stack them—they’ll steam and lose crispiness. And don’t cover them with foil for the same reason.
Variations & Adaptations
This recipe is endlessly adaptable. Here are some versions I’ve tried and loved:
- Spicy Buffalo Version: Add 1 tablespoon of buffalo sauce to the mayo and 1/2 teaspoon of cayenne to the coating. Serve with ranch or blue cheese dressing. My husband requests this version every game day.
- Lemon Herb: Add the zest of one lemon and 1 teaspoon of dried thyme to the coating. Skip the paprika. The lemon brightens everything up and makes it feel lighter—perfect for spring dinners.
- Gluten-Free: Use gluten-free panko breadcrumbs (I like Ian’s brand) and verify your Parmesan is gluten-free. Everything else is naturally gluten-free. The texture is nearly identical.
- Keto/Low-Carb: Replace the panko with crushed pork rinds or almond flour. The pork rind version is surprisingly good—even crunchier than the original. Just reduce the salt slightly since pork rinds are salty.
- Cheese Lovers: Add 2 tablespoons of grated Pecorino Romano along with the Parmesan. The Romano adds a sharper, saltier kick that cheese enthusiasts will appreciate.
I once tried a version with added nutritional yeast for a vegan friend. It wasn’t my favorite—the texture was off—but it sparked the idea for the pork rind variation, which turned out amazing. Don’t be afraid to experiment!
Serving & Storage Suggestions
These chicken thighs are best served fresh and hot, right out of the air fryer. The contrast between the crispy exterior and juicy interior is at its peak within the first 15 minutes. Serve them on a platter with lemon wedges and a sprinkle of fresh parsley for color.
What to serve alongside: I love these with a simple arugula salad dressed with lemon vinaigrette—the peppery greens cut through the richness. Roasted asparagus or green beans are also excellent. For a carb-heavy meal, try them with garlic mashed potatoes or crusty bread to soak up any juices.
Storage: Leftovers keep in an airtight container in the refrigerator for up to 4 days. The coating will soften slightly, but they’re still delicious. To reheat, place them back in the air fryer at 375°F for 3-4 minutes. The microwave will turn them soggy—don’t do it. I learned this the hard way when I reheated a batch for lunch and ended up with sad, rubbery chicken.
Freezing: You can freeze the cooked chicken thighs in a single layer on a baking sheet, then transfer to a freezer bag. They’ll keep for up to 3 months. Reheat directly from frozen in the air fryer at 375°F for 8-10 minutes. The texture won’t be quite as crispy as fresh, but it’s still pretty impressive for a freezer meal.
The flavors actually develop overnight. I’ve found that cold leftovers make an amazing chicken salad the next day—just chop them up and mix with a little mayo, celery, and grapes. It’s a whole second meal from one batch of cooking.
Nutritional Information & Benefits
Here’s the approximate nutritional breakdown per serving (2 thighs):
| Nutrient | Amount |
|---|---|
| Calories | 420 |
| Protein | 38g |
| Fat | 24g |
| Saturated Fat | 7g |
| Carbohydrates | 10g |
| Fiber | 1g |
| Sugar | 1g |
| Sodium | 680mg |
Chicken thighs are an excellent source of protein, selenium, and B vitamins. The Parmesan adds calcium and a small amount of protein. Compared to traditional fried chicken, this air fryer version uses significantly less oil—about 90% less fat than deep-frying. The mayonnaise adds some fat, but it’s a fraction of what you’d get from a deep fryer.
For those watching sodium, you can reduce the added salt to 1/2 teaspoon. The Parmesan already contributes some saltiness. This recipe is naturally low-carb (if you skip or substitute the panko) and can be made gluten-free as mentioned above. It’s also nut-free and egg-free, making it suitable for many common dietary restrictions.
I personally love that this recipe feels indulgent but doesn’t leave me feeling heavy or sluggish afterward. It’s the kind of meal that satisfies a craving without derailing a healthy eating plan.
Conclusion
This Crispy Garlic Parmesan Chicken Thighs (Air Fryer) recipe is proof that simple methods often yield the best results. It came from a moment of humility in my own kitchen, and it’s become a staple that I genuinely look forward to making. The combination of juicy chicken, savory garlic, nutty Parmesan, and that impossibly crunchy coating is just unbeatable.
I encourage you to make this recipe your own. Play with the seasonings, try different cheeses, experiment with spice levels. Cooking should be fun, not rigid. If you make a version you love, I’d love to hear about it. Drop a comment below and tell me how it turned out—did you add something unexpected? Did your family fight over the last piece? Share your wins (and your hilarious failures) in the comments. And if you snap a photo, tag me on social media—I love seeing your crispy creations!
Here’s to more crispy, garlicky, Parmesan-y dinners in your future. You’ve got this!
Frequently Asked Questions
Can I use chicken breasts instead of thighs?
Yes, but adjust the cooking time. Chicken breasts cook faster and can dry out more easily. Use boneless, skinless breasts and cook at 400°F for 10 minutes on the first side, then 5-7 minutes after flipping. Check for an internal temperature of 165°F (74°C). I recommend pounding the breasts to an even thickness for consistent cooking.
Why is my coating falling off in the air fryer?
This usually happens for one of three reasons: the chicken wasn’t patted dry enough, the mayo layer was too thick, or you didn’t let the coated chicken rest before cooking. Make sure to pat the chicken very dry, use just enough mayo to coat (not drench), and let the coated thighs sit for 5 minutes before air frying. Also, don’t flip them too aggressively—use tongs gently.
Can I make these ahead of time for a party?
Absolutely! Cook them completely, then let them cool on a wire rack. When you’re ready to serve, reheat in the air fryer at 375°F for 3-4 minutes. They’ll crisp right back up. I’ve done this for game day parties and they’re always a hit. Just don’t reheat in the microwave—it ruins the texture.
What if I don’t have an air fryer?
No problem! Bake them in a 425°F (220°C) oven on a wire rack set over a baking sheet. The wire rack allows air to circulate underneath, mimicking the air fryer effect. Bake for 25-30 minutes, flipping halfway through, until the internal temperature reaches 165°F (74°C). The coating won’t be quite as crispy, but it’ll still be delicious.
Can I use frozen chicken thighs?
I don’t recommend it for this recipe. Frozen chicken releases too much moisture as it thaws, which prevents the coating from sticking and getting crispy. If you’re in a pinch, thaw the chicken completely in the refrigerator overnight, then pat it very dry before proceeding with the recipe. Never cook frozen chicken in the air fryer without thawing first—it cooks unevenly and can be unsafe.
Pin This Recipe!
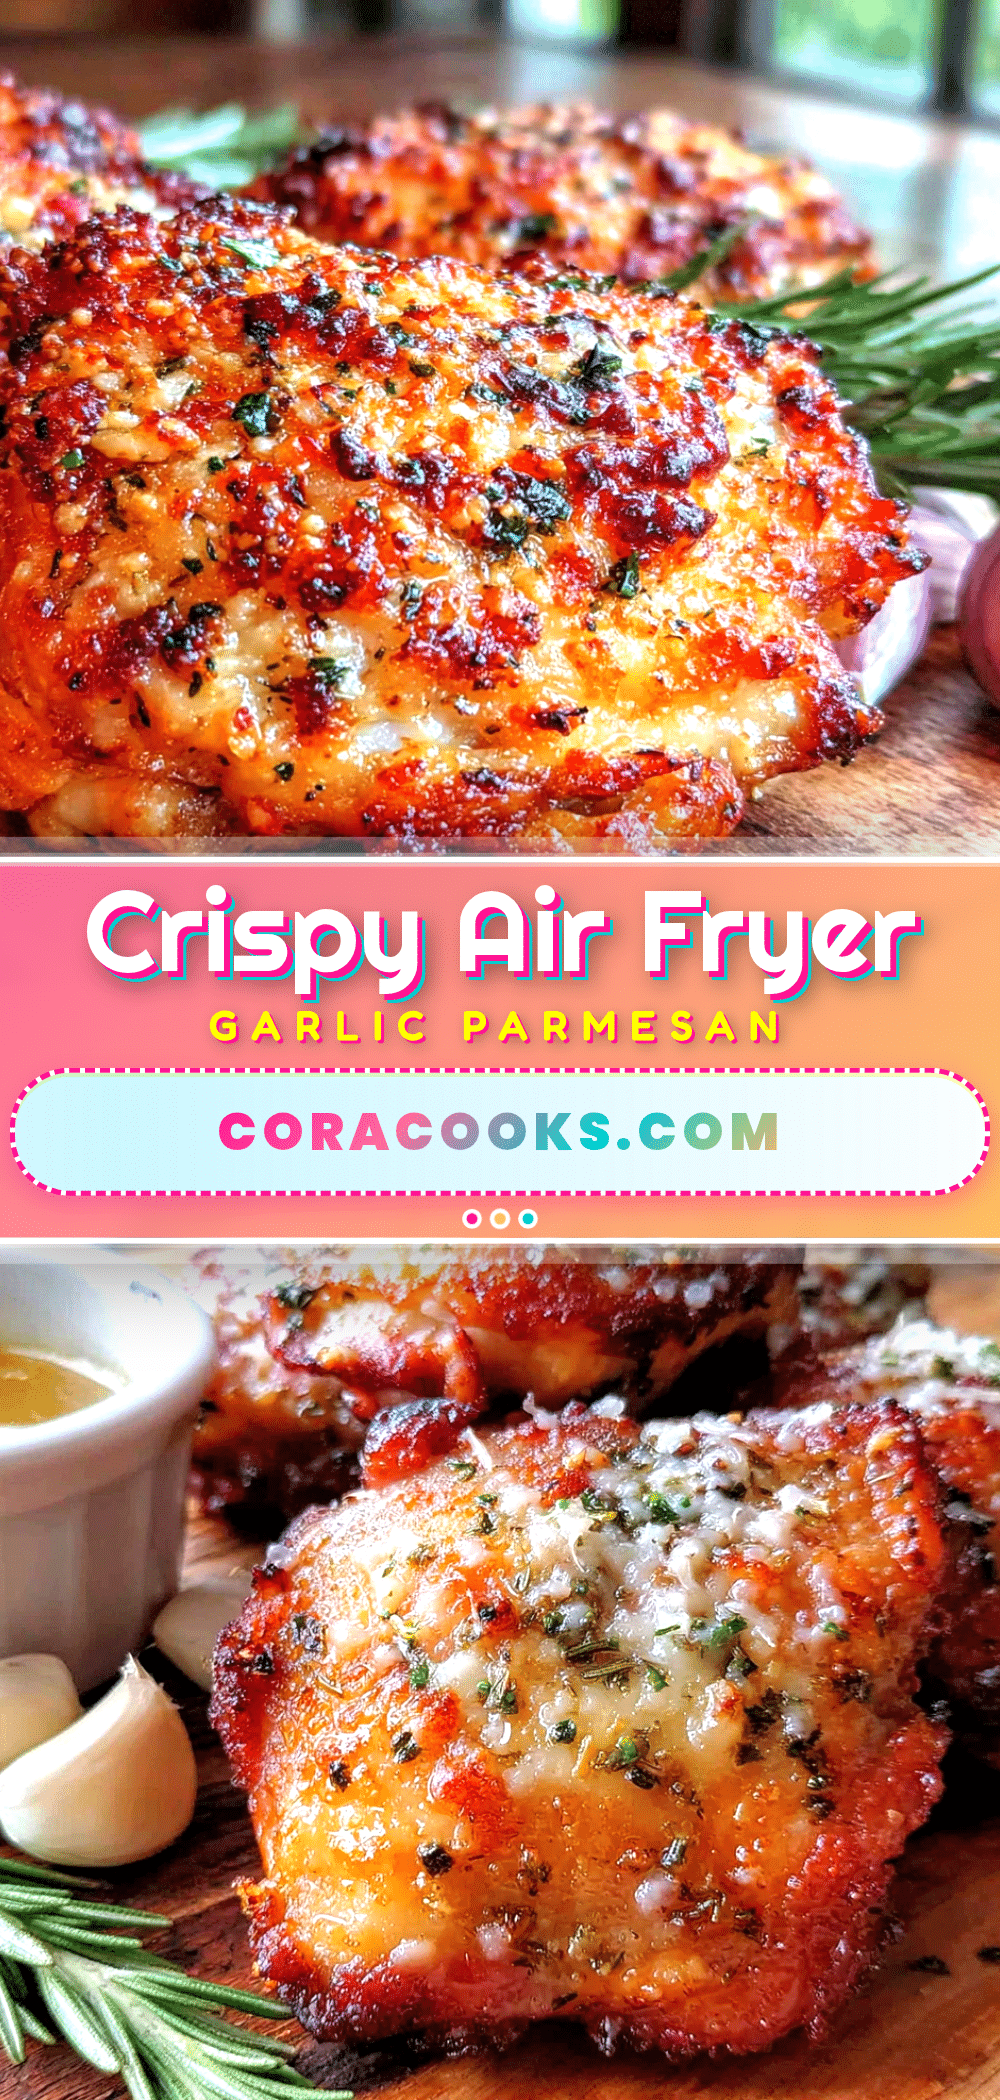
Crispy Garlic Parmesan Chicken Thighs (Air Fryer)
These air fryer chicken thighs are incredibly crispy on the outside and juicy on the inside, thanks to a secret ingredient—mayonnaise. This streamlined recipe delivers shatteringly crispy skin with minimal effort, perfect for busy weeknights.
- Prep Time: 15 minutes
- Cook Time: 16-18 minutes
- Total Time: 31-33 minutes
- Yield: 4 servings 1x
- Category: Main Course
- Cuisine: American
Ingredients
- 1.5 lbs (680g) boneless, skinless chicken thighs
- 3 tablespoons mayonnaise (full-fat recommended)
- 1/2 cup (50g) grated Parmesan cheese (freshly grated)
- 1/2 cup (30g) panko breadcrumbs
- 1 tablespoon garlic powder
- 1 teaspoon dried parsley
- 1 teaspoon kosher salt (or 3/4 teaspoon table salt)
- 1/2 teaspoon black pepper
- 1/2 teaspoon paprika (smoked paprika optional)
- Olive oil spray (or avocado oil spray)
Instructions
- Pat the chicken thighs dry with paper towels. Trim any excess fat or skin. Place in a medium bowl and season lightly with a pinch of salt and pepper. Let sit while preparing the coating.
- In a shallow bowl, combine grated Parmesan, panko breadcrumbs, garlic powder, dried parsley, salt, black pepper, and paprika. Whisk until evenly distributed.
- Add mayonnaise to the bowl with the chicken thighs. Use your hands to coat each thigh evenly with a thin layer of mayo.
- Working one thigh at a time, press the chicken into the Parmesan mixture, flipping and pressing to coat all sides. Place coated thighs on a plate and let rest for 5 minutes.
- Preheat air fryer to 400°F (200°C) for 3 minutes.
- Lightly spray the air fryer basket with olive oil spray. Arrange chicken thighs in a single layer with at least 1/2 inch of space between each piece. Work in batches if needed.
- Air fry at 400°F for 10 minutes without opening the basket.
- Carefully flip each thigh using tongs. Spray tops lightly with olive oil. Cook for another 6-8 minutes until internal temperature reaches 165°F (74°C) and coating is deep golden brown and crispy.
- Remove chicken from air fryer and let rest on a wire rack for 5 minutes before serving.
Notes
Don’t skip drying the chicken or letting the coating rest for 5 minutes—both are crucial for crispy results. Air fryers vary, so start checking at the 14-minute mark. For batch cooking, keep cooked chicken warm in a 200°F oven on a wire rack. Leftovers can be reheated in the air fryer at 375°F for 3-4 minutes (not microwave).
Nutrition
- Serving Size: 2 thighs
- Calories: 420
- Sugar: 1
- Sodium: 680
- Fat: 24
- Saturated Fat: 7
- Carbohydrates: 10
- Fiber: 1
- Protein: 38
Keywords: air fryer chicken thighs, crispy chicken thighs, garlic parmesan chicken, easy chicken recipe, weeknight dinner, air fryer recipe