Love this? Save it for later!
Share the inspiration with your friends
I was standing in the middle of the baking aisle at my local grocery store last December when the smell hit me — that sharp, cool, unmistakable scent of crushed peppermint. It was coming from a display of candy canies near the checkout, and suddenly I was seven years old, sitting cross-legged on my Aunt Lena’s linoleum kitchen floor, watching her drop a handful of chocolate chips into a jar. She didn’t say much, just hummed along to the Christmas music crackling from her tiny radio, and every few minutes she’d hand me a chip to snack on. I honestly can’t remember what we talked about, but I remember the way the glass jars lined up on her counter like little soldiers, each one filled with a promise of warmth.
Aunt Lena passed away a few years ago, and I didn’t get her hot cocoa mix recipe written down until it was almost too late. I had to piece it together from memory — the way she’d tap the jar to settle the layers, the little twist she’d give the lid before handing it over. The first batch I made on my own was a disaster, let me tell you. Too much cocoa, not enough sugar, and I forgot the vanilla powder entirely. But I kept at it, because there’s something about that first sip of peppermint hot cocoa that just wraps around you like a favorite blanket.
You know that feeling when the weather turns cold and all you want is something warm in your hands? That’s what this mix is for. It’s not complicated — honestly, it’s just a few simple ingredients layered in a jar — but it tastes like the kind of comfort you can’t buy at a store. Maybe you’ve been there, hunting for that perfect homemade gift that actually feels personal without taking three days to make. This is it. This is the jar you bring to a holiday party or tuck into a gift bag for your kid’s teacher. And every time someone makes a cup, they’ll think of you.
Why You’ll Love This Recipe
I’ve tested this peppermint hot cocoa mix more times than I care to admit, and let me tell you — it’s not just another jar mix. I’ve made it with different cocoa powders, tried various sweeteners, and even experimented with the peppermint ratio. This version is the one that finally made me close my eyes after the first sip. Here’s why it works:
- Quick & Easy: This mix comes together in under 15 minutes. Seriously, it’s mostly just layering ingredients in a jar. Perfect for those last-minute gift moments or when you need a cozy drink right now.
- Simple Ingredients: No weird additives or hard-to-find items. You probably have most of these in your pantry already, minus maybe the crushed peppermint candies.
- Perfect for Holiday Gifting: This is the ultimate homemade gift for teachers, neighbors, coworkers, or anyone on your list. It’s thoughtful, personal, and doesn’t break the bank.
- Crowd-Pleaser: Kids love the fun layers in the jar, and adults love the rich, minty flavor. It’s a hit at holiday parties and cozy gatherings.
- Unbelievably Delicious: The combination of rich cocoa and cool peppermint is next-level comfort. It’s smooth, not too sweet, and has that perfect balance that makes you want another cup.
What makes this recipe different from the dozens of others out there? It’s the little details — using a mix of cocoa powder and melted chocolate for extra richness, adding a pinch of salt to balance the sweetness, and crushing the peppermint just enough so it dissolves beautifully into the milk. This isn’t just another jar mix; it’s the one I reach for every single winter.
This recipe isn’t just good — it’s the kind that makes you pause after the first sip. It’s comfort in a mug, the kind of warmth that makes a snowy day feel like a gift. Perfect for impressing guests without any stress, or turning a quiet evening into something special.
What Ingredients You Will Need
This peppermint hot cocoa mix uses simple, wholesome ingredients to deliver that rich, minty flavor and velvety texture without any fuss. Most of these are pantry staples, but I’ve included a few notes to help you pick the best options.
For the Hot Cocoa Mix
- 1 cup granulated sugar — Regular white sugar works best here. It dissolves easily and adds just the right sweetness. (I’ve tried brown sugar, and it makes the color muddy.)
- 1 cup powdered sugar — This helps the mix dissolve smoothly into milk. Don’t skip it!
- 1 cup unsweetened cocoa powder — I recommend Ghirardelli or Hershey’s Special Dark for a richer flavor. The darker the cocoa, the deeper the chocolate taste.
- 1 cup powdered milk — This makes the mix creamy when you add hot water. You can find it in the baking aisle or near the canned milk section.
- 1/2 cup finely chopped dark chocolate or chocolate chips — This is my secret ingredient. It melts into the milk for an extra silky texture. Use good quality chocolate here — it makes a difference.
- 1/2 cup crushed peppermint candies or candy canes — You can crush them in a bag with a rolling pin or use a food processor. Just don’t pulverize them into dust — small chunks are nice.
- 1/4 teaspoon salt — A tiny pinch balances the sweetness and brings out the chocolate flavor. Trust me on this one.
For the Jar Layers (Optional but Pretty)
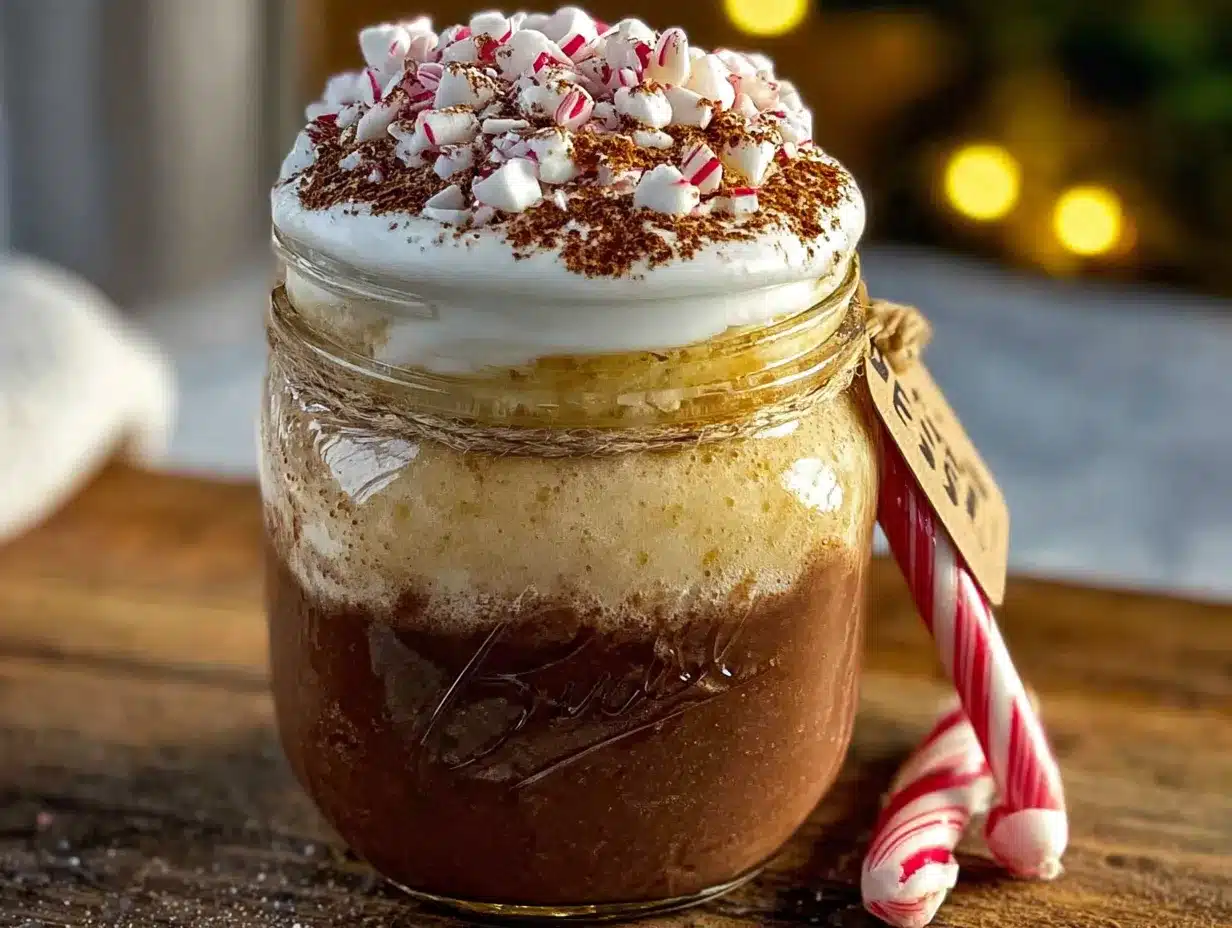
- Extra crushed peppermint candies — For sprinkling on top of the jar layers. It makes the gift look gorgeous.
- Mini marshmallows — Add a small bag on the side for serving, or layer them in the jar if you plan to use the mix within a week.
If you’re making this for someone with dietary restrictions, here are a few swaps that work well. Use dairy-free powdered milk and dairy-free chocolate chips for a vegan version. For a lower-sugar option, swap the granulated sugar with coconut sugar — just know the color will be a bit darker. And if you can’t find peppermint candies, peppermint extract works in a pinch (add about 1/2 teaspoon to the mix, though it won’t look as pretty in the jar).
One thing I learned the hard way — don’t use pre-crushed peppermint from a bag if you can help it. It’s often too fine and can make the cocoa gritty. Crush your own candy canes for the best texture and flavor.
Equipment Needed
You don’t need much fancy equipment for this recipe, which is part of why I love it. Here’s what you’ll need:
- A quart-sized glass jar (32 oz) — This is the star of the show. Mason jars work perfectly, and they look great as gifts. Wide-mouth jars are easier to fill and layer.
- A medium mixing bowl — For combining the dry ingredients before layering. You can skip this if you’re layering directly, but mixing first ensures even flavor.
- A whisk — To break up any clumps in the cocoa powder and powdered sugar. A fork works in a pinch.
- A rolling pin or food processor — For crushing the peppermint candies. I prefer the rolling pin method because it gives you more control over the texture. Just put the candies in a zip-top bag and go to town.
- A funnel — This makes layering so much cleaner. You can find cheap metal or plastic funnels at any grocery store. If you don’t have one, a rolled-up piece of paper works too.
- Measuring cups and spoons — Standard set, nothing fancy.
- Gift tags and ribbon (optional) — For attaching serving instructions to the jar.
I’ve made this mix with both a food processor and a rolling pin, and honestly, the rolling pin is less cleanup. Just be careful not to crush the bag too aggressively — I once had a candy cane shard fly across the kitchen and hit my dog. He was not impressed.
Preparation Method
Making this peppermint hot cocoa mix is almost meditative. There’s something satisfying about watching the layers build in the jar. Here’s how to do it:
- Crush the peppermint candies. Place about 1/2 cup of candy canes or peppermint candies in a sturdy zip-top bag. Seal it tight, then use a rolling pin or the bottom of a heavy pan to crush them into small pieces. You want a mix of fine crumbs and tiny chunks — not dust, but not big shards either. Set aside about 2 tablespoons for topping the jar later.
- Mix the dry ingredients. In a medium bowl, whisk together the granulated sugar, powdered sugar, unsweetened cocoa powder, powdered milk, and salt. Whisk until everything is evenly combined and there are no clumps. This step is important — if you don’t mix it well, the cocoa powder can clump in the jar and make the final drink lumpy. Trust me, I learned this the hard way.
- Prepare your jar. Make sure your glass jar is clean and completely dry. Any moisture can cause the powdered milk to clump or even spoil over time. I usually let my jars air dry overnight just to be safe.
- Start layering. Using a funnel, pour about 1/3 of the dry mix into the jar. Tap the jar gently on the counter to settle the layer. Then add about 1/3 of the chopped dark chocolate and 1/3 of the crushed peppermint. Repeat this process two more times — dry mix, chocolate, peppermint — until the jar is full. The layers should be fairly even, but don’t stress about perfection. The beauty is in the imperfection.
- Top it off. Sprinkle the reserved crushed peppermint on top of the final layer. This makes the jar look festive and gives the first cup an extra pop of mint.
- Seal and decorate. Screw the lid on tightly. If you’re giving this as a gift, attach a tag with the serving instructions: “Add 3 tablespoons of mix to 6-8 ounces of hot milk or water. Stir well and enjoy!” You can also add a small bag of mini marshmallows tied to the jar with ribbon.
- Make a cup to test. I always make one cup from the mix to make sure the flavor is right. Heat about 6 ounces of milk (or water) until steaming — don’t boil it. Add 3 heaping tablespoons of the mix and stir until everything is dissolved. The chocolate should melt completely, and the peppermint pieces will soften. Taste it and adjust if needed. If it’s not minty enough, crush a bit more peppermint into the cup.
A quick note: the mix will settle during storage, so if you’re gifting it, let the recipient know they can give the jar a gentle shake before scooping. And if you’re using mini marshmallows in the jar, keep in mind they can absorb moisture from the air and get sticky. I prefer to add them fresh when serving.
Cooking Tips & Techniques
I’ve made this peppermint hot cocoa mix at least two dozen times over the past few winters, and I’ve picked up a few tricks along the way. Here’s what I wish someone had told me:
Don’t skip the powdered milk. I know it sounds old-fashioned, but powdered milk is what gives this mix that creamy, rich texture without needing fresh milk. If you’re using water, the powdered milk makes all the difference. If you’re using fresh milk, you can reduce the powdered milk by half, but don’t cut it out entirely — it still adds body.
Crush the peppermint in stages. If you crush all the candies at once, you’ll end up with a lot of fine dust. I crush half the candies into smaller pieces for inside the mix, and leave the other half in slightly bigger chunks for the top layer. That way, you get a little crunch in every sip.
Watch out for humidity. This mix is sensitive to moisture. If you live in a humid climate, store the jar in a cool, dry place and use it within a month. I once left a jar on my counter during a rainy week, and the powdered milk clumped into hard little rocks. Not the end of the world — I just sifted it out — but not ideal.
Toast the chocolate first (optional). This is a trick I picked up from a pastry chef friend. Spread the chopped chocolate on a baking sheet and toast it in a 300°F oven for 3-4 minutes. It deepens the flavor and adds a slight nuttiness. Just let it cool completely before adding it to the jar.
Double the recipe for gifts. This mix scales beautifully. I usually make 4-5 jars at a time for holiday gifting. Just multiply the ingredients and layer them assembly-line style. It takes about 30 minutes total, and then you have gifts sorted for weeks.
One mistake I made early on: I used pre-crushed peppermint from a baking supply store, and it was basically dust. The cocoa came out gritty and the peppermint flavor was barely there. Fresh-crushed candy canes are non-negotiable for the best flavor.
Variations & Adaptations
One of the best things about this peppermint hot cocoa mix is how easy it is to customize. Here are a few variations I’ve tried and loved:
Dark Chocolate Peppermint: Swap the semi-sweet chocolate chips for dark chocolate (70% cacao or higher) and use Dutch-process cocoa powder. The result is a deeper, more sophisticated cocoa that’s less sweet and more grown-up. I made this version for a holiday book club meeting, and everyone asked for the recipe.
White Chocolate Peppermint: Replace the dark chocolate with white chocolate chips and use a vanilla powdered milk if you can find it. This version is sweeter and creamier, almost like a peppermint white hot chocolate. It’s my niece’s favorite — she calls it “snowman cocoa.”
Spicy Mexican Hot Cocoa: Add 1/2 teaspoon of cinnamon, a pinch of cayenne pepper, and a tiny dash of nutmeg to the dry mix. Keep the peppermint, and you get this amazing warm-cool-spicy flavor combo that’s incredible on a cold night. I serve this one with a cinnamon stick for stirring.
Vegan & Dairy-Free: Use coconut milk powder or soy milk powder instead of regular powdered milk, and swap the chocolate chips for dairy-free ones. The coconut version adds a subtle tropical note that pairs surprisingly well with peppermint.
Extra Minty: If you’re a mint fanatic like me, add 1/4 teaspoon of peppermint extract to the dry mix before layering. Just make sure it’s evenly distributed. You can also use crushed mint chocolate candies instead of plain peppermint for a double hit.
Low-Sugar Version: Replace the granulated sugar with a monk fruit sweetener or erythritol, and use sugar-free chocolate chips. The texture is slightly different — a bit less creamy — but the flavor is still fantastic. I’ve made this for a friend who’s watching her sugar intake, and she said it was the best cocoa she’d had in years.
Serving & Storage Suggestions
This peppermint hot cocoa mix is at its best when served fresh, but it stores beautifully too. Here’s how to get the most out of it:
Serving: For the perfect cup, heat 6-8 ounces of milk (or water) until it’s steaming but not boiling — around 160°F if you’re using a thermometer. Add 3 heaping tablespoons of the mix and stir until everything is dissolved. The chocolate pieces will melt into the milk, creating a rich, silky texture. Top with mini marshmallows, a dollop of whipped cream, and an extra sprinkle of crushed peppermint for a truly decadent treat.
Pairings: This cocoa pairs beautifully with buttery shortbread cookies, gingerbread, or a simple sugar cookie. For a grown-up twist, add a splash of peppermint schnapps or Irish cream to the finished cup. I also love serving it alongside a plate of fresh-baked chocolate chip cookies for the ultimate cozy night in.
Storage: Store the jar in a cool, dry place away from direct sunlight. Properly stored, the mix will last for up to 3 months. If you live in a humid climate, I recommend using it within 4-6 weeks. Don’t refrigerate it — the moisture in the fridge can cause the powdered milk to clump.
Reheating: If your cocoa gets cold, reheat it gently on the stovetop or in the microwave in 15-second bursts, stirring between each. Avoid boiling it, as that can make the milk proteins separate and create a grainy texture.
Flavor development: The flavors actually meld together over time. A jar that’s been sitting for a week or two will taste more cohesive than one made fresh. The peppermint infuses into the cocoa powder, and the chocolate chips distribute their flavor more evenly. So if you’re making this for gifts, making it a week ahead is actually a good thing.
Nutritional Information & Benefits
While this peppermint hot cocoa mix is definitely a treat, it does have some redeeming qualities. Here’s a rough estimate per serving (3 tablespoons of mix prepared with 6 ounces of milk):
- Calories: Approximately 180-220 (depending on the milk used)
- Fat: 6-8g (from the chocolate and powdered milk)
- Carbohydrates: 30-35g (mainly from sugars)
- Protein: 5-7g (from the milk powder)
- Calcium: About 15% of your daily needs (from the milk)
Health benefits: Cocoa powder is actually rich in antioxidants called flavonoids, which can support heart health and reduce inflammation. Peppermint has been used for centuries to aid digestion and soothe upset stomachs — so this cocoa is practically a digestive aid, right? (Okay, maybe that’s a stretch, but it makes me feel better about having a second cup.)
Dietary considerations: This recipe can be made gluten-free by ensuring your chocolate chips are certified gluten-free. It’s also easy to make dairy-free and vegan with the substitutions listed above. It’s not low-carb or keto-friendly in its standard form, but the low-sugar version works for those watching their intake.
Potential allergens: This recipe contains dairy (from the powdered milk and chocolate) and may contain traces of soy or nuts depending on the chocolate you use. Always check labels if you’re serving someone with allergies.
I personally love that this cocoa feels like a special treat without being overly indulgent. It’s the kind of thing I make on a Sunday evening when I want to unwind, and it never fails to make me feel cozy and cared for.
Conclusion
This peppermint hot cocoa mix in a jar is more than just a recipe — it’s a little piece of warmth you can share with the people you love. It’s simple enough for a beginner to make, but thoughtful enough to impress anyone on your gift list. Whether you’re sipping it by the fire on a snowy night or handing out jars to your neighbors, this cocoa has a way of making everything feel a little more special.
I love this recipe because it brings back that feeling of sitting on Aunt Lena’s kitchen floor, watching her work. Every time I layer those ingredients in a jar, I think of her humming along to the radio, and I feel like she’s right there with me. That’s the thing about making food from scratch — it connects us to the people and moments that matter most.
So go ahead and make a batch. Customize it however you like — make it extra minty, swap in dark chocolate, or add a pinch of cinnamon. Put your own spin on it. And when you take that first sip, close your eyes and let it warm you from the inside out.
I’d love to hear how yours turns out! Drop a comment below and let me know what variations you tried, or tag me in your photos if you share them online. Happy sipping, friends!
Frequently Asked Questions
Can I use water instead of milk with this cocoa mix?
Absolutely! The mix already contains powdered milk, so it will still be creamy when made with hot water. That said, using fresh milk gives it a richer, more indulgent texture. Try both and see which you prefer!
How long does the peppermint hot cocoa mix last in the jar?
Stored in a cool, dry place away from sunlight, the mix will stay fresh for up to 3 months. If you live in a humid climate, aim to use it within 4-6 weeks to prevent clumping. Always make sure the jar is completely dry before filling it.
Can I make this mix without powdered milk?
Yes, you can leave out the powdered milk, but the cocoa won’t be as creamy when made with water. If you skip the powdered milk, I recommend using fresh milk for the best results. You can also substitute with coconut milk powder or soy milk powder for a dairy-free version.
What’s the best way to crush peppermint candies for this recipe?
I’ve found that placing the candies in a sturdy zip-top bag and crushing them with a rolling pin gives the best texture. You want a mix of fine crumbs and small chunks — not dust and not big shards. A food processor works too, but pulse it gently to avoid over-processing.
Can I freeze the peppermint hot cocoa mix for longer storage?
I don’t recommend freezing this mix. The moisture in the freezer can cause the powdered milk and cocoa powder to clump, and the chocolate can develop a white bloom on the surface. It’s better to store it at room temperature in an airtight container.
Pin This Recipe!
Cozy Peppermint Hot Cocoa Mix in a Jar | Easy Homemade Gift

This peppermint hot cocoa mix in a jar is a simple, thoughtful homemade gift that combines rich cocoa and cool peppermint for ultimate comfort. Layer ingredients in a jar for a beautiful present or a cozy drink on a cold day.
- Prep Time: 15 minutes
- Cook Time: 5 minutes
- Total Time: 20 minutes
- Yield: 4 servings 1x
- Category: Beverage
- Cuisine: American
Ingredients
- 1 cup granulated sugar
- 1 cup powdered sugar
- 1 cup unsweetened cocoa powder
- 1 cup powdered milk
- 1/2 cup finely chopped dark chocolate or chocolate chips
- 1/2 cup crushed peppermint candies or candy canes
- 1/4 teaspoon salt
- Extra crushed peppermint candies (for topping, optional)
- Mini marshmallows (for serving, optional)
Instructions
- Crush the peppermint candies: Place about 1/2 cup of candy canes or peppermint candies in a sturdy zip-top bag. Seal it tight, then use a rolling pin or the bottom of a heavy pan to crush them into small pieces. Set aside about 2 tablespoons for topping the jar later.
- Mix the dry ingredients: In a medium bowl, whisk together the granulated sugar, powdered sugar, unsweetened cocoa powder, powdered milk, and salt until evenly combined and no clumps remain.
- Prepare your jar: Make sure your glass jar is clean and completely dry.
- Start layering: Using a funnel, pour about 1/3 of the dry mix into the jar. Tap the jar gently on the counter to settle the layer. Then add about 1/3 of the chopped dark chocolate and 1/3 of the crushed peppermint. Repeat this process two more times until the jar is full.
- Top it off: Sprinkle the reserved crushed peppermint on top of the final layer.
- Seal and decorate: Screw the lid on tightly. If giving as a gift, attach a tag with serving instructions: ‘Add 3 tablespoons of mix to 6-8 ounces of hot milk or water. Stir well and enjoy!’
- Make a cup to test: Heat about 6 ounces of milk (or water) until steaming. Add 3 heaping tablespoons of the mix and stir until everything is dissolved. Taste and adjust if needed.
Notes
For best results, crush your own candy canes rather than using pre-crushed peppermint. The mix can be stored in a cool, dry place for up to 3 months. If giving as a gift, let the recipient know they can gently shake the jar before scooping. For a vegan version, use dairy-free powdered milk and dairy-free chocolate chips.
Nutrition
- Serving Size: 3 tablespoons mix wi
- Calories: 200
- Sugar: 28
- Sodium: 150
- Fat: 7
- Saturated Fat: 4
- Carbohydrates: 33
- Fiber: 2
- Protein: 6
Keywords: peppermint hot cocoa, hot cocoa mix, homemade gift, Christmas gift, peppermint, hot chocolate, jar mix, easy gift