Love this? Save it for later!
Share the inspiration with your friends
I was standing in line at the DMV—of all places—when the woman ahead of me turned around and started talking about pie. Not just any pie, but a maple pumpkin cheesecake pie with a gingersnap crust that she’d apparently been perfecting for twenty-three years. Her name was Fran, she was a retired accountant, and she had the most unassuming way of describing something truly spectacular. “It’s the one people fight over at Thanksgiving,” she said, shrugging like it was no big deal. I wasn’t expecting cooking advice from a stranger in a government office, but there I was, clutching my number ticket, listening to her describe exactly how to make this dessert that would completely change my hosting game.
Fran scribbled the recipe on the back of an old insurance form she pulled from her bag. I still have that crumpled piece of paper tucked inside my favorite cookbook. Honestly, I almost lost it twice—once when I cleaned out my purse and once when my dog decided it looked like a chew toy. But something told me to hang onto it, and let me tell you, that was one of the best decisions I’ve ever made in my kitchen. The first time I made this pie for a dinner party, my friend Jen actually asked me to cater her wedding. I mean, I didn’t, but the fact that she asked says everything.
This isn’t just another pumpkin dessert that shows up on every fall table and gets forgotten by December. This is the kind of pie that makes people stop mid-conversation, fork hovering, eyes going wide. It’s got that perfect balance of creamy, spiced, and slightly tangy from the cheesecake layer, all wrapped up in a crunchy, buttery gingersnap crust that honestly steals the show. Maybe you’ve been there—searching for that one dessert that feels special enough for company but doesn’t leave you sweating in the kitchen while your guests mingle. This is that recipe. And it came from an accountant at the DMV. You really can’t make this stuff up.
Why You’ll Love This Recipe
Look, I’ve tested a lot of pumpkin cheesecake pies over the years. Some were too dense, some were too sweet, and some just fell apart when you tried to slice them. This one? It’s different. And I’m not just saying that because Fran would probably hunt me down if I didn’t give it proper credit.
Here’s what makes this maple pumpkin cheesecake pie stand out from the crowd:
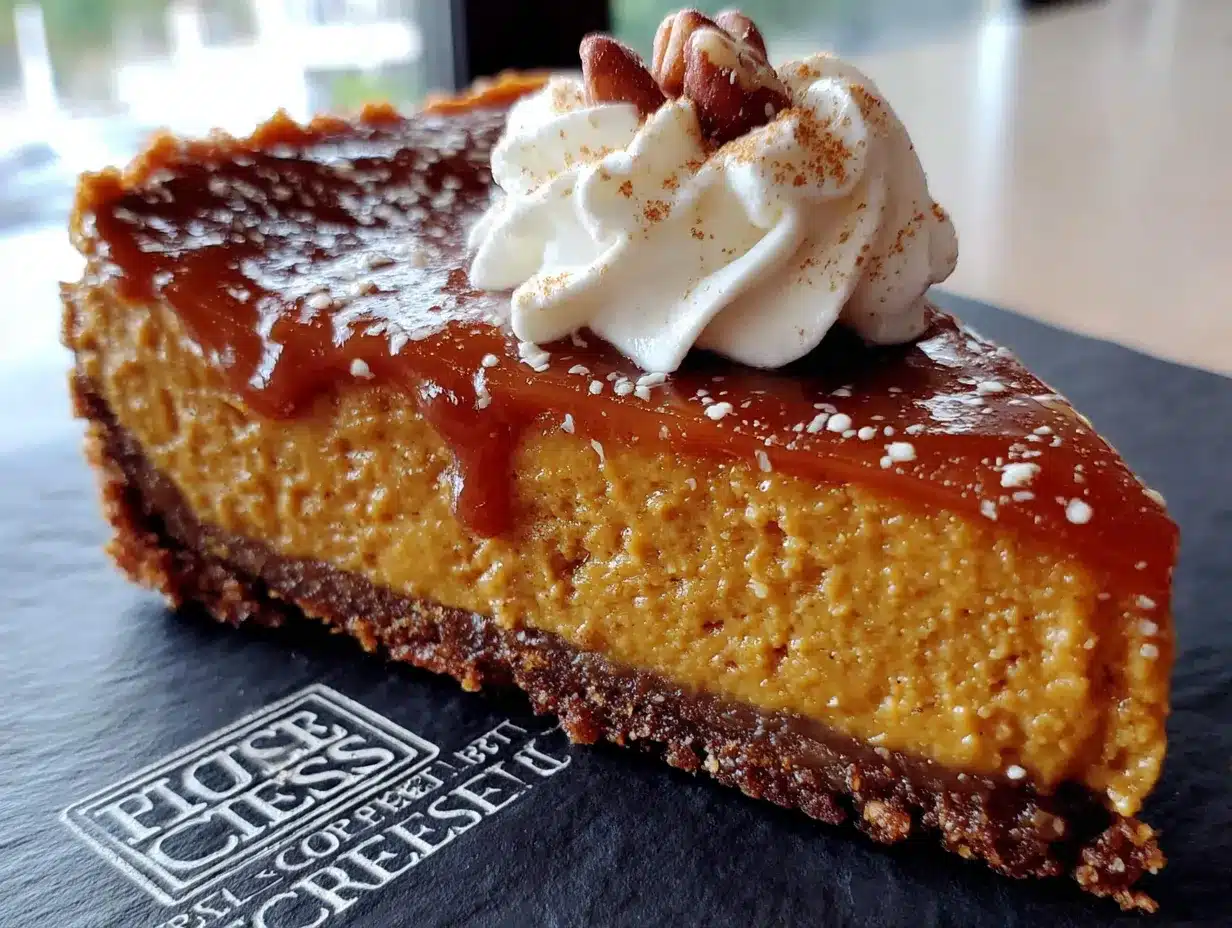
- Show-Stopping Presentation: The two distinct layers—creamy cheesecake on the bottom, silky pumpkin on top—create a gorgeous visual that looks like you spent hours in the kitchen. Your guests will think you’re a pastry chef. I’m not going to correct them.
- Make-Ahead Magic: This pie actually gets better after a night in the fridge. You can make it a full day before your gathering, which means you get to actually enjoy your own party. That’s a win in my book.
- That Gingersnap Crust: I’m convinced this is what makes people close their eyes when they take a bite. The spicy, molasses-y crunch of the gingersnaps paired with the smooth filling is pure genius.
- Perfect for Hosting: This isn’t a fussy dessert that requires last-minute assembly. It bakes low and slow, fills your house with the most incredible aroma, and slices like a dream. Your guests will be impressed, and you’ll look calm and collected.
- Crowd-Pleasing Flavors: The maple adds warmth without being overpowering, the pumpkin is classic and comforting, and the cheesecake layer keeps things rich but not heavy. It’s the dessert that disappears first every single time.
This recipe is the one I bring to every Friendsgiving, every holiday dinner, every potluck where I want to make sure I’m not bringing home leftovers. It’s comfort food reimagined—familiar enough to feel nostalgic, but unique enough to feel special. And honestly, isn’t that exactly what you want when you’re hosting?
What Ingredients You Will Need
This recipe uses simple, wholesome ingredients that come together to create something truly memorable. Most of these are pantry staples or easy to find at any grocery store, which is exactly what you want when you’re planning a gathering.
For the Gingersnap Crust
- 2 cups gingersnap cookie crumbs (about 8 ounces, or one standard box of Nabisco Gingersnaps—I’ve tried others and these work best for texture)
- 6 tablespoons unsalted butter, melted (use salted butter if that’s what you have, just reduce the added salt elsewhere)
- 2 tablespoons granulated sugar (this helps the crust hold together and adds a touch of sweetness)
- Pinch of fine sea salt (balances the sweetness and enhances the ginger flavor)
For the Cheesecake Layer
- 12 ounces cream cheese, softened (full-fat is best here—low-fat can make the texture grainy)
- 1/2 cup granulated sugar
- 1 large egg, room temperature (cold eggs can cause the batter to seize up)
- 1 teaspoon vanilla extract (pure vanilla, not imitation, makes a noticeable difference)
- 1 tablespoon all-purpose flour (this stabilizes the cheesecake and prevents cracking)
For the Maple Pumpkin Layer
- 1 cup pumpkin puree (not pumpkin pie filling—make sure it’s 100% pure pumpkin. Libby’s is my go-to brand)
- 1/2 cup pure maple syrup (the real stuff, not pancake syrup. Grade A dark amber gives the best flavor)
- 1/2 cup heavy cream (you can substitute half-and-half if needed, but the texture won’t be as luxurious)
- 2 large eggs, room temperature
- 1 teaspoon pumpkin pie spice (or make your own with 1/2 teaspoon cinnamon, 1/4 teaspoon ginger, 1/4 teaspoon nutmeg, and a pinch of cloves)
- 1/2 teaspoon ground cinnamon (I add a little extra because I love the warmth it brings)
- Pinch of salt
One thing I’ve learned over the years is that ingredient quality really matters here. The maple syrup is the star of the show in the pumpkin layer, so don’t skimp. I once used a cheaper syrup and the whole pie tasted flat. Also, make sure your cream cheese is truly softened—leave it on the counter for at least an hour before you start. Trust me on this one. I’ve made the mistake of rushing it, and you end up with little lumps of cream cheese that never quite smooth out.
Equipment Needed
You don’t need a fancy kitchen to pull this off, which is part of why I love this recipe so much. Here’s what you’ll need:
- 9-inch pie dish (glass or ceramic works best—metal can conduct heat too quickly and brown the crust unevenly)
- Food processor or rolling pin (for crushing the gingersnaps. I’ve done it both ways, and honestly, the rolling pin and a zip-top bag works fine if you don’t mind a little arm workout)
- Electric hand mixer or stand mixer (you need this for the cheesecake layer to get it smooth and fluffy. A whisk will work but your arm will hate you)
- Large mixing bowls (at least two—one for the cheesecake layer and one for the pumpkin layer)
- Measuring cups and spoons
- Rubber spatula (for scraping every last bit of filling into the pie dish)
- Baking sheet (place the pie dish on this while baking to catch any drips—learned that one the hard way)
If you don’t have a food processor, don’t sweat it. Put the gingersnaps in a sturdy zip-top bag, seal it, and go to town with a rolling pin or even a heavy skillet. It’s oddly satisfying. I keep a dedicated pie dish that I only use for special desserts like this one—it’s got a few scratches and character marks, but it’s never let me down.
Preparation Method
Let’s get into the actual making of this beauty. I’m going to walk you through every step so you feel confident, even if you’re not a seasoned baker. Take your time—this is one of those recipes that rewards patience.
- Preheat your oven to 350°F (175°C). Position a rack in the center of the oven. While it’s heating up, get your crust started.
- Make the gingersnap crust. Crush your gingersnaps into fine crumbs. You want about 2 cups of crumbs—no big chunks, but a few slightly larger pieces add nice texture. In a medium bowl, combine the crumbs, melted butter, sugar, and salt. Stir with a fork until every crumb is moistened. It should look like wet sand and hold together when you squeeze it.
- Press the crust into your pie dish. Dump the mixture into your 9-inch pie dish. Using the bottom of a measuring cup or a flat-bottomed glass, press the crumbs firmly and evenly across the bottom and up the sides. Don’t make the sides too thick at the top edge—they can burn. Bake the crust for 10 minutes, then set it aside to cool while you make the fillings. The kitchen is going to smell incredible already.
- Lower the oven temperature to 325°F (160°C). This is important—the lower temperature prevents the cheesecake from cracking and the pumpkin from curdling.
- Make the cheesecake layer. In a large bowl, beat the softened cream cheese with an electric mixer on medium speed until it’s completely smooth, about 2 minutes. Scrape down the sides and bottom of the bowl. Add the sugar and beat until fluffy, another 2 minutes. Add the egg, vanilla, and flour, and mix on low just until combined. Overmixing at this stage adds too much air, which can cause cracks. Stop when you don’t see any streaks of flour. Spread this mixture evenly into the cooled crust. Pop the whole thing in the fridge while you make the pumpkin layer—this helps the cheesecake set slightly and keeps the layers distinct.
- Make the maple pumpkin layer. In a separate bowl, whisk together the pumpkin puree, maple syrup, and heavy cream until smooth. Add the eggs one at a time, whisking gently after each addition. Stir in the pumpkin pie spice, cinnamon, and salt. Whisk until everything is combined and silky. Don’t over-whisk—you don’t want to incorporate too much air.
- Assemble the pie. Remove the pie dish from the fridge. Gently pour the pumpkin mixture over the cheesecake layer. It will seem like a lot, but it will settle as it bakes. Use a spoon to gently nudge the pumpkin layer to the edges if needed, covering the cheesecake completely.
- Bake the pie. Place the pie dish on a baking sheet and put it in the oven. Bake for 50 to 60 minutes. The edges should be set and slightly puffed, but the center will still jiggle slightly when you gently shake the pan. That’s exactly what you want—it will continue to set as it cools. If the crust is browning too quickly, tent the edges with foil or a pie shield after 30 minutes.
- Cool completely. Transfer the pie to a wire rack and let it cool to room temperature. This takes about 2 hours. Don’t rush this step. If you put it in the fridge while it’s still warm, condensation will form on the surface and make it watery.
- Chill before serving. Once the pie is at room temperature, cover it loosely with plastic wrap and refrigerate for at least 4 hours, but overnight is better. The flavors meld together and the texture becomes perfectly creamy. I promise the wait is worth it.
Cooking Tips & Techniques
I’ve made this pie more times than I can count, and I’ve definitely learned a few things the hard way. Here’s what I wish someone had told me the first time.
Don’t skip the flour in the cheesecake layer. I know it seems weird, but that little tablespoon of flour is what keeps the cheesecake from cracking as it bakes and cools. I forgot it once, and my pie looked like a map of the Grand Canyon. Still tasted good, but not exactly presentation-worthy for a dinner party.
Room temperature ingredients matter. I cannot stress this enough. Cold cream cheese creates lumps. Cold eggs can make the batter seize up. Cold cream can cause the pumpkin mixture to separate. Set everything out on the counter at least an hour before you start. If you’re in a hurry, you can soften cream cheese in the microwave on low power for 10-15 seconds, but watch it carefully—you don’t want melted cream cheese.
Bake low and slow. That 325°F temperature is non-negotiable. Higher heat will cause the cheesecake to puff up and crack, and the pumpkin layer can curdle. Be patient. The reward is a silky, smooth pie that slices beautifully.
Use a water bath if you’re nervous about cracking. I don’t always do this, but if you want extra insurance against cracks, place your pie dish inside a larger roasting pan and pour hot water halfway up the sides of the pie dish. Just make sure your pie dish is tightly wrapped in foil first so no water seeps in. I’ve skipped this step more often than not and still gotten great results, so don’t stress if you don’t want the hassle.
Let it cool gradually. After baking, turn off the oven, crack the door open, and let the pie sit in there for 30 minutes. This gradual cooling helps prevent sudden temperature changes that cause cracking. Then move it to the counter to finish cooling. It’s an extra step, but it makes a difference.
Slice with a warm knife. When you’re ready to serve, run your knife under hot water, dry it off, and make your cut. Repeat for each slice. This gives you clean, beautiful slices that don’t drag the filling around. Your guests will be impressed, and you’ll feel like a pro.
Variations & Adaptations
This recipe is pretty perfect as written, but I love playing around with variations depending on the occasion or who’s coming over. Here are a few that have worked beautifully in my kitchen.
Gluten-Free Version: Use gluten-free gingersnap cookies for the crust. I’ve tested this with Pamela’s brand and it works perfectly. The rest of the ingredients are naturally gluten-free, so you’re good to go. Just make sure your pumpkin pie spice blend doesn’t have any hidden gluten.
Dairy-Free Adaptation: Substitute the cream cheese with a good-quality dairy-free cream cheese (Kite Hill or Miyoko’s are my favorites). Use coconut cream instead of heavy cream in the pumpkin layer, and use a vegan butter for the crust. The texture will be slightly less creamy, but it’s still delicious and no one will feel left out.
Bourbon Maple Twist: Add 2 tablespoons of bourbon to the pumpkin layer along with the maple syrup. The bourbon adds a warm, smoky depth that pairs beautifully with the ginger and pumpkin. I made this version for a guys’ night gathering and it was a huge hit. Just be aware the alcohol doesn’t fully cook off, so skip this if kids will be eating it.
Spiced Pecan Topping: Before serving, top the pie with a sprinkle of candied pecans and a drizzle of extra maple syrup. Toast the pecans in a dry skillet with a little butter, brown sugar, and a pinch of cayenne for a sweet-spicy crunch that takes the pie over the top.
Individual Mini Pies: Use a muffin tin and press the crust into each cup. Fill with the cheesecake and pumpkin layers and bake for about 20-25 minutes. These are perfect for parties where people want their own little dessert. Plus, they’re adorable.
Serving & Storage Suggestions
This pie is a showstopper at room temperature or slightly chilled. I prefer to serve it straight from the fridge—the texture is firmer and slices more cleanly. Let it sit out for about 10-15 minutes before serving to take the chill off and let the flavors open up.
What to Serve Alongside: A dollop of lightly sweetened whipped cream is classic and perfect. For something a little extra, try a maple cinnamon whipped cream—just add a tablespoon of maple syrup and a pinch of cinnamon to your heavy cream before whipping. A drizzle of caramel sauce or a sprinkle of flaky sea salt on top is also incredible. If you’re serving this at a fall gathering, pair it with a hot apple cider or a spiced latte for the ultimate cozy dessert experience.
Complementary Dishes: This pie is rich, so keep the rest of your meal on the lighter side. A simple roast chicken or a hearty soup works beautifully. For a full fall spread, serve it alongside a crisp green salad with apple slices and a tangy vinaigrette to balance the sweetness.
Storage: Cover the pie tightly with plastic wrap or foil and store it in the refrigerator for up to 5 days. The flavors actually improve after the first day, so don’t be afraid to make it ahead. I’ve never had leftovers last longer than 3 days in my house, but if you’re somehow more disciplined than me, it will keep just fine.
Freezing: This pie freezes beautifully. Once it’s fully chilled and set, wrap it tightly in plastic wrap, then a layer of foil, and freeze for up to 3 months. Thaw it overnight in the refrigerator before serving. Don’t freeze it with whipped cream on top—add that fresh when you’re ready to serve.
Reheating: Honestly, I prefer this pie cold or at room temperature. If you want a warm slice, pop it in a 300°F oven for 10 minutes, but keep an eye on it—you don’t want the cheesecake to get warm and soft.
Nutritional Information & Benefits
Let’s be real—this is a decadent dessert, and it’s meant to be enjoyed as a treat. But there are a few bright spots worth mentioning.
Estimated per slice (based on 8 servings):
- Calories: 420
- Fat: 26g
- Carbohydrates: 42g
- Protein: 7g
- Fiber: 2g
- Sugar: 30g
Health Highlights: Pumpkin is packed with vitamin A and fiber, which is always a nice bonus. Maple syrup contains antioxidants and minerals like zinc and manganese—though we’re not exactly eating this for the health benefits. The ginger in the crust is known for its anti-inflammatory properties, and honestly, I’ll take any excuse to feel a little better about dessert.
Dietary Considerations: This recipe contains dairy, eggs, and gluten. As mentioned in the variations section, it can be adapted for gluten-free and dairy-free diets. It is not suitable for vegan diets without significant modifications.
Allergens: Contains wheat (in the crust), dairy, and eggs. If you’re serving a crowd with allergies, make sure to label it clearly or offer a safe alternative.
I’m a firm believer that dessert should be enjoyed without guilt. This pie is rich, satisfying, and absolutely worth every single calorie. One slice is enough to feel completely satisfied—and that’s the mark of a truly great dessert.
Conclusion
This maple pumpkin cheesecake pie with gingersnap crust is the dessert that keeps on giving. It’s the one that makes people ask for the recipe before they’ve even finished their slice. It’s the one that makes you look like a hero in the kitchen without spending all day there. And it came from a retired accountant at the DMV, which is honestly my favorite part of the story.
I hope you make this for your next gathering—whether it’s Thanksgiving, a Friendsgiving, a holiday dinner, or just a Tuesday night when you want something special. Customize it however you like. Add the bourbon, top it with pecans, make it gluten-free for your cousin with dietary restrictions. This recipe is forgiving and adaptable, and it loves being shared.
If you make this, I’d love to hear about it. Drop a comment below and tell me how it turned out, what variations you tried, or just share your own story of the best recipe you ever got from an unexpected source. And if you’re looking for more hosting-friendly desserts, check out my pumpkin cheesecake or this maple pecan tart that’s perfect for fall gatherings. Happy baking, friends—you’ve got this.
Frequently Asked Questions
Can I use store-bought graham cracker crust instead of making the gingersnap crust?
You can, but honestly, the gingersnap crust is what makes this pie so special. The spicy, molasses flavor pairs perfectly with the maple and pumpkin. If you’re in a pinch, a graham cracker crust will work, but you’ll lose some of that magic. If you do use a store-bought crust, consider adding a pinch of ginger and cinnamon to the filling to compensate.
How do I know when the pie is done baking?
The edges should be set and slightly puffed, but the center will still jiggle when you gently shake the pan. It should look like firm Jell-O, not liquid. The internal temperature should be around 150°F if you want to use a thermometer. It will continue to set as it cools, so don’t overbake it.
Can I make this pie a day ahead of time?
Absolutely! In fact, I recommend it. The pie needs at least 4 hours to chill and set, but overnight is even better. The flavors meld together and the texture becomes perfectly creamy. Make it a day ahead, cover it tightly, and keep it in the fridge. Add any toppings right before serving.
Why did my cheesecake layer crack?
Cracking usually happens from overbaking, sudden temperature changes, or overmixing the batter. Make sure you’re baking at 325°F, not higher. Let the pie cool gradually—first in the oven with the door cracked, then on the counter, then in the fridge. And don’t overbeat the cheesecake batter once you add the egg. A few small cracks can be covered with whipped cream, so don’t stress too much.
Can I freeze leftovers?
Yes, this pie freezes beautifully. Once it’s fully chilled and set, wrap it tightly in plastic wrap, then a layer of foil, and freeze for up to 3 months. Thaw it overnight in the refrigerator before serving. Don’t freeze it with whipped cream on top—add that fresh when you’re ready to serve.
PrintBest Easy Maple Pumpkin Cheesecake Pie Recipe
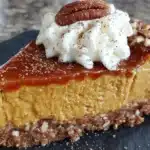
A creamy, spiced maple pumpkin cheesecake pie with a crunchy gingersnap crust that’s perfect for Thanksgiving or any fall gathering. This make-ahead dessert features two distinct layers and a rich, balanced flavor that will impress your guests.
- Prep Time: 30 minutes
- Cook Time: 60 minutes
- Total Time: 5 hours (includes chilling)
- Yield: 8 servings 1x
- Category: Dessert
- Cuisine: American
Ingredients
- 2 cups gingersnap cookie crumbs (about 8 ounces)
- 6 tablespoons unsalted butter, melted
- 2 tablespoons granulated sugar
- Pinch of fine sea salt
- 12 ounces cream cheese, softened
- 1/2 cup granulated sugar
- 1 large egg, room temperature
- 1 teaspoon vanilla extract
- 1 tablespoon all-purpose flour
- 1 cup pumpkin puree (not pumpkin pie filling)
- 1/2 cup pure maple syrup
- 1/2 cup heavy cream
- 2 large eggs, room temperature
- 1 teaspoon pumpkin pie spice
- 1/2 teaspoon ground cinnamon
- Pinch of salt
Instructions
- Preheat your oven to 350°F (175°C). Position a rack in the center of the oven.
- Make the gingersnap crust: Crush gingersnaps into fine crumbs (about 2 cups). In a medium bowl, combine crumbs, melted butter, sugar, and salt. Stir until every crumb is moistened.
- Press the crust into a 9-inch pie dish. Using the bottom of a measuring cup, press crumbs firmly across the bottom and up the sides. Bake for 10 minutes, then set aside to cool.
- Lower the oven temperature to 325°F (160°C).
- Make the cheesecake layer: In a large bowl, beat softened cream cheese with an electric mixer on medium speed until smooth, about 2 minutes. Add sugar and beat until fluffy, another 2 minutes. Add egg, vanilla, and flour; mix on low just until combined. Spread evenly into the cooled crust. Refrigerate while making the pumpkin layer.
- Make the maple pumpkin layer: In a separate bowl, whisk together pumpkin puree, maple syrup, and heavy cream until smooth. Add eggs one at a time, whisking gently. Stir in pumpkin pie spice, cinnamon, and salt until combined.
- Assemble the pie: Remove pie dish from fridge. Gently pour pumpkin mixture over the cheesecake layer. Use a spoon to nudge the pumpkin layer to the edges if needed.
- Bake the pie: Place pie dish on a baking sheet. Bake for 50 to 60 minutes. Edges should be set and slightly puffed, but center will still jiggle slightly. If crust browns too quickly, tent edges with foil after 30 minutes.
- Cool completely: Transfer pie to a wire rack and let cool to room temperature, about 2 hours.
- Chill before serving: Cover loosely with plastic wrap and refrigerate for at least 4 hours, preferably overnight.
Notes
Room temperature ingredients are crucial for a smooth texture. Bake low and slow at 325°F to prevent cracking. For extra insurance against cracks, use a water bath. Let the pie cool gradually in the oven with the door cracked open for 30 minutes before moving to the counter. Slice with a warm knife for clean slices.
Nutrition
- Serving Size: 1 slice
- Calories: 420
- Sugar: 30
- Sodium: 320
- Fat: 26
- Saturated Fat: 15
- Carbohydrates: 42
- Fiber: 2
- Protein: 7
Keywords: maple pumpkin cheesecake pie, gingersnap crust, Thanksgiving dessert, fall dessert, pumpkin pie, cheesecake pie