Love this? Save it for later!
Share the inspiration with your friends
It was 11:47 PM on a random Wednesday, and I was staring into the fridge with the desperate focus of someone who skipped dinner. The craving hit me out of nowhere—not for a snack, but for that specific, soul-warming comfort of baked mac and cheese. The kind with a golden, crunchy top that shatters when you tap it with a fork. Problem was, I didn’t have a block of cheddar to shred, and the fancy cheese shop had closed hours ago. What I did have was a sad little collection of cheese ends: some shredded mozzarella, a half-eaten block of gouda, a wedge of parmesan that was mostly rind, and a lonely slice of provolone. It looked like a cheese board that gave up. But something about the late hour—maybe the quiet, maybe the hunger—made me think, “Why not throw them all in?” I grabbed the panko breadcrumbs from the back of the pantry, the ones I bought for a recipe I never made, and I just went for it. Honestly, that midnight experiment turned into the best baked four-cheese mac and cheese I have ever made. The combination was ridiculous—creamy, tangy, nutty, and melty all at once. Maybe you’ve been there, standing in your kitchen at an ungodly hour, convinced you’re about to ruin dinner but too tired to care. That’s exactly where this recipe was born, and I’ve been making it ever since.
Why You’ll Love This Recipe
This isn’t just another mac and cheese recipe. After testing this dish for over a dozen dinner rushes—both for my family and for picky dinner guests—I can tell you it delivers every single time. The combination of four cheeses creates a flavor profile that’s miles ahead of the boxed stuff, but it takes almost the same amount of effort.
- Quick & Easy: From start to table in under 45 minutes. No complicated roux, no double-boilers, no fuss. Perfect for those weeknights when you’re running on fumes.
- Simple Ingredients: You probably already have most of these in your fridge and pantry. No hunting for obscure cheeses or specialty items.
- Perfect for Busy Weeknights: This is the kind of meal that makes everyone at the table happy—kids, adults, even the picky uncle who “doesn’t like cheese.”
- Crowd-Pleaser: I’ve brought this to potlucks and watched the dish disappear in minutes. It’s comfort food at its finest.
- Unbelievably Delicious: That crispy panko crust is the game-changer. It adds texture and crunch that takes this from “good mac and cheese” to “I need this recipe.”
What makes this version different? It’s the cheese blend, honestly. Most recipes rely on just cheddar, which can get greasy or grainy. By using a mix of mozzarella, gouda, parmesan, and provolone, you get that ultra-creamy, stretchy texture with a deep, savory flavor. And the panko crust? It’s not just for show—it adds that satisfying crunch that makes every bite feel special. This is the kind of recipe that makes you close your eyes after the first bite. It’s comfort food reimagined—faster, easier, but with the same soul-soothing satisfaction.
What Ingredients You Will Need
This recipe uses simple, wholesome ingredients to deliver bold flavor and satisfying texture without the fuss. Most of these are pantry staples or easy to find at any grocery store.
- Elbow macaroni – 16 ounces (about 4 cups dry). I prefer Barilla for its texture, but any brand works. Cook it al dente—it will continue cooking in the oven.
- Unsalted butter – 4 tablespoons (½ stick). Adds richness and helps create the creamy base.
- All-purpose flour – ¼ cup. This thickens the cheese sauce. No need for anything fancy.
- Whole milk – 3 cups (720 ml). Full-fat is best for creaminess. If you’re in a pinch, 2% works, but avoid skim—it gets watery.
- Heavy cream – 1 cup (240 ml). This is the secret to that luxurious texture. You can substitute with half-and-half if needed.
- Mozzarella cheese – 1½ cups, shredded. Use low-moisture mozzarella, not fresh—it melts better and doesn’t release water.
- Smoked gouda – 1 cup, shredded. This adds a subtle smoky flavor that makes the dish unforgettable. I recommend Boar’s Head or any deli-brand gouda.
- Parmesan cheese – ½ cup, finely grated. Use the real stuff, not the green can—it melts smoother and tastes better.
- Provolone cheese – 1 cup, shredded. This adds that perfect stretchiness. Deli-sliced provolone works great—just shred it yourself.
- Salt – 1 teaspoon, plus more for pasta water.
- Black pepper – ½ teaspoon, freshly ground.
- Garlic powder – ½ teaspoon. Adds a subtle savory note without overwhelming the cheese.
- Dijon mustard – 1 teaspoon. Trust me on this—it cuts through the richness and brightens the whole dish.
- Panko breadcrumbs – 1 cup. These create that crispy, golden crust. Regular breadcrumbs won’t give you the same crunch.
- Butter for topping – 2 tablespoons, melted. Mix with the panko for that perfect golden finish.
Equipment Needed
You don’t need a professional kitchen for this one. Here’s what you’ll need:
- Large pot – For boiling the pasta. A 5-quart pot works perfectly.
- Colander – For draining the macaroni.
- Large skillet or saucepan – For making the cheese sauce. A 3-quart saucepan is ideal.
- Whisk – Essential for a smooth, lump-free sauce. A silicone whisk is my favorite—it won’t scratch your pans.
- 9×13-inch baking dish – This is the standard size for this recipe. A glass or ceramic dish works best for even baking.
- Box grater or food processor – For shredding cheese. Pre-shredded cheese has anti-caking agents that affect melting, so grate your own if you can.
- Mixing bowl – For combining the panko and melted butter.
- Wooden spoon or spatula – For stirring the sauce.
If you don’t have a 9×13 dish, you can use a 3-quart casserole dish or even a cast-iron skillet. Just keep an eye on the baking time—a wider dish will cook faster.
Preparation Method
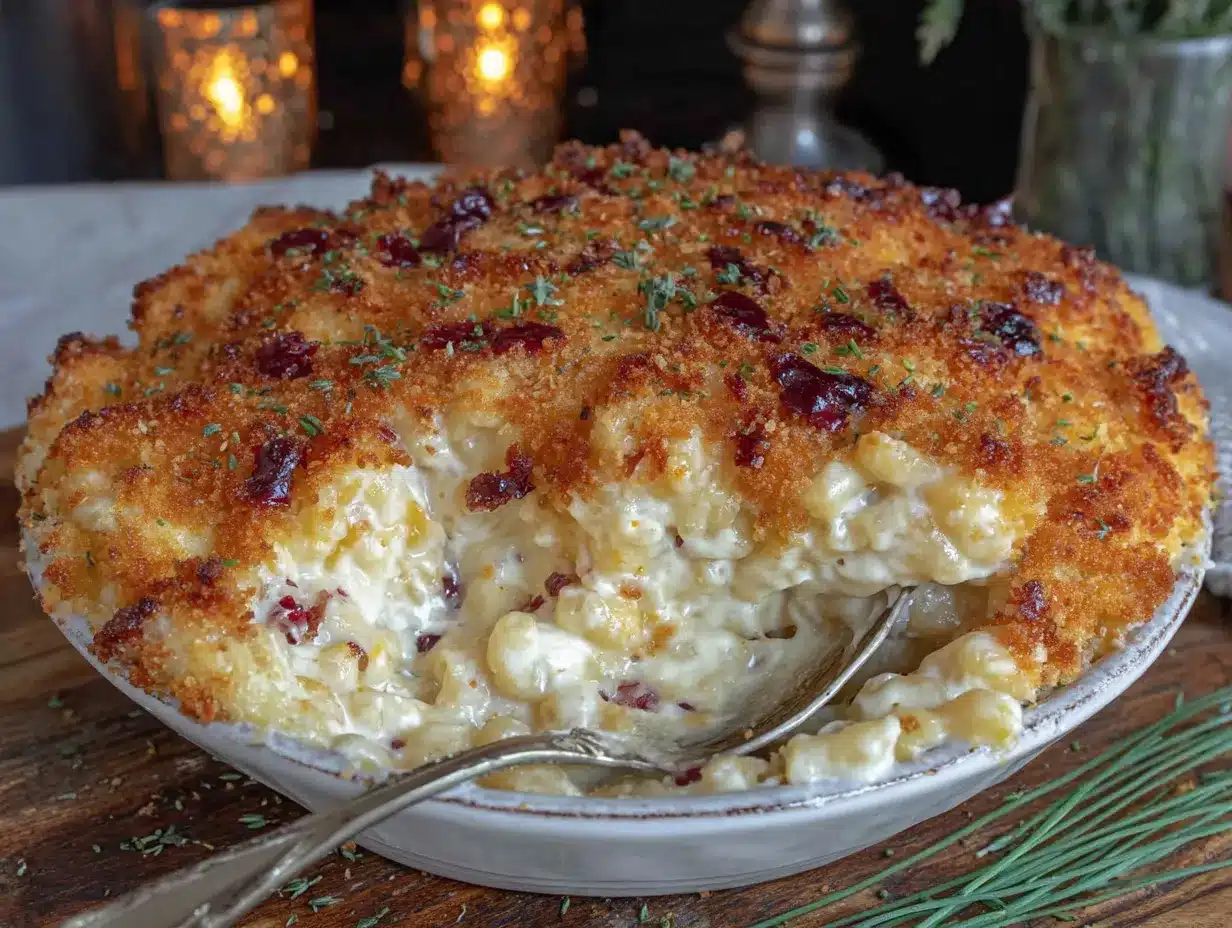
Let’s get cooking. This recipe comes together in about 40 minutes, and I promise it’s worth every second.
- Preheat your oven to 375°F (190°C). Position the rack in the middle of the oven. While it’s heating, grease your 9×13 baking dish with butter or non-stick spray.
- Boil the pasta. Fill your large pot with water, add a generous pinch of salt (about 1 tablespoon), and bring it to a rolling boil over high heat. Add the elbow macaroni and cook until al dente—about 1 minute less than the package directions. You want it firm, not mushy. Drain the pasta in a colander, but don’t rinse it. The starch helps the sauce stick.
- Start the cheese sauce. In your large skillet or saucepan, melt the 4 tablespoons of butter over medium heat. Once it’s bubbling, whisk in the flour. Keep whisking for about 1 minute—this cooks out the raw flour taste. You’ll see it turn a pale golden color.
- Add the milk and cream. Slowly pour in the whole milk and heavy cream while whisking constantly. This prevents lumps from forming. Keep whisking until the mixture thickens, about 3-4 minutes. It should coat the back of a spoon—that’s your cue.
- Season the base. Stir in the salt, black pepper, garlic powder, and Dijon mustard. The mustard might sound weird, but it adds a subtle tang that makes the cheese pop.
- Add the cheeses. Reduce the heat to low. Add the shredded mozzarella, gouda, and provolone to the sauce, one handful at a time. Stir gently after each addition until melted. Save the parmesan for later—it goes on top. Keep stirring until the sauce is smooth and velvety. If it looks a little thin, don’t worry—it will thicken in the oven.
- Combine pasta and sauce. Add the drained macaroni to the cheese sauce. Stir gently with a wooden spoon until every piece of pasta is coated. Take your time here—you want that cheese in every nook and cranny.
- Transfer to baking dish. Pour the mac and cheese mixture into your greased 9×13 dish. Spread it into an even layer with the back of your spoon.
- Make the panko crust. In a small mixing bowl, combine the panko breadcrumbs, the finely grated parmesan cheese, and the 2 tablespoons of melted butter. Mix with a fork until the crumbs are evenly coated. Sprinkle this mixture over the top of the mac and cheese. Don’t press it down—you want those crumbs to stay light and crunchy.
- Bake to perfection. Place the dish in the preheated oven and bake for 20-25 minutes. You’ll know it’s done when the sauce is bubbly around the edges and the panko crust is deep golden brown. If you want extra color, switch the oven to broil for the last 1-2 minutes, but watch it closely—it can burn fast.
- Rest before serving. Let the mac and cheese sit on the counter for 5 minutes before serving. This allows the sauce to set slightly, so it doesn’t slide off your fork.
Cooking Tips & Techniques
I’ve made this recipe more times than I can count, and I’ve learned a few things the hard way. Here’s what you need to know:
Shred your own cheese. I know it’s tempting to buy the pre-shredded bags, but they’re coated with potato starch or cellulose to prevent clumping. That coating also prevents smooth melting. You’ll end up with a grainy sauce instead of that silky texture. Spend the extra 3 minutes grating your own—it makes a real difference.
Don’t overcook the pasta. This is the most common mistake I see. If you cook the macaroni to full tenderness, it will turn mushy in the oven. Always cook it al dente—firm to the bite. It will finish cooking while it bakes, and you’ll get perfect pasta every time.
Watch your heat on the sauce. When you add the cheese, keep the heat on low. High heat can cause the cheese to separate or become grainy. Patience is your friend here. Let the residual heat from the sauce do the work.
Don’t skip the rest time. I know you’re hungry, but that 5-minute rest is crucial. It allows the starches to set, so your mac and cheese holds its shape instead of turning into a soupy mess. Trust me—I learned this after serving a few puddles that tasted great but looked sad.
Make it ahead. This recipe is perfect for meal prep. Assemble everything up to step 9, then cover and refrigerate for up to 24 hours. When you’re ready to bake, add 10 minutes to the cooking time. The panko crust might not be as crunchy, but it’s still delicious.
Variations & Adaptations
This recipe is a great base, but don’t be afraid to make it your own. Here are some variations I’ve tried and loved:
Spicy Southwestern Mac: Add 1 can of diced green chiles (drained) and ½ teaspoon of cayenne pepper to the cheese sauce. Top with crushed tortilla chips mixed with the panko. It’s smoky, spicy, and totally addictive.
Lobster Mac & Cheese: Fold in 8 ounces of cooked, chopped lobster meat right before transferring to the baking dish. This turns a simple weeknight dinner into something special enough for date night. I’ve done this for Valentine’s Day, and it was a hit.
Gluten-Free Version: Use gluten-free elbow pasta and substitute the all-purpose flour with a 1:1 gluten-free flour blend. The sauce will be slightly thinner, but it still works. Make sure your panko is gluten-free too—some brands are, some aren’t.
Vegetable-Packed Mac: Steam 2 cups of broccoli florets or cauliflower and fold them in with the pasta. The cheese sauce hides the veggies perfectly, making this a great way to sneak greens into a kid-friendly meal.
Extra-Crunchy Crust: Mix ½ cup of crushed potato chips or french-fried onions into the panko topping. It adds an incredible salty crunch that takes this over the top.
Serving & Storage Suggestions
This mac and cheese is best served hot, straight from the oven. The contrast between the crispy panko crust and the creamy, cheesy interior is what makes it special. Let it rest for 5 minutes, then scoop it onto plates with a large spoon or spatula.
For sides, I love pairing this with a simple green salad dressed with lemon vinaigrette—the acidity cuts through the richness. Roasted broccoli or green beans work beautifully too. If you’re serving it as a main dish, it’s hearty enough on its own, but a side of garlic bread never hurts.
Storage: Leftovers can be stored in an airtight container in the refrigerator for up to 4 days. The panko crust will soften, but the flavor will still be fantastic. To reheat, place individual portions in the microwave for 1-2 minutes, or reheat the whole dish in a 350°F oven for 15-20 minutes. If you want to restore some crunch, sprinkle a little extra panko on top before reheating.
Freezing: This mac and cheese freezes beautifully. Assemble the dish completely but don’t bake it. Wrap it tightly with plastic wrap, then foil, and freeze for up to 3 months. When you’re ready, thaw it in the refrigerator overnight, then bake as directed, adding 10-15 minutes to the cooking time.
One thing I’ve noticed—the flavors actually deepen after a day in the fridge. The second-day leftovers are often even better than the first serving. The cheeses meld together, and the whole dish becomes more cohesive. It’s the kind of recipe that rewards you for making extra.
Nutritional Information & Benefits
Let’s be honest—this is comfort food, not health food. But that doesn’t mean it can’t fit into a balanced diet. Here’s the estimated nutritional breakdown per serving (based on 8 servings):
- Calories: Approximately 520
- Protein: 22 grams
- Fat: 28 grams
- Carbohydrates: 45 grams
- Fiber: 2 grams
- Calcium: 35% of the Daily Value
The cheese provides a good dose of calcium and protein, which supports bone health and muscle repair. The whole milk and heavy cream add vitamin D and A, though they also contribute to the fat content. If you’re watching your calories, you can swap the heavy cream for half-and-half and use reduced-fat cheese—just know the texture won’t be as luxurious.
This recipe is not gluten-free (unless modified) and contains dairy. For a dairy-free version, you can use plant-based butter, unsweetened oat milk, and vegan cheese shreds, but the flavor and texture will be different.
Conclusion
This baked four-cheese mac and cheese with crispy panko crust is the kind of recipe that earns a permanent spot in your dinner rotation. It’s quick enough for a busy Tuesday, but impressive enough for a holiday table. The combination of four cheeses creates a depth of flavor that you just can’t get from a single cheese, and that panko crust? It’s pure magic.
I hope you give this recipe a try, and I hope it becomes as beloved in your kitchen as it is in mine. Don’t be afraid to play with the cheese blend or add your own twist—that’s the beauty of cooking. If you make it, I’d love to hear how it turned out. Drop a comment below, share your photos, or tell me about your own late-night kitchen experiments. Happy cooking!
Frequently Asked Questions
Can I use pre-shredded cheese for this recipe?
You can, but I don’t recommend it. Pre-shredded cheese is coated with anti-caking agents that prevent it from melting smoothly. You’ll get a grainier sauce. Grate your own cheese—it takes 3 extra minutes and makes a huge difference.
Can I make this mac and cheese ahead of time?
Absolutely. Assemble the dish completely (without baking), cover it, and refrigerate for up to 24 hours. When you’re ready, bake it as directed, adding 10 minutes to the cooking time. The panko crust might be slightly less crunchy, but it’s still delicious.
What can I use instead of panko breadcrumbs?
If you don’t have panko, you can use regular breadcrumbs, crushed crackers (like Ritz), or even crushed potato chips. Each will give a slightly different texture, but all will add crunch. Just mix them with melted butter before topping.
Can I freeze baked mac and cheese?
Yes! This freezes beautifully. Assemble and bake the dish, let it cool completely, then wrap it tightly in plastic wrap and foil. Freeze for up to 3 months. Thaw in the refrigerator overnight, then reheat in a 350°F oven for 20-25 minutes.
Why did my cheese sauce turn out grainy?
Grainy sauce usually happens for one of two reasons: the heat was too high when you added the cheese, or you used pre-shredded cheese. Keep the heat on low and stir constantly. If it’s already grainy, you can try whisking in a tablespoon of cold butter or a splash of milk to smooth it out.
Pin This Recipe!
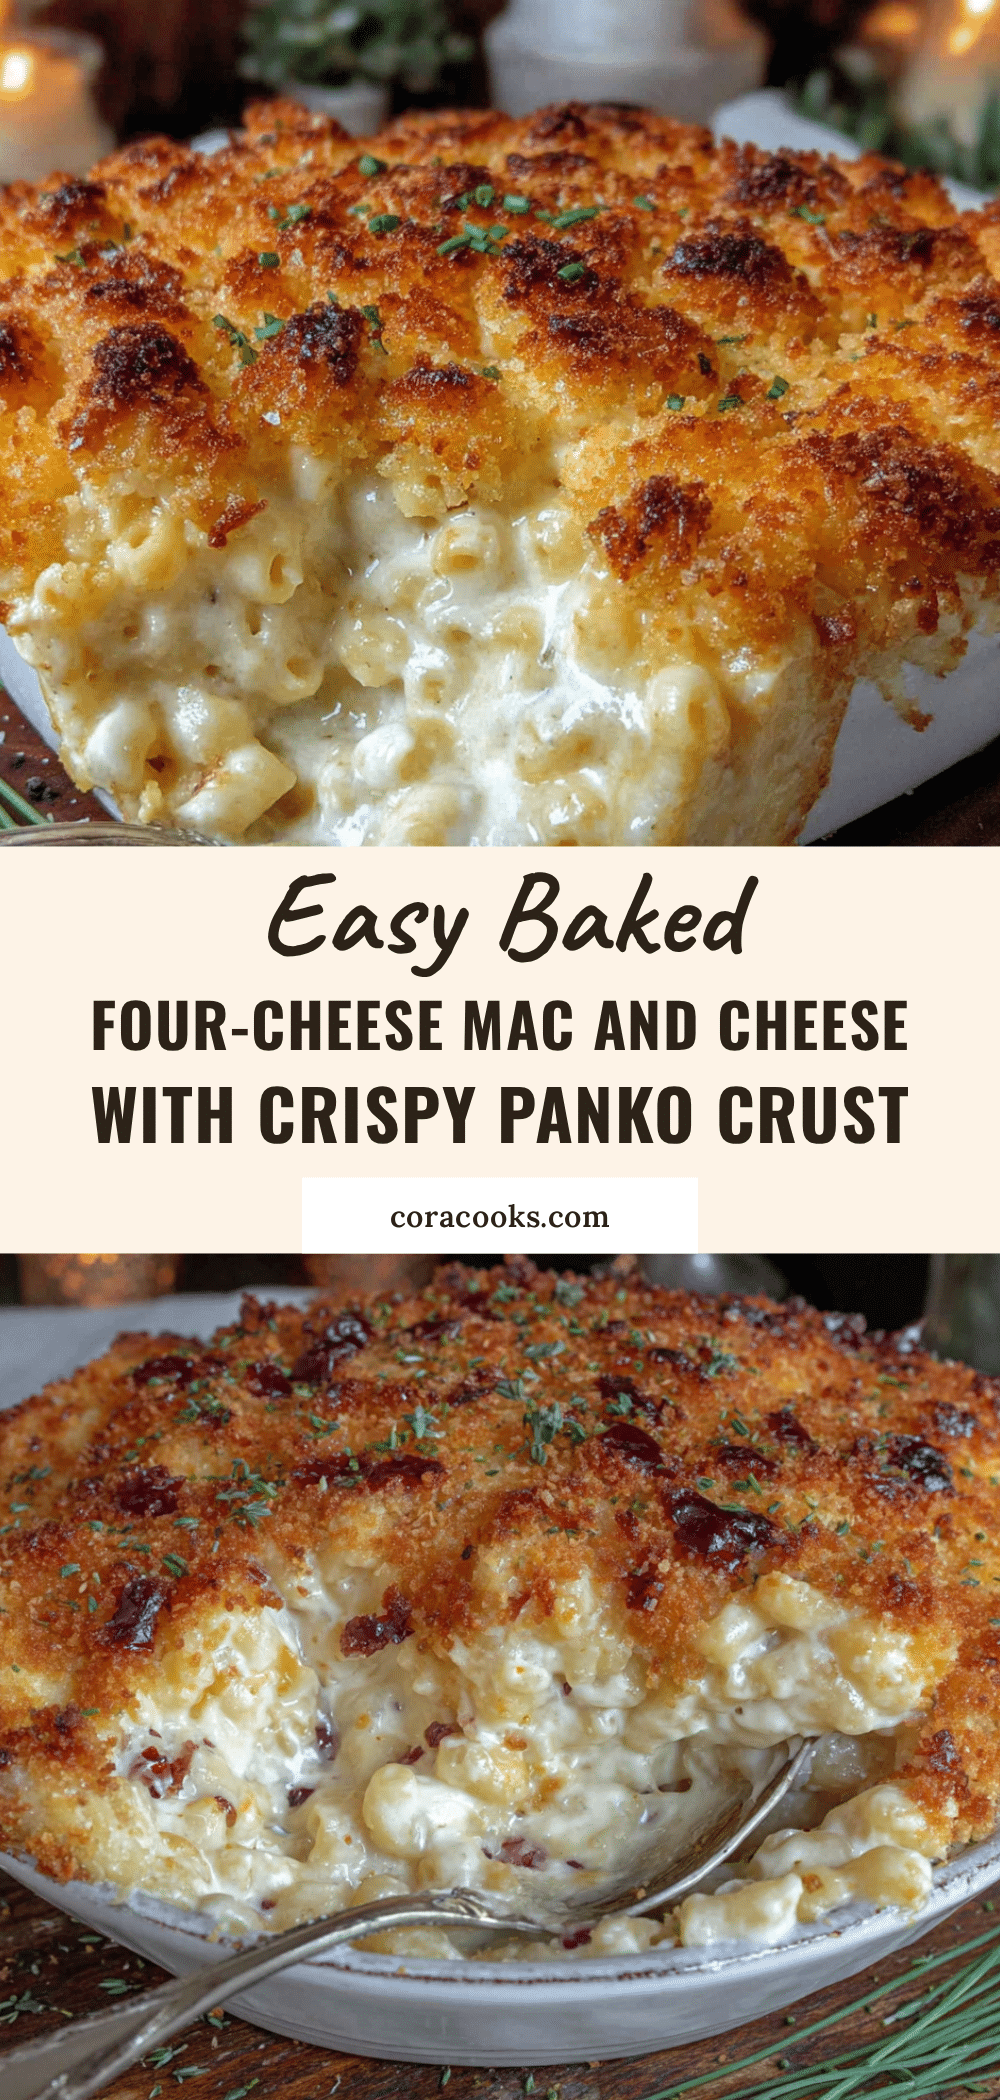
Best Baked Four-Cheese Mac and Cheese with Crispy Panko

This baked four-cheese mac and cheese combines mozzarella, gouda, parmesan, and provolone for an ultra-creamy, stretchy texture with a deep, savory flavor. Topped with a crispy panko crust, it’s comfort food at its finest—ready in under 45 minutes.
- Prep Time: 15 minutes
- Cook Time: 25 minutes
- Total Time: 40 minutes
- Yield: 8 servings 1x
- Category: Main Course
- Cuisine: American
Ingredients
- 16 ounces elbow macaroni (about 4 cups dry)
- 4 tablespoons unsalted butter (½ stick)
- ¼ cup all-purpose flour
- 3 cups whole milk (720 ml)
- 1 cup heavy cream (240 ml)
- 1½ cups shredded low-moisture mozzarella cheese
- 1 cup shredded smoked gouda cheese
- ½ cup finely grated Parmesan cheese
- 1 cup shredded provolone cheese
- 1 teaspoon salt, plus more for pasta water
- ½ teaspoon freshly ground black pepper
- ½ teaspoon garlic powder
- 1 teaspoon Dijon mustard
- 1 cup panko breadcrumbs
- 2 tablespoons melted butter for topping
Instructions
- Preheat your oven to 375°F (190°C). Position the rack in the middle of the oven. Grease a 9×13-inch baking dish with butter or non-stick spray.
- Fill a large pot with water, add about 1 tablespoon of salt, and bring to a rolling boil over high heat. Add the elbow macaroni and cook until al dente—about 1 minute less than package directions. Drain in a colander (do not rinse).
- In a large skillet or saucepan, melt 4 tablespoons of butter over medium heat. Whisk in the flour and cook for about 1 minute until pale golden.
- Slowly pour in the whole milk and heavy cream while whisking constantly. Continue whisking until the mixture thickens, about 3-4 minutes, until it coats the back of a spoon.
- Stir in the salt, black pepper, garlic powder, and Dijon mustard.
- Reduce heat to low. Add the shredded mozzarella, gouda, and provolone one handful at a time, stirring gently after each addition until melted. Reserve the Parmesan for the topping.
- Add the drained macaroni to the cheese sauce and stir gently until every piece is coated.
- Pour the mac and cheese mixture into the greased 9×13 baking dish and spread into an even layer.
- In a small mixing bowl, combine the panko breadcrumbs, finely grated Parmesan cheese, and 2 tablespoons of melted butter. Mix with a fork until evenly coated. Sprinkle over the top of the mac and cheese without pressing down.
- Bake for 20-25 minutes until bubbly around the edges and the panko crust is deep golden brown. For extra color, broil for the last 1-2 minutes, watching closely.
- Let the mac and cheese rest on the counter for 5 minutes before serving.
Notes
Shred your own cheese for the smoothest sauce—pre-shredded cheese contains anti-caking agents that can make the sauce grainy. Cook pasta al dente to avoid mushiness after baking. Let the dish rest for 5 minutes before serving to allow the sauce to set. For make-ahead, assemble without baking, cover, and refrigerate up to 24 hours; add 10 minutes to baking time.
Nutrition
- Serving Size: 1 serving (about 1/8
- Calories: 520
- Sugar: 6
- Sodium: 680
- Fat: 28
- Saturated Fat: 16
- Carbohydrates: 45
- Fiber: 2
- Protein: 22
Keywords: baked mac and cheese, four-cheese mac and cheese, crispy panko mac and cheese, comfort food, easy mac and cheese, homemade mac and cheese