Love this? Save it for later!
Share the inspiration with your friends
It was 11:47 PM on a forgettable Wednesday, and I had a very specific need for something warm, sweet, and not too heavy. I’d just gotten back from a late shift, and the usual cookie dough or brownie batter felt like too much work. I opened the fridge, hoping for some leftover dessert, but all I found were three bosc pears sitting in the fruit bowl, looking a little lonely. I didn’t have the energy for a pie crust or a crumble topping, but I had a jar of honey, a bag of walnuts, and a desperate hope that these simple things could turn into something wonderful.
So I sliced those pears in half, scooped out the cores, and just started drizzling. A little honey, a generous sprinkle of cinnamon, a handful of chopped walnuts. I popped them in the oven, set a timer for 25 minutes, and honestly, I didn’t expect much. But when the timer went off and I pulled them out, the kitchen smelled like a fall festival had exploded. The pears were tender, the honey had caramelized into a sticky syrup, and the walnuts were toasty and warm. I ate one right out of the baking dish, standing at the counter, and let me tell you—it was one of the best desserts I’d had in weeks.
That late-night experiment turned into my go-to dessert for when I want something that feels fancy but takes almost no effort. Maybe you’ve been there—craving something sweet but not wanting to pull out a mixer or dirty a dozen dishes. These easy cinnamon baked pears with honey and walnuts are the answer. They’re simple, they’re fast, and they taste like you spent an hour in the kitchen. It’s one of those recipes that just works, and I keep coming back to it because it never disappoints.
Why You’ll Love This Recipe
This isn’t just another fruit dessert. These easy cinnamon baked pears with honey and walnuts are the kind of recipe that makes you look like a kitchen pro without any of the stress. I’ve made this for dinner parties, solo weeknight treats, and even holiday brunches, and it always gets the same reaction—surprise that something so simple can taste this good.
- Quick & Easy: From start to finish, this comes together in about 30 minutes. Most of that is hands-off oven time, so you can clean up or just relax while they bake.
- Simple Ingredients: You probably already have pears, honey, cinnamon, and walnuts in your kitchen. No fancy grocery runs needed.
- Perfect for Any Occasion: Great for a cozy weeknight dessert, a healthy-ish breakfast, or an impressive but effortless dinner party finale.
- Crowd-Pleaser: I’ve served these to kids and adults alike, and everyone goes back for seconds. The natural sweetness of the pears paired with the honey and crunch of walnuts is universally loved.
- Unbelievably Delicious: The texture is what gets me every time—the pears turn buttery soft, the honey creates a luscious syrup, and the walnuts add that perfect crunch. It’s comfort food that feels light.
What makes this recipe different? It’s the balance. A lot of baked pear recipes are too watery or too sweet. This one uses just enough honey to complement the fruit without overwhelming it, and the cinnamon brings warmth without being spicy. I’ve tested this with different pear varieties, honey types, and nut combinations, and this version is the one that consistently delivers. It’s the kind of dessert that makes you close your eyes after the first bite—simple, honest, and absolutely satisfying.
What Ingredients You Will Need
This recipe uses a handful of simple, wholesome ingredients that work together to create something truly special. No complicated shopping list here—just real food that delivers big flavor.
- Pears: 4 firm but ripe pears (Bosc or Anjou work best). Look for pears that yield slightly to gentle pressure near the stem but are still firm enough to hold their shape during baking. Bosc pears are my personal favorite because they hold up beautifully and have a lovely honeyed flavor.
- Honey: 3 tablespoons of good-quality honey. I recommend a mild, floral honey like clover or orange blossom. Avoid strong-flavored honey like buckwheat, which can overpower the delicate pear flavor.
- Walnuts: 1/2 cup of chopped walnuts. Toast them lightly before adding for extra depth of flavor. You can use pecans or almonds if that’s what you have on hand.
- Cinnamon: 1 teaspoon of ground cinnamon. Use Ceylon cinnamon for a milder, sweeter flavor or Cassia for a more robust spice. Fresh cinnamon makes a noticeable difference here.
- Butter: 2 tablespoons of unsalted butter, cut into small pieces. This adds richness and helps the honey create a silky syrup. Use vegan butter or coconut oil for a dairy-free option.
- Lemon Juice: 1 tablespoon of fresh lemon juice. This prevents the pears from browning and balances the sweetness with a touch of acidity.
- Vanilla Extract: 1 teaspoon of pure vanilla extract. It deepens the flavor and makes everything taste more luxurious. Skip imitation vanilla—it’s worth using the real thing here.
- Salt: A tiny pinch of flaky sea salt. This is optional but highly recommended—it enhances all the other flavors and makes the sweetness pop.
For the best results, use pears that are at peak ripeness but not mushy. If your pears are too hard, they won’t soften enough during baking. If they’re too soft, they’ll turn into mush. I’ve found that pears from farmers’ markets or local orchards tend to have the best texture and flavor.
Equipment Needed
You don’t need a lot of fancy tools for this recipe, which is part of its charm. Here’s what you’ll need:
- Baking Dish: An 8×8-inch or 9×13-inch baking dish works perfectly. I use a ceramic dish because it distributes heat evenly, but glass or metal works fine too. Just avoid dark nonstick pans, which can cause the honey to burn.
- Sharp Knife: A good chef’s knife or paring knife for halving and coring the pears. A melon baller or small spoon also works great for scooping out the cores.
- Cutting Board: Any sturdy cutting board will do. I prefer wood because it’s gentler on knives.
- Small Bowl: For mixing the honey, cinnamon, vanilla, and lemon juice together before drizzling.
- Measuring Spoons: For accurate measurements of the honey, cinnamon, and other small ingredients.
- Baking Sheet (optional): Place your baking dish on a sheet pan to catch any drips if the honey bubbles over. Trust me on this one—learned that the hard way.
If you don’t have a baking dish, you can use a cast-iron skillet or even a rimmed baking sheet. Just make sure there’s a slight lip to hold the juices. I’ve also made these in individual ramekins for a more elegant presentation—just reduce the baking time by about 5 minutes.
Preparation Method
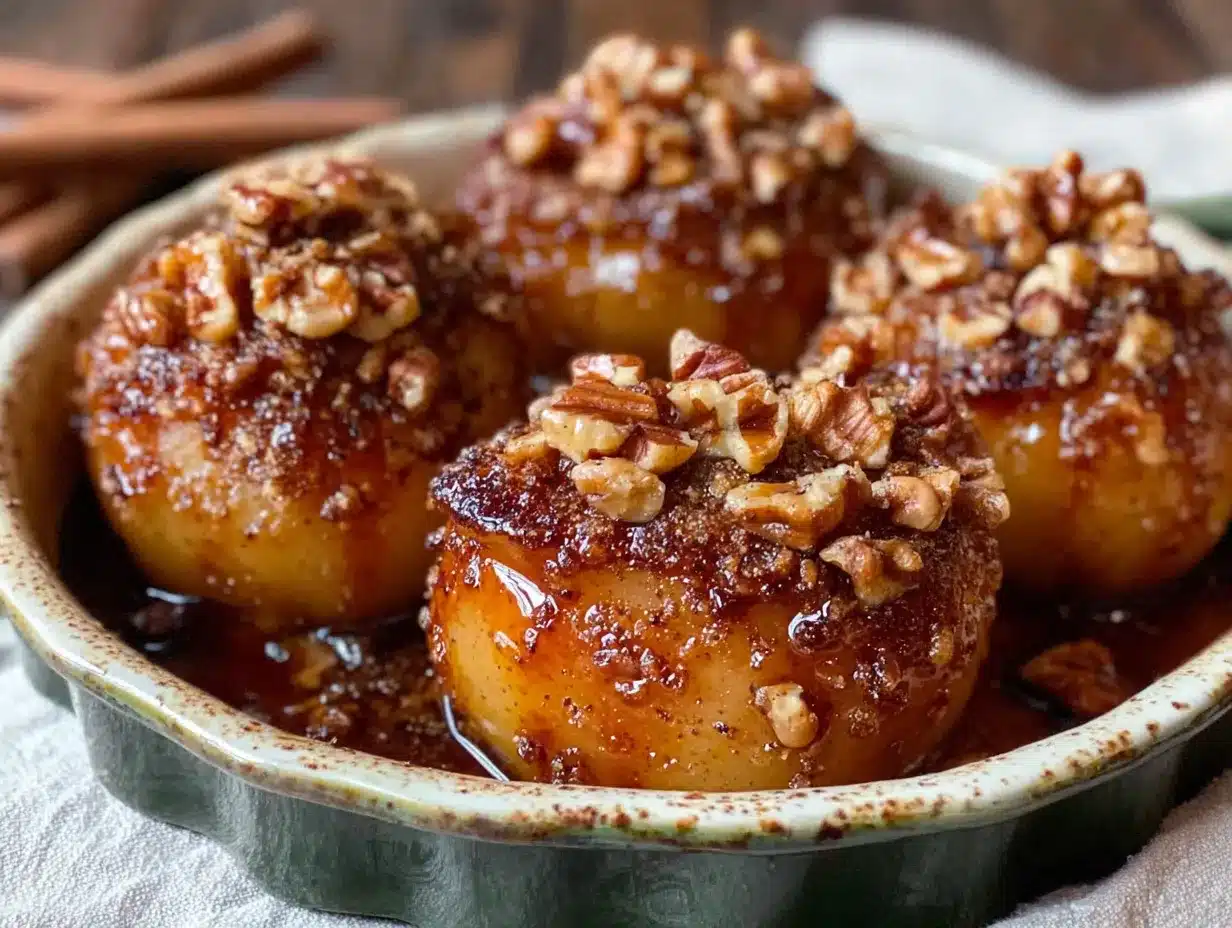
Let me walk you through this step by step. It’s so simple, but I want you to get perfect results every time.
- Preheat your oven to 375°F (190°C). This is important because you want the oven hot when the pears go in. While it heats, prepare your pears.
- Prepare the pears: Wash and dry your pears. Cut each pear in half lengthwise. Use a melon baller or a small spoon to scoop out the core and seeds, creating a small well in the center. Don’t worry about being perfect—just remove the tough bits. Leave the stem on for a prettier presentation, or trim it off if you prefer.
- Make the honey mixture: In a small bowl, whisk together the honey, cinnamon, vanilla extract, and lemon juice. Set aside. This mixture will become your glaze.
- Arrange the pears: Place the pear halves cut-side up in your baking dish. They should fit snugly but not be overcrowded. If they’re too tight, use a slightly larger dish.
- Add the butter: Dot each pear half with a small piece of butter, placing it right in the center well. This melts during baking and combines with the honey to create a rich, silky sauce.
- Drizzle the honey mixture: Spoon the honey-cinnamon mixture evenly over each pear half. Don’t be shy—let it run down the sides and into the dish. The pears will absorb it as they bake.
- Add the walnuts: Sprinkle the chopped walnuts over and around the pears. Some will stick to the tops, and some will fall into the honey mixture below—both are perfect. The walnuts that sit in the honey will become candied and delicious.
- Bake: Place the dish in the preheated oven and bake for 20-25 minutes. The pears are done when they are tender when pierced with a fork but still hold their shape. The honey should be bubbling and slightly thickened. Halfway through baking, spoon some of the pan juices over the pears to keep them moist.
- Rest and serve: Remove from the oven and let the pears rest for 5 minutes. This allows the juices to settle and the pears to firm up slightly. Serve warm, spooning the pan juices over the top. Add a tiny pinch of flaky sea salt if you’re feeling fancy.
One thing I learned the hard way—don’t skip the resting step. If you serve them straight out of the oven, the honey syrup is too runny and the pears might fall apart. Those five minutes make all the difference.
Cooking Tips & Techniques
After making these easy cinnamon baked pears with honey and walnuts more times than I can count, I’ve picked up a few tricks that make them even better.
Choose the right pears. This is the most important tip. You want pears that are ripe but still firm. If they’re too soft, they’ll turn into pear sauce. If they’re too hard, they won’t soften enough in the 25-minute bake time. Give them a gentle squeeze near the stem—if they yield slightly, they’re ready. Bosc pears are my top choice because they hold their shape beautifully and have a naturally honeyed flavor that complements this recipe perfectly.
Don’t skip the lemon juice. I know it seems like a small detail, but that splash of acid does two things. First, it prevents the pears from turning brown while they wait to go in the oven. Second, it balances the sweetness of the honey and the natural sugars in the pears. Without it, the dish can taste one-note sweet. With it, every bite has a little brightness that keeps you coming back.
Toast your walnuts first. This is optional but highly recommended. Spread the chopped walnuts on a baking sheet and toast them at 350°F for 5-7 minutes until fragrant. This brings out their natural oils and adds a deeper, nuttier flavor. I forgot to do this once, and the difference was noticeable—the untoasted walnuts were fine, but the toasted ones were spectacular.
Watch the honey. Honey can burn quickly, especially if your oven runs hot. If you notice the honey starting to darken too much around the 15-minute mark, tent the dish loosely with foil for the remaining bake time. This will prevent burning while still allowing the pears to cook through.
Baste halfway through. Set a timer for 12 minutes, then open the oven and spoon some of the bubbling honey mixture over the pears. This keeps them moist and ensures every bite is infused with that cinnamon-honey flavor. It takes 30 seconds and makes a huge difference.
Let them rest. I mentioned this in the method, but it bears repeating. Those five minutes of resting time allow the pears to absorb more of the syrup and firm up slightly. The result is a more cohesive dish that’s easier to serve and even more delicious.
Variations & Adaptations
One of the best things about this recipe is how easy it is to adapt. Here are some variations I’ve tried and loved:
Dairy-Free Version: Swap the butter for coconut oil or a high-quality vegan butter. The flavor changes slightly—coconut oil adds a subtle tropical note—but the texture remains just as rich and satisfying. I’ve made this for dairy-free friends and they couldn’t tell the difference.
Spiced Variation: Add 1/4 teaspoon of ground ginger, a pinch of nutmeg, and a tiny pinch of cloves to the honey mixture. This turns the dish into something that tastes like a warm chai latte in pear form. I made this version for a fall dinner party and got requests for the recipe.
Nut-Free Option: Replace walnuts with pumpkin seeds or sunflower seeds for a nut-free version. The seeds toast beautifully in the honey and add a similar crunch. You can also use rolled oats for a different texture—just sprinkle them on top before baking.
Maple Variation: Swap the honey for maple syrup for a completely different flavor profile. Maple pairs beautifully with pears and cinnamon, and the result is slightly less sweet but more complex. I use Grade A dark amber maple syrup for the richest flavor.
Individual Servings: Instead of baking all the pears in one dish, place each pear half in a small ramekin or oven-safe dish. This makes for a stunning presentation and allows everyone to have their own little dessert. Reduce the baking time by about 5 minutes since the smaller dishes heat up faster.
Savory Twist: Add a sprinkle of crumbled blue cheese or goat cheese to the warm pears right before serving. The salty, tangy cheese against the sweet, warm pears is absolutely incredible. I tried this on a whim one night and it’s become my favorite way to serve these as an appetizer.
Serving & Storage Suggestions
These easy cinnamon baked pears with honey and walnuts are incredibly versatile when it comes to serving. Here’s how I like to enjoy them:
Serving Temperature: Serve them warm, straight from the oven, or at room temperature. Cold pears are fine but lose some of their magic—the warm honey syrup and tender fruit are what make this dish special.
Presentation Ideas: For a simple dessert, serve 2 pear halves per person in a shallow bowl with a generous spoonful of the pan juices. For something more elegant, place one pear half on a plate, drizzle with the syrup, and add a dollop of whipped cream or a scoop of vanilla ice cream. A sprinkle of extra chopped walnuts and a tiny pinch of flaky salt on top makes it look like it came from a fancy restaurant.
Complementary Dishes: These pears pair beautifully with a warm cup of chai tea or a bold coffee. For a breakfast or brunch, serve them alongside Greek yogurt and a drizzle of extra honey. They also work wonderfully as a side dish for roasted pork or chicken—the sweetness complements savory meats perfectly.
Storage Instructions: Store any leftovers in an airtight container in the refrigerator for up to 3 days. The pears will continue to soften and absorb more of the syrup, which actually makes them even more delicious the next day.
Reheating Methods: To reheat, place the pears in a baking dish with a splash of water or apple juice and warm them in a 350°F oven for about 10 minutes. You can also microwave them for 30-60 seconds, though the texture won’t be quite as good. I prefer the oven method because it brings back that tender, caramelized texture.
Flavor Development: The flavors actually deepen over time. The honey and cinnamon continue to meld with the pears, and the walnuts soften slightly, creating a more unified dish. I’ve made these a day ahead for a dinner party and they were just as good—if not better—than fresh-baked.
Nutritional Information & Benefits
This recipe isn’t just delicious—it’s also pretty good for you. Here’s a rough breakdown per serving (2 pear halves):
| Nutrient | Amount per Serving |
|---|---|
| Calories | 280-320 |
| Total Fat | 12g |
| Saturated Fat | 4g |
| Carbohydrates | 45g |
| Fiber | 6g |
| Sugar | 32g |
| Protein | 4g |
| Vitamin C | 15% DV |
| Potassium | 10% DV |
Pears are an excellent source of dietary fiber, which supports digestive health and helps you feel full longer. They also contain vitamin C and copper, both important for immune function and collagen production. Walnuts are packed with omega-3 fatty acids, which are great for brain health and reducing inflammation. Honey provides natural antioxidants and has antibacterial properties.
This recipe is naturally gluten-free, nut-free if you skip the walnuts, and can be made dairy-free with a simple swap. It’s also relatively low in added sugar compared to most desserts—the sweetness comes mostly from the pears themselves. If you’re watching your sugar intake, you can reduce the honey to 2 tablespoons without sacrificing too much flavor.
I love that this dessert feels indulgent but is actually made from whole, nutritious ingredients. It’s the kind of treat I feel good about serving to my family and enjoying myself.
Conclusion
These easy cinnamon baked pears with honey and walnuts are proof that you don’t need complicated techniques or fancy ingredients to create something truly memorable. They’re the kind of recipe that saves you on a busy weeknight, impresses guests without stressing you out, and makes your kitchen smell like heaven while they bake.
What I love most about this recipe is how forgiving it is. You can swap the nuts, change the sweetener, add different spices, and it still turns out beautifully. It’s a recipe you can make your own, and that’s what keeps me coming back to it again and again.
I’d love to hear how yours turn out! Did you try a variation? Serve it with something unexpected? Drop a comment below and let me know—I read every single one. And if you share a photo on social media, tag me so I can see your beautiful creation. Happy baking, friends!
Frequently Asked Questions
Can I use other types of pears for this recipe?
Absolutely! While I recommend Bosc or Anjou pears for their firm texture and honeyed flavor, you can use Bartlett, Comice, or even Asian pears. Just keep in mind that softer pear varieties will cook faster and may become mushier. Adjust your baking time accordingly—start checking at 15 minutes for softer varieties.
Can I make this recipe ahead of time?
Yes! These pears actually taste even better the next day as the flavors meld together. Prepare and bake them as directed, then let them cool completely before storing in an airtight container in the refrigerator. Reheat in a 350°F oven for 10 minutes before serving. They’ll keep well for up to 3 days.
What can I use instead of honey?
Maple syrup is the best substitute—it has a similar consistency and sweetness level. You can also use agave nectar, date syrup, or even brown rice syrup. For a sugar-free option, try a monk fruit sweetener or allulose, though the texture and caramelization will be slightly different. If using a liquid sweetener, use the same amount as honey.
Can I freeze baked pears?
Yes, but I recommend eating them fresh for the best texture. If you must freeze them, let them cool completely, then transfer to a freezer-safe container. They’ll keep for up to 2 months. Thaw overnight in the refrigerator and reheat in the oven. The texture will be softer than fresh, but the flavor will still be wonderful.
How do I know when the pears are done baking?
The pears are done when they are tender all the way through but still hold their shape. Insert a fork or small knife into the thickest part of the pear—it should slide in easily with slight resistance. The honey should be bubbling and slightly thickened, and the walnuts should be fragrant and lightly toasted. If the pears are still hard, bake for another 5 minutes and check again.
Pin This Recipe!
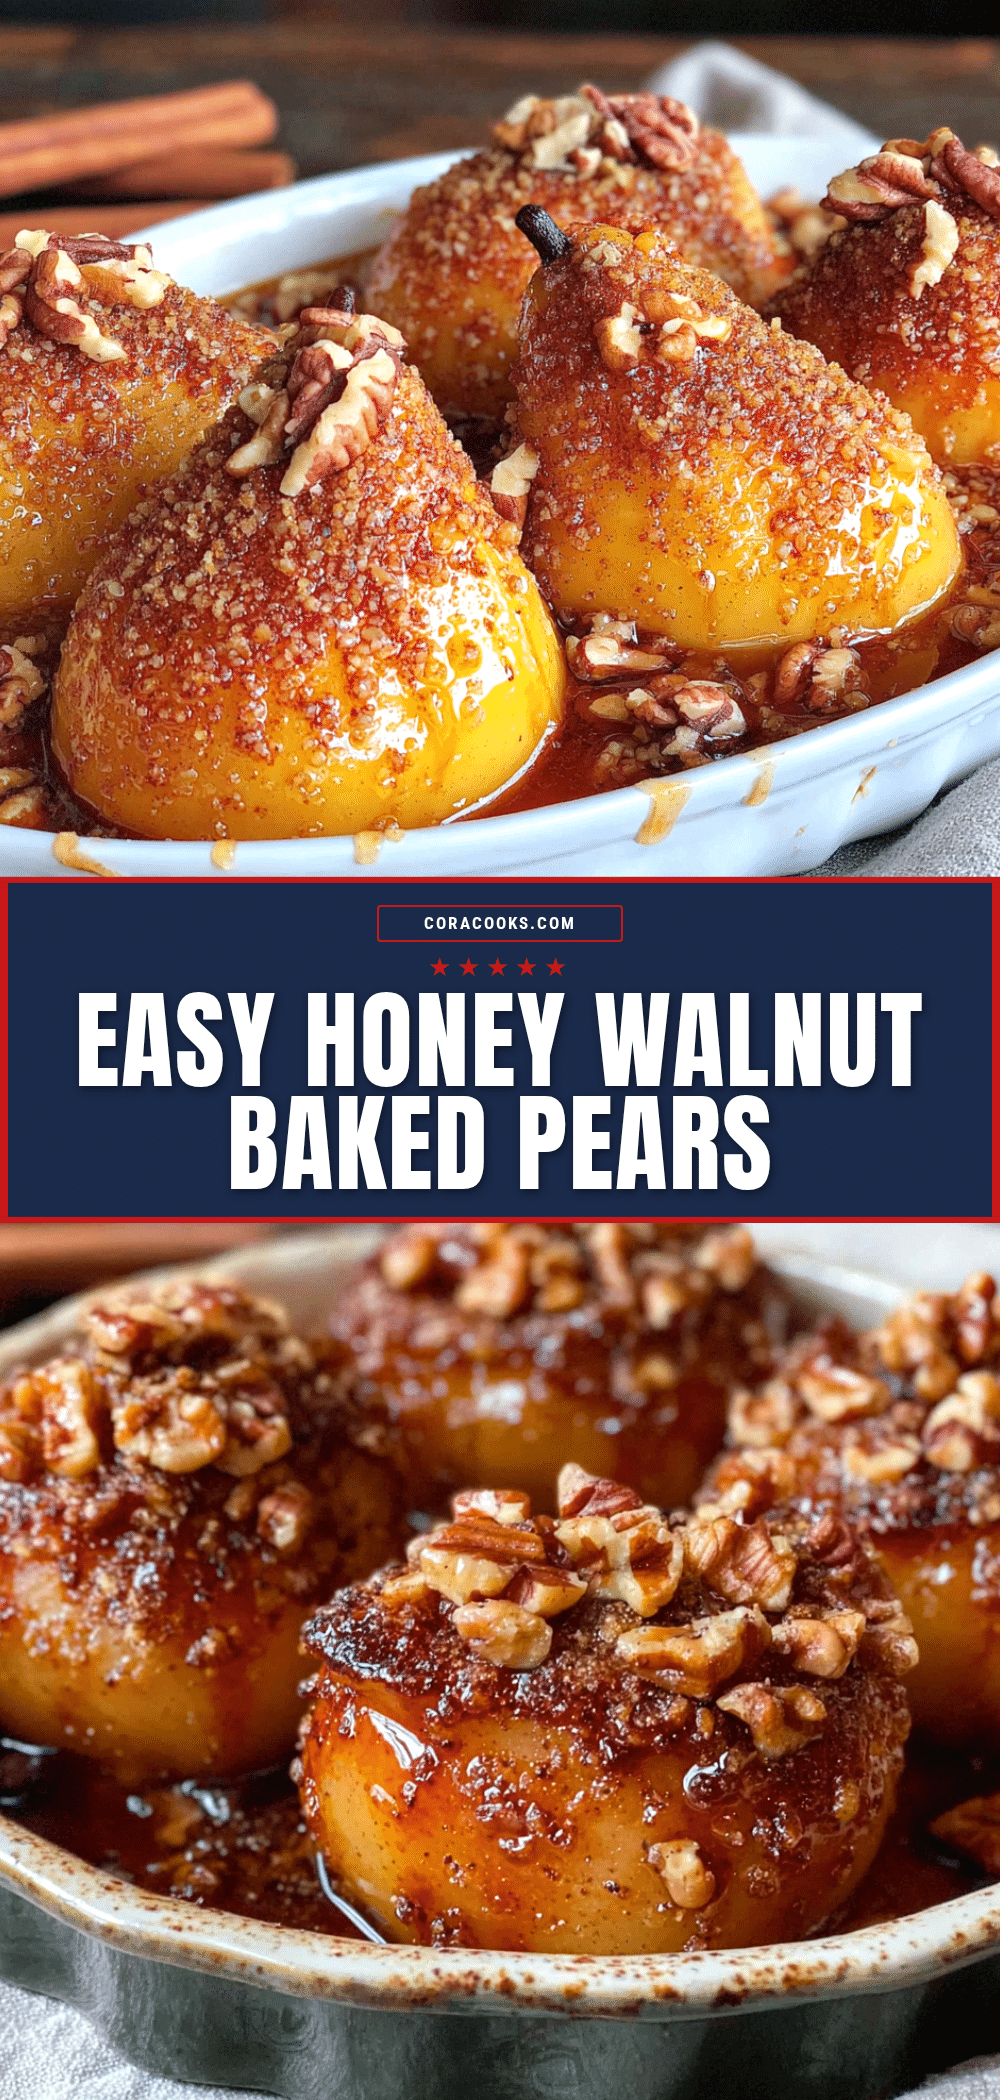
Easy Cinnamon Baked Pears with Honey and Walnuts

These easy cinnamon baked pears with honey and walnuts are a simple, quick dessert that tastes like you spent an hour in the kitchen. Perfect for a cozy weeknight treat or an impressive dinner party finale.
- Prep Time: 10 minutes
- Cook Time: 25 minutes
- Total Time: 35 minutes
- Yield: 4 servings 1x
- Category: Dessert
- Cuisine: American
Ingredients
- 4 firm but ripe pears (Bosc or Anjou work best)
- 3 tablespoons honey
- 1/2 cup chopped walnuts
- 1 teaspoon ground cinnamon
- 2 tablespoons unsalted butter, cut into small pieces
- 1 tablespoon fresh lemon juice
- 1 teaspoon pure vanilla extract
- A tiny pinch of flaky sea salt (optional)
Instructions
- Preheat your oven to 375°F (190°C).
- Wash and dry the pears. Cut each pear in half lengthwise. Use a melon baller or small spoon to scoop out the core and seeds, creating a small well in the center. Leave the stem on for a prettier presentation, or trim it off.
- In a small bowl, whisk together the honey, cinnamon, vanilla extract, and lemon juice. Set aside.
- Place the pear halves cut-side up in an 8×8-inch or 9×13-inch baking dish. They should fit snugly but not be overcrowded.
- Dot each pear half with a small piece of butter, placing it right in the center well.
- Spoon the honey-cinnamon mixture evenly over each pear half, letting it run down the sides and into the dish.
- Sprinkle the chopped walnuts over and around the pears.
- Bake for 20-25 minutes, until the pears are tender when pierced with a fork but still hold their shape. Halfway through baking, spoon some of the pan juices over the pears to keep them moist.
- Remove from the oven and let the pears rest for 5 minutes. Serve warm, spooning the pan juices over the top. Add a tiny pinch of flaky sea salt if desired.
Notes
For best results, use pears that are ripe but still firm. Bosc pears are ideal. Toast the walnuts before adding for extra flavor. Don’t skip the resting step after baking—it allows the syrup to thicken and the pears to firm up. If the honey starts to darken too much during baking, tent the dish loosely with foil.
Nutrition
- Serving Size: 2 pear halves
- Calories: 300
- Sugar: 32
- Sodium: 50
- Fat: 12
- Saturated Fat: 4
- Carbohydrates: 45
- Fiber: 6
- Protein: 4
Keywords: baked pears, cinnamon pears, honey pears, easy dessert, healthy dessert, fall dessert, pear recipe, walnut recipe