Love this? Save it for later!
Share the inspiration with your friends
I’m not usually one to get obsessed over a birthday cake. Honestly, I’ve made so many over the years that they sometimes blur together—a chocolate layer here, a vanilla buttercream there. But last spring, my best friend asked for something different. She wanted a cake that looked like the night sky, specifically the Virgo constellation. And I thought, sure, how hard could that be? Famous last words, right?
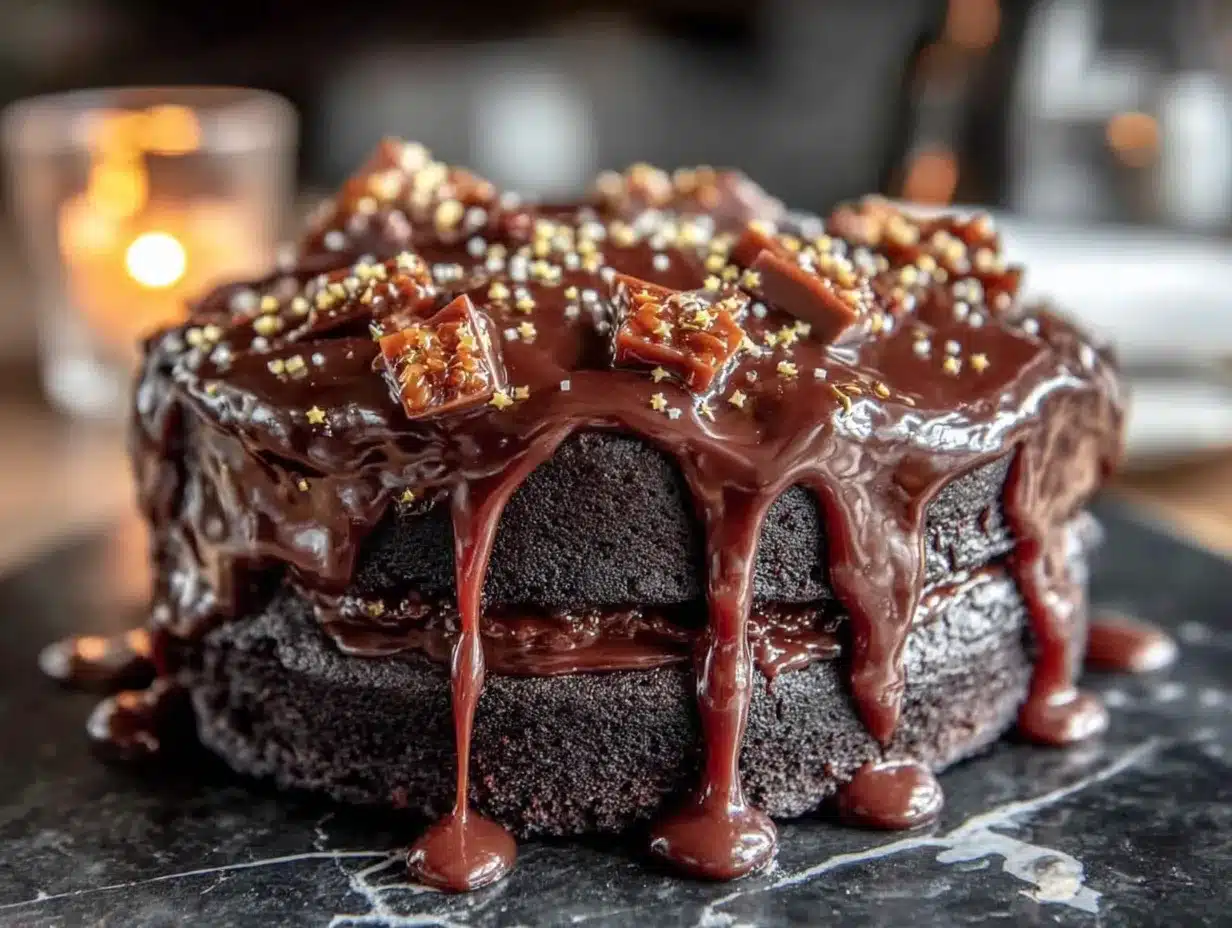
After three attempts—and I mean three full, frosting-covered disasters—I finally cracked the code on this Stunning Virgo Constellation Drip Cake. The first one looked like a galaxy had sneezed on it. The second one… well, let’s just say the drip went rogue and ended up looking more like a horror movie prop. But the third one? That was the moment. The deep navy buttercream, the golden stars, that perfect white drip cascading down the sides. My friend actually teared up when she saw it. And honestly? I kind of did too.
There’s something about combining astrology with baking that just works. It feels personal, you know? Like you’re not just making a dessert—you’re making a statement about someone’s identity. This Virgo constellation drip cake is that perfect blend of celestial elegance and homemade charm. It looks like it came from a fancy bakery, but I promise, if I can nail it after three tries, you can absolutely get it right on your first go. Let me show you how.
Why You’ll Love This Stunning Virgo Constellation Drip Cake
- Bakery-Quality at Home : This cake looks like it costs a hundred bucks, but you’re making it in your own kitchen with ingredients from the regular grocery store.
- Personalized and Meaningful : Whether it’s for a Virgo friend, family member, or yourself, this cake shows you put thought into the design. It’s not just a cake—it’s a celestial tribute.
- Easier Than It Looks : The drip technique sounds intimidating, but I’ve broken it down so you get that perfect, controlled cascade every single time. No more runaway drips.
- Customizable Color Palette : Deep navy and gold are classic, but you can switch up the colors to match any zodiac sign or personal preference. The technique stays the same.
- Crowd-Pleasing Flavor Combo : Under all that stunning decoration is a moist, tender vanilla cake with a silky buttercream that everyone loves. It’s not just a pretty face.
What makes this recipe different from all the other galaxy cakes out there? It’s the attention to detail. I tested three different buttercream consistencies to get that smooth, starlit finish. I tried five different methods for creating edible stars before landing on the one that actually works. This isn’t just another recipe thrown together—it’s the result of real kitchen trial and error, so you don’t have to make the same mistakes I did.
This is the kind of cake that makes people stop and stare. The kind where someone says, “Wait, you made that?” and you get to smile and say yes. It’s perfect for birthdays, anniversaries, or honestly, any Tuesday that needs a little extra magic.
What Ingredients You Will Need
This stunning Virgo constellation drip cake uses simple, high-quality ingredients to create something truly spectacular. Most of these are pantry staples, but a few special items will make all the difference in the final look.
For the Vanilla Cake Layers
- 2 ½ cups (312g) all-purpose flour – Spoon and level for accuracy. Too much flour makes a dense cake.
- 2 ½ teaspoons baking powder – Make sure it’s fresh for proper rise.
- ½ teaspoon salt – Balances the sweetness.
- 1 cup (226g) unsalted butter, softened – I use Kerrygold for its rich flavor, but any good brand works.
- 1 ¾ cups (350g) granulated sugar – Regular white sugar gives the best texture.
- 4 large eggs, room temperature – Cold eggs can seize the batter. Let them sit out for 30 minutes.
- 1 tablespoon vanilla extract – Pure vanilla, not imitation. It makes a difference.
- 1 cup (240ml) whole milk, room temperature – Whole milk adds richness, but 2% works in a pinch.
For the Vanilla Buttercream
- 1 ½ cups (340g) unsalted butter, softened – Must be soft but not melty. You should be able to press it easily.
- 5 cups (600g) powdered sugar, sifted – Sifting prevents lumps. Trust me on this one.
- 3-4 tablespoons heavy cream – Adds silkiness. Use as needed for consistency.
- 2 teaspoons vanilla extract – Again, pure vanilla.
- Pinch of salt – Cuts the sweetness.
- Gel food coloring: Deep navy and black – I prefer Americolor brand. Liquid coloring will thin the buttercream.
For the White Chocolate Drip
- 1 cup (170g) white chocolate chips – Use a good brand like Ghirardelli. Cheap white chocolate seizes easily.
- ⅓ cup (80ml) heavy cream – Full fat is non-negotiable here.
- White gel food coloring – Optional, but helps achieve a pure white drip if your chocolate is slightly yellow.
For the Constellation Decoration
- Gold luster dust – Edible and gives that starry glow.
- Clear vanilla extract or vodka – To mix with the luster dust for painting.
- Edible gold stars or star sprinkles – For the constellation points.
- Small paintbrush – A clean, unused one from an art store.
- Piping bag and small round tip (Wilton #2 or #3) – For drawing the constellation lines.
Equipment Needed
You don’t need a professional bakery setup, but a few key tools will make your life much easier. First, three 8-inch round cake pans. I love my Fat Daddio’s anodized aluminum pans—they conduct heat evenly and never warp. If you only have two pans, just bake the layers in batches. Let the pans cool completely between batches.
A stand mixer is ideal for the buttercream, but a hand mixer works perfectly fine. You’ll just need to be patient and scrape the bowl more often. I’ve made this cake with both, and honestly, the hand mixer just takes a few extra minutes.
You’ll also need a turntable for frosting. It’s not strictly necessary, but it makes getting that smooth finish so much easier. If you don’t have one, invert a large bowl and place your cake plate on top. It’s a little janky, but it works. I’ve done it more times than I care to admit.
Other essentials: offset spatula, bench scraper, piping bags, small round piping tip, and a cake board or serving plate. For the constellation design, grab a small paintbrush and tweezers for placing the stars. That last one is optional, but it saves your sanity when you’re trying to position tiny gold stars.
Preparation Method
Step 1: Prepare the Cake Layers
Preheat your oven to 350°F (175°C). Grease three 8-inch round pans and line the bottoms with parchment paper. In a medium bowl, whisk together the flour, baking powder, and salt. In your stand mixer, beat the butter and sugar on medium-high speed until light and fluffy—about 4 minutes. It should look pale and almost doubled in volume.
Add the eggs one at a time, beating well after each addition. Scrape down the bowl. Add the vanilla extract. Now, alternate adding the flour mixture and the milk, starting and ending with the flour. I do three additions of flour and two of milk. Mix on low until just combined. Overmixing will give you a tough cake.
Divide the batter evenly among the three pans. Bake for 22-26 minutes, or until a toothpick inserted in the center comes out clean. The tops should be golden and spring back when touched. Cool in the pans for 10 minutes, then turn out onto wire racks to cool completely. And I mean completely—warm cake will melt your buttercream into a sad puddle.
Step 2: Make the Buttercream
In your stand mixer, beat the softened butter on medium speed for 5 minutes. Yes, five minutes. It should look pale, smooth, and almost fluffy. Scrape the bowl. Add the sifted powdered sugar one cup at a time, mixing on low to avoid a sugar cloud. Add the vanilla and salt. Add the heavy cream one tablespoon at a time until you reach a smooth, spreadable consistency.
Now for the color. Add a small amount of black gel coloring first—just a tiny dot. Mix well. Then add navy blue until you reach that deep, midnight sky color. I usually end up using about 1 teaspoon of navy. Go slowly; you can always add more, but you can’t take it out.
Step 3: Assemble and Frost the Cake
Level each cake layer with a serrated knife if they domed during baking. Place one layer on your cake board. Add a generous scoop of buttercream and spread evenly. Repeat with the second and third layers. Apply a thin crumb coat—just enough to trap any loose crumbs. Refrigerate for 20 minutes.
After the crumb coat is set, apply the final coat of buttercream. Use your bench scraper to get smooth sides. Don’t stress about perfection here; the drip will cover some imperfections. Chill the cake for at least 30 minutes. The cake needs to be cold for the drip to work properly.
Step 4: Make the White Chocolate Drip
Place the white chocolate chips in a small heatproof bowl. Heat the heavy cream in a small saucepan until it just simmers—bubbles around the edges, not boiling. Pour the hot cream over the chocolate chips. Let it sit for 2 minutes, then stir gently until smooth. If you want a pure white drip, add a tiny drop of white gel coloring. Let the mixture cool to room temperature. It should be thick but pourable—like warm honey.
Test the drip on the side of a glass. If it runs too fast, let it cool more. If it’s too thick, add a tiny bit more warm cream. When it’s perfect, transfer to a piping bag and snip a small tip. Pipe drips around the edge of the chilled cake, letting them fall naturally. Then pour the remaining ganache on top and spread to the edges. Chill again for 15 minutes.
Step 5: Create the Virgo Constellation
While the cake chills, prepare your gold paint. Mix a small amount of gold luster dust with a few drops of clear vanilla extract until it forms a paintable paste. Using a small paintbrush, lightly sketch the Virgo constellation pattern on top of the cake. You can find the pattern online—it’s a distinctive “M” or “W” shape with a few extra stars.
Using your small piping tip and some reserved white buttercream (or royal icing), pipe tiny dots at each star point. Place a gold star sprinkle on each dot using tweezers. Then, using your gold paint and a fine brush, connect the stars with thin, delicate lines. Add a few scattered stars around the constellation for that “night sky” feel.
Let the cake sit at room temperature for 20 minutes before serving to allow the buttercream to soften.
Cooking Tips & Techniques
Let me save you from my own mistakes. First, the drip temperature is everything. I ruined an entire cake because my ganache was too warm—it ran all the way down and pooled on the board. It looked like a white chocolate crime scene. So test it on the side of a glass first. If it runs too fast, wait two minutes and test again.
Second, don’t skip the crumb coat. I know it’s tempting to just slather on the final coat and call it a day, but that crumb coat is what gives you that smooth, professional finish. And it only takes 20 minutes in the fridge. Just do it.
Third, when coloring your buttercream, go darker than you think you need. Buttercream always lightens as it sits. I made my first batch a lovely medium blue, and after chilling, it looked like a pale baby blue. Not exactly the night sky I was going for. So be bold with your color.
For the constellation lines, use a light hand. You want them to look delicate and celestial, not like you drew them with a Sharpie. If you mess up, just pipe a star over the mistake. That’s the beauty of a constellation cake—stars cover everything.
Variations & Adaptations
This recipe is incredibly flexible. For a gluten-free version, swap the all-purpose flour with a good 1:1 gluten-free baking flour. I’ve used King Arthur’s Measure for Measure with great results. Just don’t overmix the batter.
If you want a different zodiac sign, the technique is exactly the same. Just look up the constellation pattern for whatever sign you need. I’ve made this for Leo (a simple sickle shape) and Scorpio (a tricky hook shape), and both turned out beautifully. The colors can change too—deep purple for Pisces, fiery orange for Aries.
For a chocolate version, replace ½ cup of the flour with ½ cup of unsweetened cocoa powder. Use chocolate buttercream instead of vanilla, and make the drip with dark chocolate. The gold stars against dark chocolate is actually stunning.
I once made a dairy-free version for a friend with allergies. I used vegan butter (Miyoko’s is my favorite), oat milk in the cake, and coconut cream in the drip. The texture was slightly different—a bit more dense—but the taste was still incredible. Just make sure your white chocolate is dairy-free too.
Serving & Storage Suggestions
Serve this cake at room temperature for the best flavor and texture. Cold buttercream tastes like solid butter, and nobody wants that. Let it sit out for 20-30 minutes before slicing. Use a sharp knife dipped in hot water and wiped dry between cuts for clean slices.
This cake pairs beautifully with a cup of coffee or a glass of cold milk. For a fancy presentation, serve with a small side of fresh berries—the tartness cuts through the sweetness. I love raspberries with this cake; the red against the navy and gold is gorgeous.
For storage, keep the cake in an airtight container in the refrigerator for up to 5 days. The buttercream will firm up, so let slices come to room temperature before eating. You can also freeze the unfrosted cake layers, wrapped tightly in plastic wrap and foil, for up to 3 months. Just thaw overnight in the fridge before frosting.
The flavors actually develop over time. Day two is my favorite—the cake has settled, the buttercream has softened into the layers, and everything tastes more cohesive. So honestly, this is a great make-ahead cake. Bake and frost a day early, then add the constellation decoration the day of serving.
Nutritional Information & Benefits
Let’s be real—this is a celebration cake, not a health food. But here’s the estimated breakdown per slice (based on 12 servings): approximately 520 calories, 28g fat, 66g carbs, and 5g protein. The butter and eggs do provide some protein and calcium, and hey, the gold luster dust is technically calorie-free.
For dietary considerations, this recipe contains gluten, dairy, and eggs. It can be made gluten-free and dairy-free with the substitutions mentioned above. The white chocolate drip contains dairy, so if you’re vegan, use a coconut-based white chocolate alternative.
My personal perspective? Food is about joy and connection. This cake isn’t an everyday thing—it’s for moments that matter. Birthdays, milestones, celebrations. And sometimes, the most nourishing thing you can eat is something that makes you smile. So go ahead, have a slice. The stars align once in a while.
Conclusion
This stunning Virgo constellation drip cake is more than just a dessert—it’s a conversation starter, a personal tribute, and honestly, a total showstopper. It looks complicated, but once you break it down step by step, it’s totally doable for any home baker. The deep navy buttercream, the golden stars, that perfect white drip—it all comes together to create something truly magical.
I want you to make this cake your own. Switch up the colors, try a different constellation, add more stars, fewer stars—whatever feels right. The best part of baking is making a recipe yours. And if you mess up? Throw a few more stars on it. Trust me, I’ve covered many mistakes with sprinkles.
I’d love to see your creation! Drop a comment below and let me know which zodiac sign you made, or tag me in your photos. Did the drip behave for you? Did you add any special touches? Your feedback helps other bakers, and honestly, it just makes my day. Now go bake something stellar—you’ve got this.
Frequently Asked Questions
Can I use a boxed cake mix for this recipe?
Absolutely! If you’re short on time, use your favorite vanilla boxed mix. Just follow the package instructions and bake in three 8-inch pans. The decoration techniques work the same way regardless of the cake base.
How do I prevent the drip from running all the way down?
The key is temperature. Your cake must be very cold, and the ganache must be at the right consistency. Test the ganache on the side of a glass first. If it runs too fast, let it cool for a few more minutes before applying to the cake.
Can I make this cake ahead of time?
Yes! Bake the cake layers up to 3 days ahead and store them wrapped tightly in the fridge. Frost and decorate the day before serving. The flavors actually improve overnight. Just add the gold stars and constellation lines on the day you serve it for the freshest look.
What if I can’t find gold luster dust?
You can use gold sprinkles, edible gold leaf, or even yellow sanding sugar for the stars. For the constellation lines, pipe them with yellow buttercream or royal icing instead of gold paint. It won’t have the same shimmer, but it will still look beautiful.
How do I get smooth buttercream sides?
A bench scraper is your best friend. After applying the final coat, hold the bench scraper against the side of the cake at a 45-degree angle while spinning the turntable. Work quickly and clean the scraper between passes. A hot offset spatula can also smooth out any rough spots.
PrintStunning Virgo Constellation Drip Cake: Easy Zodiac Dessert
A stunning Virgo constellation drip cake with deep navy buttercream, golden stars, and a perfect white chocolate drip. This celestial dessert is easier than it looks and perfect for birthdays or any special occasion.
- Prep Time: 45 minutes
- Cook Time: 26 minutes
- Total Time: 1 hour 11 minutes
- Yield: 12 servings 1x
- Category: Dessert
- Cuisine: American
Ingredients
- 2 ½ cups (312g) all-purpose flour
- 2 ½ teaspoons baking powder
- ½ teaspoon salt
- 1 cup (226g) unsalted butter, softened
- 1 ¾ cups (350g) granulated sugar
- 4 large eggs, room temperature
- 1 tablespoon vanilla extract
- 1 cup (240ml) whole milk, room temperature
- 1 ½ cups (340g) unsalted butter, softened (for buttercream)
- 5 cups (600g) powdered sugar, sifted
- 3–4 tablespoons heavy cream
- 2 teaspoons vanilla extract
- Pinch of salt
- Gel food coloring: Deep navy and black
- 1 cup (170g) white chocolate chips
- ⅓ cup (80ml) heavy cream
- White gel food coloring (optional)
- Gold luster dust
- Clear vanilla extract or vodka
- Edible gold stars or star sprinkles
- Small paintbrush
- Piping bag and small round tip (Wilton #2 or #3)
Instructions
- Preheat oven to 350°F (175°C). Grease three 8-inch round pans and line bottoms with parchment paper.
- In a medium bowl, whisk together flour, baking powder, and salt.
- In a stand mixer, beat butter and sugar on medium-high until light and fluffy (about 4 minutes).
- Add eggs one at a time, beating well after each. Scrape bowl. Add vanilla.
- Alternate adding flour mixture and milk, starting and ending with flour. Mix on low until just combined.
- Divide batter evenly among pans. Bake 22-26 minutes until toothpick comes out clean. Cool in pans 10 minutes, then turn out onto wire racks to cool completely.
- For buttercream: Beat softened butter on medium speed for 5 minutes until pale and fluffy.
- Add sifted powdered sugar one cup at a time, mixing on low. Add vanilla, salt, and heavy cream until smooth.
- Add black gel coloring (tiny dot) then navy blue until deep midnight sky color.
- Level cake layers. Place one layer on cake board, add buttercream, repeat with remaining layers.
- Apply thin crumb coat. Refrigerate 20 minutes. Apply final coat of buttercream, smooth with bench scraper. Chill 30 minutes.
- For drip: Place white chocolate chips in heatproof bowl. Heat heavy cream until simmering, pour over chocolate. Let sit 2 minutes, stir until smooth. Add white gel coloring if desired. Cool to room temperature.
- Test drip on side of glass. Transfer to piping bag, snip tip. Pipe drips around edge of chilled cake, then pour remaining ganache on top. Chill 15 minutes.
- Mix gold luster dust with clear vanilla extract to make paint. Lightly sketch Virgo constellation on top of cake.
- Pipe tiny dots at star points with reserved buttercream. Place gold star on each dot using tweezers. Connect stars with gold paint lines. Add scattered stars.
- Let cake sit at room temperature 20 minutes before serving.
Notes
The drip temperature is crucial: test on a glass first. Don’t skip the crumb coat. Color buttercream darker than desired as it lightens when chilled. Use a light hand for constellation lines; stars can cover mistakes. Let cake come to room temperature before serving for best texture.
Nutrition
- Serving Size: 1 slice
- Calories: 520
- Sugar: 48
- Sodium: 210
- Fat: 28
- Saturated Fat: 17
- Carbohydrates: 66
- Fiber: 1
- Protein: 5
Keywords: Virgo cake, constellation cake, drip cake, zodiac cake, galaxy cake, birthday cake, vanilla cake, buttercream cake, white chocolate drip, gold stars