Love this? Save it for later!
Share the inspiration with your friends
Introduction
There used to be this little ice cream shop on the corner of Maple and 5th, the kind of place with a faded red and white striped awning and a bell that jingled every time the door opened. They made this cookies and cream ice cream that was honestly unforgettable — the kind that clung to your memory like a favorite song. When they closed down after the summer of 2017, I was gutted. I mean, I went there every Saturday after my morning jog — it was my ritual, my treat, my moment of pure bliss on a sticky summer afternoon.
After a dozen tries — some too icy, some too sweet, and a couple that ended up more like a frozen cookie milkshake than ice cream — I finally got it right. This Easy Creamy No-Churn Cookies and Cream Ice Cream is my answer to that lost shop’s magic. I’ll admit, I once forgot to fold in the cookies before freezing, and that was a sticky mess, but it helped me perfect the texture and flavor. You know that feeling when you finally nail something you thought was impossible? That’s exactly why I keep making this recipe, especially when the heat is relentless and you need that perfect, creamy, crunchy, nostalgic bite.
Why You’ll Love This Recipe
Honestly, this no-churn cookies and cream ice cream is a lifesaver for busy days when you crave something indulgent without the fuss. I’ve tested this over and over in my kitchen, tweaking just the right amount of cookie pieces and creaminess to get that perfect balance. Here’s why it stands out:
- Quick & Easy: Comes together in under 15 minutes, perfect for last-minute dessert cravings or unexpected guests.
- Simple Ingredients: Just a handful of pantry staples — no ice cream machine needed, which means zero hassle.
- Perfect for Summer Parties: Great for barbecues, kids’ birthdays, or just a cozy night in with a classic treat.
- Crowd-Pleaser: The cookies add that irresistible crunch, and everyone loves a creamy, dreamy dessert that tastes homemade.
- Unbelievably Delicious: The creamy texture combined with crunchy cookie chunks makes every bite feel special — a little like the best scoop you ever had at that old ice cream shop.
What makes this recipe different? Well, it’s the method of folding in crushed cookies at just the right time and using whipped cream instead of heavy cream alone, which results in a lighter, airier texture that still feels indulgent. This isn’t just any no-churn ice cream — it’s the one I reach for when I want that perfect scoop, the one that makes you pause and savor every bite.
What Ingredients You Will Need
This recipe uses simple, wholesome ingredients to deliver bold flavor and satisfying texture without the fuss. Most are pantry staples, and the cookies can be swapped to suit your taste or dietary needs.
- Sweetened condensed milk (1 can, 14 oz / 400 g) – the secret to creamy sweetness without extra sugar.
- Heavy whipping cream (2 cups / 480 ml) – chilled, for that rich, fluffy texture.
- Vanilla extract (1 teaspoon) – adds warmth and depth to the ice cream base.
- Chocolate sandwich cookies (about 15 cookies) – crushed into chunks; I prefer Oreo brand for the classic taste, but any chocolate sandwich cookie works.
You can easily swap out the cookies for gluten-free versions if needed, or use dairy-free condensed milk and coconut cream for a vegan twist. For extra flair, I sometimes toss in a pinch of sea salt to balance the sweetness.
Equipment Needed

- Large mixing bowl – for whipping the cream and folding ingredients.
- Electric mixer or hand whisk – electric mixers speed things up, but a strong arm will do!
- Spatula – essential for gentle folding to keep the airy texture intact.
- Freezer-safe container (preferably with a lid) – to store the ice cream while it sets.
- Measuring cups and spoons – for accuracy, especially with the condensed milk and vanilla extract.
If you don’t have an electric mixer, a balloon whisk works fine, though it takes longer to get stiff peaks. I once made this while camping with just a whisk — talk about an arm workout! For budget-friendly options, any sturdy bowl and a plastic container from the dollar store do the trick.
Preparation Method
- Chill your bowl and beaters: Place your mixing bowl and beaters in the freezer for 10-15 minutes to help the heavy cream whip up faster and fluffier.
- Whip the cream: Pour the cold heavy whipping cream into the chilled bowl. Using an electric mixer on medium-high speed, whip the cream until stiff peaks form. This usually takes about 4-5 minutes. Be careful not to overbeat — the cream should hold its shape but look smooth and silky.
- Mix condensed milk and vanilla: In a separate large bowl, stir together the sweetened condensed milk and vanilla extract until well combined. This mix is your sweet, creamy base.
- Fold whipped cream into condensed milk: Gently fold about one-third of the whipped cream into the condensed milk mixture using a spatula. This lightens the base. Then fold in the remaining whipped cream carefully to avoid deflating the mixture. It should look airy and smooth.
- Prepare cookies: Crush the chocolate sandwich cookies into chunks — not too fine, so you get nice crunchy bites. I like using a zip-top bag and a rolling pin for this; just be sure not to pulverize them into crumbs.
- Fold cookies into ice cream base: Gently fold the cookie chunks into the creamy mixture until evenly distributed.
- Transfer to container and freeze: Pour the ice cream mixture into your freezer-safe container, smoothing the top with the spatula. Cover tightly with a lid or plastic wrap.
- Freeze for at least 6 hours: Let it freeze overnight for best results. The ice cream should be firm but scoopable. If you find it too hard straight from the freezer, let it sit at room temperature for 5-10 minutes before scooping.
Pro tip: When folding, always be gentle — you want to keep the fluffiness of the whipped cream intact, or the ice cream can turn dense. Also, use fresh cookies for the best crunch; stale cookies tend to get soggy faster after freezing.
Cooking Tips & Techniques
No-churn ice cream is all about technique, not complicated equipment. I’ve learned a few things the hard way:
- Whip cream just right: Underwhipping results in a runny base, while overwhipping makes it grainy or buttery. Stiff peaks are your sweet spot.
- Folding technique: Use a spatula in a gentle “folding” motion, scraping the sides and folding over the mixture to keep air in. Stirring vigorously will deflate your cream and make ice cream icy.
- Cookie size matters: Bigger chunks give a satisfying crunch, but too big and they might be hard to scoop. Medium chunks work best.
- Freezing time: Patience is key. Resist the urge to dig in too soon; the longer it freezes, the better the texture.
- Multitasking: While the ice cream freezes, use the wait time to prep toppings or whip up a quick sauce — like a chocolate drizzle — for serving.
One time, I mixed the cookies in too early and they got soggy before freezing — lesson learned! Adding them just before freezing keeps them crisp.
Variations & Adaptations
This easy recipe is super adaptable. Here are some fun ways to switch it up:
- Peanut butter swirl: Drizzle peanut butter over the ice cream base and gently swirl before freezing for a creamy, nutty twist.
- Mint cookies and cream: Use mint-flavored sandwich cookies instead of classic chocolate for a refreshing change.
- Vegan version: Swap sweetened condensed milk for coconut condensed milk and use coconut cream instead of heavy cream. Use dairy-free cookies.
- Seasonal berries: Fold in chopped fresh strawberries or raspberries along with the cookies for a fruity surprise.
- Extra crunch: Add chopped nuts like almonds or pecans for texture variation.
I once made a birthday batch with crushed salted caramel cookies mixed in — it was a hit and added a lovely salty-sweet balance. Feel free to customize based on your cravings!
Serving & Storage Suggestions
This cookies and cream ice cream is best served cold but not frozen rock-hard. Let it sit for about 5 minutes at room temperature before scooping to get that perfect creamy texture. It pairs wonderfully with a warm chocolate brownie or a drizzle of caramel sauce.
Store leftovers in an airtight container in the freezer for up to two weeks. To avoid ice crystals, press a piece of parchment paper or plastic wrap directly on the surface before sealing. When reheating, let it thaw in the fridge for 10-15 minutes or on the counter for a few minutes before scooping.
Flavors actually deepen after a day or two in the freezer, so don’t be surprised if it tastes even better the next day. For a fancy touch, serve in waffle cones or alongside a slice of this classic chocolate layer cake I love for celebrations.
Nutritional Information & Benefits
Per serving (about ½ cup): approximately 250 calories, 16g fat, 24g carbohydrates, and 3g protein. The sweetened condensed milk and heavy cream make this a rich treat, so it’s best enjoyed in moderation.
Cookies add some fiber and a little calcium, depending on the brand. For a lighter option, you can reduce the cookie amount or swap to lower-fat dairy alternatives, but the texture may shift slightly.
This recipe is naturally gluten-containing due to the cookies, but swapping in gluten-free sandwich cookies makes it suitable for gluten sensitivity. No added artificial flavors or preservatives make it a cleaner indulgence compared to store-bought ice cream.
Conclusion
This Easy Creamy No-Churn Cookies and Cream Ice Cream recipe is my homemade answer to that vanished ice cream shop’s magic. It’s straightforward, satisfying, and full of nostalgia — perfect for anyone who loves a classic dessert without the fuss of machines or complicated ingredients.
Feel free to tweak the cookies or add your favorite mix-ins — that’s part of the fun! Honestly, I love how this recipe brings back the joy of summer afternoons and simple pleasures. Give it a try, and let me know how your batch turns out; I’m always up for recipe stories and new ideas!
Now, who’s ready for a scoop?
FAQs
Can I use different types of cookies for this ice cream?
Absolutely! Chocolate sandwich cookies are classic, but you can use any cookie you like — just crush them into chunks. Ginger snaps, shortbread, or even chocolate chip cookies work well.
How long does the ice cream need to freeze?
At least 6 hours, but overnight is best for a firm, scoopable texture.
Can I make this recipe ahead of time?
Yes! It’s perfect for prepping a day or two in advance. Just keep it tightly covered in the freezer.
What if I don’t have an electric mixer?
You can whip the cream by hand with a balloon whisk — it takes a bit longer and more muscle, but it’s definitely doable.
Is this recipe suitable for vegans?
Not as written, but you can make a vegan version by using coconut condensed milk, coconut cream, and dairy-free cookies.
Pin This Recipe!
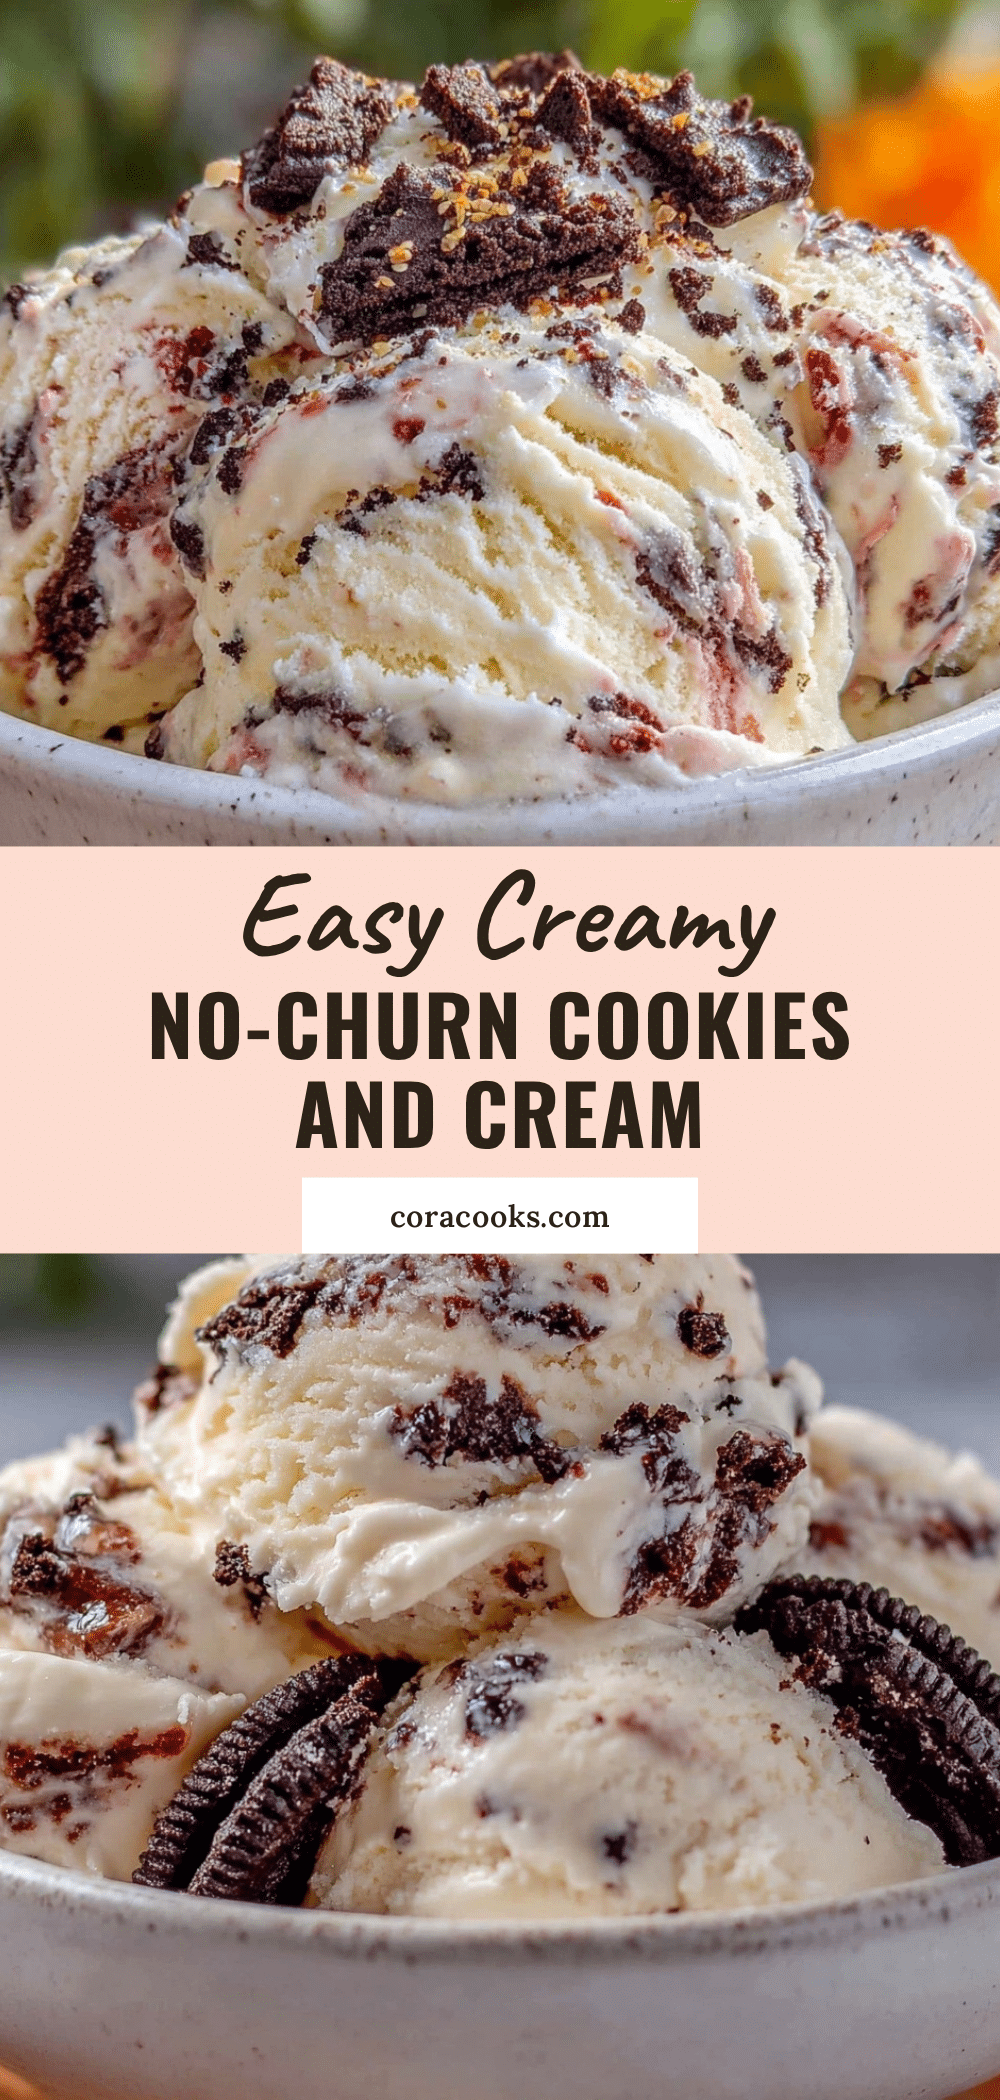
Easy Creamy No-Churn Cookies and Cream Ice Cream

A quick and easy no-churn cookies and cream ice cream recipe that delivers creamy texture and crunchy cookie chunks without the need for an ice cream machine.
- Prep Time: 15 minutes
- Cook Time: 0 minutes
- Total Time: 6 hours 15 minutes
- Yield: 8 servings 1x
- Category: Dessert
- Cuisine: American
Ingredients
- 1 can (14 oz / 400 g) sweetened condensed milk
- 2 cups (480 ml) heavy whipping cream, chilled
- 1 teaspoon vanilla extract
- About 15 chocolate sandwich cookies (e.g., Oreo), crushed into chunks
Instructions
- Chill your mixing bowl and beaters in the freezer for 10-15 minutes to help the heavy cream whip faster and fluffier.
- Pour the cold heavy whipping cream into the chilled bowl. Using an electric mixer on medium-high speed, whip the cream until stiff peaks form, about 4-5 minutes. Avoid overbeating.
- In a separate large bowl, stir together the sweetened condensed milk and vanilla extract until well combined.
- Gently fold about one-third of the whipped cream into the condensed milk mixture using a spatula to lighten the base. Then fold in the remaining whipped cream carefully to keep the mixture airy and smooth.
- Crush the chocolate sandwich cookies into chunks, avoiding pulverizing them into crumbs.
- Gently fold the cookie chunks into the creamy mixture until evenly distributed.
- Pour the ice cream mixture into a freezer-safe container, smoothing the top with a spatula. Cover tightly with a lid or plastic wrap.
- Freeze for at least 6 hours or overnight for best results. Let sit at room temperature for 5-10 minutes before scooping if too hard.
Notes
Chill bowl and beaters before whipping cream for better volume. Fold ingredients gently to keep the mixture airy. Use fresh cookies for best crunch. Let ice cream sit at room temperature for a few minutes before scooping if too hard. Variations include peanut butter swirl, mint cookies, vegan substitutions, and adding fresh berries or nuts.
Nutrition
- Serving Size: About 1/2 cup
- Calories: 250
- Sugar: 22
- Sodium: 90
- Fat: 16
- Saturated Fat: 10
- Carbohydrates: 24
- Fiber: 1
- Protein: 3
Keywords: no-churn ice cream, cookies and cream, easy dessert, homemade ice cream, no machine ice cream, Oreo ice cream, summer dessert