Love this? Save it for later!
Share the inspiration with your friends
“The power went out halfway through our Fourth of July barbecue,” my cousin Jenna told me last summer, “and honestly, I thought the dessert was ruined.” But what happened next was pure magic. Jenna grabbed a bag of Oreos, some ice cream, and whipped together this Creamy Patriotic Ice Cream Pie with Oreo Crust that instantly became the unofficial star of the night.
That pie wasn’t just a last-minute save; it was a delicious surprise that captured the holiday spirit with its red, white, and blue layers and a rich, crumbly crust. I mean, who expects a no-bake ice cream pie to taste this indulgently creamy while still feeling light enough after a day of grilling and fireworks?
Maybe you’ve been there too—last-minute dessert ideas that turn out better than planned. This recipe is exactly that kind of easy, crowd-pleasing treat that feels festive but requires almost no fuss. It’s perfect for those summer days when you want something cool, sweet, and patriotic without heating up the kitchen.
Honestly, I keep making this pie every year now because it reminds me of that chaotic but unforgettable evening. Plus, the Oreo crust adds that perfect chocolatey crunch that balances the smooth ice cream layers. If you’re anything like me, you’ll find yourself sneaking slices before anyone else gets a chance.
Why You’ll Love This Creamy Patriotic Ice Cream Pie Recipe
Let me tell you why this pie has earned a permanent spot in my summer recipe lineup:
- Quick & Easy: Comes together in under 20 minutes, which is ideal when you’re juggling the grill and guests.
- Simple Ingredients: No need to hunt for exotic stuff. Oreos, your favorite vanilla and berry ice creams, and a few toppings are all you need.
- Perfect for Celebrations: Whether it’s the Fourth of July, Memorial Day, or a summer birthday, this pie brings the festive vibes.
- Crowd-Pleaser: Kids and adults alike rave about the creamy texture and the crunchy Oreo base.
- Unbelievably Delicious: The contrast between the cool, velvety ice cream and the crunchy, chocolatey crust is next-level comfort dessert.
This isn’t just another ice cream pie. What makes it stand out is the no-bake Oreo crust, which keeps things wonderfully simple but totally satisfying. Plus, layering red and blue berries with vanilla ice cream gives it that unmistakable patriotic look and a burst of fresh flavor.
Honestly, after a few test runs, I adjusted the crust ratio and layering order to maximize creaminess and crunch. It’s the kind of dessert that makes you close your eyes with the first bite and think, “Yep, this is summer on a plate.”
What Ingredients You Will Need
This recipe uses straightforward ingredients to deliver a bold, creamy dessert without any fuss. You probably already have most of them in your pantry or freezer.
- Oreo Cookies: About 24 cookies, crushed (I prefer Nabisco Oreos for the perfect balance of crunch and sweetness)
- Unsalted Butter: 6 tablespoons, melted (helps bind the crust with a rich flavor)
- Vanilla Ice Cream: 1.5 quarts (choose a creamy, high-quality brand for best results)
- Strawberries: 1 cup, sliced (fresh is best, but frozen and thawed works too)
- Blueberries: 1 cup, whole and washed
- Whipped Cream: 1 cup (store-bought or homemade, for topping)
- Powdered Sugar: 2 tablespoons (optional, to sweeten whipped cream slightly)
- Vanilla Extract: 1 teaspoon (optional, enhances the whipped cream flavor)
For substitutions, you can swap Oreos with gluten-free chocolate cookies if needed. Dairy-free ice cream options work well for a vegan twist, and coconut whipped cream is a great alternative for topping.
When choosing berries, in summer, fresh berries add a bright, natural sweetness, but frozen berries thawed gently will do just fine if the season is off.
Equipment Needed
- 9-inch Pie Dish: Glass or ceramic works best to showcase the layers.
- Food Processor or Plastic Bag and Rolling Pin: For crushing the Oreos finely. I personally like the food processor for speed, but the bag and rolling pin method works just as well.
- Mixing Bowls: A couple of medium-sized bowls for mixing crust and whipped cream.
- Electric Mixer or Whisk: To whip the cream—an electric mixer saves effort, but a good whisk works in a pinch.
- Spatula: For spreading and smoothing ice cream layers.
If you don’t have a food processor, no worries—just be patient with crushing the cookies by hand. And if you’re short on pie dishes, a springform pan can work but may make serving trickier.
Preparation Method
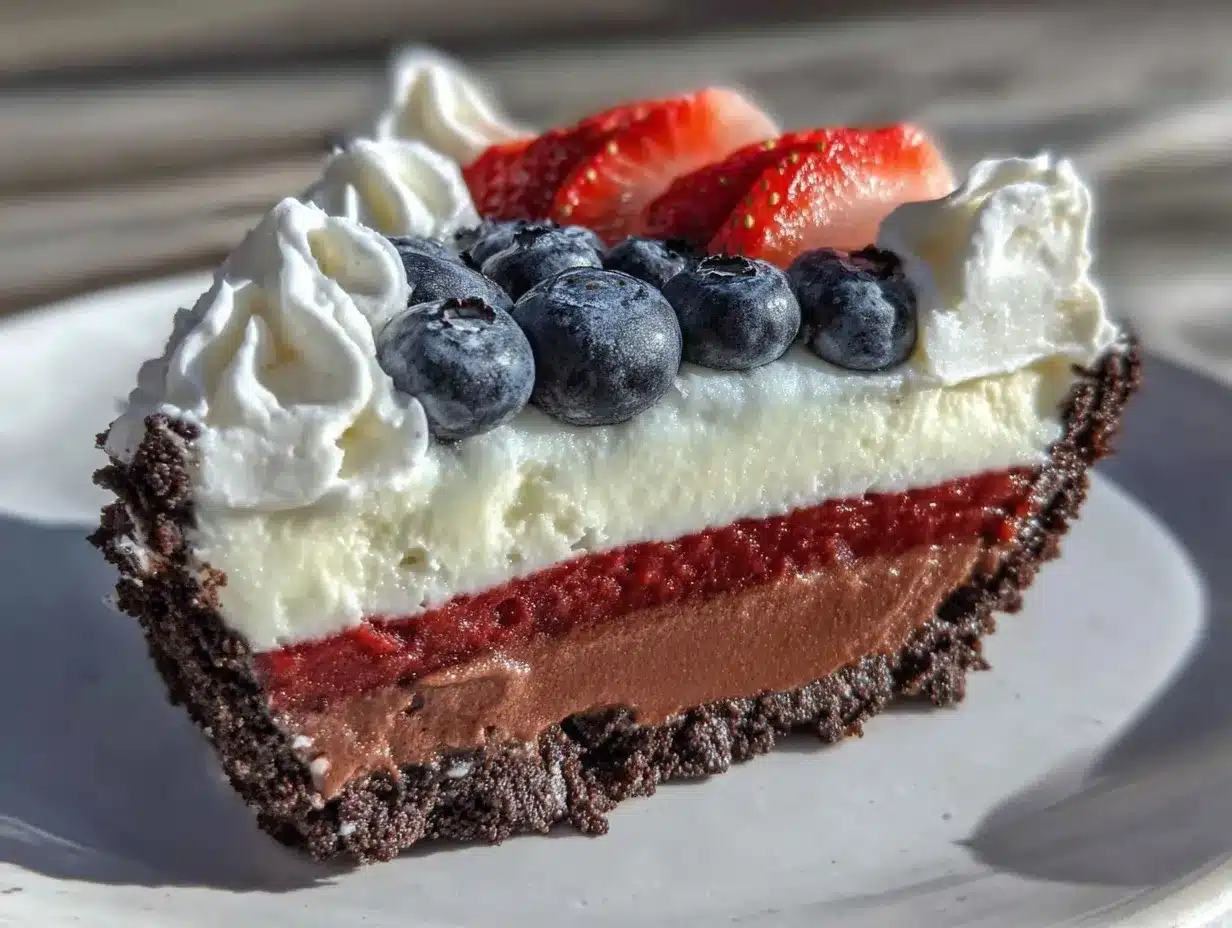
- Prepare the Oreo Crust: Crush 24 Oreos finely using a food processor or place them in a sealed plastic bag and crush with a rolling pin. Transfer crumbs to a bowl and mix with 6 tablespoons of melted unsalted butter until the mixture resembles wet sand.
- Press the Crust: Firmly press the Oreo mixture into the bottom and slightly up the sides of your 9-inch pie dish. Use the bottom of a flat glass or measuring cup to create an even, compact crust. Place the crust in the freezer for about 15 minutes to set.
- Soften the Ice Cream: While the crust chills, let 1.5 quarts of vanilla ice cream sit at room temperature for 5-7 minutes until it softens but isn’t melted. This makes it easier to spread.
- Layer the Pie: Spread half of the softened vanilla ice cream over the chilled Oreo crust evenly. Add a layer of 1/2 cup sliced strawberries and 1/2 cup blueberries on top, gently pressing fruit into the ice cream.
- Repeat Layers: Spread the remaining ice cream over the fruit layer, smoothing the surface with a spatula. Top with the remaining strawberries and blueberries, arranging them in a decorative pattern to bring out that patriotic vibe.
- Freeze the Pie: Cover the pie with plastic wrap and freeze for at least 4 hours or overnight to firm up completely.
- Prepare Whipped Cream: Just before serving, whip 1 cup of heavy cream with 2 tablespoons powdered sugar and 1 teaspoon vanilla extract until soft peaks form. Spread or pipe the whipped cream over the top of the pie.
- Serve: Slice with a warm knife for clean cuts. Serve immediately after adding whipped cream for best texture.
Tip: If the pie is too firm to slice, let it sit at room temperature for 5 minutes before cutting. You’ll get cleaner slices and a better bite.
Cooking Tips & Techniques
One trick I learned early on: don’t rush softening the ice cream all the way to melt—it should be spreadable but hold its shape. If it gets too soft, the layers blend and lose their definition.
Pressing the Oreo crust firmly is key to avoid crumbling when slicing. I like to chill the crust before adding ice cream to help it set, which prevents sogginess.
When arranging berries, gently press them into the ice cream so they don’t slide off when you serve the pie. Also, using a serrated knife warmed under hot water makes slicing through the frozen pie much easier.
Multitasking tip: While the pie freezes, you can prep other dishes or set the table. The pie actually benefits from longer chilling, so overnight is perfect if you have the time.
From experience, homemade whipped cream always wins over store-bought for topping—it adds a fresh, light touch that balances the richness.
Variations & Adaptations
- Berry Swap: Use raspberries or blackberries instead of strawberries for a slightly tart flavor.
- Chocolate Twist: Add mini chocolate chips between the ice cream layers for extra texture.
- Non-Dairy Version: Choose dairy-free vanilla ice cream and whip up coconut cream instead of regular whipped cream for a vegan-friendly pie.
- Patriotic Pops: Instead of a pie, layer the same ingredients in clear cups for individual no-fuss treats.
- Spiked Adult Version: Mix a tablespoon of bourbon or rum into the softened ice cream for a boozy kick.
Personally, I once tried mixing crushed peppermint candies into the Oreo crust for a festive winter version. It was unexpected but totally fun!
Serving & Storage Suggestions
Serve this pie chilled, right after adding the whipped cream topping to keep it fluffy and fresh. It pairs beautifully with a cold glass of lemonade or iced tea on a hot day.
Leftovers can be stored in the freezer covered tightly with plastic wrap or foil to prevent freezer burn. When reheating, let slices sit at room temperature for about 10 minutes to soften slightly before eating.
As the pie sits, the flavors meld—the Oreo crust softens a bit, blending with the creamy ice cream and juicy berries for a melt-in-your-mouth experience. It’s honestly even better the next day if you can wait that long!
Nutritional Information & Benefits
This pie offers a delightful treat with moderate calories per serving—about 300 calories for a generous slice depending on your ice cream and toppings. The berries provide antioxidants and vitamin C, adding a fresh nutritional boost.
While this dessert isn’t low-calorie, choosing a light or reduced-fat vanilla ice cream can help balance indulgence with health. The Oreo crust is rich but provides a satisfying chocolate flavor without needing extra mix-ins.
For those with gluten sensitivities, gluten-free cookies can be substituted to keep this pie inclusive. Just be mindful of cross-contamination if you’re extremely sensitive.
From a wellness point of view, this dessert is a joyful way to enjoy summer flavors without complicated prep or artificial ingredients.
Conclusion
This Creamy Patriotic Ice Cream Pie with Oreo Crust is more than just a dessert—it’s a celebration you can make at home with ease and a few simple ingredients. Whether you’re hosting a backyard party or craving a festive treat, this pie delivers creamy texture, fresh berries, and chocolate crunch in every bite.
Feel free to tweak the layers, swap berries, or add your favorite toppings to make it your own. I love this recipe because it brings a little joy and nostalgia, reminding me of summer nights, family laughs, and the best kind of sweet surprises.
If you try it out, I’d love to hear how you customized it—drop a comment or share your photo! Let’s keep making summer desserts that feel special without the stress.
Here’s to many more no-fuss, creamy, patriotic pies in your kitchen!
FAQs About Creamy Patriotic Ice Cream Pie with Oreo Crust
Can I make this pie ahead of time?
Absolutely! In fact, freezing the pie overnight helps the layers set perfectly. Just add the whipped cream topping right before serving for best results.
What can I use if I don’t have Oreos?
Any chocolate sandwich cookie works well, or you can use crushed chocolate graham crackers for a different flavor and texture.
How do I prevent the crust from getting soggy?
Press the crust firmly and chill it before adding the ice cream. This helps it hold its shape and stay crunchy longer.
Can I use other ice cream flavors?
Yes! Vanilla works best for the classic look and flavor, but you could try berry or chocolate ice cream for a unique twist.
Is this recipe kid-friendly?
Definitely. Kids love the creamy ice cream and cookie crust combo, plus the bright berries add a fun, colorful touch perfect for any family gathering.
Pin This Recipe!
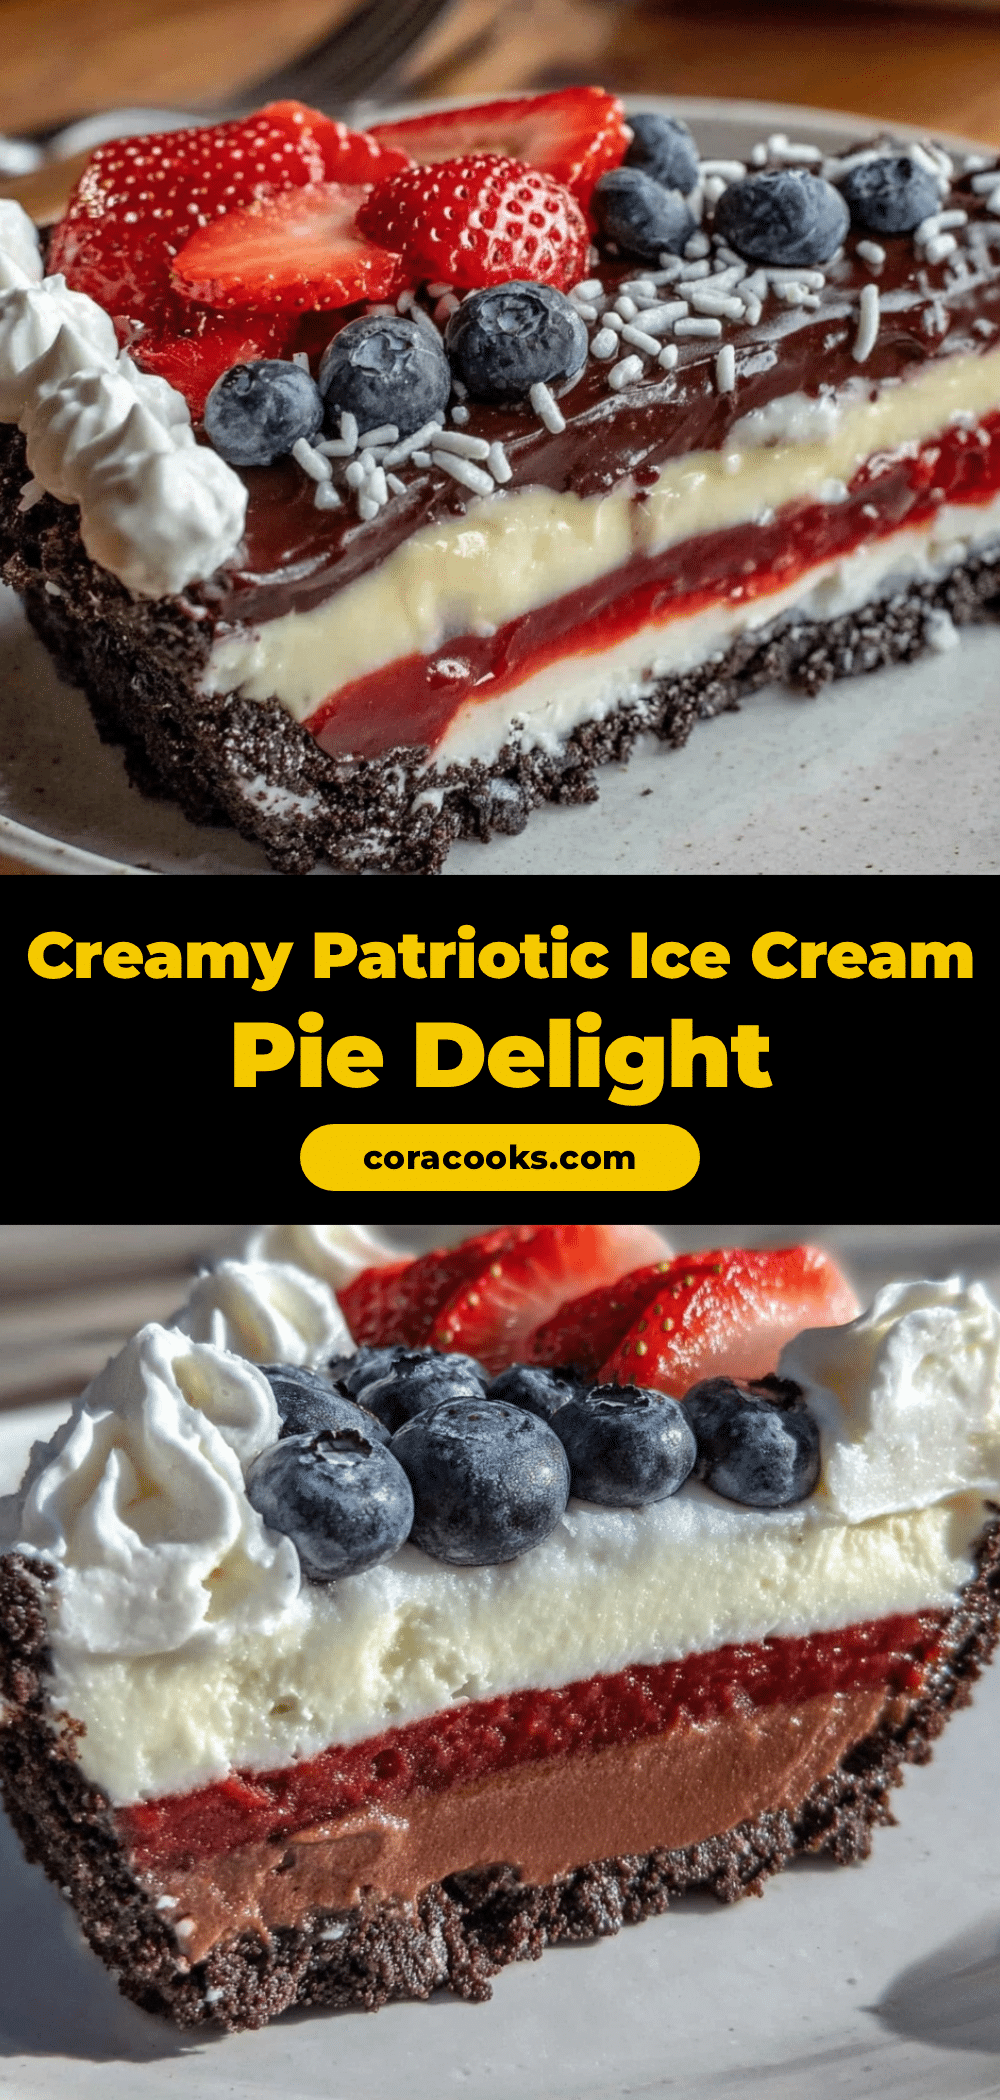
Creamy Patriotic Ice Cream Pie Recipe Easy No-Bake Oreo Crust Dessert

A no-bake, creamy ice cream pie with a crunchy Oreo crust and patriotic red, white, and blue layers of berries and vanilla ice cream. Perfect for summer celebrations and easy to prepare.
- Prep Time: 15 minutes
- Cook Time: 4 hours
- Total Time: 4 hours 15 minutes
- Yield: 8 servings 1x
- Category: Dessert
- Cuisine: American
Ingredients
- 24 Oreo Cookies, crushed
- 6 tablespoons unsalted butter, melted
- 1.5 quarts vanilla ice cream
- 1 cup sliced strawberries
- 1 cup blueberries
- 1 cup whipped cream
- 2 tablespoons powdered sugar (optional)
- 1 teaspoon vanilla extract (optional)
Instructions
- Crush 24 Oreos finely using a food processor or place them in a sealed plastic bag and crush with a rolling pin. Transfer crumbs to a bowl and mix with 6 tablespoons of melted unsalted butter until the mixture resembles wet sand.
- Firmly press the Oreo mixture into the bottom and slightly up the sides of a 9-inch pie dish. Use the bottom of a flat glass or measuring cup to create an even, compact crust. Place the crust in the freezer for about 15 minutes to set.
- Let 1.5 quarts of vanilla ice cream sit at room temperature for 5-7 minutes until softened but not melted.
- Spread half of the softened vanilla ice cream over the chilled Oreo crust evenly. Add a layer of 1/2 cup sliced strawberries and 1/2 cup blueberries on top, gently pressing fruit into the ice cream.
- Spread the remaining ice cream over the fruit layer, smoothing the surface with a spatula. Top with the remaining strawberries and blueberries, arranging them decoratively.
- Cover the pie with plastic wrap and freeze for at least 4 hours or overnight to firm up completely.
- Just before serving, whip 1 cup of heavy cream with 2 tablespoons powdered sugar and 1 teaspoon vanilla extract until soft peaks form. Spread or pipe the whipped cream over the top of the pie.
- Slice with a warm knife for clean cuts and serve immediately after adding whipped cream.
Notes
Do not let the ice cream soften too much to avoid blending layers. Press the Oreo crust firmly and chill before adding ice cream to prevent sogginess. Use a serrated knife warmed under hot water for easier slicing. Homemade whipped cream is preferred for topping.
Nutrition
- Serving Size: 1 slice (1/8 of pie)
- Calories: 300
- Sugar: 25
- Sodium: 150
- Fat: 18
- Saturated Fat: 10
- Carbohydrates: 35
- Fiber: 2
- Protein: 4
Keywords: ice cream pie, no-bake dessert, Oreo crust, patriotic dessert, Fourth of July dessert, easy summer dessert, berry ice cream pie