Love this? Save it for later!
Share the inspiration with your friends
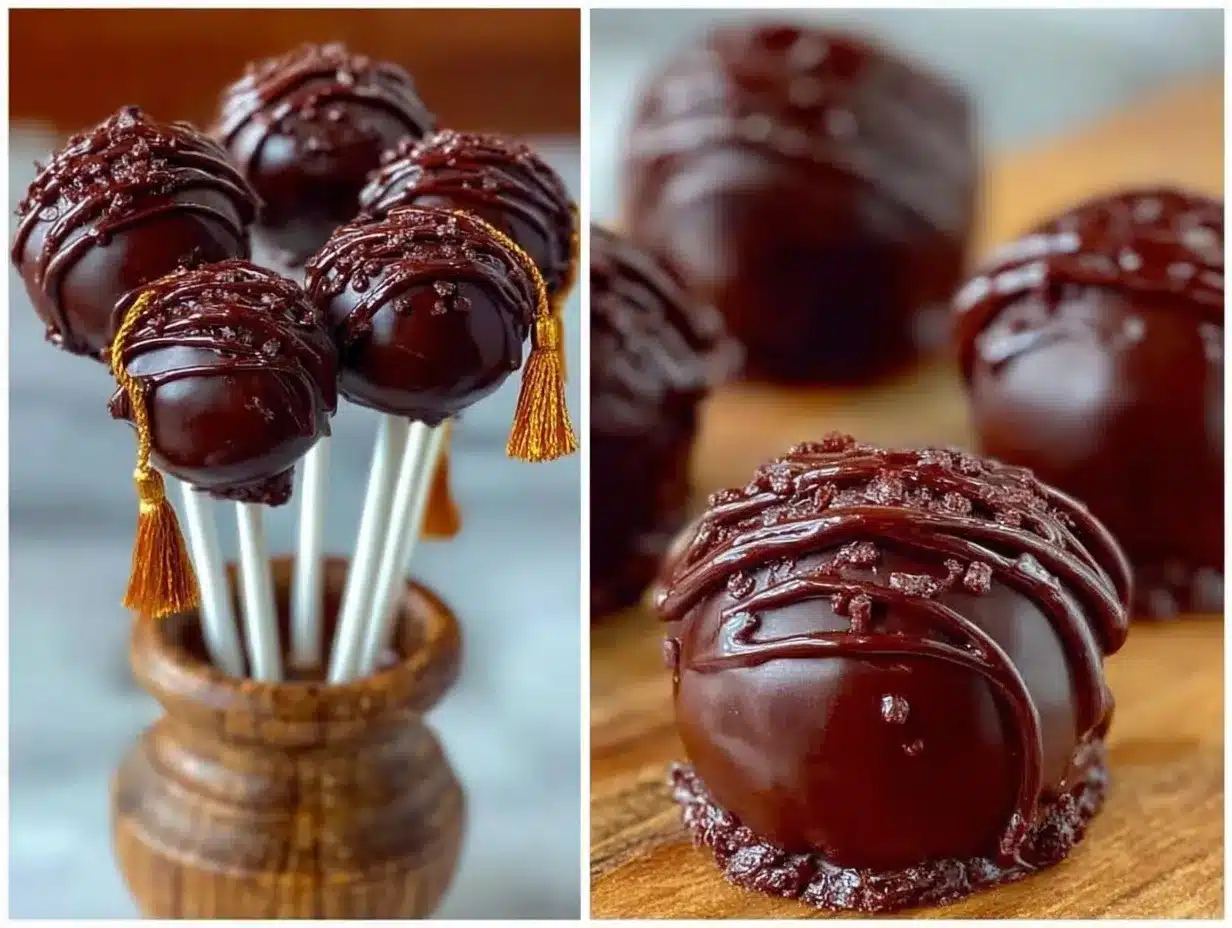
“I never thought a last-minute craft project would turn into a full-blown baking obsession,” I confessed to my friend while juggling a tray of these perfect graduation cap cake pops with fondant tassels. It was the eve of my niece’s graduation party, and honestly, I was scrambling. I had planned to buy something simple from the bakery, but then inspiration hit when I spotted a stack of leftover cake crumbs from a recent birthday bash. You know that feeling when you’re caught between panic and creativity? That’s exactly where I was.
The idea of turning those crumbs into fun, bite-sized treats shaped like graduation caps seemed both charming and doable. Plus, adding the little fondant tassels gave them this extra personalized touch that no store-bought dessert could match. I have to admit, my kitchen looked like a battleground—flour dust everywhere, a fondant mishap that left a small tear, and a few cake pops that stubbornly refused to stand upright. But by the time the party started, those cake pops were the centerpiece everyone was snapping photos of (and stealing off the platter).
Maybe you’ve been there—trying to pull off something simple yet memorable for a big occasion. These graduation cap cake pops aren’t just adorable; they’re a little project with a big payoff. And honestly, once I made them that night, they became my go-to for graduations and celebrations alike. Let me tell you, there’s something so satisfying about seeing those happy smiles as guests bite into a perfect little cap of cake and chocolate. Keep reading, and I’ll walk you through how to make these charming treats yourself—no fancy bakery required.
Why You’ll Love This Recipe
After countless trials (and a few fondant frustrations), I’m confident this perfect graduation cap cake pops recipe is one you’ll want to bookmark for every celebration ahead. Here’s why:
- Quick & Easy: You can get these done in about 2 hours, including chilling time—perfect if you’re juggling a busy schedule but still want to impress.
- Simple Ingredients: No need for specialty stores. Most of what you need is probably already in your pantry or fridge.
- Perfect for Graduation Parties: These pops are a charming way to celebrate milestones and make your dessert table stand out.
- Crowd-Pleaser: Kids and adults alike love the fun shape and rich chocolate coating.
- Unbelievably Delicious: The moist cake center paired with smooth chocolate and a delicate fondant tassel is pure joy in each bite.
What sets this recipe apart is the fondant tassel tutorial. Instead of buying pre-made decorations, you’ll learn how to create those tiny tassels yourself for a personalized touch. Plus, the cake pop mixture is perfectly balanced for shaping and flavor—not too dry, not too crumbly. Honestly, it’s the kind of recipe that makes you close your eyes after the first bite and think, “Yep, I nailed this.” Whether you’re a beginner baker or a seasoned pro, this recipe strikes that sweet spot of fun and finesse.
What Ingredients You Will Need
This recipe relies on straightforward, wholesome ingredients that come together beautifully to create the perfect texture and look. Most are pantry staples, and the fondant tassels require just a bit of extra fondant and patience.
- Cake:
- 1 box of yellow or chocolate cake mix (plus ingredients listed on the box—usually eggs, oil, and water)
- Optional: 1 tsp vanilla extract (for extra flavor)
- Frosting:
- 1 cup (240g) homemade or store-bought buttercream frosting (I prefer Wilton’s for smooth texture)
- Coating & Decoration:
- 12 oz (340g) black candy melts or dark chocolate (for the cap)
- 12 oz (340g) white candy melts or white chocolate (optional, for base coating)
- Fondant (black and gold or yellow) for tassels (I recommend Satina brand; it’s pliable and easy to work with)
- Edible gold dust or luster dust (optional, for shimmer on tassels)
- Extras:
- White lollipop sticks
- Styrofoam block or cake pop stand (for drying)
- Non-stick spray or shortening (for smoothing fondant if needed)
Ingredient tip: If you want a gluten-free version, swap the boxed cake mix with a gluten-free alternative like a trusted gluten-free yellow cake recipe. For dairy-free needs, use dairy-free frosting and candy melts.
Equipment Needed
- Mixing bowls (medium and large) – I like glass or stainless steel for easy cleanup
- Electric mixer or stand mixer – essential for frosting and batter mixing
- Baking pan (9×13 inches / 23×33 cm) – standard size for cake mix
- Cooling rack – helps cake cool evenly
- Food processor or fork – for crumbling cake
- Microwave-safe bowls – for melting candy melts or chocolate
- Lollipop sticks – sturdy and food-safe
- Styrofoam block or cake pop stand – to hold pops upright while drying
- Fondant tools (optional) – rolling pin, small sharp knife, or pizza cutter for tassels
If you don’t have a food processor, no worries—you can crumble the cake by hand with a fork. For melting candy melts, a double boiler works well if you prefer not to use a microwave. When working with fondant, a clean, smooth surface and a little cornstarch can help prevent sticking. Budget-wise, you can find basic cake pop stands online or even use a block of floral foam wrapped in foil.
Preparation Method
- Bake the Cake: Preheat your oven to 350°F (175°C). Prepare your boxed cake mix according to package instructions, including eggs, oil, and water. Add 1 tsp vanilla extract if using for extra flavor. Pour batter into a greased 9×13 inch (23×33 cm) pan and bake for 30–35 minutes or until a toothpick inserted comes out clean. Let cool completely on a wire rack (about 1 hour).
- Crumble the Cake: Once cooled, crumble the cake into a large bowl using your hands or a food processor. Break it down until it’s fine crumbs but avoid turning it into powder. This texture is key for cake pops that hold shape.
- Mix with Frosting: Add 1 cup (240g) of buttercream frosting to the crumbs. Mix thoroughly until the texture resembles dough—moist and moldable but not sticky. If it’s too wet, add a bit more cake crumbs; too dry, add a touch more frosting.
- Shape the Cake Pops: Roll the mixture into 1 1/4-inch (3 cm) balls. Flatten each ball gently into a square shape to form the graduation cap base. Place shaped pops on parchment-lined trays. Chill in the fridge for 30 minutes to firm up.
- Melt Candy Melts: Melt black candy melts according to package instructions (microwave in 30-second bursts, stirring between). Ensure smooth, lump-free chocolate for dipping.
- Insert Sticks & Dip: Dip one end of each lollipop stick into melted candy, then insert halfway into each cake pop. This helps secure the stick. Dip each cake pop into melted candy, covering completely. Tap off excess and place upright into a Styrofoam block or cake pop stand. Let dry until firm (about 20 minutes).
- Make Fondant Tassels: Roll out black fondant thinly (about 1/8 inch / 3 mm). Cut small rectangles (approx. 1-inch x 1/2-inch / 2.5 x 1.3 cm). Snip fine fringe on one long side with scissors, leaving about 1/4 inch (6 mm) uncut to form the tassel base. Roll fringe slightly to create tassel texture. Attach gold/yellow fondant “cord” by rolling a thin snake and wrapping it around the tassel base. Use edible gold dust on tassels for shimmer. Let dry for 10 minutes.
- Attach Tassels: Dab a small amount of melted candy on the top center of each cake pop and gently press the tassel in place. Hold for a few seconds until secure.
Tip: If your cake pops wobble, chill them longer before dipping. Also, working in a cool room helps candy melts set faster and prevents melting fondant.
Cooking Tips & Techniques
Let me share a few things I learned the hard way while mastering these cake pops. First, the cake-to-frosting ratio is everything. Too much frosting and your pops get too soft; too little and they dry out or crumble. I usually start with 1 cup frosting and adjust slightly if needed. Another tip is to chill your cake balls well before dipping. This keeps them firm and reduces cracking when you dunk them in warm chocolate.
When melting candy melts, use gentle heat and stir often to avoid burning. If the chocolate gets too thick, add a tiny bit of vegetable oil or shortening to thin it. Also, don’t skip dipping the stick in candy before insertion—that little step really holds the pops together.
Fondant tassels can be tricky but don’t stress! If your fondant tears, just knead a bit of shortening into it to soften. You can also use a toothpick to help position tassels on the cake pops gently. For consistency, make the tassels all roughly the same size, but a little character in each one is charming, too.
If you find yourself short on time, you can skip the tassels and decorate with colored sprinkles or edible markers instead. But honestly, the tassels are the star of the show!
Variations & Adaptations
- Flavor Variations: Swap the cake mix for red velvet or lemon for a different twist. You can also mix in a bit of cocoa powder to the batter for a richer chocolate base.
- Dietary Adaptations: Use gluten-free cake mixes and dairy-free frosting to accommodate allergies. Coconut or almond flour can be experimented with for a homemade gluten-free version, though texture may vary.
- Decorative Alternatives: Instead of fondant tassels, try piped royal icing tassels or edible metallic pearls for a different look. For a simpler version, dip the pops only in white chocolate and paint the caps black with food-safe markers.
- Seasonal Touch: Add edible glitter to the chocolate coating for a festive sparkle during winter graduations or swap gold fondant for school colors to match the graduate’s alma mater.
One time, I added a tiny edible diploma scroll made from rolled fondant tied with a colored ribbon—my niece loved how personal that felt. Feel free to get creative based on your celebration’s vibe!
Serving & Storage Suggestions
These graduation cap cake pops are best served at room temperature, about 15 minutes after removing from the fridge. This lets the chocolate soften slightly for the perfect bite. Present them upright in a decorative stand or nestled in a pretty box with shredded paper for gifting.
For storage, keep them chilled in an airtight container for up to 5 days. They freeze well, too—wrap individually in plastic wrap, then place in a freezer-safe container for up to 3 months. Thaw overnight in the fridge before serving.
Reheat gently by letting them sit at room temperature, never in the microwave, to avoid melting the chocolate and fondant. Over time, the cake inside will absorb moisture, making the pops even more moist but be cautious of sogginess if stored too long.
Pair these pops with cold lemonade, coffee, or even a sparkling cider to match the celebratory mood perfectly.
Nutritional Information & Benefits
Each graduation cap cake pop roughly contains 150–180 calories, depending on the cake and frosting used. Key ingredients like cake and frosting provide quick energy from carbs and fats, while the fondant adds decorative sugar content.
While these are definitely a treat, making them at home allows you to control ingredient quality—choosing real buttercream and avoiding artificial additives found in some store-bought sweets. You can also experiment with reduced sugar frosting or natural food colorings for a cleaner option.
These cake pops are gluten-friendly if you choose the right ingredients, and dairy-free adaptations are straightforward. Just watch for common allergens like nuts if you customize toppings or decorations.
Personally, I believe celebrations deserve indulgence balanced with care—these cake pops fit perfectly into that philosophy.
Conclusion
If you’re looking to make a memorable statement at your next graduation party, these perfect graduation cap cake pops with fondant tassels are a winner. They combine simplicity, charm, and that little wow factor that turns heads. I love how they add a personal touch without hours of complicated work, and honestly, seeing friends and family delighted by them never gets old.
Feel free to tweak the flavors, colors, or decorations to fit your style—you might discover your own signature version! If you try this recipe, drop a comment sharing your experience or creative spin. And don’t hesitate to pass this along to anyone gearing up for a big graduation celebration.
Here’s to sweet moments and big accomplishments, one bite at a time!
FAQs
How long do graduation cap cake pops last?
Stored in an airtight container in the fridge, they last about 5 days. You can also freeze them for up to 3 months.
Can I make these cake pops ahead of time?
Absolutely! Prepare and decorate them a day or two before your event, then store them properly chilled.
What if my cake pops crack when dipping?
This often happens if the cake balls are too warm. Chill them well before dipping, and make sure your candy melts aren’t too hot.
Can I use store-bought fondant for tassels?
Yes, store-bought fondant works great. Just knead it until soft before shaping tassels.
Are these cake pops suitable for kids?
Yes, they’re perfect for kids and adults alike. Just be cautious with small decorations if very young children will be eating them.
Pin This Recipe!
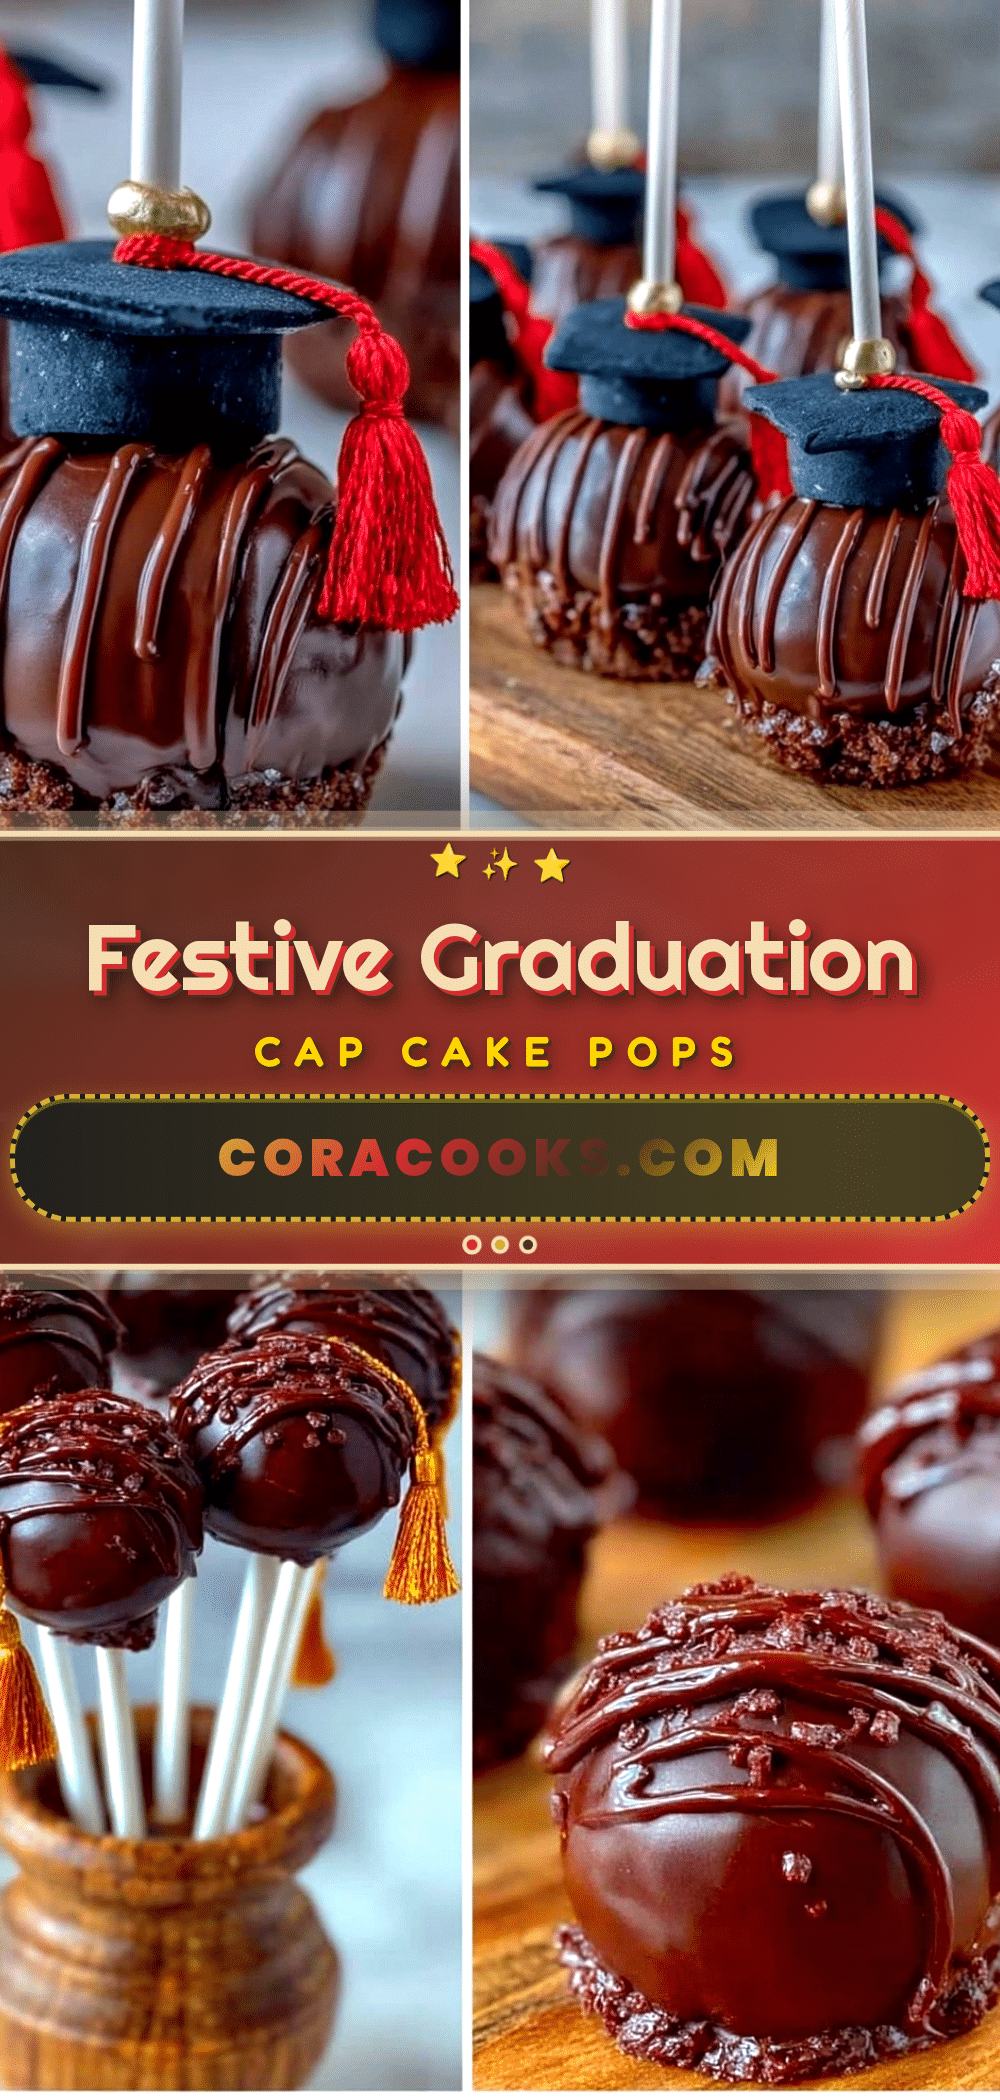
Perfect Graduation Cap Cake Pops Recipe Easy Homemade Fondant Tassels Tutorial
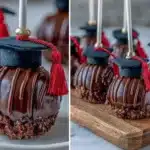
These charming graduation cap cake pops feature a moist cake center coated in rich chocolate and topped with delicate homemade fondant tassels, perfect for celebrating milestones with a personalized touch.
- Prep Time: 1 hour 15 minutes
- Cook Time: 35 minutes
- Total Time: 2 hours
- Yield: 24 cake pops 1x
- Category: Dessert
- Cuisine: American
Ingredients
- 1 box yellow or chocolate cake mix (plus ingredients listed on the box, usually eggs, oil, and water)
- 1 tsp vanilla extract (optional)
- 1 cup (240g) homemade or store-bought buttercream frosting
- 12 oz (340g) black candy melts or dark chocolate
- 12 oz (340g) white candy melts or white chocolate (optional)
- Fondant (black and gold or yellow) for tassels
- Edible gold dust or luster dust (optional)
- White lollipop sticks
- Styrofoam block or cake pop stand
- Non-stick spray or shortening (optional)
Instructions
- Preheat oven to 350°F (175°C). Prepare cake mix according to package instructions, adding vanilla extract if using. Pour batter into greased 9×13 inch pan and bake 30–35 minutes until toothpick comes out clean. Cool completely on wire rack (about 1 hour).
- Crumble cooled cake into fine crumbs using hands or food processor, avoiding powdery texture.
- Mix cake crumbs with 1 cup buttercream frosting until dough-like texture is achieved; adjust crumbs or frosting if too wet or dry.
- Roll mixture into 1 1/4-inch (3 cm) balls, then gently flatten into square shapes for graduation caps. Place on parchment-lined trays and chill in fridge for 30 minutes.
- Melt black candy melts according to package instructions until smooth.
- Dip one end of each lollipop stick into melted candy, insert halfway into each cake pop to secure.
- Dip each cake pop into melted candy, covering completely. Tap off excess and place upright in Styrofoam block or cake pop stand. Let dry about 20 minutes.
- Roll out black fondant thinly (1/8 inch / 3 mm). Cut small rectangles (~1 inch x 1/2 inch). Snip fringe on one long side leaving 1/4 inch uncut to form tassel base. Roll fringe slightly to create texture.
- Roll thin snake of gold/yellow fondant and wrap around tassel base as cord. Dust tassels with edible gold dust if desired. Let dry 10 minutes.
- Dab small amount of melted candy on top center of each cake pop and press tassel in place. Hold until secure.
Notes
Chill cake balls well before dipping to prevent cracking. Use gentle heat when melting candy melts and stir often. If chocolate thickens, add a bit of vegetable oil or shortening. Knead shortening into fondant if it tears. Work in a cool room to help candy melts set faster and prevent fondant melting. Pops can be stored chilled up to 5 days or frozen up to 3 months. Serve at room temperature for best texture.
Nutrition
- Serving Size: 1 cake pop
- Calories: 150180
- Sugar: 18
- Sodium: 120
- Fat: 8
- Saturated Fat: 5
- Carbohydrates: 22
- Fiber: 0.5
- Protein: 2
Keywords: graduation cake pops, cake pops recipe, fondant tassels, graduation party dessert, easy cake pops, homemade cake pops