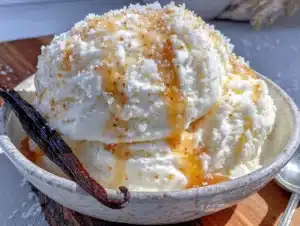
Love this? Save it for later!
Share the inspiration with your friends
My youngest swore she hated snow ice cream for six years. Six years. Every winter, when the first decent snowfall would blanket the yard, I’d watch her sister race outside with the biggest mixing bowl we own, scooping up the freshest, fluffiest snow she could find. And there she’d stand—arms crossed, chin jutted out, declaring that “snow is for sledding, not for eating.” I figured it was a texture thing, or maybe the idea of eating frozen water straight from the ground just felt wrong to her. Either way, I stopped asking.
Then last February, during a surprise snow day that shut down school and the roads, I made a batch “just for myself” while they were both bundled up in the living room watching cartoons. I used the last of the sweetened condensed milk I’d been hoarding for just such an occasion. I poured it over the fresh snow, stirred in a splash of vanilla, and sat down with my bowl, not even trying to hide how much I was enjoying it. About three spoonfuls in, I felt someone staring at me. She was standing in the kitchen doorway, still in her pajamas, watching me like I was doing something suspicious. “Can I just try one bite?” she asked. I handed her the spoon. She took a bite. Then she took the bowl out of my hands and finished the whole thing without saying a word. I mean, honestly, I’ve never felt more victorious in my entire parenting life.
That’s the thing about this Easy 3-Ingredient Snow Ice Cream with Sweetened Condensed Milk. It’s not fancy. It’s not complicated. But there’s something about the creamy, sweet simplicity of it that wins people over—even the most stubborn skeptics. Maybe you’ve got a picky eater at home who turns their nose up at anything that isn’t chicken nuggets. Or maybe you’re just looking for a fun, cheap way to make a snow day feel special without raiding the pantry for a dozen ingredients. Either way, this recipe is the one that finally got my kid to admit she was wrong. And trust me, that doesn’t happen often.
Why You’ll Love This Recipe
Let me tell you why this particular snow ice cream recipe has earned a permanent spot in our winter rotation. I’ve tested plenty of versions over the years—some with heavy cream, some with evaporated milk, some that required an egg or two—and this one wins every single time. Here’s why:
- Only 3 Ingredients : You need fresh snow, sweetened condensed milk, and vanilla extract. That’s it. No running to the store, no hunting for specialty items, no complicated steps.
- Ready in 5 Minutes : From the moment you step outside with your bowl to the moment you’re taking that first creamy spoonful, you’re looking at less than five minutes of actual work. Perfect for impatient little hands and hungry snow bunnies.
- Budget-Friendly Magic : A can of sweetened condensed milk costs around two dollars. Vanilla extract lasts forever. And the snow? Completely free. This might be the most affordable dessert you’ll make all year.
- Kid-Approved Through and Through : I’ve served this to my own kids, their friends, neighbor kids, and even a few skeptical adults. The reaction is always the same—wide eyes, quick smiles, and requests for seconds.
- No Special Equipment : You don’t need an ice cream maker, a mixer, or any fancy kitchen gadgets. Just a bowl, a spoon, and a snowy backyard.
What makes this version different from all the others? It’s the sweetened condensed milk. Most snow ice cream recipes use regular milk plus sugar, which can get icy and watery as it sits. The condensed milk gives you this thick, creamy texture that coats every snowflake perfectly. It’s rich without being heavy, sweet without being cloying, and it stays scoopable even after a few minutes in the bowl. Honestly, it’s the kind of recipe that makes you wonder why you ever bothered with store-bought ice cream on snow days.
And here’s the thing—this isn’t just a dessert. It’s a memory. It’s the taste of cold cheeks and wet mittens and the quiet magic of a world turned white. It’s comfort food at its most elemental, and it costs next to nothing to make. That’s the kind of recipe I can get behind.
What Ingredients You Will Need
This recipe uses simple, pantry-friendly ingredients to create something genuinely special. The beauty of it is that you probably already have most of these items on hand, and the one you don’t—the snow—is literally falling from the sky.
- Fresh Snow, 8-10 cups (lightly packed, clean, and freshly fallen) — The star of the show. Not all snow is created equal. You want the light, fluffy stuff that fell during the current storm, not the crusty, icy snow that’s been sitting for days. I usually wait until we’ve had at least a couple of inches of fresh accumulation before I head outside. Pro tip: place a clean bowl or baking sheet outside during the snowfall to collect the freshest snow possible, away from trees and walkways where it might pick up dirt or debris.
- Sweetened Condensed Milk, 1 can (14 ounces) (adds richness and sweetness) — This is the secret weapon. Unlike regular milk, sweetened condensed milk is thick, creamy, and already sweetened, which means you don’t need to add any extra sugar. I personally prefer Eagle Brand for its consistent texture and flavor, but any brand will work. If you’re dairy-free, there are excellent coconut-based sweetened condensed milk alternatives available now—just check the label to make sure it’s the full-fat version for the best texture.
- Vanilla Extract, 1 teaspoon (adds warmth and depth) — Pure vanilla extract makes a noticeable difference here, but if all you have is imitation vanilla, go ahead and use it. I’ve done it both ways, and honestly, when you’re eating frozen snow, the difference is subtle. That said, if you want to get fancy, you can use vanilla bean paste or even scrape the seeds from a real vanilla bean. My neighbor once used a splash of almond extract instead, and it was surprisingly delicious—like a snow day marzipan situation.
Optional Add-Ins (Not Required, But Fun) :
- Pinch of salt (enhances sweetness and balances flavors) — Just a tiny pinch, trust me on this one.
- Food coloring (for fun pastel colors) — My kids love making “unicorn snow” with a drop of pink or blue coloring stirred in.
- Sprinkles (for texture and celebration vibes) — Because everything is better with sprinkles.
- Chocolate syrup or caramel sauce (for drizzling) — Turns this into a sundae situation real quick.
One thing I’ve learned the hard way: don’t try to use snow that’s been sitting around for more than a day. It gets dense and icy, and your ice cream will end up more like a snow cone than creamy ice cream. Fresh, fluffy snow gives you that light, scoopable texture that makes this recipe so special. Also, if you live in an area where snow is rare or not exactly clean-looking, you can use shaved ice from a bag—but honestly, it’s just not the same. There’s something about real snow that makes this recipe work in a way that crushed ice can’t replicate.
Equipment Needed
The equipment list for this recipe is almost embarrassingly short, which is part of why I love it so much. You won’t need to dig through your kitchen drawers or wash any specialty gadgets. Here’s what you’ll need:
- Large Mixing Bowl — You want something big enough to hold 8-10 cups of snow with room to stir. I use my grandmother’s old ceramic mixing bowl, but any large bowl will do. Stainless steel works great because it stays cold, which helps keep the snow from melting too fast.
- Measuring Cups and Spoons — You’ll need a 1-teaspoon measuring spoon for the vanilla and a liquid measuring cup if you want to be precise about the snow volume, though honestly, I just eyeball it at this point.
- Wooden Spoon or Rubber Spatula — For folding the condensed milk into the snow. I prefer a rubber spatula because it gets into the corners of the bowl and doesn’t compact the snow as much as a wooden spoon might.
- Freezer-Safe Container (Optional) — If you’re making a big batch and want to save some for later, a freezer-safe container with a tight-fitting lid is helpful. I use a standard glass loaf pan.
That’s genuinely it. No ice cream maker, no mixer, no special attachments. This is the kind of recipe you can make in a college dorm room or a cabin with minimal kitchen access. My sister once made it using a plastic salad bowl and a fork, and it worked fine. The key is just having something to mix in and something to mix with.
One piece of advice: if you’re making this with kids, use a bowl that’s wider than it is tall. A deep, narrow bowl makes it harder to stir without spilling, and trust me, you don’t want sweetened condensed milk all over your counter. Ask me how I know.
Preparation Method
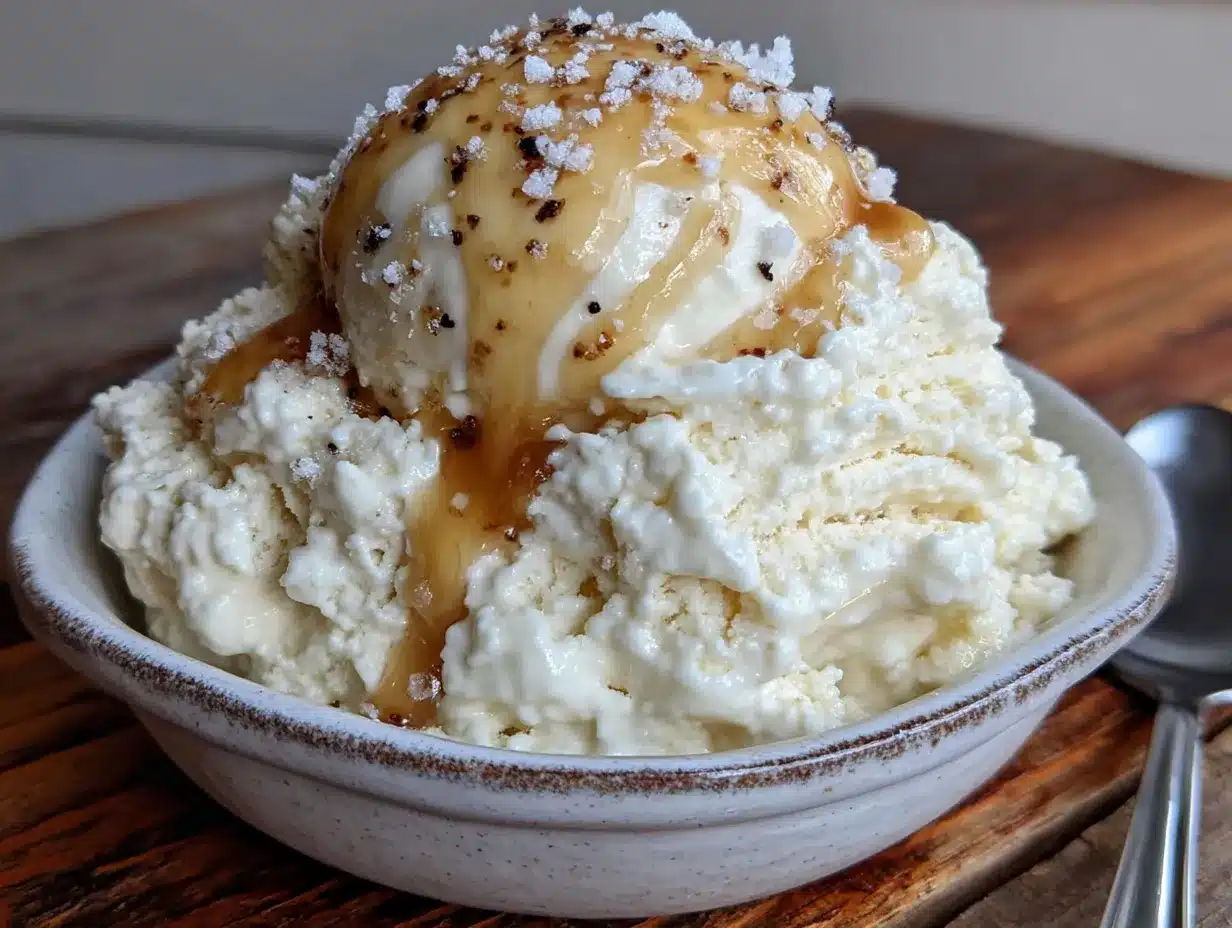
Making this snow ice cream is almost laughably simple, but there are a few tricks I’ve picked up along the way that make the difference between “pretty good” and “absolutely perfect.” Follow these steps, and you’ll have the creamiest, most delicious snow ice cream you’ve ever tasted.
- Wait for the Right Snow — This is step zero, but it matters. Don’t rush outside the second the first flake falls. Wait until you have at least 2-3 inches of fresh accumulation. The snow should be light and fluffy, not wet and heavy. If you can make a snowball that holds together easily, the snow is too wet for ice cream. You want the kind of snow that would make a terrible snowball but a fantastic bowl of ice cream.
- Collect Your Snow — Take your largest mixing bowl outside and gently scoop up the top layer of fresh snow. Avoid snow that’s close to the ground, near roads, driveways, or anywhere it might have picked up dirt or chemicals. I usually collect from the middle of our backyard, away from trees and the fence line. Fill the bowl with about 8-10 cups of loosely packed snow. Don’t press it down—you want it light and airy.
- Bring It Inside Quickly — Snow starts melting the second it hits a warm environment, so move fast. If your kitchen is particularly warm, consider placing your mixing bowl in the freezer for 5-10 minutes before you start. This gives you a little more working time before everything turns to soup.
- Pour the Sweetened Condensed Milk — Open your can of sweetened condensed milk and pour it evenly over the snow. Don’t dump it all in one spot—try to distribute it as best you can. This makes the stirring process much easier and more even.
- Add the Vanilla — Drizzle 1 teaspoon of vanilla extract over the top. If you’re using any optional add-ins like a pinch of salt or food coloring, add them now.
- Fold, Don’t Stir — Here’s the technique that makes all the difference. Use your rubber spatula or spoon to gently fold the condensed milk into the snow. Imagine you’re folding whipped cream into a batter—you want to incorporate the ingredients without deflating the snow too much. Use a cutting motion through the center, then fold the edges in. Repeat until the condensed milk is mostly incorporated and you have a uniform, creamy texture. This usually takes about 30-45 seconds of gentle folding.
- Check the Consistency — The mixture should look like soft-serve ice cream—creamy, scoopable, and a little bit fluffy. If it’s too thin or watery, you either used too much condensed milk or the snow was too wet. If it’s too stiff and not coming together, add a tablespoon more condensed milk and fold again.
- Serve Immediately — This is the most important step. Snow ice cream is best eaten within minutes of making it. Scoop it into bowls and serve right away. If you wait too long, it will melt into a sweet, snowy puddle. That’s still delicious, honestly, but it’s not the same experience.
- Optional Freezing — If you have leftovers, transfer them to a freezer-safe container, press a piece of plastic wrap directly against the surface to prevent ice crystals, and seal with a lid. It will keep for up to 24 hours, but the texture will be denser and icier than fresh. I usually just make what we’ll eat in one sitting.
One thing I want to emphasize: don’t overmix. I know it’s tempting to keep stirring until everything looks perfectly smooth, but the more you mix, the more the snow melts. You want to work quickly and gently. The first few times I made this, I stirred like I was making cake batter, and I ended up with snow soup. Learn from my mistakes.
Cooking Tips & Techniques
After many snow days and many bowls of snow ice cream (some successful, some… less so), I’ve gathered a few tips that will help you nail this recipe every single time.
Temperature Matters More Than You Think — Your bowl should be cold. Your spoon should be cold. Your kitchen should ideally be on the cooler side. If your house is toasty warm, the snow will start melting the second it comes inside. I’ve started keeping my mixing bowl in the freezer during snowstorms, and it makes a noticeable difference. You get a good 2-3 extra minutes of working time before the snow starts breaking down.
The Snow Quality Check — Not all snow is created equal, and I learned this the hard way. The best snow for ice cream is the stuff that falls when temperatures are in the 20s or low 30s Fahrenheit. If it’s too warm, the snowflakes are heavy and wet, and your ice cream will be dense and watery. If it’s too cold (like, below 10°F), the snow is powdery and dry, which actually works beautifully—you just need a little more condensed milk to bring it together. I’ve made this in both conditions, and honestly, the dry, powdery snow from a deep freeze makes the best texture.
Don’t Skip the Vanilla — I know it’s tempting to think you can leave it out, especially if you’re short on time or ingredients. But the vanilla does something magical here. It rounds out the sweetness of the condensed milk and adds a warmth that makes the ice cream taste more complex. Without it, the ice cream is just sweet—good, but one-dimensional. With it, it’s something special.
Work in Batches for Crowds — If you’re making this for a group of kids (or adults who refuse to admit they love snow ice cream), don’t try to make one giant batch. The snow will melt before you get it all mixed. Instead, make smaller batches in sequence. One batch serves about 4 people comfortably. For a bigger group, make two or three batches back to back. It only takes a few minutes per batch, and the results are much better.
The Leftover Problem (and Solution) — Let’s be real: snow ice cream doesn’t keep well. But if you absolutely must save some, spread it in a thin layer in a freezer-safe dish, cover it tightly, and freeze for no more than 24 hours. When you’re ready to eat it, let it sit at room temperature for 5-10 minutes to soften slightly. It won’t be as good as fresh, but it’s still pretty tasty.
Variations & Adaptations
One of the best things about this recipe is how easily it adapts to different tastes and dietary needs. Over the years, I’ve tried quite a few variations, and some of them have become family favorites in their own right.
Chocolate Snow Ice Cream — This is probably the most popular variation at my house. Before adding the condensed milk to the snow, whisk 2 tablespoons of unsweetened cocoa powder into the condensed milk until smooth. Then proceed as usual. The result is a rich, chocolatey ice cream that tastes like a frozen chocolate pudding. My kids fight over who gets the last scoop.
Dairy-Free Version — For our friends and family members who avoid dairy, I’ve had great success using canned coconut sweetened condensed milk. It’s a little thinner than the dairy version, so you might need to use slightly less (about ¾ of a can) and add a tablespoon of coconut cream to thicken it up. The coconut flavor is subtle and actually pairs beautifully with the vanilla. Just make sure you’re using the full-fat version—the low-fat or light versions are too watery.
Fruity Snow Ice Cream — During berry season (or when I have frozen berries in the freezer), I like to add a layer of fruit to the snow before pouring the condensed milk. Drop in about ½ cup of mashed strawberries, blueberries, or raspberries, and fold gently. The fruit gets slightly icy and chewy in the cold snow, creating little pockets of fruity flavor throughout. My neighbor calls this “berry snow” and makes it every time we get a decent snowfall.
Mint Chocolate Chip Version — Add ½ teaspoon of peppermint extract along with the vanilla, and fold in ¼ cup of mini chocolate chips after the condensed milk is incorporated. It tastes exactly like a Thin Mint cookie in ice cream form. This is my personal favorite, and I’ve been known to stash an extra can of condensed milk in the pantry just for this variation.
Maple Walnut Snow Ice Cream — Replace the vanilla extract with 1 teaspoon of maple extract (or 2 tablespoons of real maple syrup, though this will make the mixture a bit thinner), and fold in ¼ cup of toasted chopped walnuts at the end. This version feels a little more grown-up, and I’ve served it to adults who were initially skeptical about “eating snow” and ended up asking for the recipe.
Serving & Storage Suggestions
Snow ice cream is best enjoyed immediately, but there are ways to make the experience even better and stretch it out if you have leftovers.
Serving Temperature and Presentation — Serve this ice cream right after you make it, while it’s still soft and creamy. Scoop it into small bowls or cups—it’s rich, so a little goes a long way. I like to top each bowl with a sprinkle of colorful sprinkles or a drizzle of chocolate syrup for a sundae feel. If you’re feeling fancy, a small cookie on the side never hurts. My kids love when I serve it in those little glass dessert cups we usually only use for holidays.
Complementary Dishes and Beverages — This ice cream pairs beautifully with warm desserts. Serve it alongside a slice of warm apple pie or a brownie fresh from the oven. The contrast between hot and cold is absolutely perfect. For drinks, hot chocolate is the obvious choice—there’s something magical about sipping hot cocoa while eating snow ice cream. Coffee or tea works too, especially for the adult versions.
Storage Instructions — If you have leftovers (which is rare in my house, but it happens), transfer the ice cream to a freezer-safe container. Press a piece of plastic wrap directly onto the surface of the ice cream to prevent ice crystals from forming, then seal with a tight-fitting lid. Store in the freezer for up to 24 hours. After that, the texture degrades noticeably.
Reheating Methods — When you’re ready to eat your frozen leftovers, don’t microwave them—that will just create a mess. Instead, let the container sit at room temperature for 10-15 minutes, then scoop and serve. The texture will be denser and icier than fresh, but it’s still perfectly edible. You can also stir in a tablespoon of fresh snow if you have any, which helps bring back some of the original creaminess.
How Flavors Develop Over Time — Interestingly, if you let the ice cream sit in the freezer for a few hours, the vanilla flavor becomes more pronounced and the sweetness mellows slightly. Some people actually prefer day-old snow ice cream for this reason. I’m not one of them—I’m firmly team fresh—but it’s worth knowing that the flavor profile does shift a bit.
Nutritional Information & Benefits
Let’s be honest: snow ice cream is a treat, not a health food. But knowing what’s in it helps you make informed choices, especially if you’re serving it to kids.
Estimated Nutritional Values (per ½ cup serving, based on 6 servings per batch) :
- Calories: 180
- Fat: 4g
- Carbohydrates: 33g
- Sugar: 32g
- Protein: 4g
- Calcium: 130mg (about 10% of daily value)
Health Benefits of Key Ingredients : Sweetened condensed milk is made from cow’s milk, so it does contain calcium and protein, which are good for bone health and muscle development. The snow, of course, is just water—but staying hydrated is important, especially after playing outside in the cold. Vanilla extract has been studied for its antioxidant properties, though the amount in this recipe is too small to have a significant effect.
Dietary Considerations : This recipe is vegetarian and can be made gluten-free by checking your vanilla extract label (most are gluten-free, but some brands add flavorings that contain gluten). For a dairy-free version, use coconut-based sweetened condensed milk. The recipe is not suitable for vegans unless you use a plant-based condensed milk alternative, as traditional sweetened condensed milk is made from cow’s milk.
Potential Allergens : This recipe contains dairy (milk) from the sweetened condensed milk. If you’re serving a crowd, it’s worth asking about dairy allergies before offering it around. The recipe does not contain nuts, eggs, soy, or wheat in its basic form, though variations may introduce allergens.
Personal Wellness Perspective : I believe in balance. This isn’t the kind of thing we eat every day—it’s a snow day tradition, a special treat that comes around only when the weather cooperates. In that context, I don’t worry about the sugar content. The joy and the memories are worth more than the calories. That said, I do try to serve it in small portions and balance it out with a healthy meal beforehand.
Conclusion
If you’ve never made snow ice cream before, or if you’ve tried other versions that turned out watery or bland, I really hope you give this one a shot. The combination of fresh, fluffy snow and rich, creamy sweetened condensed milk is genuinely magical—the kind of simple alchemy that makes you feel like a kitchen wizard even though you barely did any work.
What I love most about this recipe is how it brings people together. Snow days can be long and chaotic, especially with kids bouncing off the walls. But the moment you pull out that mixing bowl and head outside, something shifts. Everyone gathers around, curious and excited. There’s a shared anticipation that turns into shared delight when that first spoonful hits. It’s a small, sweet moment of connection, and it costs almost nothing to create.
So go ahead—wait for the next snowfall, grab your biggest bowl, and make some memories. Customize it with your favorite add-ins, let the kids help with the stirring, and don’t forget to save a spoonful for yourself. And when you do make it, I’d love to hear about it. Drop a comment below and tell me how it turned out, or share your own favorite variation. Did your kids love it? Did you try the chocolate version? Did someone in your house who “hated” snow ice cream finally come around? I want to know.
Until the next snow day, friends. Stay warm, stay cozy, and keep a can of sweetened condensed milk in your pantry—you never know when you’ll need it.
Frequently Asked Questions
Can I use snow that’s been sitting outside for a few days?
I wouldn’t recommend it. Snow that’s been sitting for more than a day tends to get dense, icy, and may have collected dirt or debris from the air. For the best results, use freshly fallen snow from the current storm. If you’re in a pinch, you can scrape the top layer off older snow, but fresh is always better.
What if I don’t have sweetened condensed milk?
You can make a substitute by combining 1 cup of whole milk with ¾ cup of sugar and simmering it on the stove until it reduces by about half. Let it cool completely before using. It won’t be as thick as the canned stuff, but it works in a pinch. Alternatively, you can use regular milk and add extra sugar to taste, though the texture will be icier.
Can I make this without vanilla extract?
You can, but I really wouldn’t skip it. The vanilla adds depth and warmth that makes the ice cream taste more complex. Without it, the ice cream is just sweet—good, but not great. If you don’t have vanilla, you could try a splash of almond extract, maple extract, or even a pinch of cinnamon for a different flavor profile.
How do I know if the snow is clean enough to eat?
Stick to fresh, white snow that fell during the current storm. Avoid snow that’s been plowed, shoveled, or walked on. Stay away from snow near roads, driveways, or areas where pets might have been. If you’re unsure, collect snow from the middle of your yard, away from trees and structures. When in doubt, you can always use shaved ice from a bag—though it’s not quite the same experience.
Can I double this recipe for a crowd?
You can, but I’d recommend making separate batches instead of trying to mix everything in one giant bowl. Snow melts quickly in warm environments, and a huge batch will turn to soup before it’s fully mixed. Make one batch at a time, serve it immediately, and then start the next batch. It only takes a few minutes per batch, and the quality stays high.
Pin This Recipe!
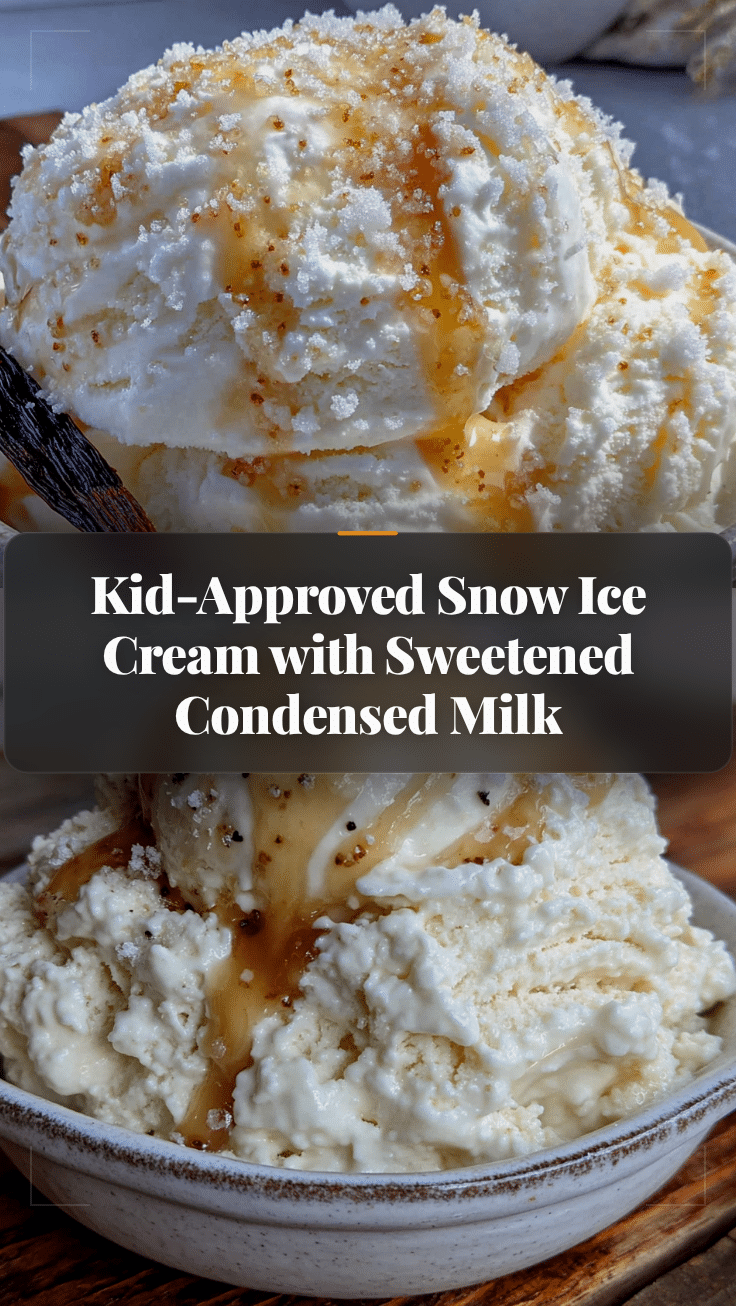
Easy 3-Ingredient Snow Ice Cream with Sweetened Condensed Milk

This creamy, sweet snow ice cream uses just three ingredients and is ready in 5 minutes. It’s a budget-friendly, kid-approved treat perfect for snow days.
- Prep Time: 5 minutes
- Cook Time: 0 minutes
- Total Time: 5 minutes
- Yield: 4 servings 1x
- Category: Dessert
- Cuisine: American
Ingredients
- 8–10 cups fresh snow, lightly packed
- 1 can (14 ounces) sweetened condensed milk
- 1 teaspoon vanilla extract
- Pinch of salt (optional)
- Food coloring (optional)
- Sprinkles (optional)
- Chocolate syrup or caramel sauce (optional)
Instructions
- Wait for at least 2-3 inches of fresh, fluffy snow accumulation.
- Take a large mixing bowl outside and gently scoop up the top layer of fresh snow, avoiding areas near roads, driveways, or trees. Fill the bowl with 8-10 cups of loosely packed snow.
- Bring the bowl inside quickly. If your kitchen is warm, place the bowl in the freezer for 5-10 minutes beforehand.
- Pour the sweetened condensed milk evenly over the snow.
- Drizzle 1 teaspoon of vanilla extract over the top. Add any optional add-ins now.
- Gently fold the condensed milk into the snow using a rubber spatula or spoon, using a cutting motion through the center and folding the edges in. Fold until the mixture is uniform and creamy, about 30-45 seconds.
- Check the consistency: it should look like soft-serve ice cream. If too thin, the snow was too wet; if too stiff, add a tablespoon more condensed milk.
- Serve immediately in bowls. For leftovers, transfer to a freezer-safe container, press plastic wrap against the surface, and freeze for up to 24 hours.
Notes
Use fresh, fluffy snow from the current storm for best texture. Avoid overmixing to prevent melting. Serve immediately for optimal creaminess. For dairy-free, use coconut-based sweetened condensed milk.
Nutrition
- Serving Size: 1/2 cup
- Calories: 180
- Sugar: 32
- Sodium: 60
- Fat: 4
- Saturated Fat: 2.5
- Carbohydrates: 33
- Protein: 4
Keywords: snow ice cream, 3-ingredient, sweetened condensed milk, snow day dessert, easy ice cream, kid-friendly, winter treat