Love this? Save it for later!
Share the inspiration with your friends
It was 10:47 PM on a random Wednesday, and I had this very specific, almost irrational craving for something sweet, tart, and creamy. Not a cookie—too simple. Not a full cake—too much effort. I wanted a bar, but not just any bar. I wanted those fancy coffee shop cranberry bliss bars, the ones that cost five bucks and disappear in two bites. The problem? I didn’t have the fancy white chocolate chips the “real” recipe calls for, and I definitely didn’t have the patience for a complicated dough. But I had a bag of dried cranberries, a block of cream cheese, and a weird idea that arrived like a bolt of lightning: what if I just used a simple shortbread base and a quick, no-fuss cream cheese frosting? Honestly, it felt a little reckless. I mean, at that hour, your judgment is a bit fuzzy, right? I just started mixing, hoping for the best.
The kitchen was quiet except for the hum of the fridge and the satisfying *thwack* of the butter knife against the cutting board. I forgot to soften the cream cheese—classic late-night move—so I had to zap it in the microwave for a few seconds, which felt deeply unprofessional but incredibly efficient. Let me tell you, there’s something about baking when no one is watching. You take risks. You skip steps. You use one bowl even when you know you shouldn’t. And somehow, that reckless energy turned into the best cranberry bliss bars I’ve ever made. The base came together in under ten minutes, the cranberries softened into these little bursts of tangy sweetness, and that cream cheese frosting? It was so simple it felt like cheating. Maybe you’ve been there—standing in your kitchen late at night, wanting something delicious *now*, not in an hour. This recipe is for that exact moment. It stayed with me because it proved that you don’t need fancy ingredients or a ton of time to make something that tastes like a special occasion.
Why You’ll Love This Recipe
Let’s be real—weeknights are chaos. You’re tired, the to-do list is long, and the last thing you need is a complicated dessert recipe that requires a stand mixer and a trip to three different stores. These Quick Cranberry Bliss Bars are the opposite of that. They’re the kind of recipe that makes you look like a hero without actually working that hard. Here’s why they work so well for busy people like us:
- Quick & Easy: From start to finish, these bars are on your plate in about 35 minutes. The active prep time is barely 15 minutes, so you can whip them up while dinner is in the oven or even while the kids are doing homework.
- Simple Ingredients: You probably already have most of this stuff in your pantry. Butter, sugar, flour, eggs, vanilla—all the usual suspects. The cranberries are the only “special” ingredient, and they keep forever in the fridge.
- Perfect for Weeknights: These aren’t just for holiday parties. They’re perfect for a Tuesday night treat, an after-school snack, or a last-minute dessert when friends pop over unexpectedly.
- Crowd-Pleaser: I’ve brought these to potlucks and work events, and they disappear faster than almost anything else. The combination of buttery shortbread, tart cranberries, and creamy frosting is basically irresistible.
- Unbelievably Delicious: The texture is what gets me every time. The base is crisp on the edges but soft in the middle, the cranberries add these little chewy pockets of tartness, and the frosting is just the right amount of sweet and tangy. It’s comfort food at its finest.
What makes this recipe different from the rest? It’s the simplicity, honestly. Most cranberry bliss bar recipes have a complicated layer of white chocolate chunks or a fussy glaze. This version strips it all back to what really matters: a great shortbread base, a generous amount of cranberries, and a luscious cream cheese frosting that comes together in about two minutes. It’s not just another version—it’s the version I make when I want something that tastes like I spent hours in the kitchen, but I actually spent most of that time on the couch. And that first bite? The one where the creamy frosting hits the tart cranberry and the buttery base? Yeah, it’s the kind that makes you close your eyes for a second. It’s pure, simple satisfaction.
What Ingredients You Will Need
This recipe uses simple, wholesome ingredients to deliver big flavor without the fuss. Most of these are pantry staples, which is exactly what you want on a busy weeknight. Here’s what you’ll need and why each one matters:
For the Shortbread Base
- Unsalted butter, softened (1/2 cup / 113g): Butter is the backbone of the shortbread. I use unsalted so I can control the salt level. Make sure it’s truly softened—not melted, not rock hard. (Cold butter won’t cream properly, and melted butter will make the bars greasy.)
- Granulated sugar (1/2 cup / 100g): Just regular white sugar. It gives the base sweetness and helps it get those lovely golden edges.
- Large egg (1): Room temperature is best, but honestly, if you forget to take it out of the fridge, it’s fine. Just crack it in and mix well.
- Vanilla extract (1 teaspoon): Pure vanilla makes a difference, but imitation works in a pinch. I always reach for Nielsen-Massey when I want that deep, rich flavor.
- All-purpose flour (1 1/2 cups / 180g): Regular AP flour is perfect. Don’t pack it into your measuring cup—spoon it in and level it off for the right texture. (If you’re gluten-free, a 1:1 gluten-free baking blend works beautifully here.)
- Baking powder (1/2 teaspoon): Just a little lift so the base isn’t too dense. It makes the bars tender without being cakey.
- Salt (1/4 teaspoon): A pinch of salt balances the sweetness and makes the butter flavor pop. Don’t skip it!
- Dried cranberries (3/4 cup / 90g): The star of the show. I prefer Ocean Spray’s original dried cranberries because they’re plump and not too sweet. If yours are a little dry, soak them in hot water for 5 minutes, then drain before using.
For the Cream Cheese Frosting
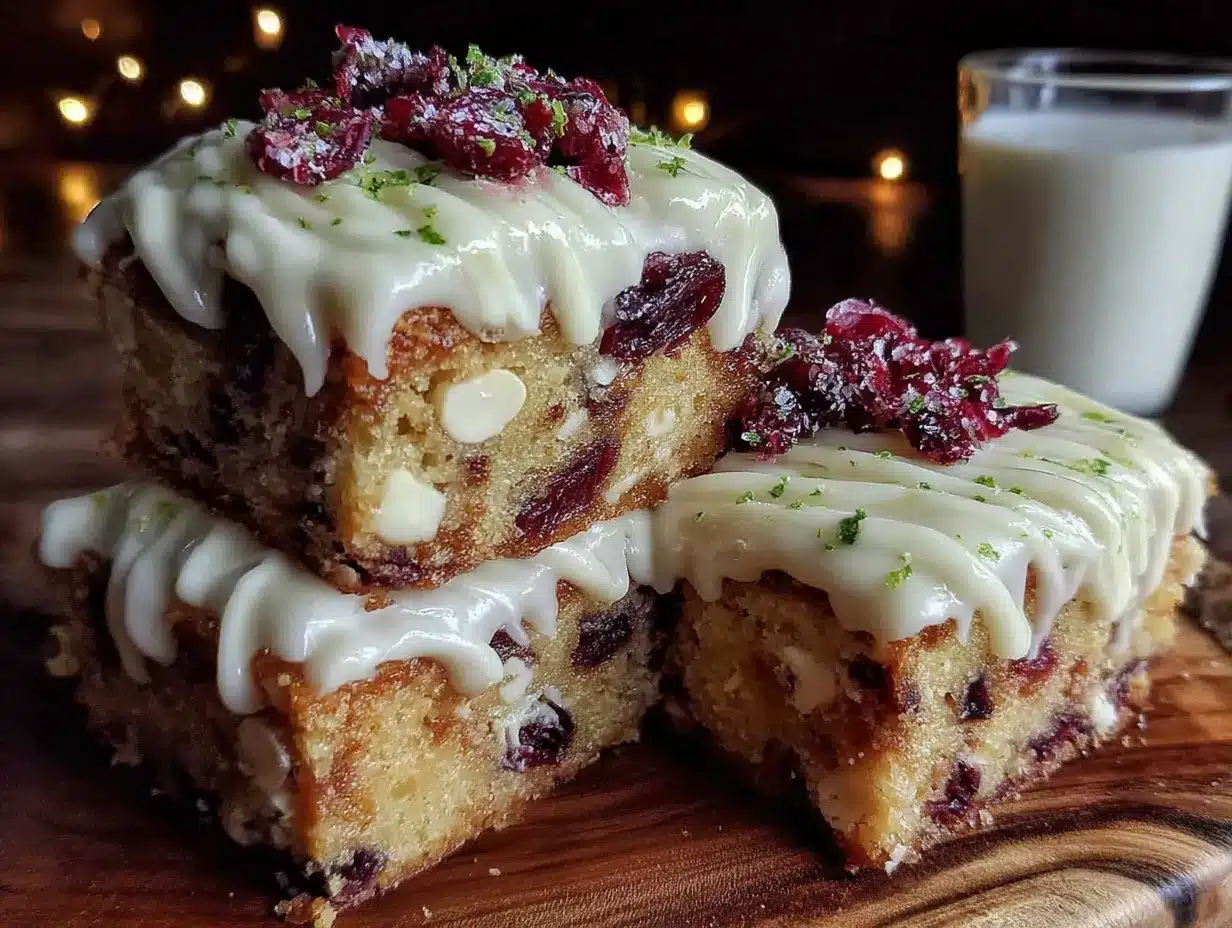
- Cream cheese, softened (4 oz / 113g): Full-fat is best for richness and stability. Let it sit out for at least 20 minutes so it’s soft and spreadable. (Neufchâtel or reduced-fat works, but the frosting will be slightly less thick.)
- Unsalted butter, softened (2 tablespoons / 28g): This helps the frosting hold its shape and adds a silky texture.
- Powdered sugar (1 cup / 120g): Also called confectioners’ sugar. Sift it if you have the energy, but honestly, I just whisk it in and it’s fine. It dissolves easily.
- Vanilla extract (1/2 teaspoon): A little goes a long way in the frosting. It rounds out the tanginess of the cream cheese.
- Milk (1-2 tablespoons): Just enough to thin the frosting to a spreadable consistency. Start with one tablespoon and add more if needed.
Equipment Needed
You don’t need a fancy kitchen to make these bars. Here’s what you’ll actually use:
- 8×8-inch baking pan: This is the sweet spot for these bars. A 9×9 will work, but the bars will be thinner and might bake a little faster. (I’ve used a metal pan and a glass one—both work, but metal gives you slightly crispier edges.)
- Parchment paper: A total lifesaver. Line the pan with parchment, leaving an overhang on two sides, and you can lift the whole block of bars out for easy cutting. No scraping, no mess.
- Mixing bowls (2): One for the base, one for the frosting. If you’re in a rush, you can mix the frosting in the same bowl after you’ve washed it—but I usually just grab a second one.
- Electric hand mixer or stand mixer: You can do this by hand with a wooden spoon, but a mixer makes the creaming step so much faster. (And on a weeknight, every minute counts!)
- Rubber spatula: For scraping down the bowl and spreading the batter evenly in the pan. The batter is thick, so a spatula is your best friend.
- Measuring cups and spoons: Standard set. I prefer metal measuring cups for dry ingredients—they’re more accurate than plastic ones that can warp over time.
- Cooling rack: Helps the bars cool evenly so the frosting doesn’t melt. If you don’t have one, just let them cool in the pan on the counter.
Preparation Method
Alright, let’s get these bars made. The whole process is straightforward, but I’ll walk you through each step with the little tricks I’ve learned from making this recipe about a dozen times.
- Preheat and prep. First things first—preheat your oven to 350°F (175°C). While that’s heating up, line your 8×8 pan with parchment paper. Leave a couple inches hanging over two opposite sides—this will be your “handle” to lift the bars out later. (I learned this the hard way after a batch got stuck in the pan. Parchment paper is non-negotiable here.)
- Cream the butter and sugar. In your mixing bowl, combine the softened butter and granulated sugar. Beat them together with your mixer on medium speed for about 2 minutes, until the mixture looks light and fluffy. You want it to be pale yellow and slightly aerated. (If you’re doing this by hand, give it some elbow grease—it’ll take about 4 minutes.)
- Add the egg and vanilla. Crack in the egg and add the vanilla extract. Mix on low speed until just combined. Don’t overmix here—you don’t want to beat too much air into the batter. It should look smooth and creamy, like a thick pancake batter.
- Mix the dry ingredients. In a separate small bowl, whisk together the flour, baking powder, and salt. This ensures the baking powder is evenly distributed. (Trust me, you don’t want a pocket of baking powder in one bite—it tastes metallic and gross.)
- Combine wet and dry. Gradually add the flour mixture to the butter mixture, mixing on low speed. Stop as soon as the flour disappears. The dough will be thick and slightly crumbly—that’s exactly what you want. Don’t keep mixing, or the bars will be tough.
- Fold in the cranberries. Add the dried cranberries and fold them in with a rubber spatula. Make sure they’re evenly distributed throughout the dough. If the dough feels too stiff to fold, you can use your hands—just knead it gently a few times.
- Press into the pan. Transfer the dough to your prepared pan. Here’s the trick: instead of trying to spread it with a spatula (which is frustrating because the dough is thick), lightly wet your fingers with water and press the dough evenly into the pan. It should be about 1/2-inch thick. Try to get the corners filled in nicely.
- Bake the base. Pop the pan into the preheated oven and bake for 18-22 minutes. You’re looking for the edges to be lightly golden and the center to be set—it should spring back slightly when you touch it. (My oven runs hot, so I start checking at 18 minutes.) Let the base cool completely in the pan on a wire rack. This is important—if you frost it while it’s warm, the frosting will melt into a sad, runny mess.
- Make the frosting. While the base is cooling, make the frosting. In a clean bowl, beat the softened cream cheese and butter together until smooth and creamy—about 2 minutes. No lumps allowed! Add the powdered sugar and vanilla, then beat on low speed until combined. Add the milk, one tablespoon at a time, until the frosting is smooth and spreadable. It should be thick but not stiff.
- Frost and chill. Once the base is completely cool, spread the frosting evenly over the top. Use an offset spatula or the back of a spoon to get it smooth. Pop the pan in the fridge for at least 30 minutes to let the frosting set. (This makes cutting clean slices so much easier.)
- Slice and serve. Lift the bars out of the pan using the parchment paper overhang. Place them on a cutting board and use a sharp knife to slice them into squares. I usually cut them into 16 bars (4×4 grid), but you can go bigger or smaller depending on your crowd. Wipe the knife clean between cuts for the neatest edges.
Cooking Tips & Techniques
Over the years, I’ve made plenty of mistakes with bar recipes. Here’s what I’ve learned so you don’t have to repeat my failures:
Don’t overbake the base. This is the number one mistake I see. The shortbread base should be just barely golden on the edges and pale in the center. If you bake it until it’s brown all over, the bars will be dry and crumbly. Remember: it will continue to cook slightly from the residual heat of the pan after you take it out of the oven.
Room temperature ingredients matter. I know, I know—you’re busy. But cold cream cheese will give you lumpy frosting, and cold butter won’t cream properly with the sugar. Take them out of the fridge 20-30 minutes before you start. (If you forget, cut the cream cheese into small cubes and microwave it in 5-second bursts until it’s soft but not warm.)
Patience with cooling. I get it—you want to eat these immediately. But frosting a warm base is a recipe for disaster. The frosting will slide right off or get absorbed into the base. Let the base cool completely, then chill the frosted bars. The wait is worth it for those clean, beautiful slices.
Sharp knife for clean cuts. A dull knife will squish the frosting and drag it across the bars. Use a sharp chef’s knife and wipe it clean with a damp paper towel between each cut. For the neatest results, you can even chill the bars for an hour before slicing.
Multitasking tip: While the base is baking, clean up your dishes and make the frosting. By the time the base is done, you’ll have minimal mess and the frosting ready to go. This is the kind of efficiency that makes weeknight baking feel manageable.
Variations & Adaptations
One of the best things about this recipe is how flexible it is. Here are some ways to make it your own:
Citrus Twist: Add the zest of one orange to the shortbread base and a splash of orange juice to the frosting. The citrus pairs beautifully with the cranberries and gives the bars a bright, almost holiday-like flavor. (I tried this last Christmas and it was a huge hit.)
White Chocolate Version: If you want that classic coffee shop taste, fold in 1/2 cup of white chocolate chips along with the cranberries. They melt slightly during baking and create little pockets of sweetness. (Use good-quality white chocolate—the cheap stuff doesn’t melt as smoothly.)
Gluten-Free Adaptation: Substitute the all-purpose flour with a 1:1 gluten-free baking blend. I’ve used Bob’s Red Mill and King Arthur’s GF blends with great results. Just be sure to let the base cool completely before frosting, as GF baked goods can be a bit more delicate when warm.
Vegan Option: Use vegan butter (like Miyoko’s or Earth Balance) and a flax egg (1 tablespoon ground flaxseed mixed with 3 tablespoons water, let sit for 5 minutes). For the frosting, use vegan cream cheese—Tofutti or Kite Hill work well. The texture will be slightly different, but the flavor is still fantastic.
Spiced Version: Add 1/2 teaspoon of cinnamon and 1/4 teaspoon of nutmeg to the flour mixture. These warm spices make the bars taste cozier and more autumnal. It’s my go-to variation for fall baking.
Serving & Storage Suggestions
These bars are delicious at room temperature, but I actually prefer them straight from the fridge—the frosting gets firmer and the base stays perfectly chewy. If you’re serving them at a party, let them sit out for about 10 minutes so the frosting softens slightly.
What to serve with them: A hot cup of coffee or a mug of chai tea is the perfect companion. The bitterness of the coffee balances the sweetness of the bars beautifully. For a dessert platter, pair them with fresh berries and a dollop of whipped cream.
Storage: Keep the bars in an airtight container in the refrigerator. They’ll stay fresh for up to 5 days—though honestly, they never last that long in my house. Layer them between sheets of parchment paper so the frosting doesn’t stick together.
Freezing: These freeze like a dream. Place the unfrosted bars in a freezer-safe container (or wrap them tightly in plastic wrap and then foil) and freeze for up to 3 months. When you’re ready to eat, thaw them in the fridge overnight, then make the frosting fresh and spread it on. (Frosting doesn’t freeze as well—it can get grainy.)
Reheating: If you want a warm bar, pop a single serving in the microwave for about 10 seconds. The base will soften and the frosting will get slightly melty. It’s a completely different experience from the chilled version—both are good, just different.
Flavor development: These bars actually taste better the next day. The flavors meld together as they sit, and the cranberries soften even more. So if you can wait, make them a day ahead—your future self will thank you.
Nutritional Information & Benefits
Let’s be honest—these are a treat, not a health food. But that doesn’t mean they can’t fit into a balanced lifestyle. Here’s the rough nutritional breakdown per bar (based on 16 bars):
- Calories: Approximately 180-200
- Fat: 10g (mostly from butter and cream cheese)
- Carbohydrates: 24g
- Sugar: 16g
- Protein: 2g
Health highlights: Cranberries are packed with antioxidants and vitamin C. They’re known for supporting urinary tract health and reducing inflammation. So while these bars are indulgent, at least the cranberries are doing some good work! The cream cheese frosting adds a small amount of calcium and protein, but it’s mostly about the joy factor.
Dietary considerations: This recipe contains gluten, dairy, and eggs. For gluten-free, dairy-free, or vegan options, check the variations section above. These bars are not low-carb or keto-friendly due to the sugar and flour, but you could experiment with almond flour and a sugar substitute if you’re feeling adventurous.
My perspective: I believe in balance. These bars are a celebration—a little indulgence that makes a regular Tuesday feel special. Enjoy them without guilt, savor every bite, and maybe share a few with a neighbor. That’s the real nutritional benefit: the joy of sharing something delicious.
Frequently Asked Questions
Can I use fresh cranberries instead of dried?
I wouldn’t recommend it for this recipe. Fresh cranberries are very tart and release a lot of liquid during baking, which can make the base soggy. Dried cranberries are sweeter and have a chewier texture that works perfectly here. If you only have fresh, chop them roughly and toss them with a tablespoon of sugar before folding them in—but the texture will be different.
Why did my frosting turn out runny?
This usually happens when the cream cheese is too soft or warm. If your cream cheese was at room temperature for too long, or if you microwaved it too much, the frosting won’t hold its shape. To fix it, pop the frosting in the fridge for 15-20 minutes to firm up, then try spreading it again. You can also add a little more powdered sugar to thicken it.
Can I make these bars ahead of time?
Absolutely! In fact, I prefer them made a day ahead. Bake the base, let it cool, then cover it tightly and store it at room temperature overnight. Make the frosting and frost the bars the next day. The flavors meld together beautifully, and the bars slice even cleaner after a full chill in the fridge.
How do I get clean, neat slices?
Chill the frosted bars for at least an hour before slicing. Use a sharp chef’s knife, and wipe the blade clean with a damp paper towel between each cut. For the absolute cleanest slices, you can even run the knife under hot water and dry it off before cutting—the heat helps the knife glide through the frosting.
Can I double this recipe?
Yes! Double all the ingredients and bake the bars in a 9×13-inch pan. You’ll need to increase the baking time slightly—start checking at 25 minutes. The bars will be a little thinner, so they might bake a bit faster than you’d expect. Use the same doneness cues: golden edges and a set center.
Conclusion
These Quick Cranberry Bliss Bars with Cream Cheese Frosting are proof that you don’t need a special occasion or a complicated recipe to make something truly wonderful. They’re the kind of dessert that fits into real life—busy weeknights, lazy Sundays, or those late-night moments when a craving hits and you just need something good, fast. I love this recipe because it’s forgiving, adaptable, and always delivers. The buttery base, the tart pops of cranberry, the creamy, tangy frosting—it’s a combination that just works, every single time.
I hope you give these a try and make them your own. Maybe you’ll add a little orange zest, or swap in dried cherries for the cranberries, or double the batch for a party. Whatever you do, I’d love to hear about it. Drop a comment below and let me know how they turned out—did you make any changes? Did they disappear as fast as mine always do? Share a photo on Pinterest and tag me so I can see your beautiful creations. Happy baking, friend. You’ve got this.
Pin This Recipe!
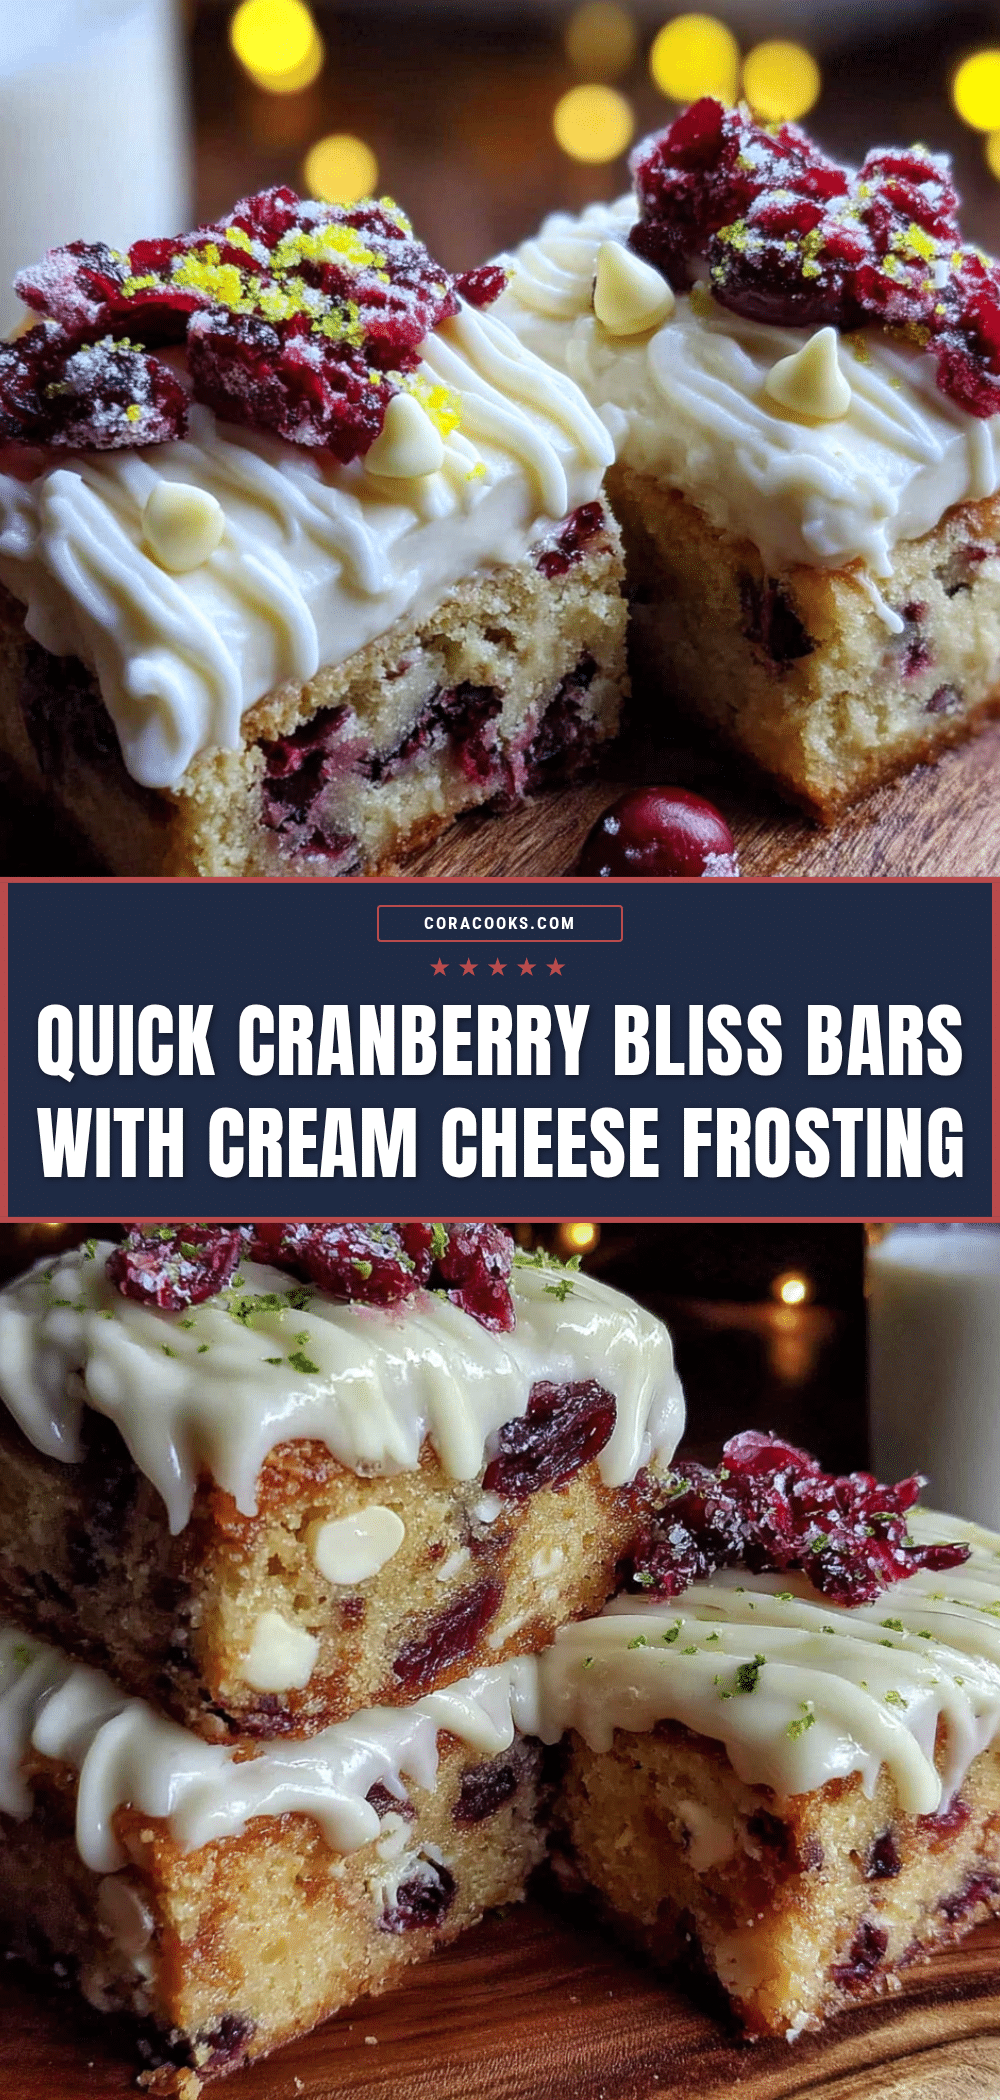
Quick Cranberry Bliss Bars with Easy Cream Cheese Frosting
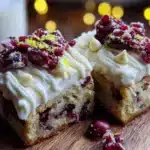
These Quick Cranberry Bliss Bars feature a buttery shortbread base, tart dried cranberries, and a luscious cream cheese frosting. Ready in about 35 minutes, they’re the perfect weeknight dessert that tastes like a special occasion.
- Prep Time: 15 minutes
- Cook Time: 20 minutes
- Total Time: 35 minutes
- Yield: 16 bars 1x
- Category: Dessert
- Cuisine: American
Ingredients
- 1/2 cup (113g) unsalted butter, softened
- 1/2 cup (100g) granulated sugar
- 1 large egg
- 1 teaspoon vanilla extract
- 1 1/2 cups (180g) all-purpose flour
- 1/2 teaspoon baking powder
- 1/4 teaspoon salt
- 3/4 cup (90g) dried cranberries
- 4 oz (113g) cream cheese, softened
- 2 tablespoons (28g) unsalted butter, softened
- 1 cup (120g) powdered sugar
- 1/2 teaspoon vanilla extract
- 1–2 tablespoons milk
Instructions
- Preheat oven to 350°F (175°C). Line an 8×8-inch baking pan with parchment paper, leaving overhang on two sides.
- In a mixing bowl, beat softened butter and granulated sugar with an electric mixer on medium speed until light and fluffy, about 2 minutes.
- Add egg and vanilla extract; mix on low speed until just combined.
- In a separate bowl, whisk together flour, baking powder, and salt.
- Gradually add flour mixture to butter mixture, mixing on low speed until just combined. Dough will be thick and slightly crumbly.
- Fold in dried cranberries with a rubber spatula until evenly distributed.
- Transfer dough to prepared pan. Lightly wet fingers with water and press dough evenly into pan, about 1/2-inch thick.
- Bake for 18-22 minutes, until edges are lightly golden and center is set. Cool completely in pan on a wire rack.
- For frosting: In a clean bowl, beat softened cream cheese and butter until smooth and creamy, about 2 minutes.
- Add powdered sugar and vanilla; beat on low speed until combined. Add milk 1 tablespoon at a time until smooth and spreadable.
- Spread frosting evenly over cooled base. Refrigerate for at least 30 minutes to set.
- Lift bars out using parchment overhang. Slice into 16 squares with a sharp knife, wiping blade clean between cuts.
Notes
Don’t overbake the base; edges should be just golden. Use room temperature ingredients for best results. Chill bars before slicing for clean cuts. Bars taste even better the next day. For a citrus twist, add orange zest to the base and orange juice to the frosting.
Nutrition
- Serving Size: 1 bar
- Calories: 190
- Sugar: 16
- Sodium: 95
- Fat: 10
- Saturated Fat: 6
- Carbohydrates: 24
- Fiber: 1
- Protein: 2
Keywords: cranberry bliss bars, cream cheese frosting, shortbread bars, quick dessert, weeknight baking, cranberry dessert