Love this? Save it for later!
Share the inspiration with your friends
My sister-in-law wasn’t trying to impress anyone. I’d stopped by to return a slow cooker I’d borrowed three months earlier, and the smell of white chocolate hit me before I even got the screen door open. It was a Tuesday afternoon in December, snow melting on my boots, and there she was—standing in her kitchen with melted marshmallow on her thumb, completely unfazed by the fact that she was creating something magical.
“Oh, that,” she said when I asked what she was making. “Just the snowman poop the kids wanted for their class party.” She shrugged like it was nothing. But let me tell you—that first handful was a revelation. The crunch of the cereal, the sweetness of the white chocolate, the little pops of color from the M&Ms. I stood there eating it straight from the bowl while she laughed at me. “You know,” she said, “I’ve been making this for years. It’s the only thing both my kids agree on.”
Honestly, I think that’s when I fell in love with this recipe. Not because it was fancy or complicated, but because it was real. It was a mom solving a problem—what to bring to a winter party that kids would actually eat—and accidentally creating something that would become a family tradition. I asked for the recipe right there, standing in her messy kitchen with her toddler tugging at her apron. She dictated it to me while fishing a stray Cheerio out of her coffee mug. That’s the kind of recipe this is. No pretense. Just pure, crowd-pleasing deliciousness.
I’ve made this Kid-Approved Snowman Poop White Chocolate Snack Mix at least a dozen times since that day. For school parties, for movie nights, for those afternoons when you just need something sweet to get through the witching hour with the kids. And every single time, I think of her standing there, completely casual, making something I’d never forget. Maybe you’ve been there—standing in someone else’s kitchen, watching them make something ordinary feel extraordinary. That’s this recipe. It’s the one you’ll keep coming back to.
Why You’ll Love This Recipe
Let’s be real for a second. Finding a snack that pleases everyone in the family—from the picky preschooler to the snack-obsessed teenager to the tired parent—feels like winning the lottery. This Snowman Poop White Chocolate Snack Mix is that lottery ticket. And the best part? You don’t need a culinary degree or a special grocery trip to make it happen.
- Budget-Friendly Ingredients: Everything in this recipe comes from the regular grocery store. No specialty shops, no expensive imported chocolate. We’re talking cereal, pretzels, marshmallows, and white chocolate chips—stuff you probably already have in your pantry.
- Comes Together in Under 20 Minutes: Seriously. From start to finish, you’re looking at about 15 minutes of active time. That’s faster than a trip through the drive-thru, and way more satisfying.
- Perfect for Any Winter Occasion: Classroom parties, holiday movie nights, snow day treats, or just a Tuesday afternoon—this snack mix fits every scenario. It’s also a lifesaver for last-minute potlucks or neighbor gifts.
- Crowd-Pleaser Guaranteed: I’ve never seen a bowl of this stuff last more than 15 minutes at any gathering. Kids love the sweet crunch, and adults love the nostalgic flavor. It’s the kind of snack that makes people stand around the kitchen island, eating and chatting.
- Unbelievably Easy to Customize: Don’t like one of the mix-ins? Swap it out. Need it nut-free? Easy. Want to make it extra festive? Toss in some seasonal sprinkles. This recipe practically begs you to make it your own.
What makes this version different from all the other white chocolate snack mixes out there? It’s the texture. The combination of crispy cereal, salty pretzels, chewy marshmallows, and creamy white chocolate creates this perfect storm of crunch and sweetness. And the name—well, let’s just say kids find “Snowman Poop” hilarious, which means they’ll actually eat it without you having to beg. That alone is worth the price of admission.
This isn’t just a recipe—it’s a tool in your parenting arsenal. It’s the snack that makes you look like a hero at the school party. It’s the treat that gets your kids excited about a snow day. It’s the thing you throw together when you need something sweet but don’t have the energy for a full baking project. And honestly? It tastes like childhood. Simple, sweet, and completely satisfying.
What Ingredients You Will Need
This recipe uses simple, pantry-friendly ingredients to create a snack that’s greater than the sum of its parts. The beauty of this Snowman Poop White Chocolate Snack Mix is that every ingredient plays a specific role—texture, flavor, or visual appeal—and together they create something irresistible.
For the Base Mix
- 4 cups Rice Chex cereal (or any crispy rice cereal—I prefer Chex because it holds up well without getting soggy)
- 2 cups small pretzel twists or sticks (the salty crunch is essential for balancing the sweetness)
- 1 cup mini marshmallows (these add little pockets of chewiness that kids love)
- 1 cup white chocolate chips (I recommend Ghirardelli or Guittard for the smoothest melt—cheaper brands can seize up)
- ½ cup powdered sugar (this gives the mix that snowy, “poop-like” appearance—yes, that’s the goal)
For the Festive Touch
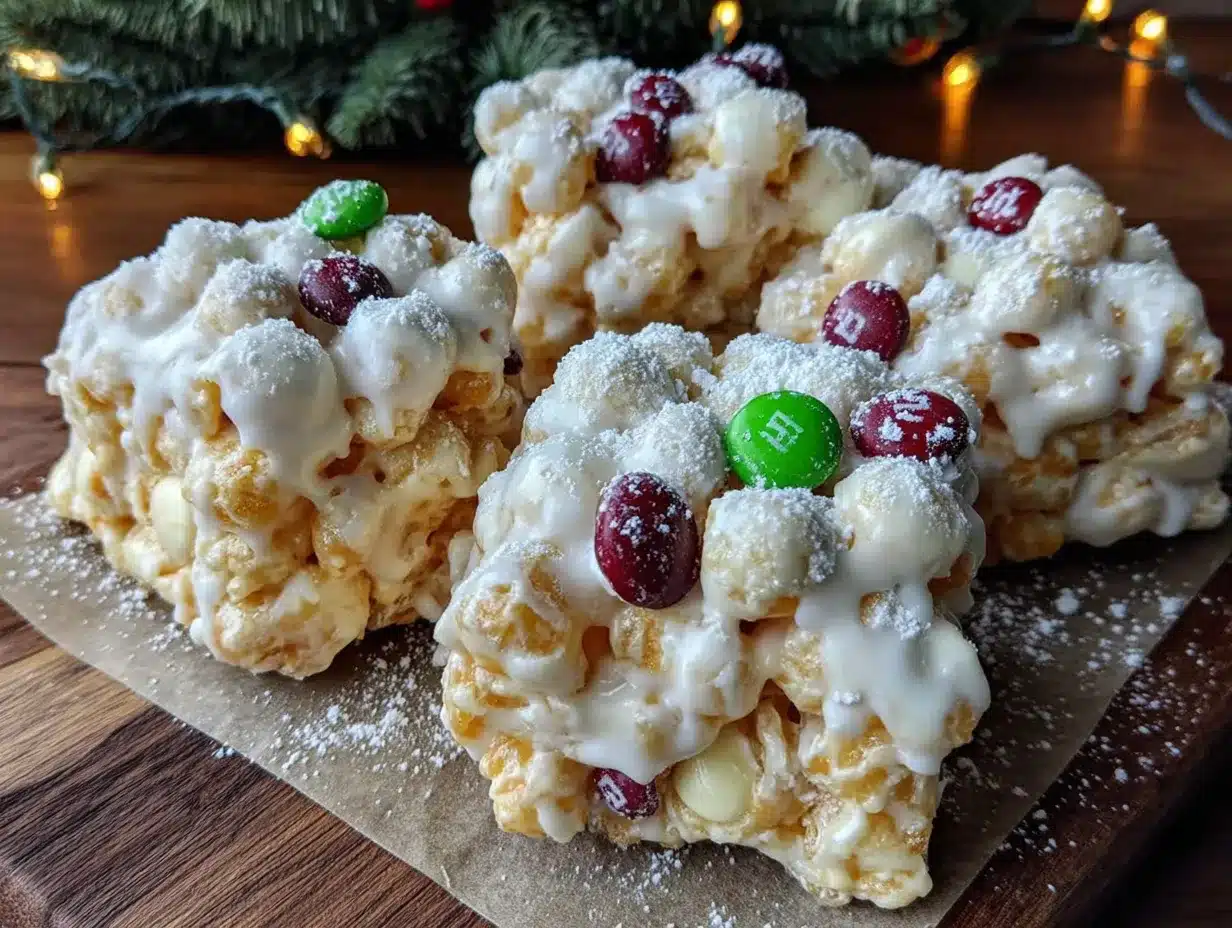
- ½ cup M&Ms (white or pastel colors preferred) (these add color and make it look festive—I use the white chocolate M&Ms when I can find them)
- 2 tablespoons holiday sprinkles (optional) (jimmies work best—nonpareils can bleed color into the white chocolate)
Let me walk you through a few ingredient notes I’ve learned from making this more times than I can count. First, the cereal. Rice Chex is my go-to because it stays crunchy even after being coated in white chocolate. If you use a flakier cereal, it might get soggy. I learned that the hard way when I tried to use corn flakes once—disaster. Stick with the nugget-style cereals.
The white chocolate chips are where you want to spend a little extra attention. Not necessarily money—you don’t need the super expensive stuff—but quality matters. I’ve found that store-brand white chocolate chips sometimes have a waxy texture and don’t melt as smoothly. Ghirardelli is my sweet spot: affordable enough for a big batch but high-quality enough to melt like a dream. If you’re dairy-free, there are some good white chocolate-style chips made with coconut milk that work well, though the flavor is slightly different.
For the M&Ms, I like to use the white or pastel-colored ones when I’m making this for a winter party. They fit the snowman theme perfectly. But honestly, any color works. My kids actually prefer the regular red and green ones during the holidays, and I’ve even used the Valentine’s Day pink and red mix in February. The recipe is flexible like that.
One more thing about the powdered sugar—don’t skip it. I know it sounds weird to coat a sweet snack mix in more sugar, but the powdered sugar does two things. First, it gives the mix that snowy, frosty look that makes it feel like winter. Second, it helps balance the sweetness of the white chocolate so it’s not cloying. Trust me on this one.
Equipment Needed
You don’t need much to make this snack mix, which is part of its charm. Here’s what you’ll need:
- Large microwave-safe bowl (I use a 4-quart glass bowl—big enough to toss everything without spilling)
- Spatula or wooden spoon (for stirring the white chocolate and coating the mix)
- Parchment paper or wax paper (for the mix to set on)
- Baking sheet (to hold the parchment paper while the mix sets)
- Measuring cups and spoons (standard set will do)
- Ziploc bag or airtight container (for storage—if it lasts that long)
If you don’t have a microwave, you can melt the white chocolate in a double boiler on the stovetop. Just be careful not to overheat it—white chocolate burns easily. I’ve ruined more than one batch by walking away for 30 seconds too long. Set a timer, seriously.
For the baking sheet, any size works as long as it fits in your fridge or freezer. I use a half-sheet pan because it’s big enough to spread the mix in a thin layer, which helps it set faster. If you don’t have a baking sheet, you can spread the mix directly on a clean countertop covered in parchment paper. Just make sure the surface is flat.
One budget-friendly tip: you don’t need a fancy silicone spatula for this. A regular wooden spoon works fine. I use an old spatula that’s seen better days, and it does the job perfectly. Save your money for the good white chocolate chips.
Preparation Method
Alright, let’s get to the fun part. This is one of those recipes that’s almost impossible to mess up, but I’ll walk you through every step so you feel confident. The whole process takes about 15 minutes of active time, plus 30 minutes for the mix to set.
- Line a baking sheet with parchment paper or wax paper. This is your landing zone for the finished mix. Make sure the paper is flat and secure—I like to put a little dab of the white chocolate on each corner to hold it in place. Trust me, you don’t want the paper sliding around when you’re trying to spread the mix.
- Combine the dry ingredients in a large bowl. Add the Rice Chex cereal, pretzels, and mini marshmallows. Give them a gentle toss with your hands to distribute everything evenly. Don’t add the M&Ms yet—they’ll go in after the white chocolate coating so they don’t get smeared. I learned that one the hard way when I ended up with pink-streaked pretzels.
- Melt the white chocolate chips. Place the white chocolate chips in a microwave-safe bowl. Microwave in 30-second intervals, stirring well after each interval. White chocolate is finicky—it can go from perfectly melted to grainy and burnt in seconds. I usually do 30 seconds, stir, 20 seconds, stir, then 10-second intervals if needed. It should be smooth and completely liquid when you’re done. If it looks thick or lumpy, you’ve overheated it. (Don’t toss it! Add a teaspoon of coconut oil or vegetable shortening and stir—it might smooth out.)
- Pour the melted white chocolate over the dry ingredients. This is where things get a little messy, and that’s okay. Use your spatula to gently fold the white chocolate into the cereal mixture. Work from the bottom up, making sure every piece gets coated. Don’t stir too vigorously or you’ll crush the cereal. I use a folding motion, like I’m making a cake batter. It takes about 2 minutes to get everything evenly coated.
- Add the M&Ms and optional sprinkles. Once the white chocolate is evenly distributed, gently fold in the M&Ms and sprinkles. You want them to stick to the coated pieces, not get buried at the bottom. If you add them too early, the white chocolate will smear the colors. Trust me on the timing here.
- Transfer the mixture to the prepared baking sheet. Spread it out in an even layer. Don’t pack it down—you want some air between the pieces so the white chocolate sets properly. If it’s piled too thick, the center might stay soft and sticky. I like to use my spatula to create a thin, even layer.
- Dust with powdered sugar. This is the step that makes it look like snowman poop—yes, that’s the goal. Use a fine-mesh sieve or a small strainer to sprinkle the powdered sugar evenly over the warm mix. Don’t dump it all in one spot or you’ll get clumps. I do a light, even dusting, then let it sit for a minute before doing a second pass. The powdered sugar will stick to the tacky white chocolate and create that snowy, frosty look.
- Let the mixture set completely. This takes about 30 minutes at room temperature, or 15 minutes in the refrigerator. Don’t rush this step—if you try to break it apart too early, the white chocolate will be soft and everything will stick together in one big clump. I know it’s tempting to dig in, but patience pays off here. The mix should feel firm and the white chocolate should be set when you touch it.
- Break into pieces. Once set, use your hands to break the mixture into bite-sized clusters. Don’t worry about making them uniform—the irregular pieces are part of the charm. Some will be bigger, some smaller. That’s how it should be.
A few sensory cues to watch for: when you’re folding the white chocolate, you should hear a slight “swoosh” sound as the warm coating hits the cereal. The mixture should look glossy and wet, not dry or patchy. When you dust with powdered sugar, you want to see a light, even snow-like coating—not so much that it looks like a blizzard. And when the mix is set, it should break with a clean snap, not bend or stretch.
Cooking Tips & Techniques
After making this Snowman Poop White Chocolate Snack Mix more times than I care to count, I’ve collected a few tips that make the process smoother and the results better. Let me share what I’ve learned—including the mistakes.
Don’t overheat the white chocolate. This is the number one mistake people make. White chocolate has a lower melting point than milk or dark chocolate, and it seizes up when overheated. If your melted chocolate looks thick, grainy, or lumpy, you’ve gone too far. Next time, try microwaving at 50% power instead of full power—it takes a little longer but gives you more control. And always, always stir between intervals. No exceptions.
Work quickly once the chocolate is melted. White chocolate starts to set as it cools, so you want to coat the dry ingredients and get everything onto the baking sheet within a few minutes. If the mixture starts to look dry before you’ve finished coating, pop the bowl in the microwave for 10 seconds to rewarm it. Don’t do this more than once, though, or the chocolate will degrade.
Use room-temperature ingredients. Cold cereal and cold pretzels can cause the white chocolate to seize up or set too quickly. I like to let my ingredients sit out on the counter for about 15 minutes before I start. It’s a small step that makes a big difference in how smoothly everything comes together.
Don’t skip the parchment paper. I know it’s tempting to spread the mix directly on the baking sheet, but the white chocolate will stick. Parchment paper makes cleanup a breeze and ensures your mix comes off cleanly. Wax paper works in a pinch, but it can stick if the white chocolate gets too warm. Parchment is the safer bet.
Let it set completely before breaking. I’ve ruined more batches than I’d like to admit by getting impatient. If you try to break the mix while it’s still warm, you’ll end up with a sticky, clumpy mess. The white chocolate needs time to crystallize and firm up. Thirty minutes at room temperature is the minimum—longer if your kitchen is warm. If you’re in a hurry, pop it in the fridge for 15 minutes, but watch it carefully. Too long in the fridge can cause condensation, which makes the mix sticky.
One failure I’ll never forget: I once tried to double the recipe and melt the white chocolate in a huge bowl. It took forever to melt evenly, and by the time I got it smooth, the first batch of cereal had already started to absorb moisture from the air. The result was a soggy, clumpy mess that no one would eat. Now I always make single batches—or if I need more, I make two separate batches and combine them after they’ve set. Lesson learned.
Variations & Adaptations
One of the best things about this snack mix is how adaptable it is. Here are some variations I’ve tried and loved:
Dietary Variations
- Gluten-Free Version: Use gluten-free pretzels and check that your cereal is certified gluten-free. Most Rice Chex is gluten-free, but always double-check the label. This is an easy swap that doesn’t change the flavor at all.
- Dairy-Free Version: Use dairy-free white chocolate chips (Enjoy Life makes a good one) and dairy-free M&Ms. The texture will be slightly different—dairy-free white chocolate tends to be a bit softer—but the taste is still fantastic.
- Nut-Free Version: This recipe is naturally nut-free as written, which makes it perfect for school parties. Just double-check that all your ingredients are processed in nut-free facilities if allergies are a concern.
Flavor Twists
- Peppermint Snowman Poop: Add ½ teaspoon of peppermint extract to the melted white chocolate and top with crushed candy canes instead of sprinkles. This is my favorite holiday version—it tastes like a candy cane in snack form.
- Chocolate Lovers Version: Swap the white chocolate for milk or dark chocolate chips. The look changes completely, but the taste is incredible. My husband actually prefers this version.
- Cookie Butter Snowman Poop: Swirl 2 tablespoons of cookie butter (like Biscoff spread) into the melted white chocolate before coating the mix. It adds a subtle spiced flavor that’s absolutely addictive.
Seasonal Adaptations
- Spring/Easter Version: Use pastel M&Ms and add mini marshmallow bunnies or chicks. The pastel colors make it feel fresh and springy.
- Summer Version: Swap the pretzels for goldfish crackers and use red, white, and blue M&Ms for the Fourth of July. It’s a fun, salty-sweet twist.
- Fall Version: Add ½ cup of roasted pumpkin seeds and use autumn-colored M&Ms. The pumpkin seeds add a nice crunch and make it feel seasonal.
My personal favorite variation? The peppermint one. I stumbled on it by accident when I was trying to use up leftover candy canes after Christmas. The crushed candy cane adds a satisfying crunch and a cool, minty finish that cuts through the sweetness of the white chocolate. It’s become my go-to for holiday parties, and I’ve had multiple people ask for the recipe. Try it—you won’t be disappointed.
Serving & Storage Suggestions
This snack mix is incredibly versatile when it comes to serving. Here’s how I like to do it:
Serving Temperature and Presentation: Serve the mix at room temperature in a large bowl or individual cups. For parties, I like to use clear plastic cups tied with a ribbon—it makes for easy grab-and-go servings and looks festive. For a classroom party, portion it into small cellophane bags tied with twist ties. Kids love having their own little bag of treats.
Complementary Dishes or Beverages: This snack pairs beautifully with hot chocolate, coffee, or a cold glass of milk. If you’re serving it at a party, set it out alongside other sweet treats like cookies or brownies. It also works great as a topping for ice cream sundaes—just crush it up and sprinkle it over vanilla ice cream for an easy dessert.
Storage Instructions: Store the snack mix in an airtight container at room temperature for up to 1 week. Do not refrigerate—the moisture in the fridge can make the white chocolate sticky and the cereal soggy. If your kitchen is warm, you can store it in a cool, dark pantry. I use a large mason jar or a ziploc bag with the air squeezed out.
Freezer Instructions: You can freeze this mix for up to 3 months. Place it in a freezer-safe ziploc bag, squeeze out as much air as possible, and lay it flat in the freezer. To serve, let it thaw at room temperature for about 30 minutes. The texture might be slightly softer after freezing, but it’s still delicious. I’ve done this for holiday parties when I wanted to get ahead on prep.
How Flavors Develop Over Time: Honestly, this mix is best within the first 2-3 days. The cereal stays crunchy, the white chocolate is firm, and everything tastes fresh. After that, the cereal starts to soften slightly as it absorbs moisture from the marshmallows and the air. It’s still good—just not as crunchy. If you’re making it for a party, try to make it no more than 2 days in advance for the best texture.
Nutritional Information & Benefits
Let’s be honest—this is a treat, not a health food. But here’s what you should know:
Estimated Nutritional Values (per ½ cup serving):
- Calories: 220
- Total Fat: 9g
- Saturated Fat: 5g
- Carbohydrates: 34g
- Sugar: 22g
- Protein: 2g
- Sodium: 180mg
Health Benefits of Key Ingredients: While this is definitely a sweet treat, it’s not entirely without redeeming qualities. The Rice Chex cereal provides some iron and B vitamins. Pretzels offer a small amount of sodium for electrolyte balance. And white chocolate contains calcium from the milk solids. But let’s not kid ourselves—the main benefit here is joy. And sometimes, that’s exactly what you need.
Dietary Considerations: This recipe is naturally nut-free and can easily be made gluten-free and dairy-free with simple substitutions. It contains dairy (white chocolate) and gluten (pretzels) in its standard form. Always check labels if you’re serving to someone with allergies.
My Personal Wellness Perspective: I believe in balance. This snack mix isn’t something you eat every day—it’s a treat for special occasions, school parties, or cozy winter nights. And that’s okay. Food is about more than just nutrition; it’s about connection, celebration, and joy. When I make this for my family, I focus on the laughter and the memories, not the sugar content. A little indulgence now and then is part of a happy life.
Conclusion
This Kid-Approved Snowman Poop White Chocolate Snack Mix is the kind of recipe that becomes a tradition. It’s simple enough to throw together on a busy afternoon, special enough to bring to a party, and delicious enough that everyone asks for the recipe. The combination of crunchy cereal, salty pretzels, chewy marshmallows, and creamy white chocolate is absolutely irresistible—and the silly name makes it even more fun.
I love that this recipe started in a real kitchen, made by a real mom who wasn’t trying to impress anyone. It’s a reminder that the best recipes often come from the most ordinary moments. And honestly? That’s what makes them special. This isn’t a fussy, complicated dessert that requires special equipment or rare ingredients. It’s a simple, joyful snack that brings people together.
I encourage you to make this your own. Try the peppermint version for the holidays. Swap in different mix-ins based on what you have in your pantry. Make it with your kids on a snow day and let them help with the sprinkles. The beauty of this recipe is that it’s forgiving—it doesn’t care if you’re precise or if you improvise. It just wants to be delicious.
So go ahead—make a batch. Share it with someone you love. And when they ask for the recipe, smile and tell them the story of how you found it. Because that’s what makes food special—not just the ingredients, but the memories we create around them. I’d love to hear how your version turns out! Drop a comment below and let me know what mix-ins you used, or tag me in your photos. Happy snacking!
Frequently Asked Questions
Can I make this snack mix ahead of time?
Absolutely! You can make this up to 2 days in advance for the best texture. Store it in an airtight container at room temperature, and it will stay fresh and crunchy. If you need to make it further ahead, you can freeze it for up to 3 months—just let it thaw at room temperature before serving.
Why did my white chocolate seize up?
White chocolate seizes when it gets too hot or when moisture gets into the melted chocolate. Always melt it in short intervals (30 seconds at a time) and stir well between each interval. If a few drops of water get into the bowl, it can cause the chocolate to become grainy and thick. If this happens, try stirring in a teaspoon of coconut oil or vegetable shortening to smooth it out.
Can I use a different cereal?
Yes, but choose wisely. Crispy rice cereal (like Rice Chex) works best because it holds its shape and stays crunchy. Avoid flaky cereals like corn flakes, which can get soggy. You can also try Cheerios, Crispix, or even a combination of cereals for different textures.
How do I make this recipe nut-free for school parties?
This recipe is naturally nut-free as written, but always check the labels on your ingredients. Some brands of white chocolate chips are processed in facilities that also handle nuts. Look for brands that specifically state they’re nut-free, and double-check your cereal and pretzel labels too. When in doubt, contact the manufacturer directly.
Can I double this recipe?
Technically yes, but I recommend making two separate batches rather than one giant one. The white chocolate is harder to melt evenly in large quantities, and the coating process becomes unwieldy. Make one batch, let it set, then make the second batch. You can combine them after they’ve set if you want to store them together.
Pin This Recipe!
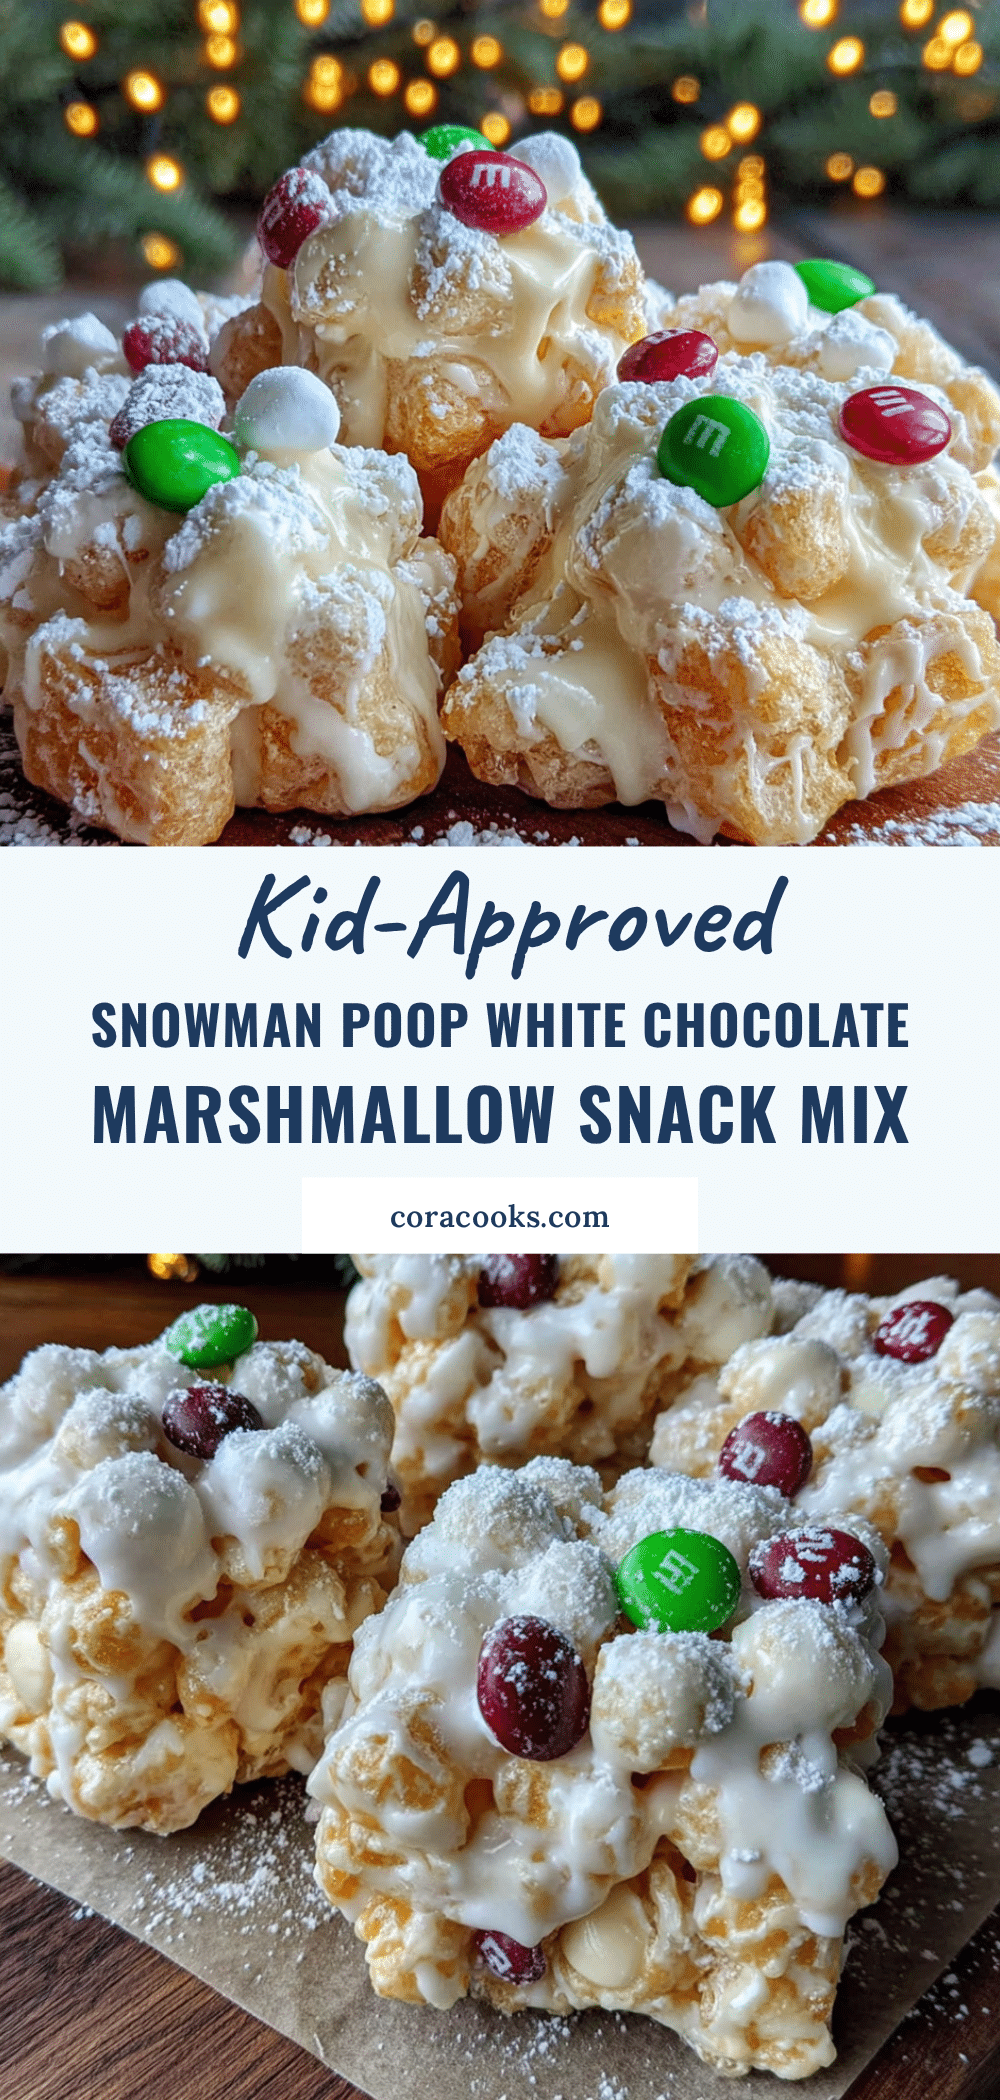
Kid-Approved Snowman Poop Snack Mix Recipe

A fun and easy white chocolate snack mix with crispy cereal, salty pretzels, chewy marshmallows, and colorful M&Ms. Perfect for winter parties, school events, or cozy nights in.
- Prep Time: 15 minutes
- Cook Time: 0 minutes
- Total Time: 45 minutes
- Yield: 8 servings 1x
- Category: Snack
- Cuisine: American
Ingredients
- 4 cups Rice Chex cereal
- 2 cups small pretzel twists or sticks
- 1 cup mini marshmallows
- 1 cup white chocolate chips
- ½ cup powdered sugar
- ½ cup M&Ms (white or pastel colors preferred)
- 2 tablespoons holiday sprinkles (optional)
Instructions
- Line a baking sheet with parchment paper or wax paper.
- Combine the dry ingredients in a large bowl: Rice Chex cereal, pretzels, and mini marshmallows. Toss gently to distribute evenly.
- Melt the white chocolate chips in a microwave-safe bowl in 30-second intervals, stirring well after each interval, until smooth and completely liquid.
- Pour the melted white chocolate over the dry ingredients. Use a spatula to gently fold the white chocolate into the cereal mixture until every piece is evenly coated.
- Gently fold in the M&Ms and optional sprinkles.
- Transfer the mixture to the prepared baking sheet and spread it out in an even layer.
- Dust with powdered sugar using a fine-mesh sieve or small strainer, applying a light, even coating.
- Let the mixture set completely at room temperature for about 30 minutes, or 15 minutes in the refrigerator.
- Once set, break into bite-sized clusters with your hands.
Notes
Don’t overheat the white chocolate; melt in short intervals. Work quickly once chocolate is melted. Use room-temperature ingredients for best results. Let mix set completely before breaking apart. Store in an airtight container at room temperature for up to 1 week. Can be frozen for up to 3 months.
Nutrition
- Serving Size: ½ cup
- Calories: 220
- Sugar: 22
- Sodium: 180
- Fat: 9
- Saturated Fat: 5
- Carbohydrates: 34
- Protein: 2
Keywords: snowman poop, white chocolate snack mix, winter snack, kid-friendly, party snack, easy snack mix