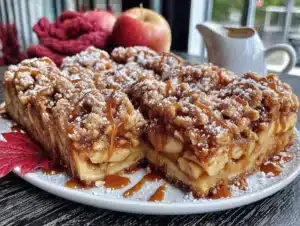
Love this? Save it for later!
Share the inspiration with your friends
This was supposed to be a traditional apple pie. I had the all-butter crust recipe memorized, the fancy lattice strips planned out, and even a new pie dish I’d been saving for a special occasion. Friendsgiving was in two days, and I was determined to bring the showstopper dessert. But somewhere between the flour dusting and the third glass of wine I was stress-drinking while prepping, everything went sideways. I grabbed the wrong measuring cup—the one for liquids instead of dry—and dumped what felt like a waterfall of ice water into my beautiful flour mixture. The dough turned into a sticky, hopeless mess that no amount of extra flour could fix. I was already running late, my kitchen looked like a flour bomb had exploded, and I sat down on the floor, ready to call for takeout pies.
Then I looked at the bowl of sliced apples I’d already tossed with cinnamon and sugar, and the bag of oats sitting on the counter. And honestly? A tiny, stubborn voice in my head said, “Just throw it all in a pan and see what happens.” So I did. I pressed what was left of the dough into the bottom of a baking dish, layered the apples on top, and made a quick oat crumble with butter and brown sugar because, you know, crumble fixes everything. I slid it into the oven without much hope. What came out was nothing like the plan—and better. The bars were perfectly golden, the oat topping was crunchy and buttery, and the apples were soft and jammy in a way that felt like a hug. My Friendsgiving crew devoured the entire pan in about ten minutes, and someone actually asked for the recipe. Maybe you’ve been there—the moment a kitchen disaster turns into something you secretly love more than the original. That’s this recipe. It’s the happy accident I keep making on purpose now.
Why You’ll Love This Recipe
Let me tell you, these apple pie bars aren’t just another dessert. They’re the kind of thing that makes people close their eyes after the first bite. I’ve tested this recipe about six times now, tweaking the oat-to-butter ratio and the apple thickness until it was just right. Here’s why I think you’ll fall for them too:
- Quick & Easy: No rolling out dough, no chilling for hours. You can have these in the oven in about 20 minutes flat. Perfect for when you’re juggling a million Friendsgiving dishes.
- Simple Ingredients: You probably have everything in your pantry right now—flour, oats, butter, apples, sugar. No fancy grocery store trips required.
- Perfect for Friendsgiving: These bars are portable, easy to cut, and feed a crowd without needing plates and forks. Just grab a bar and go.
- Crowd-Pleaser: I’ve served them to kids, picky eaters, and my aunt who “doesn’t do dessert.” The pan was empty every single time.
- Unbelievably Delicious: The combination of a buttery shortbread crust, soft cinnamon apples, and a crunchy oat crumble is next-level comfort food. It’s like apple pie’s laid-back, more approachable cousin.
What makes these bars different from every other apple dessert out there? It’s the texture. The crust stays firm and crumbly, the apples get tender but not mushy, and the oat crumble adds this incredible crunch that pie crust just can’t match. Plus, there’s no fussing with lattice tops or crimping edges. I mean, who has time for that on a busy Friendsgiving morning?
This recipe isn’t just good—it’s the kind that makes you feel warm and cozy from the inside out. It’s comfort food at its finest, without the stress. Perfect for impressing your friends without spending all day in the kitchen.
What Ingredients You Will Need
This recipe uses simple, wholesome ingredients to deliver big flavor without any complicated steps. Most of these are pantry staples, so you can whip these up anytime the craving hits. Here’s what you’ll need:
For the Shortbread Crust
- 1 ½ cups all-purpose flour (I use King Arthur for best texture)
- ½ cup granulated sugar
- ½ teaspoon salt
- ¾ cup unsalted butter, cold and cut into small cubes (adds richness)
For the Apple Filling
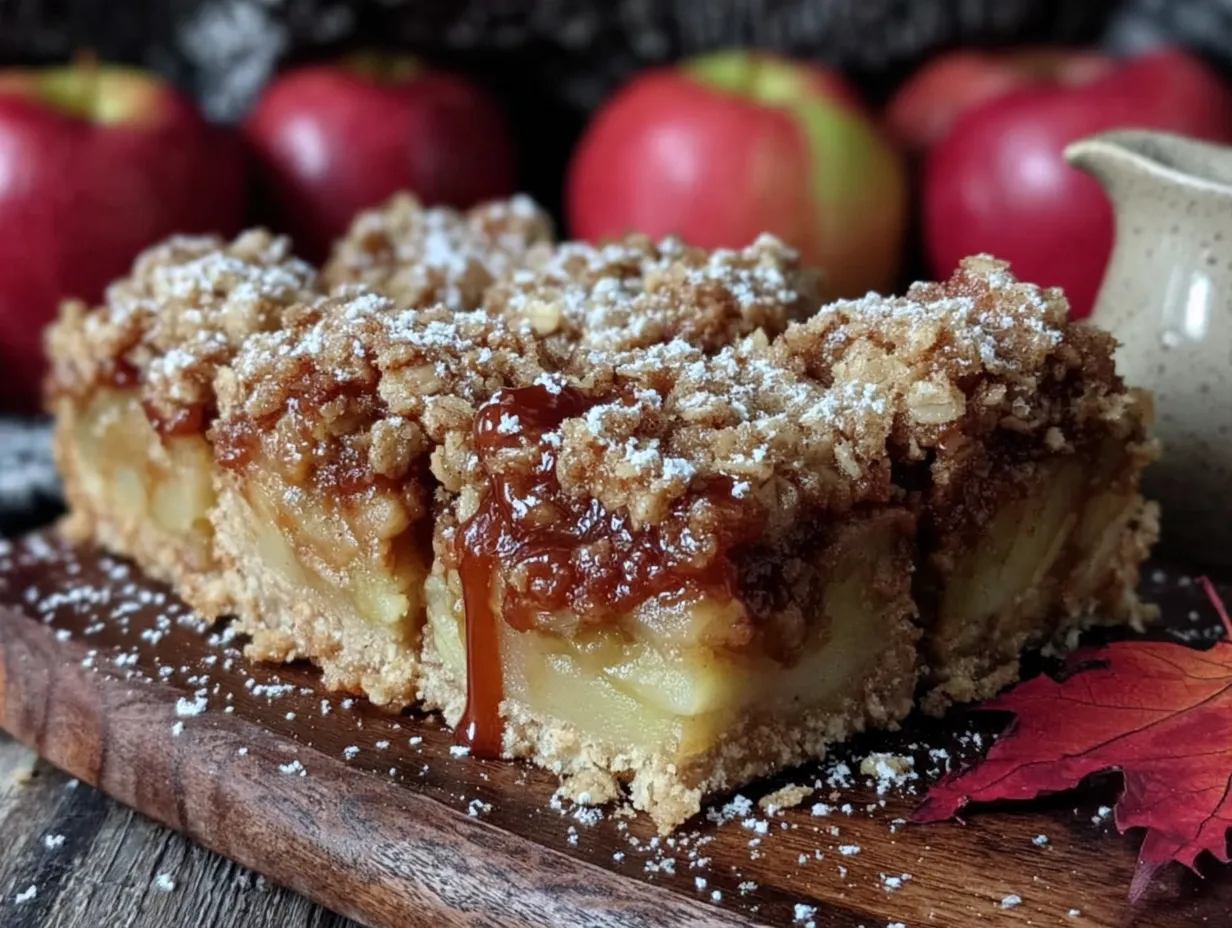
- 4 cups peeled and sliced apples (about 4 medium apples; I prefer Honeycrisp or Granny Smith for balance)
- ¼ cup granulated sugar
- 2 tablespoons brown sugar, packed
- 1 tablespoon lemon juice (keeps apples from browning and adds brightness)
- 1 teaspoon ground cinnamon
- ¼ teaspoon ground nutmeg
- 2 tablespoons cornstarch (helps thicken the filling)
For the Oat Crumble Topping
- 1 cup old-fashioned rolled oats (not quick oats; they get mushier)
- ½ cup all-purpose flour
- ½ cup brown sugar, packed
- ½ teaspoon ground cinnamon
- ¼ teaspoon salt
- ½ cup unsalted butter, melted (use dairy-free butter if needed)
A few ingredient notes from my testing: I recommend using a mix of tart and sweet apples for the best flavor. Granny Smith holds its shape well, while Honeycrisp adds natural sweetness. If you only have one type, that’s totally fine—just adjust the sugar slightly. For the oats, stick with old-fashioned rolled oats. I tried quick oats once, and the topping turned out more like paste than crumble. Not great. Also, make sure your butter for the crust is really cold. Like, straight-from-the-fridge cold. It makes the crust flakier and more tender.
If you’re gluten-free, you can swap the all-purpose flour with a 1:1 gluten-free baking flour blend. I’ve tested it with Bob’s Red Mill, and it works great. For a dairy-free version, use vegan butter sticks—not the spreadable kind in a tub. The water content is different and can mess with the texture.
Equipment Needed
You don’t need a fancy kitchen to make these bars. Here’s what I use:
- 9×13-inch baking pan – This is the perfect size for a generous batch. A metal pan gives a crisper crust than glass.
- Parchment paper – Line your pan with it, leaving some overhang. This makes lifting the bars out so much easier. Trust me, I learned the hard way.
- Mixing bowls – You’ll need a few: one for the crust, one for the apples, and one for the crumble.
- Pastry cutter or fork – For cutting the cold butter into the flour for the crust. You can also use your fingers, but a pastry cutter is faster and less messy.
- Sharp knife and cutting board – For slicing the apples. A good peeler helps too.
- Measuring cups and spoons – Accuracy matters, especially for the cornstarch and spices.
- Oven – Preheated to 350°F (175°C).
If you don’t have a pastry cutter, don’t stress. Two forks work perfectly fine. And if your baking pan is slightly smaller or larger, just adjust the baking time by a few minutes. I’ve used a 9×9-inch pan before, and the bars were just a bit thicker—still delicious.
Preparation Method
Alright, let’s get to the fun part. Here’s how to make these cozy apple pie bars, step by step. I’ve added some sensory cues and little tips I’ve picked up along the way.
- Preheat your oven to 350°F (175°C). Line your 9×13-inch baking pan with parchment paper, leaving about 2 inches of overhang on the long sides. This will be your “handle” for lifting the bars out later.
- Make the shortbread crust. In a medium mixing bowl, whisk together the flour, granulated sugar, and salt. Add the cold, cubed butter. Use a pastry cutter or two forks to cut the butter into the flour mixture until it looks like coarse sand with some pea-sized butter pieces remaining. Don’t overwork it—those little butter bits create a flaky texture. Press the mixture firmly and evenly into the bottom of your prepared pan. I use the bottom of a measuring cup to really pack it down. Bake for 15 minutes, until the edges are just barely golden. The surface should look dry and set. Set aside to cool slightly while you make the filling.
- Prepare the apple filling. In a large bowl, toss the sliced apples with lemon juice first—this prevents browning. Then add the granulated sugar, brown sugar, cinnamon, nutmeg, and cornstarch. Mix well with your hands or a spatula until every slice is coated. Let it sit for about 5 minutes. You’ll notice the apples start to release some juice. That’s good—the cornstarch will thicken it as it bakes. The mixture should look glossy and smell like fall in a bowl.
- Make the oat crumble topping. In a separate bowl, combine the rolled oats, flour, brown sugar, cinnamon, and salt. Pour the melted butter over the dry ingredients and stir with a fork until everything is moistened and clumps together. It should look like wet sand with some larger crumbles. If it looks too dry, add another tablespoon of melted butter. If it’s too wet, add a tablespoon more oats.
- Assemble the bars. Spread the apple mixture evenly over the pre-baked crust. Don’t worry if it looks piled high—it will shrink down as it bakes. Sprinkle the oat crumble topping evenly over the apples, covering them completely. I like to use my fingers to drop clumps of the crumble for a more rustic look.
- Bake. Place the pan in the preheated oven and bake for 35-40 minutes. The bars are done when the topping is deep golden brown and the apple filling is bubbly around the edges. You should see thick, syrupy bubbles—not thin, watery ones. If the topping is browning too quickly but the filling isn’t bubbly yet, tent the pan loosely with foil for the last 10 minutes.
- Cool completely before cutting. This is the hardest part, I know. But if you cut them warm, the filling will run everywhere and the bars will fall apart. Let them cool in the pan on a wire rack for at least 2 hours. For clean, sharp slices, refrigerate for another hour before cutting. Use the parchment overhang to lift the whole block out onto a cutting board. Slice into squares or rectangles with a sharp knife.
A quick note: The first time I made these, I was so impatient that I cut into them after 30 minutes. It was a delicious, soupy mess. Learn from my mistake. Patience pays off here.
Cooking Tips & Techniques
I’ve made these bars more times than I care to count, and I’ve picked up a few tricks along the way. Here’s what I wish someone had told me:
Don’t skip the lemon juice. I know it seems like a small thing, but it does two jobs: it keeps the apples from turning brown while you prep, and it balances the sweetness. Without it, the bars can taste one-note sweet.
Slice your apples evenly. Aim for about ¼-inch thick slices. If they’re too thick, they won’t soften enough in the baking time. Too thin, and they turn into applesauce. I learned this the hard way when I got distracted and sliced them paper-thin. The filling was more like jam than chunky apples.
Use a metal pan if you have one. Glass and ceramic pans retain heat differently and can make the crust less crispy. A metal pan gives you that golden, buttery bottom that’s worth the effort. If you only have glass, increase the baking time by 5-7 minutes and keep an eye on the bottom crust.
Let the bars cool completely. I know I said this already, but it’s that important. The filling needs time to set up. If you’re in a rush, pop the pan in the fridge for an hour after it’s cooled to room temperature. The bars will slice like a dream.
Toast your oats first for extra flavor. This is a pro tip I picked up from a pastry chef friend. Spread the oats on a baking sheet and toast them at 350°F for 5-7 minutes before making the crumble. It adds a nutty depth that takes these bars to another level.
Multitask like a pro. While the crust is pre-baking, prep your apple filling and crumble topping. That way, everything is ready to go as soon as the crust comes out. It makes the assembly feel quick and easy.
Variations & Adaptations
One of the best things about this recipe is how flexible it is. Here are some ways to make it your own:
Gluten-Free Version: Swap the all-purpose flour in both the crust and the crumble with a 1:1 gluten-free baking flour blend. Make sure your oats are certified gluten-free. I’ve tested this with my celiac friend, and she said it was the best dessert she’d had in years. The texture is slightly more delicate, so let it cool completely before slicing.
Vegan Version: Use vegan butter sticks (like Earth Balance) in both the crust and the crumble. The crust will be a bit softer, so press it firmly into the pan. Everything else stays the same. I served this at a Friendsgiving with vegan friends, and they couldn’t tell the difference.
Seasonal Fruit Swap: In the summer, swap apples for sliced peaches or nectarines. Reduce the sugar by a tablespoon since stone fruits are sweeter. In the fall, try a mix of apples and pears. The pears add a lovely, soft texture. I made a pear version last November, and it was a hit.
Spice It Up: Add ¼ teaspoon of cardamom or ginger to the apple filling for a warm, aromatic twist. Or use apple pie spice instead of cinnamon and nutmeg. I once added a pinch of cloves, and it gave the bars a holiday-spice vibe that was perfect for Christmas.
Nutty Crunch: Add ½ cup of chopped pecans or walnuts to the oat crumble. Toast them first for extra flavor. My husband loves this version—he says it makes the bars feel more “bakery-quality.”
Caramel Drizzle: After the bars have cooled, drizzle them with store-bought or homemade caramel sauce. It’s extra, but sometimes you need extra. I did this for a birthday party, and people went absolutely wild.
Serving & Storage Suggestions
These apple pie bars are incredibly versatile when it comes to serving. Here’s how I like to enjoy them:
Serving Temperature: They’re delicious at room temperature, but I also love them slightly warm. If you want to serve them warm, pop individual bars in the microwave for 10-15 seconds. The filling gets all soft and gooey again. For a special treat, serve them with a scoop of vanilla ice cream or a dollop of whipped cream. The cold creaminess against the warm, spiced apples is just perfect.
Presentation: Arrange the bars on a wooden board or a pretty platter. Dust them lightly with powdered sugar for a bakery-style finish. I sometimes add a few fresh thyme or rosemary sprigs around the board for a rustic, fall look. It’s simple but impressive.
Complementary Dishes: These bars pair beautifully with a hot cup of coffee, spiced chai, or apple cider. For a full Friendsgiving spread, serve them alongside a pumpkin cheesecake bars or a cranberry orange scones for a dessert table that has something for everyone.
Storage: Store leftover bars in an airtight container at room temperature for up to 3 days. If your kitchen is warm, refrigerate them—the filling can get a bit soft otherwise. Layer them with parchment paper between the bars to prevent sticking.
Freezing: These bars freeze beautifully. Once they’re completely cooled and cut, place them on a baking sheet in a single layer and freeze for 1 hour. Then transfer them to a freezer-safe container or zip-top bag, with parchment between layers. They’ll keep for up to 3 months. To thaw, leave them at room temperature for about an hour, or warm them in a 300°F oven for 10 minutes.
Flavor Development: Honestly, these bars taste even better the next day. The flavors meld together overnight, and the crust absorbs a bit of the apple juices, making everything more cohesive. So don’t be afraid to make them a day ahead—your future self will thank you.
Nutritional Information & Benefits
While these are definitely a treat, there are a few redeeming qualities worth noting. Here’s the estimated nutrition for one bar (based on 12 servings):
| Nutrient | Amount per Bar |
|---|---|
| Calories | 320 |
| Total Fat | 16g |
| Saturated Fat | 10g |
| Carbohydrates | 44g |
| Fiber | 3g |
| Sugar | 26g |
| Protein | 3g |
Health Benefits: Apples are a great source of fiber and vitamin C. The oats in the crumble provide soluble fiber, which is good for heart health. Cinnamon has anti-inflammatory properties and can help regulate blood sugar. So while these bars are definitely a dessert, they’re not totally empty calories. I like to think of them as a “happy medium” treat—satisfying enough that you don’t feel deprived, but not so over-the-top that you regret it.
Dietary Considerations: This recipe is vegetarian. For gluten-free and vegan options, see the variations section above. The bars contain dairy (butter) and gluten (flour and oats). If you’re avoiding nuts, skip the pecan variation.
Personal Perspective: I believe in enjoying food without guilt. These bars are made for celebration and connection—Friendsgiving is about gathering with people you love. One bar isn’t going to derail your health goals. It’s going to make your evening a little sweeter. And that’s a good thing.
Conclusion
So there you have it—my happy accident turned favorite dessert. These cozy Friendsgiving apple pie bars with oat crumble are everything I love about fall baking: simple, forgiving, and absolutely delicious. They started as a kitchen disaster, but now they’re the recipe I bring to every gathering. There’s something special about a dessert that doesn’t take itself too seriously but still manages to impress everyone who tries it.
I really hope you give these a try. Don’t be afraid to make them your own—swap the apples, add some nuts, drizzle on the caramel. The best recipes are the ones you tweak until they feel like yours. And honestly, if you mess up? Just call it a happy accident. It might turn out even better than you planned.
When you make these bars, I’d love to hear about it. Leave a comment below and tell me how they turned out, or share your own kitchen disaster-turned-triumph story. And if you’re looking for more cozy fall desserts, check out my apple cider donut cake or maple pecan scones. Happy baking, friends. I hope these bars bring a little warmth and sweetness to your Friendsgiving table.
Frequently Asked Questions
Can I use pre-made pie filling instead of fresh apples?
You can, but I don’t recommend it. Canned pie filling is usually too soft and sweet, and it lacks the texture of fresh apples. The bars will turn out mushy. Fresh apples give you that perfect balance of tender and firm. If you’re short on time, you can use frozen sliced apples—just thaw and drain them well before using.
Why did my oat crumble turn out soggy?
This usually happens if the butter is too warm or if you used quick oats instead of old-fashioned rolled oats. Quick oats absorb more moisture and turn pasty. Also, make sure your crumble is evenly distributed over the apples. If it’s piled too thick in some spots, it won’t crisp up properly.
Can I make these bars ahead of time for Friendsgiving?
Absolutely! In fact, I prefer making them a day ahead. The flavors meld together overnight, and the bars slice more cleanly. Just bake, cool completely, cover tightly, and store at room temperature. Add any powdered sugar or caramel drizzle right before serving.
How do I get clean, sharp slices?
Patience is key. Let the bars cool completely—at least 2 hours at room temperature, then 1 hour in the fridge. Use a sharp chef’s knife and wipe it clean between cuts. For extra clean slices, dip the knife in hot water and dry it off before each cut.
Can I double this recipe for a larger crowd?
Yes! Double all the ingredients and bake in a half-sheet pan (about 12×17 inches). You may need to increase the baking time by 5-10 minutes. Keep an eye on the crumble topping—if it’s browning too fast, tent with foil. For a standard 9×13 pan, you can also just make two separate batches.
Pin This Recipe!
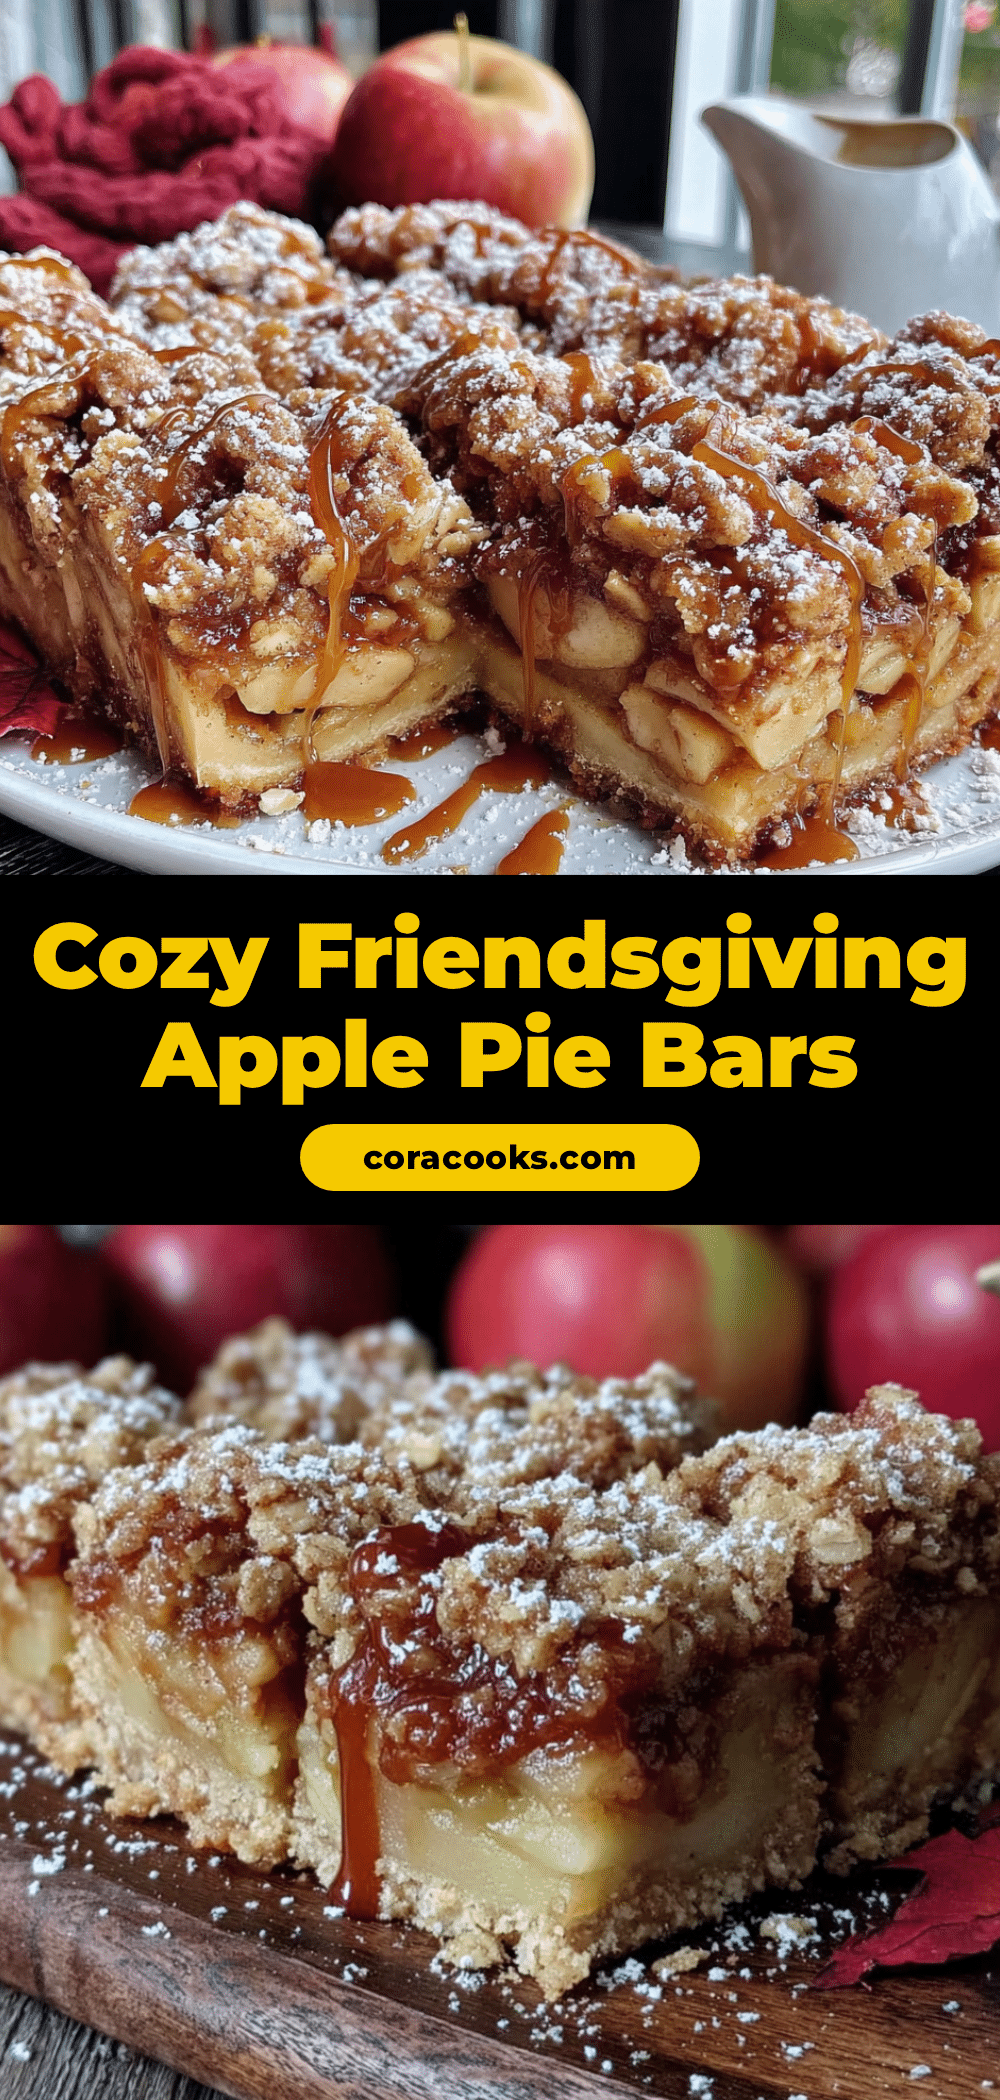
Perfect Cozy Friendsgiving Apple Pie Bars with Oat Crumble
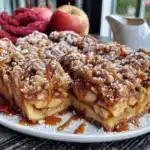
These apple pie bars feature a buttery shortbread crust, a soft cinnamon-spiced apple filling, and a crunchy oat crumble topping. They’re the happy accident that turned into a favorite dessert—easy to make, perfect for sharing, and full of cozy fall flavor.
- Prep Time: 20 minutes
- Cook Time: 35-40 minutes
- Total Time: 55-60 minutes (plus cooling time)
- Yield: 12 servings 1x
- Category: Dessert
- Cuisine: American
Ingredients
- 1 ½ cups all-purpose flour
- ½ cup granulated sugar
- ½ teaspoon salt
- ¾ cup unsalted butter, cold and cut into small cubes
- 4 cups peeled and sliced apples (about 4 medium apples; Honeycrisp or Granny Smith recommended)
- ¼ cup granulated sugar
- 2 tablespoons brown sugar, packed
- 1 tablespoon lemon juice
- 1 teaspoon ground cinnamon
- ¼ teaspoon ground nutmeg
- 2 tablespoons cornstarch
- 1 cup old-fashioned rolled oats
- ½ cup all-purpose flour
- ½ cup brown sugar, packed
- ½ teaspoon ground cinnamon
- ¼ teaspoon salt
- ½ cup unsalted butter, melted
Instructions
- Preheat your oven to 350°F (175°C). Line a 9×13-inch baking pan with parchment paper, leaving about 2 inches of overhang on the long sides.
- Make the shortbread crust: In a medium mixing bowl, whisk together 1 ½ cups flour, ½ cup granulated sugar, and ½ teaspoon salt. Add the cold, cubed butter. Use a pastry cutter or two forks to cut the butter into the flour mixture until it looks like coarse sand with some pea-sized butter pieces remaining. Press the mixture firmly and evenly into the bottom of the prepared pan. Bake for 15 minutes, until the edges are just barely golden. Set aside to cool slightly.
- Prepare the apple filling: In a large bowl, toss the sliced apples with lemon juice. Add ¼ cup granulated sugar, 2 tablespoons brown sugar, 1 teaspoon cinnamon, ¼ teaspoon nutmeg, and 2 tablespoons cornstarch. Mix well until every slice is coated. Let sit for about 5 minutes.
- Make the oat crumble topping: In a separate bowl, combine 1 cup rolled oats, ½ cup flour, ½ cup brown sugar, ½ teaspoon cinnamon, and ¼ teaspoon salt. Pour the melted butter over the dry ingredients and stir with a fork until everything is moistened and clumps together.
- Assemble the bars: Spread the apple mixture evenly over the pre-baked crust. Sprinkle the oat crumble topping evenly over the apples.
- Bake for 35-40 minutes, until the topping is deep golden brown and the apple filling is bubbly around the edges. If the topping browns too quickly, tent loosely with foil for the last 10 minutes.
- Cool completely before cutting: Let cool in the pan on a wire rack for at least 2 hours. For clean slices, refrigerate for another hour before cutting. Use the parchment overhang to lift the block out onto a cutting board. Slice into squares or rectangles.
Notes
For best results, use a mix of tart and sweet apples (e.g., Granny Smith and Honeycrisp). Old-fashioned rolled oats are essential for a crunchy topping. Let bars cool completely before slicing to avoid a soupy mess. Bars taste even better the next day. For gluten-free, use a 1:1 gluten-free flour blend and certified gluten-free oats. For vegan, use vegan butter sticks.
Nutrition
- Serving Size: 1 bar
- Calories: 320
- Sugar: 26
- Fat: 16
- Saturated Fat: 10
- Carbohydrates: 44
- Fiber: 3
- Protein: 3
Keywords: apple pie bars, oat crumble, Friendsgiving dessert, apple dessert, fall baking, easy apple bars