Love this? Save it for later!
Share the inspiration with your friends
My sister-in-law, Jen, wasn’t trying to impress anyone. I’d stopped by on a random Tuesday afternoon to drop off a book she’d lent me, and the smell hit me before I even got the screen door open. It was nutty, warm, and deeply familiar in a way I couldn’t quite place. She was standing at the counter in sweatpants, flour dusted on her favorite worn-out concert t-shirt, casually scraping a pan of melted butter into a mixing bowl.
“What is that smell?” I asked, probably sounding a little too intense for a casual Tuesday visit.
She just shrugged. “Oh, just trying a new cookie thing. I browned the butter.”
Just a new cookie thing. Like it was no big deal. Like she hadn’t just unlocked some kind of secret portal to cookie heaven right there in her modest kitchen. I mean, honestly, I’ve baked a lot of cookies in my life. Hundreds, probably. But I had never thought to brown the butter. It seemed like one of those fussy chef things that took too much time and required a thermometer and a lot of patience I didn’t have.
Jen handed me one straight off the baking sheet—still warm, the chocolate a little melty, the edges perfectly golden. That first bite had this unexpected depth. The brown butter added this toasty, almost caramel-like richness that made the whole thing feel cozy in a way a regular chocolate chip cookie just doesn’t. It was like the cookie version of wrapping your hands around a warm mug on a cold morning. You know that feeling when you taste something and immediately think, “Where has this been my whole life?” Yeah, it was that.
I stood there in her kitchen, eating three more cookies while she told me about her day, and I knew I wasn’t leaving without that recipe. These cozy brown butter chocolate chip cookies have been a staple in my kitchen ever since. They are the cookies I make when I need a little comfort, when the weather turns chilly, or when I just want to make the house smell incredible. And honestly, they are way easier than I ever thought they’d be.
Why You’ll Love This Recipe
Let me tell you why these cozy brown butter chocolate chip cookies are different. I have tested this recipe at least a dozen times—changing the chill time, the ratio of brown to white sugar, even the type of chocolate. This version is the one that makes people close their eyes after the first bite. It is the one my neighbor, who claims she “doesn’t really like sweets,” asked for the recipe to. Twice.
- Unbelievably Rich Flavor: The brown butter adds a nutty, toasty depth that regular cookies just can’t touch. It is the secret ingredient that makes these taste like they came from a fancy bakery.
- Perfectly Chewy Texture: With a slightly crisp edge and a soft, chewy center, these cookies have that ideal texture we all chase. The trick is in the chill time and the ratio of melted butter to flour.
- Simple, Everyday Ingredients: No weird extracts, no specialty flours, no trip to a gourmet store. You probably have everything you need in your pantry right now.
- Perfect for Cozy Season: These are fall and winter cookie champions. They are the ultimate comfort food for chilly evenings, holiday cookie swaps, or lazy Sunday afternoons with a hot cup of coffee.
- Crowd-Pleaser Guaranteed: I have brought these to potlucks, family dinners, and work events. They disappear fast. Kids love them, adults love them, and people who claim they don’t bake will ask you how you did it.
What makes this recipe my best version is the technique. It is not just about browning the butter—it is about how you handle it after. Letting it cool slightly, using the right combination of sugars, and giving the dough time to rest in the fridge. These small steps make a massive difference. This recipe is comfort food reimagined—richer, more complex, but with the same soul-soothing satisfaction of a classic chocolate chip cookie. It is the kind of cookie that makes a regular Tuesday feel special.
What Ingredients You Will Need
This recipe uses simple, wholesome ingredients to deliver that incredible brown butter flavor and the perfect chewy texture. Most of these are pantry staples, so you can whip up a batch whenever the craving hits.
For the Cookies
- 1 cup (2 sticks) unsalted butter – This is the star of the show. Browning the butter transforms it from ordinary to extraordinary. I recommend using a good-quality unsalted butter like Kerrygold or Land O’Lakes for the best flavor.
- ¾ cup granulated sugar – Adds sweetness and helps create those crisp, golden edges.
- ¾ cup packed light brown sugar – This adds moisture, chewiness, and a subtle molasses flavor that pairs beautifully with the brown butter. (You can use dark brown sugar for an even deeper flavor.)
- 2 large eggs – Use room temperature eggs for the best emulsion. If you forgot to take them out of the fridge, just place them in a bowl of warm water for 5 minutes.
- 2 teaspoons vanilla extract – Pure vanilla extract makes a difference here. It enhances the toasty notes of the brown butter.
- 2 ¼ cups all-purpose flour – Spoon and level your flour for the most accurate measurement. Scooping directly from the bag can pack in too much flour and make your cookies dry.
- 1 teaspoon baking soda – Helps the cookies spread and become chewy.
- ½ teaspoon salt – I prefer fine sea salt. It balances the sweetness and enhances all the flavors. If you use salted butter, reduce this to ¼ teaspoon.
- 2 cups semi-sweet chocolate chips or chunks – I love using a mix of semi-sweet chips and dark chocolate chunks for a more complex chocolate experience. Ghirardelli and Guittard are my go-to brands. You can also use milk chocolate or white chocolate if you prefer a sweeter cookie.
- Flaky sea salt for topping (optional but highly recommended) – A sprinkle of flaky salt like Maldon right after baking takes these cookies to another level. It cuts through the richness and adds a lovely little crunch.
Ingredient Selection Tips
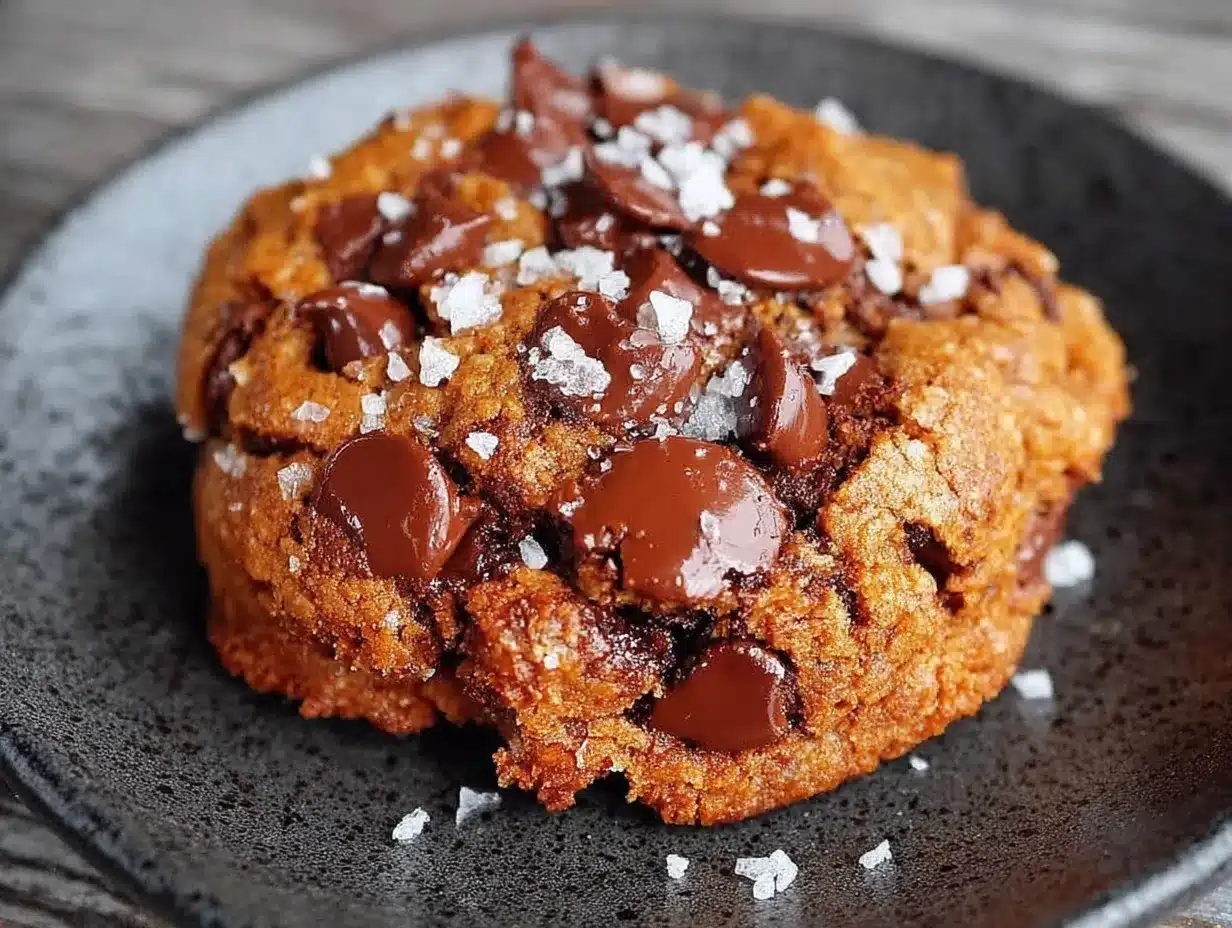
For the best brown butter flavor, use a light-colored pan so you can see the butter change color easily. When it comes to chocolate, skip the low-quality chips. You want chocolate that melts beautifully and has a good cocoa content. I have found that chocolate chunks give you those lovely pools of melted chocolate, while chips hold their shape a bit more. Both work great, so use what you have on hand. If you are baking in the summer, you can swap in some toasted nuts like pecans or walnuts for a seasonal twist.
Equipment Needed
You do not need a fancy kitchen to make these cookies. Here is what you will need:
- A light-colored saucepan or skillet – This is crucial for browning the butter. A dark pan makes it hard to see the color change, and you risk burning the butter. I use a stainless steel saucepan.
- Large mixing bowl – Any large bowl will do. I prefer a glass or ceramic bowl.
- Whisk – For combining the wet ingredients and the dry ingredients.
- Rubber spatula – For folding in the chocolate chips and scraping down the sides of the bowl.
- Baking sheets – I recommend using light-colored, rimmed baking sheets. Dark sheets can cause the bottoms of your cookies to brown too quickly.
- Parchment paper or silicone baking mat – This prevents sticking and makes cleanup a breeze.
- Cookie scoop – A 1.5-tablespoon scoop ensures even-sized cookies that bake uniformly. If you do not have one, you can use two spoons.
- Cooling rack – Allows air to circulate around the cookies so they cool evenly and stay crisp on the outside.
If you do not have a stand mixer, do not worry. A hand mixer or even a good old-fashioned whisk and some elbow grease will work perfectly. I actually prefer mixing these by hand because it is harder to overmix the dough.
Preparation Method
Alright, let’s get baking. This method is broken down into simple steps. Take your time with the butter browning—it is the most important part.
- Brown the butter. Place the 1 cup of unsalted butter in a light-colored saucepan over medium heat. Let it melt completely, then continue cooking, stirring frequently with a whisk or rubber spatula. The butter will start to foam and bubble. After a few minutes, you will see small brown specks forming at the bottom of the pan. The butter will smell nutty and toasty. This takes about 5-7 minutes. Once it is a golden-amber color and smells amazing, immediately remove it from the heat and pour it into a large mixing bowl to stop the cooking process. Do not walk away from it—it can go from perfectly browned to burnt in seconds.
- Cool the browned butter. Let the browned butter cool for about 10-15 minutes. It should be warm but not hot. If it is too hot, it will cook the eggs. You want it to be the temperature of a warm bath. (I learned this the hard way when I scrambled my eggs in the bowl. Not a good look.)
- Mix the sugars and butter. Add the ¾ cup granulated sugar and ¾ cup packed light brown sugar to the cooled browned butter. Whisk vigorously until the mixture is smooth and well combined. It will look like a thick, grainy paste. This takes about a minute.
- Add the eggs and vanilla. Crack in the 2 large eggs and add the 2 teaspoons of vanilla extract. Whisk until the mixture is smooth, glossy, and slightly lighter in color. It should look like a caramel-colored batter. Make sure there are no streaks of egg white.
- Combine the dry ingredients. In a separate medium bowl, whisk together the 2 ¼ cups all-purpose flour, 1 teaspoon baking soda, and ½ teaspoon salt. This ensures the leavening agent and salt are evenly distributed.
- Add the dry ingredients to the wet. Pour the flour mixture into the butter mixture. Using a rubber spatula, fold gently until just combined. A few streaks of flour are okay. Do not overmix, or your cookies will be tough.
- Fold in the chocolate. Add the 2 cups of chocolate chips or chunks. Fold them in gently until they are evenly distributed throughout the dough. The dough will be thick and slightly sticky.
- Chill the dough. This is a non-negotiable step. Cover the bowl with plastic wrap and refrigerate for at least 30 minutes, or up to 72 hours. Chilling the dough solidifies the butter, which prevents the cookies from spreading too much and gives them that perfect chewy texture. I usually chill mine for an hour. The longer it chills, the more the flavors develop.
- Preheat the oven. About 15 minutes before you are ready to bake, preheat your oven to 350°F (175°C). Line your baking sheets with parchment paper.
- Scoop the dough. Use a 1.5-tablespoon cookie scoop to portion out the dough. Roll each portion into a ball and place them on the prepared baking sheets about 2 inches apart. You should get about 24 cookies.
- Bake. Bake for 10-12 minutes, or until the edges are golden brown and the centers look slightly underdone and puffy. They will continue to set on the baking sheet. For softer, chewier cookies, bake on the shorter side. For crispier cookies, bake a minute or two longer. (I always pull mine out at 10 minutes for that perfect soft center.)
- Cool. Let the cookies cool on the baking sheet for 5 minutes. This is important—they are fragile right out of the oven. While they are still warm, sprinkle a little flaky sea salt on top if you are using it. Then transfer them to a wire cooling rack to cool completely.
Cooking Tips & Techniques
I have made these cozy brown butter chocolate chip cookies more times than I can count, and I have made every mistake in the book. Here is what I have learned so you do not have to.
The biggest mistake is burning the butter. I did it the first time I tried. I got distracted by a phone call, and by the time I looked back, the butter was dark brown and smelled bitter. It ruined the whole batch. The key is to keep a close eye on it. Use a light-colored pan and stir constantly. Once you see those brown specks and smell that nutty aroma, get it off the heat immediately.
Do not skip the chill time. I know it is tempting to just scoop and bake, but trust me on this. If you bake the dough straight away, the cookies will spread into thin, greasy pucks. Chilling the dough solidifies the butter, which means the cookies will hold their shape better and have a thicker, chewier texture. It also gives the flour time to hydrate, which improves the flavor.
Use a cookie scoop for even baking. When I first started baking, I used two spoons and ended up with cookies of all different sizes. Some were burnt, some were underdone. A cookie scoop gives you uniform balls of dough that bake at the same rate. It is a small investment that makes a big difference.
Rotate your baking sheets halfway through. Every oven has hot spots. Halfway through the baking time, swap the top sheet with the bottom sheet and rotate them front to back. This ensures even browning on all the cookies.
Let them rest on the sheet. The cookies will look puffy and slightly underdone when you pull them out. That is perfect. If you try to move them immediately, they will fall apart. Let them rest on the hot baking sheet for 5 minutes. This allows the residual heat to finish setting the centers while the edges stay crisp.
Variations & Adaptations
One of the best things about this recipe is how adaptable it is. Here are some of my favorite variations.
- Gluten-Free Version: Swap the all-purpose flour with a 1:1 gluten-free baking flour blend. I have used Bob’s Red Mill and King Arthur Flour’s blends with great results. The texture will be slightly different, but they are still delicious.
- Nutty Brown Butter Cookies: Add ½ cup of toasted, chopped pecans or walnuts along with the chocolate chips. Toast the nuts in a dry skillet for a few minutes until fragrant before adding them to the dough. The extra crunch is wonderful.
- Dark Chocolate Sea Salt Version: Use dark chocolate chunks instead of semi-sweet chips, and double down on the flaky sea salt. The bitterness of the dark chocolate and the salt perfectly complement the sweet, nutty brown butter.
- Miso Brown Butter Twist: This is a variation I stumbled upon by accident. Whisk in 1 tablespoon of white miso paste along with the eggs and vanilla. The miso adds a savory, umami depth that is absolutely incredible with the brown butter and chocolate. It sounds weird, but it works.
- Seasonal Swaps: In the fall, add ½ teaspoon of cinnamon and a pinch of nutmeg to the dry ingredients. In the winter, try using white chocolate chips and dried cranberries for a festive twist.
Serving & Storage Suggestions
These cookies are best served warm, when the chocolate is still a little melty and the brown butter flavor is at its peak. I love them with a tall glass of cold milk or a hot cup of coffee. They also make a fantastic dessert alongside a scoop of vanilla bean ice cream.
Storing at Room Temperature: Store leftover cookies in an airtight container at room temperature for up to 5 days. Place a slice of bread in the container to keep them soft—the cookies will absorb the moisture from the bread. (Just toss the bread after a day or two.)
Freezing the Baked Cookies: Let the cookies cool completely, then place them in a single layer in a freezer-safe bag or container. They will keep for up to 3 months. Thaw at room temperature or pop them in a 300°F oven for a few minutes to warm them up.
Freezing the Cookie Dough: This is my favorite trick. Scoop the dough into balls, place them on a baking sheet lined with parchment paper, and freeze until solid. Transfer the frozen dough balls to a freezer bag. You can bake them straight from the freezer—just add 2-3 minutes to the baking time. Fresh cookies anytime you want them!
Reheating: For that just-baked experience, microwave a cookie for 10-15 seconds. Or, place it on a baking sheet in a 300°F oven for 5 minutes. The flavor actually deepens after a day or two, so day-old cookies are still fantastic.
Nutritional Information & Benefits
I am not a nutritionist, but here is an approximate breakdown per cookie (based on 24 cookies):
| Nutrient | Amount |
|---|---|
| Calories | ~220 |
| Total Fat | 12g |
| Saturated Fat | 7g |
| Cholesterol | 35mg |
| Sodium | 120mg |
| Total Carbohydrates | 28g |
| Sugars | 18g |
| Protein | 3g |
While these are a treat, there are some nutritional benefits to note. The brown butter contains conjugated linoleic acid, which has been linked to some health benefits. Dark chocolate is rich in antioxidants and can support heart health when consumed in moderation. Plus, these cookies are made with simple, recognizable ingredients—no preservatives or artificial flavors. They are a wholesome indulgence that fits into a balanced lifestyle.
FAQs
Can I use salted butter instead of unsalted?
Yes, you can. Just reduce the added salt in the recipe to ¼ teaspoon. The brown butter will still be delicious, but you want to control the overall saltiness, especially since we are adding flaky salt on top.
Why did my cookies turn out flat?
Flat cookies usually mean the butter was too warm or the dough was not chilled long enough. Make sure you let the browned butter cool before adding the eggs, and do not skip the 30-minute chill time. Also, check that your baking soda is fresh—old baking soda loses its potency.
Can I make these cookies without a stand mixer?
Absolutely. I actually prefer making them by hand. A whisk and a rubber spatula are all you need. Just be sure to whisk the wet ingredients vigorously to incorporate air, and fold the dry ingredients gently to avoid overmixing.
How do I know when the butter is properly browned?
Look for three signs: the color turns a golden-amber, you see small brown specks at the bottom of the pan, and it smells nutty and toasty. It usually takes 5-7 minutes over medium heat. Remove it from the heat immediately once you see these signs.
Can I use white chocolate chips instead of semi-sweet?
Yes, white chocolate works beautifully with the nutty brown butter. I recommend using a good-quality white chocolate like Ghirardelli or Lindt. You can also try a mix of white and dark chocolate for a beautiful contrast.
Conclusion
These cozy brown butter chocolate chip cookies are more than just a recipe—they are a little moment of warmth and comfort you can create in your own kitchen. The nutty, caramel-like depth of the brown butter transforms a classic cookie into something truly special, and the best part is how simple it is to achieve. You do not need to be a professional baker to nail these. You just need a little patience with the butter, a willingness to chill the dough, and a healthy appetite for cookies.
I hope you give these a try and make them your own. Maybe you will add a little extra salt, or swap in dark chocolate chunks, or bake a batch on a rainy Tuesday just because. However you make them, I think you will fall in love with that first bite. So go ahead, brown that butter, and let your kitchen smell incredible. And when you do, come back and let me know how they turned out. I would love to hear about your own cozy cookie moments.
Pin This Recipe!
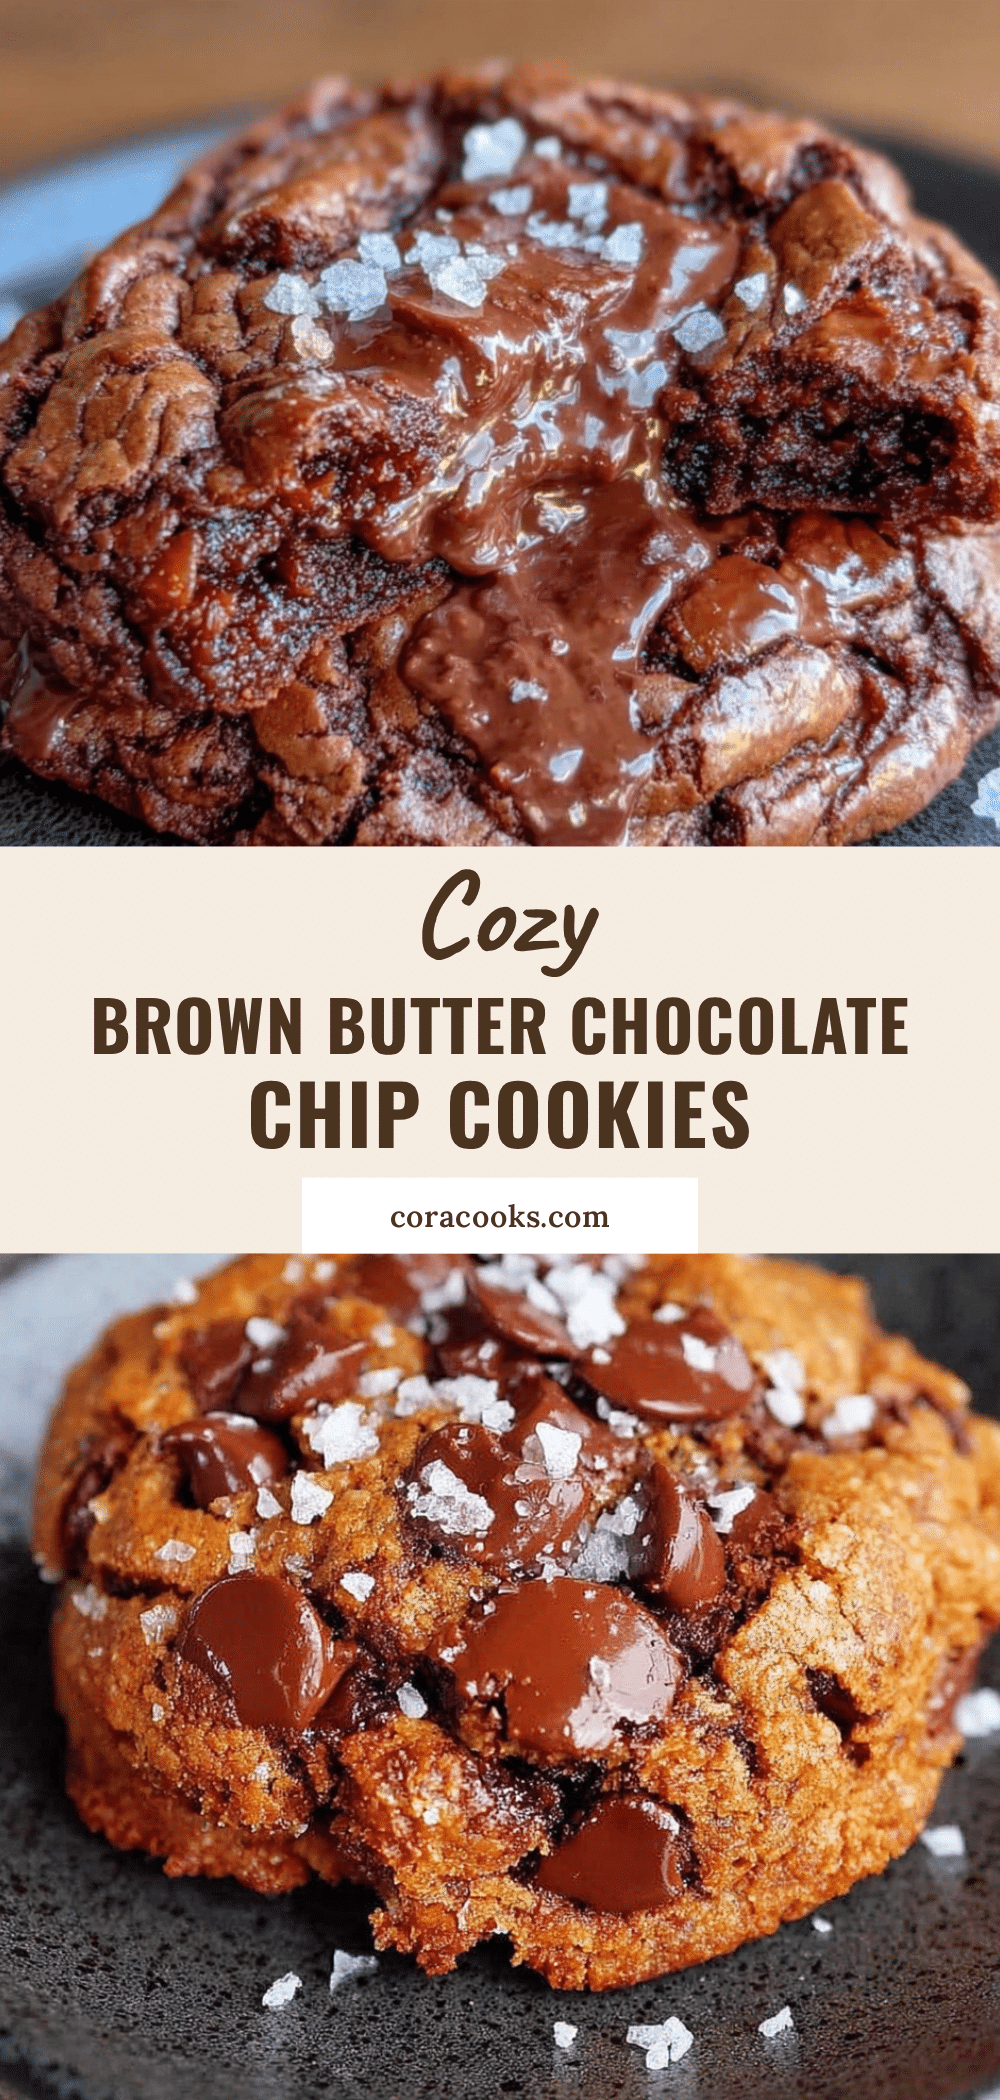
Cozy Brown Butter Chocolate Chip Cookies: Best Easy Recipe
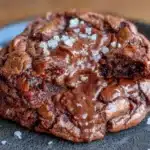
These cozy brown butter chocolate chip cookies are the ultimate comfort food. The nutty, caramel-like depth of the brown butter transforms a classic cookie into something truly special, with perfectly chewy centers and crisp edges.
- Prep Time: 15 minutes
- Cook Time: 12 minutes
- Total Time: 1 hour 27 minutes (including 1 hour chill time)
- Yield: 24 servings 1x
- Category: Dessert
- Cuisine: American
Ingredients
- 1 cup (2 sticks) unsalted butter
- ¾ cup granulated sugar
- ¾ cup packed light brown sugar
- 2 large eggs, room temperature
- 2 teaspoons vanilla extract
- 2 ¼ cups all-purpose flour
- 1 teaspoon baking soda
- ½ teaspoon salt
- 2 cups semi-sweet chocolate chips or chunks
- Flaky sea salt for topping (optional)
Instructions
- Brown the butter: Place 1 cup unsalted butter in a light-colored saucepan over medium heat. Melt completely, then continue cooking, stirring frequently, until the butter turns golden-amber with brown specks and smells nutty (about 5-7 minutes). Immediately remove from heat and pour into a large mixing bowl to stop cooking.
- Cool the browned butter for 10-15 minutes until warm but not hot (temperature of a warm bath).
- Add ¾ cup granulated sugar and ¾ cup packed light brown sugar to the cooled butter. Whisk vigorously until smooth and well combined (about 1 minute).
- Add 2 large eggs and 2 teaspoons vanilla extract. Whisk until smooth, glossy, and slightly lighter in color.
- In a separate medium bowl, whisk together 2 ¼ cups all-purpose flour, 1 teaspoon baking soda, and ½ teaspoon salt.
- Pour the flour mixture into the butter mixture. Fold gently with a rubber spatula until just combined (a few streaks of flour are okay). Do not overmix.
- Fold in 2 cups chocolate chips or chunks until evenly distributed. The dough will be thick and slightly sticky.
- Cover the bowl with plastic wrap and refrigerate for at least 30 minutes, or up to 72 hours.
- About 15 minutes before baking, preheat oven to 350°F (175°C). Line baking sheets with parchment paper.
- Use a 1.5-tablespoon cookie scoop to portion dough into balls. Place on prepared baking sheets about 2 inches apart (about 24 cookies).
- Bake for 10-12 minutes, until edges are golden brown and centers look slightly underdone and puffy.
- Let cookies cool on the baking sheet for 5 minutes. Sprinkle with flaky sea salt if desired. Transfer to a wire cooling rack to cool completely.
Notes
Do not skip chilling the dough—it prevents spreading and creates a chewy texture. Watch the butter carefully while browning; it can burn quickly. For softer cookies, bake on the shorter side (10 minutes). For crispier cookies, bake 1-2 minutes longer. The dough can be frozen for up to 3 months.
Nutrition
- Serving Size: 1 cookie
- Calories: 220
- Sugar: 18
- Sodium: 120
- Fat: 12
- Saturated Fat: 7
- Carbohydrates: 28
- Fiber: 1
- Protein: 3
Keywords: brown butter chocolate chip cookies, easy cookie recipe, chewy cookies, comfort food, homemade cookies, best chocolate chip cookies