Love this? Save it for later!
Share the inspiration with your friends
I was standing in the baking aisle of my local grocery store last October when a woman walked past me carrying a pumpkin pie. The smell hit me—not even the actual pie, just the cardboard box it came in, mixed with the faint cinnamon of the holiday display nearby. And just like that, I was eleven years old again, sitting on the counter in my neighbor Mrs. Kowalski’s kitchen, watching her pull a steaming pie from the oven. She’d let me lick the spatula, and I remember thinking, “This is what fall tastes like.” She moved away years ago, and I’ve never been able to find a pumpkin dessert that felt exactly like that moment. Honestly, I’d stopped trying for a while. But then my gluten-free baking obsession kicked in, and I realized maybe I wasn’t chasing her pie at all. Maybe I was just chasing the feeling of something warm and easy—something that didn’t require rolling dough or stressing about a perfect crust. So I started testing these bars. And let me tell you, the first time I pulled them out of the oven, that same cinnamon smell filled my kitchen, and I actually closed my eyes for a second. Maybe you’ve been there—that moment when a recipe finally clicks and brings back a memory you didn’t know you were holding onto.
Why You’ll Love This Recipe
Let’s be real for a second. Weeknight cooking is already a circus, and baking can feel like a whole other level of commitment. But these Easy Gluten-Free Pumpkin Pie Bars? They’re the kind of recipe that makes you look like a hero without actually doing much work. I’ve tested this version about six times now—once with a crust that crumbled into a million pieces (we don’t talk about that), and once where I forgot the sugar entirely. The final version is the one my family now requests every single week, and I think you’ll feel the same way.
Here’s why these bars work so well:
- Quick & Easy: From start to finish, you’re looking at about 50 minutes, and most of that is hands-off baking time. Perfect for those nights when you want dessert but also want to collapse on the couch.
- Simple Ingredients: You probably already have pumpkin puree, eggs, and butter in your kitchen. No weird flours or obscure spices required.
- Perfect for Weeknights: No rolling pins, no pie weights, no fuss. Just press the crust into a pan, pour the filling, and bake.
- Crowd-Pleaser: I brought these to a potluck last month, and three people asked for the recipe before I even sat down. Even the gluten-eaters couldn’t tell the difference.
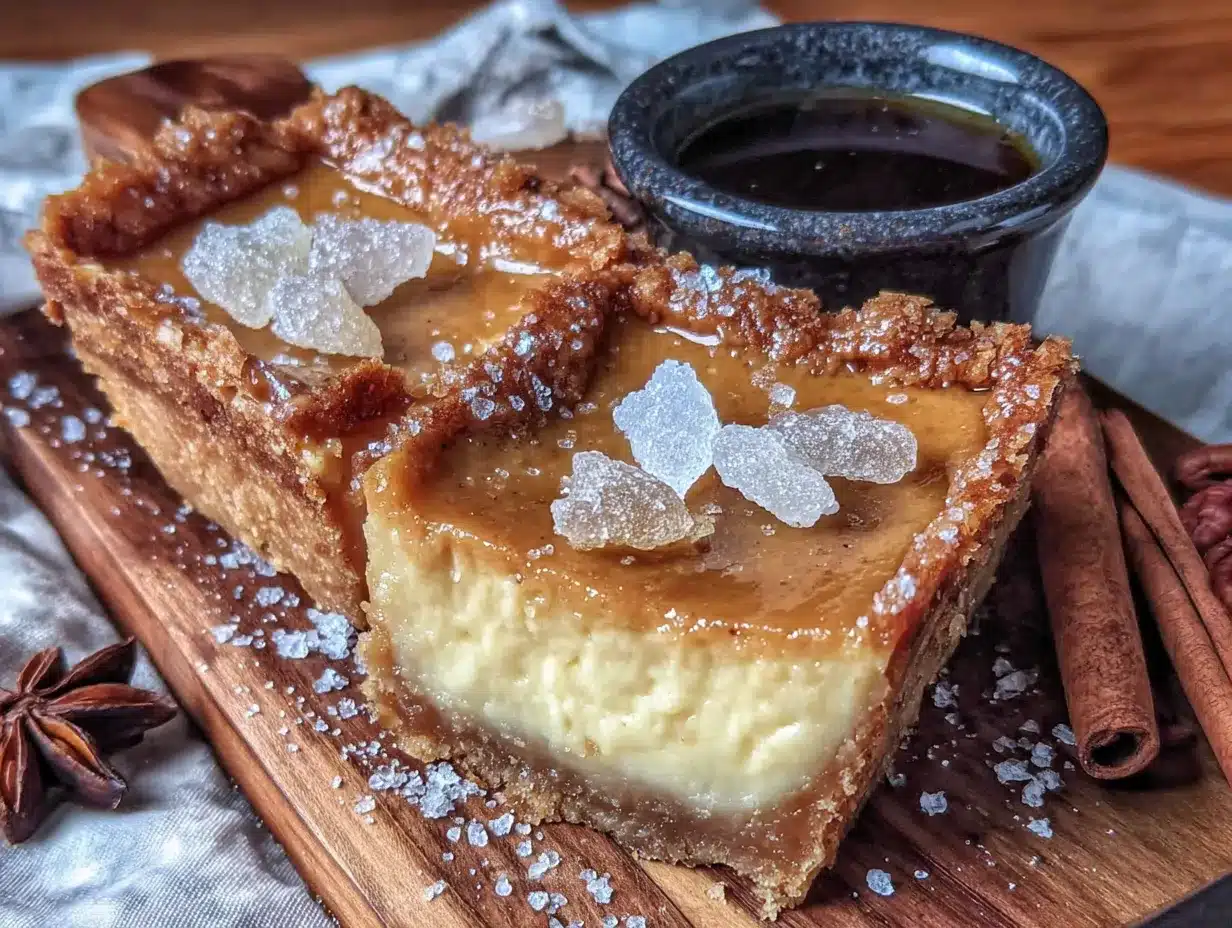
- Unbelievably Delicious: The crust is buttery and crisp, the filling is silky and spiced, and the whole thing tastes like autumn in bar form.
What makes these bars different from every other pumpkin dessert out there? It’s the crust, honestly. Most gluten-free crusts are either too crumbly or too dense. I landed on a blend of almond flour and oat flour that gives you that shortbread-like texture without any of the sadness. And the filling? It’s perfectly spiced—not too sweet, not too heavy. Just right.
This is the kind of dessert that makes you close your eyes after the first bite. It’s comfort food reimagined—easier, faster, but with the same soul-soothing satisfaction. Perfect for impressing guests without stress, or turning a simple Tuesday into something a little special.
What Ingredients You Will Need
This recipe uses simple, wholesome ingredients to deliver bold flavor and satisfying texture without the fuss. Most of these are pantry staples, and I’ve included notes on substitutions so you can adapt based on what you have on hand.
For the Crust
- Almond flour, 1 ½ cups (finely ground, not almond meal — I prefer Bob’s Red Mill for consistent texture)
- Oat flour, ½ cup (certified gluten-free if needed; you can also grind rolled oats in a blender)
- Butter, ½ cup (1 stick), melted (use coconut oil for dairy-free)
- Coconut sugar, ¼ cup (or brown sugar)
- Salt, ¼ teaspoon
For the Pumpkin Filling
- Pumpkin puree, 1 can (15 oz) — not pumpkin pie filling, just plain puree. Libby’s is my go-to.
- Eggs, 2 large, room temperature
- Coconut sugar, ½ cup (or brown sugar)
- Heavy cream, ½ cup (full-fat canned coconut milk works beautifully for dairy-free)
- Pumpkin pie spice, 2 teaspoons (store-bought or homemade — I mix cinnamon, ginger, nutmeg, and a pinch of cloves)
- Vanilla extract, 1 teaspoon
- Salt, ¼ teaspoon
A quick note on ingredients: I’ve tested this with both canned pumpkin and roasted fresh pumpkin, and honestly, canned is more consistent. Fresh pumpkin can be watery, which messes with the texture. If you’re using fresh, make sure to strain it through cheesecloth for about 30 minutes first.
For the flour blend, almond flour gives the crust a rich, buttery flavor, while oat flour adds structure. If you’re nut-free, you can swap the almond flour for more oat flour, but the crust will be slightly denser. I’ve also tried this with a 1:1 gluten-free baking flour, and it works, but the texture isn’t quite as tender.
Equipment Needed
You don’t need a fancy kitchen for these bars, which is honestly my favorite thing about them. Here’s what you’ll need:
- 9×9-inch baking pan (an 8×8 works too, but the bars will be slightly thicker and may need a few extra minutes of baking time)
- Parchment paper (for easy removal — trust me on this one)
- Mixing bowls (one medium, one large)
- Whisk (a fork works in a pinch)
- Spatula (for pressing the crust evenly)
- Measuring cups and spoons (or a kitchen scale for accuracy)
If you don’t have a 9×9 pan, you can use a 9-inch pie plate. The bars will be a little less uniform, but they’ll taste just as good. And if you’re like me and hate washing extra dishes, you can mix the crust right in the pan — just be careful not to scratch the surface if it’s non-stick.
I also recommend using a glass or ceramic baking dish if you have one. Metal pans conduct heat faster, which can over-brown the crust before the filling sets. Learned that one the hard way!
Preparation Method
Alright, let’s get to it. This is straightforward, I promise. Here’s how to make these Easy Gluten-Free Pumpkin Pie Bars:
- Preheat your oven to 350°F (175°C). Line your 9×9 baking pan with parchment paper, leaving some overhang on two sides. This makes lifting the bars out so much easier later.
- Make the crust. In a medium bowl, combine the almond flour, oat flour, melted butter, coconut sugar, and salt. Stir until it looks like wet sand and holds together when you pinch it. Don’t overmix — you want it just combined.
- Press the crust into the pan. Dump the crust mixture into your lined pan and press it down firmly and evenly. I use the bottom of a measuring cup to really pack it in. Make sure it’s even, especially in the corners. Bake for 12 minutes, until it’s lightly golden and smells nutty. Set aside to cool slightly while you make the filling.
- Make the filling. In a large bowl, whisk together the pumpkin puree, eggs, coconut sugar, heavy cream, pumpkin pie spice, vanilla extract, and salt. Whisk until smooth and completely combined. The mixture should be silky and a little thick — if it looks curdled, your eggs might have been too cold. Let them come to room temperature next time, but for now, just whisk vigorously and it’ll come together.
- Pour the filling over the crust. Gently pour the pumpkin mixture over the pre-baked crust. Use a spatula to spread it evenly to the edges. Tap the pan on the counter a few times to release any air bubbles.
- Bake. Place the pan in the oven and bake for 30-35 minutes, or until the filling is set around the edges but still has a slight jiggle in the center. It should look matte, not shiny. A toothpick inserted in the center should come out mostly clean with just a few moist crumbs.
- Cool completely. This is the hardest part, I know. Let the bars cool in the pan on a wire rack for at least 1 hour, then transfer to the fridge for another 2 hours (or overnight). The filling continues to set as it cools, and cutting into them too early will give you a messy slice. I’ve done it — it’s still delicious, just not pretty.
- Slice and serve. Use the parchment overhang to lift the entire block out of the pan. Place it on a cutting board and slice into 9 or 16 squares, depending on how generous you’re feeling. Wipe your knife clean between cuts for neat edges.
Cooking Tips & Techniques
After testing these bars more times than I’d like to admit, here are the things I wish someone had told me:
Don’t skip the pre-bake. I tried skipping it once because I was in a hurry, and the crust turned into a soggy mess. That 12-minute pre-bake is non-negotiable — it seals the crust and keeps it crisp.
Room temperature eggs matter. Cold eggs can seize up the filling and create a lumpy texture. If you forgot to take them out ahead of time, place them in a bowl of warm water for 5 minutes. Problem solved.
Watch the jiggle. The filling is done when the edges are set and the center jiggles like firm Jell-O, not like liquid. Overbaking will make the bars dry and crackly. Underbaking leaves them too soft to slice. That middle ground is your sweet spot.
Cooling is not optional. I know you want to eat them warm. I get it. But these bars need time to set. If you cut into them while they’re still warm, you’ll get pumpkin soup with a crust. Pop them in the fridge for at least 2 hours, and I promise the wait is worth it.
Use a sharp knife for clean slices. A dull knife will drag through the filling and mess up your edges. Run the knife under hot water, wipe it dry, then slice. Repeat between each cut.
Variations & Adaptations
One of the best things about this recipe is how flexible it is. Here are some variations I’ve tried and loved:
Dairy-Free Version: Swap the butter in the crust for coconut oil (use refined if you don’t want coconut flavor), and use full-fat canned coconut milk instead of heavy cream. The texture is slightly different — a little less rich — but still incredibly good.
Nut-Free Version: Replace the almond flour with an equal amount of oat flour or a gluten-free all-purpose flour blend. The crust will be a bit more dense and less tender, but it still holds together beautifully.
Spice It Up: Add ¼ teaspoon of black pepper to the filling. I know it sounds weird, but black pepper actually enhances the flavor of pumpkin and cinnamon. It’s a little trick I picked up from an old cookbook, and it adds a subtle warmth that’s hard to describe but impossible to ignore.
Maple Sweetened: Swap the coconut sugar for ⅓ cup maple syrup. Reduce the heavy cream by 2 tablespoons to compensate for the extra liquid. The bars will be a little softer and have a lovely maple undertone.
Chocolate Twist: Sprinkle ½ cup dark chocolate chips over the crust before pouring in the filling. The chocolate melts into the pumpkin and creates these little pockets of richness. Dangerous, honestly.
Paleo Version: Use coconut sugar, coconut oil, and full-fat coconut milk. The almond flour crust is already paleo-friendly, so you’re basically there.
Serving & Storage Suggestions
These bars are fantastic at room temperature, but I actually prefer them chilled straight from the fridge. The filling firms up nicely, and the crust stays crisp. If you want to serve them warm, pop an individual bar in the microwave for about 10 seconds — just enough to take the chill off without melting the structure.
For a truly decadent experience, top each bar with a dollop of whipped cream (coconut whipped cream works great for dairy-free) and a light dusting of cinnamon. A drizzle of caramel sauce wouldn’t hurt either, but that’s more of a weekend move.
These bars pair beautifully with a hot cup of coffee or chai tea. I’ve also served them alongside a scoop of vanilla ice cream for a full dessert experience, and let me tell you, it’s a crowd-pleaser.
Storage: Keep the bars in an airtight container in the refrigerator for up to 5 days. They actually get better on day 2 as the flavors meld together. To freeze, wrap individual bars tightly in plastic wrap, then place them in a freezer-safe bag. They’ll keep for up to 3 months. Thaw in the fridge overnight before serving.
Reheating: For a single bar, microwave for 15-20 seconds. For a whole pan, reheat in a 300°F (150°C) oven for 10 minutes, covered loosely with foil to prevent the crust from burning.
Nutritional Information & Benefits
Here’s an approximate nutritional breakdown per bar (based on 9 servings):
- Calories: 285
- Fat: 18g
- Carbohydrates: 28g
- Fiber: 4g
- Sugar: 16g
- Protein: 6g
These bars are naturally gluten-free, and with a few swaps, they can be dairy-free, nut-free, or paleo-friendly. Pumpkin is packed with vitamin A and fiber, which makes this dessert feel a little less indulgent than it actually is. The almond flour adds healthy fats and protein, keeping you satisfied longer than a traditional graham cracker crust would.
I’m not a nutritionist, but I try to be mindful about what I bake. These bars use coconut sugar instead of refined white sugar, which has a lower glycemic index. That said, they’re still a treat — and I think that’s perfectly fine. Life needs dessert.
Conclusion
These Easy Gluten-Free Pumpkin Pie Bars have become my go-to fall dessert for a reason. They capture everything I love about pumpkin pie — the silky filling, the warm spices, the cozy feeling — without any of the stress. No rolling dough, no blind baking, no worrying about a cracked crust. Just simple, honest baking that tastes like a hug.
I hope you give these a try and make them your own. Maybe you’ll add extra spice, or swap in a different sweetener, or top them with something you love. That’s the beauty of a good recipe — it’s a starting point, not a rulebook.
If you make these bars, I’d love to hear about it. Drop a comment below and let me know how they turned out, or share your own twist on the recipe. And if you’re looking for more easy gluten-free desserts, you might also enjoy my flourless chocolate cake or these apple crisp bars — both are weeknight-friendly and absolutely delicious.
Happy baking, friends. Fall is waiting.
Frequently Asked Questions
Can I use pumpkin pie filling instead of pumpkin puree?
No, I wouldn’t recommend it. Pumpkin pie filling is pre-sweetened and spiced, so it will throw off the sugar and spice balance in this recipe. Stick with plain pumpkin puree for the best results.
Can I make these bars ahead of time?
Absolutely. In fact, I recommend it. These bars actually taste better on day two, after the flavors have had time to meld. You can make them up to two days in advance and store them in the fridge.
How do I know when the bars are done baking?
The edges should be set and look matte, while the center should have a slight jiggle — like firm Jell-O. A toothpick inserted in the center should come out with just a few moist crumbs, not wet batter.
Can I freeze these pumpkin pie bars?
Yes! Wrap individual bars tightly in plastic wrap, then place them in a freezer-safe bag. They’ll keep for up to three months. Thaw in the fridge overnight before serving.
What can I use instead of almond flour in the crust?
You can substitute the almond flour with an equal amount of oat flour or a gluten-free all-purpose flour blend. The texture will be slightly denser, but the bars will still be delicious.
Pin This Recipe!
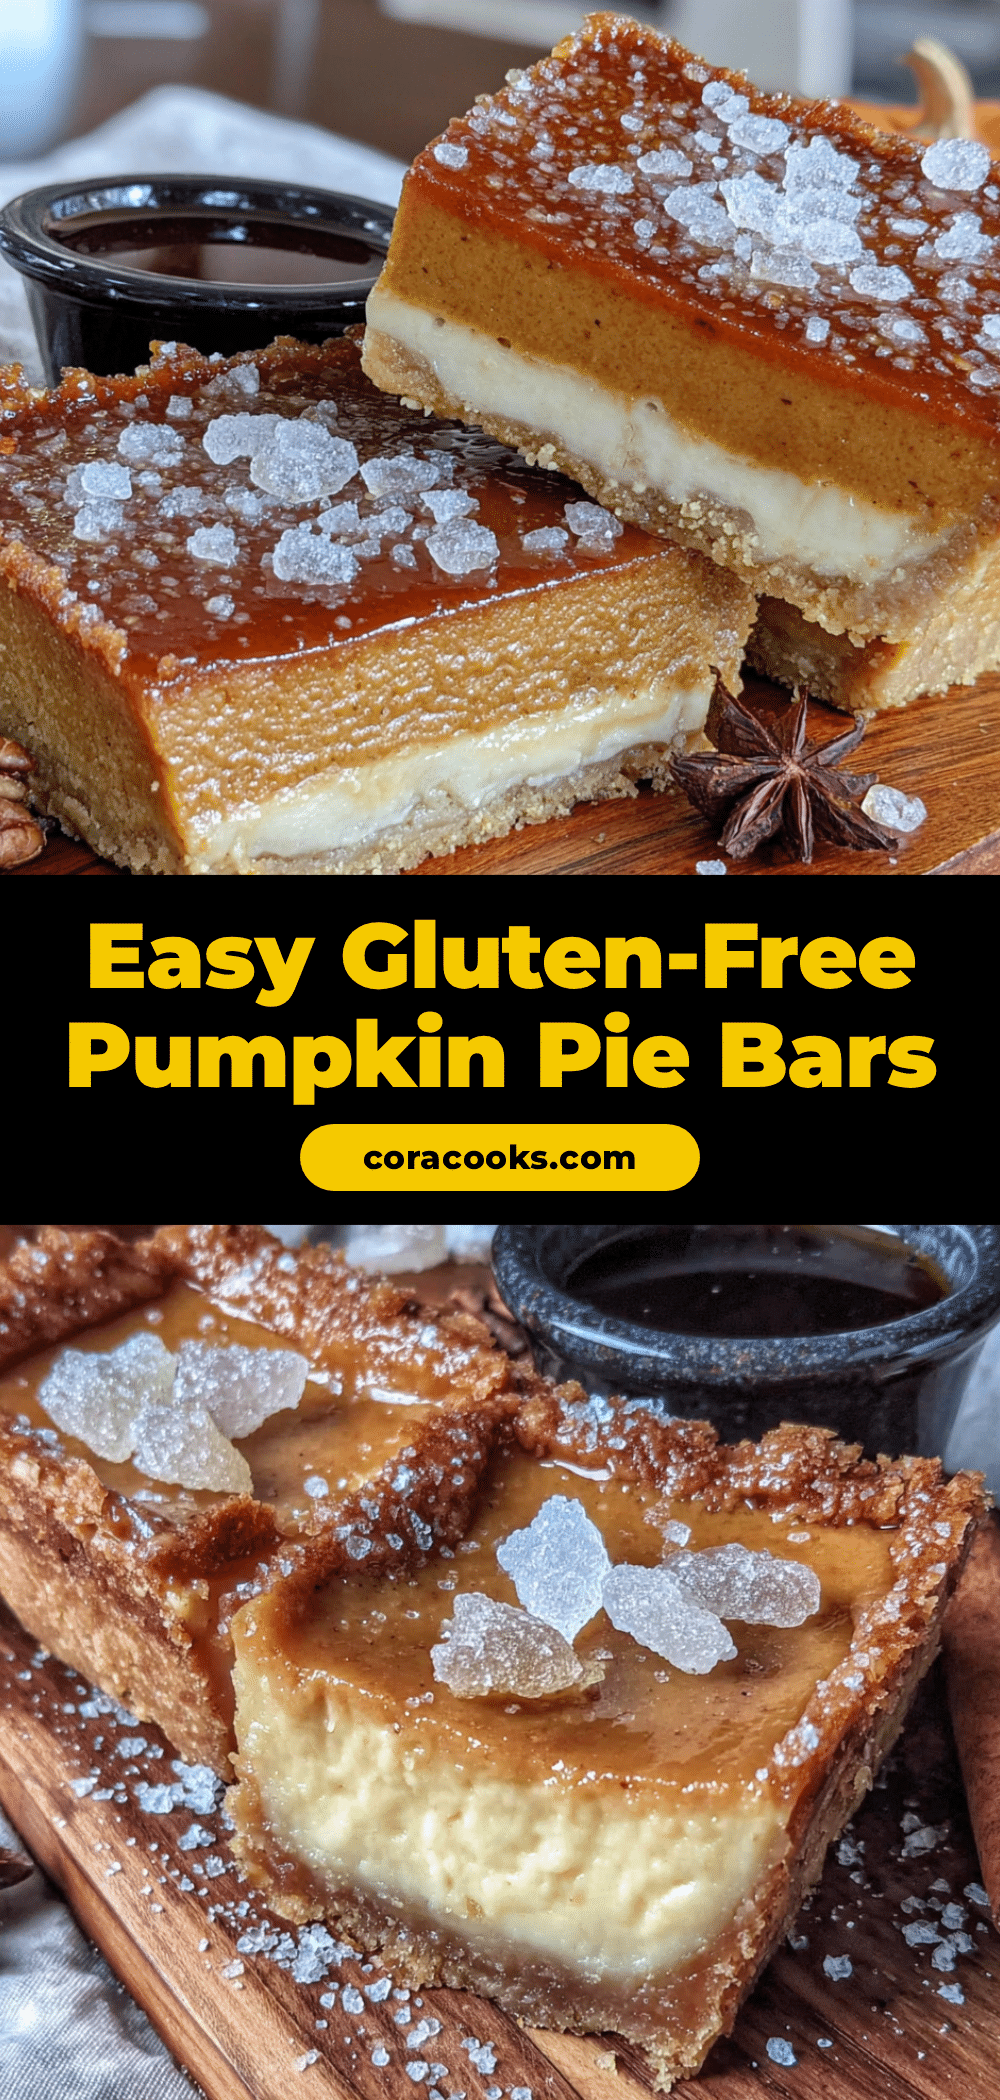
Easy Gluten-Free Pumpkin Pie Bars: Best Fall Dessert
These Easy Gluten-Free Pumpkin Pie Bars capture the cozy flavors of fall with a buttery almond-oat crust and a silky, perfectly spiced pumpkin filling. They’re quick to make, require no rolling dough, and are a guaranteed crowd-pleaser.
- Prep Time: 15 minutes
- Cook Time: 35 minutes
- Total Time: 50 minutes
- Yield: 9 servings 1x
- Category: Dessert
- Cuisine: American
Ingredients
- 1 ½ cups almond flour (finely ground)
- ½ cup oat flour (certified gluten-free if needed)
- ½ cup (1 stick) butter, melted (or coconut oil for dairy-free)
- ¼ cup coconut sugar (or brown sugar)
- ¼ teaspoon salt
- 1 can (15 oz) pumpkin puree (not pumpkin pie filling)
- 2 large eggs, room temperature
- ½ cup coconut sugar (or brown sugar)
- ½ cup heavy cream (or full-fat canned coconut milk for dairy-free)
- 2 teaspoons pumpkin pie spice
- 1 teaspoon vanilla extract
- ¼ teaspoon salt
Instructions
- Preheat your oven to 350°F (175°C). Line a 9×9-inch baking pan with parchment paper, leaving overhang on two sides.
- Make the crust: In a medium bowl, combine almond flour, oat flour, melted butter, ¼ cup coconut sugar, and ¼ teaspoon salt. Stir until it looks like wet sand and holds together when pinched.
- Press the crust mixture firmly and evenly into the prepared pan. Bake for 12 minutes, until lightly golden. Set aside to cool slightly.
- Make the filling: In a large bowl, whisk together pumpkin puree, eggs, ½ cup coconut sugar, heavy cream, pumpkin pie spice, vanilla extract, and ¼ teaspoon salt until smooth and combined.
- Pour the filling over the pre-baked crust and spread evenly. Tap the pan on the counter to release air bubbles.
- Bake for 30-35 minutes, until the edges are set and the center jiggles slightly like firm Jell-O. A toothpick inserted in the center should come out mostly clean.
- Cool completely in the pan on a wire rack for at least 1 hour, then refrigerate for at least 2 hours (or overnight) to set.
- Use the parchment overhang to lift the bars out of the pan. Slice into 9 or 16 squares with a sharp knife, wiping the blade clean between cuts.
Notes
Don’t skip the pre-bake of the crust to avoid sogginess. Use room temperature eggs for a smooth filling. Cool completely before slicing for clean edges. Bars can be stored in the refrigerator for up to 5 days or frozen for up to 3 months.
Nutrition
- Serving Size: 1 bar
- Calories: 285
- Sugar: 16
- Sodium: 200
- Fat: 18
- Saturated Fat: 8
- Carbohydrates: 28
- Fiber: 4
- Protein: 6
Keywords: gluten-free pumpkin bars, pumpkin pie bars, easy fall dessert, gluten-free dessert, pumpkin dessert